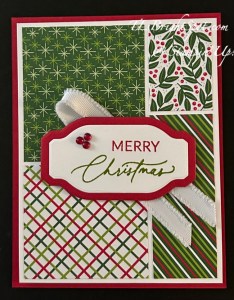
Welcome to the HOP! Our theme today is fun folds – and there will be some extraordinary ones, I am certain. I have chosen a tried & true front flap fun fold for today, using the WinterlyTree Tops bundle, the
Christmas Labels bundle and Nests of Winter 12 x 12 DSP.


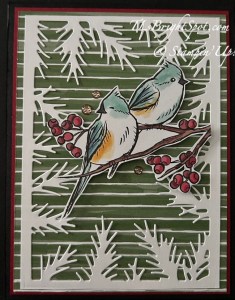
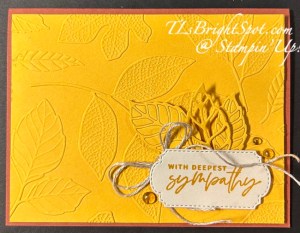
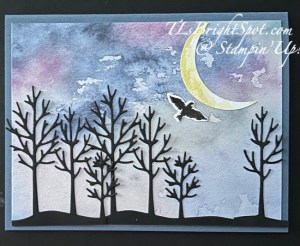
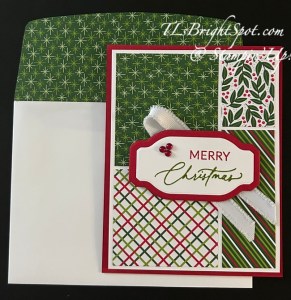
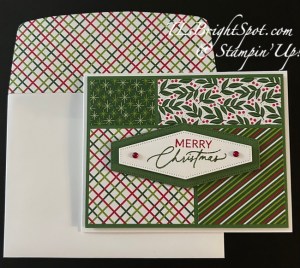
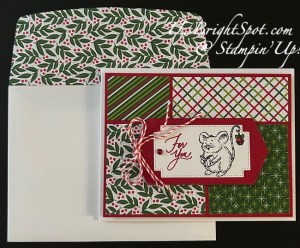
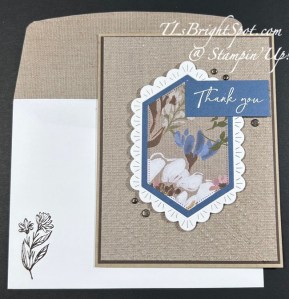
I’m going to be honest, I haven’t played with this set and I’ve had it for a bit. I… LOVE… IT… The pine frame is from Basic White card stock (3 5/8 x 5) and die cut with Winterly Tree Tops Dies. The birds are fussy cut (paper snips) from the Nests of Winter 12×12 DSP and added with dimensionals. The background (stripes) is also from this DSP pack (3 7/8 x 5 1/8) and was layered on Cherry Cobbler (4 x 5 3/8), and adhered to the Basic Black card front. I added three Pecan Pie Ribboned Adhesive-Backed Dots (an ONLINE EXCLUSIVE). Let’s look at how this card opens… the front flap opens from the top to show the gatefold, below.

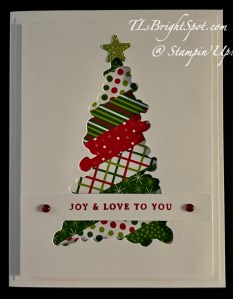
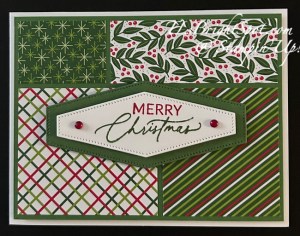
The layers are Cherry Cobbler (2 x 5 3/8 – cut 2) and a smaller Nests of Winter 12×12 DSP (1 7/8 x 5 1/4- cut 2) and adhere together and then to the Basic Black card baseThe sentiment panel is stamped on Basic White with Cherry Cobbler ink using the Christmas Labels stamp set then die cut with the coordinating Christmas Lablels Dies. Only the left side of the label was attached to the left ‘gate’.
Here is the inside…

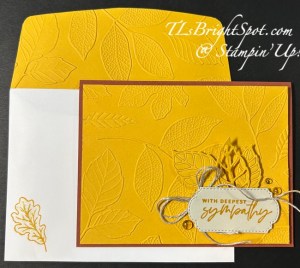
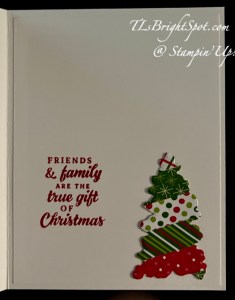
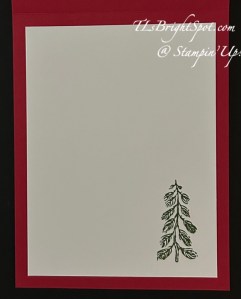
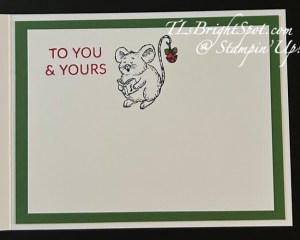
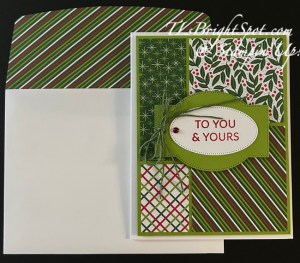
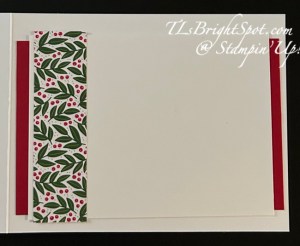
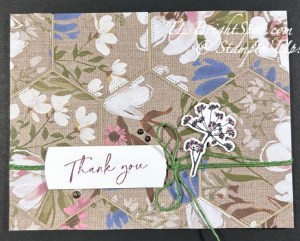
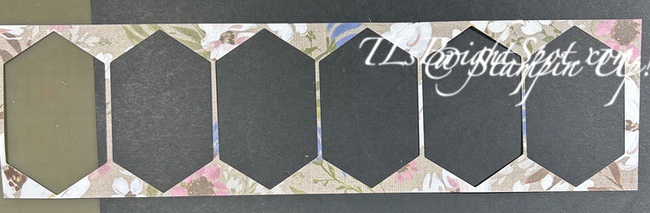
The inside… a panel of Basic White (3 7/8 x 5 1/8) with another fussy cut bird from the Nests of Winter 12×12 DSP attached with liquid glue. This panel was added to Cherry Cobbler (4 x 5 1/4) then to the inside of the Basic Black card base. All opened out the card looks like this…

And the envelope I kept very simple… more of the Nests of Winter 12×12 DSP on the flap & trimmed to fit, and a sentiment stamped in Cherry Cobbler ink from the Christmas Labels stamp set.

These two bundles and the DSP may be found in the Stampin’ Up! Sep-Dec 2024 Catalog. The card stock & adhesive, scissors, paper trimmer, bone folder are in the Stampin’ Up! 2024 Annual Catalog. And the adhesive dots part of the Stampin’ Up! ONLINE EXCLUSIVES. You can find more information about shopping with me below the list of names of those participating in the hop today – so scroll down to learn more.
Carol is the next participant on the hop and she always has something amazing to share. Click the next button or click on a name to take you on an extraordinary adventure.

LOTS GOING ON IN THE STAMPIN’ UP! WORLD – give me a few minutes to share the excitement…
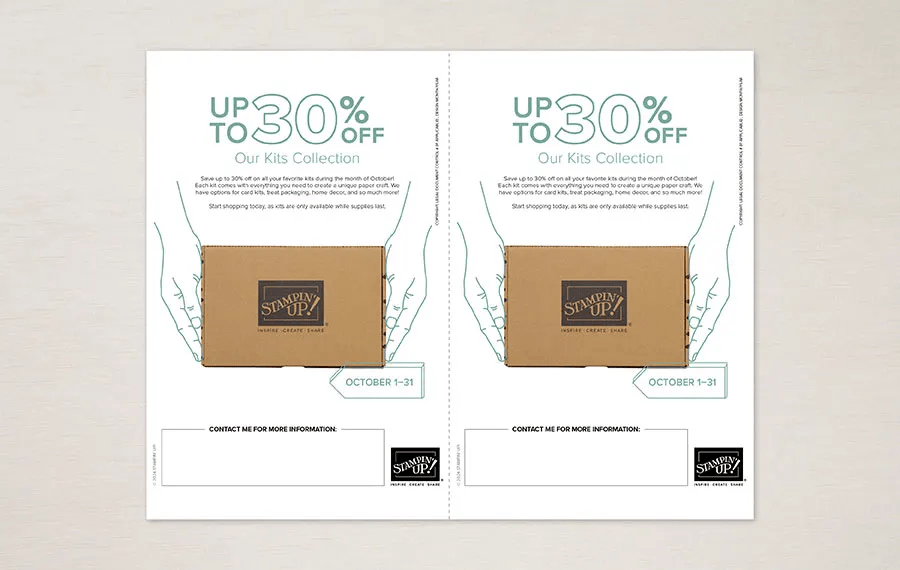
Kits Collection Sale started Oct 1!
Exciting news! We’re having a huge sale on our Kits Collection beginning October 1! All kits will be available at a discounted price. Save up to 30% off on all your favorite kits October 1–31! Our kits come with everything you need to create a unique paper craft. We have crafting options for card kits, treat packaging, home decor, and so much more! Click here

Clearance Rack Refresh – click here!
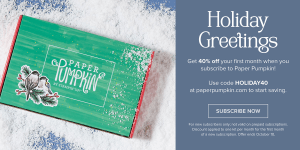
Santa Claus is comin’ to town a bit early this year—and he’s brought a holiday Paper Pumpkin sale! Starting September 11, 2024, at 12:01 a.m. (MT) until October 10, 2024, at 11:50 p.m. (MT), anyone who signs up for our monthly Paper Pumpkin subscription as a new subscriber will receive 40% off their first kit. That’s right, 40% OFF!

Where This Discount Is Applied
This discount will be applied to one kit in the first kit shipment of the Paper Pumpkin subscription, which means new subscribers will get 40% off the October Nests of Christmas Paper Pumpkin Kit. After that, each month’s kit will return to the regular price of $25.00.
Qualifying for This Discount
This offer is only for new month-to-month subscribers and is not valid on purchased or redeemed prepaid subscriptions.
Now that you’ve read through all the details, it’s time to head to paperpumpkin.com to subscribe and use code HOLIDAY40 to get 40% off.
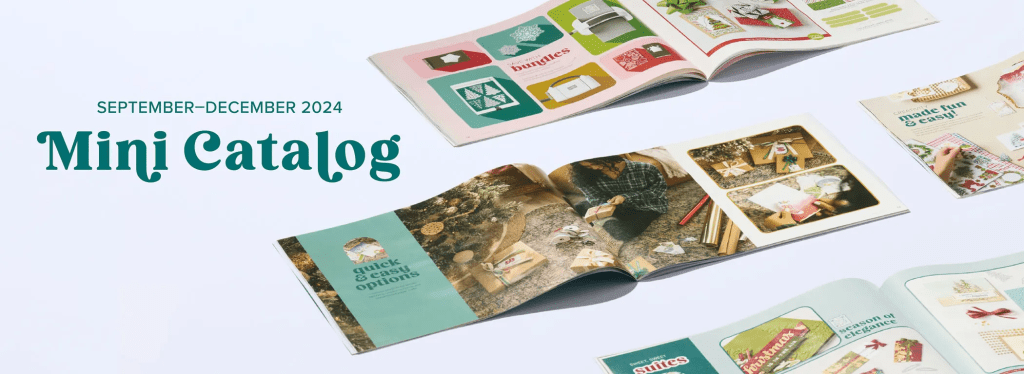
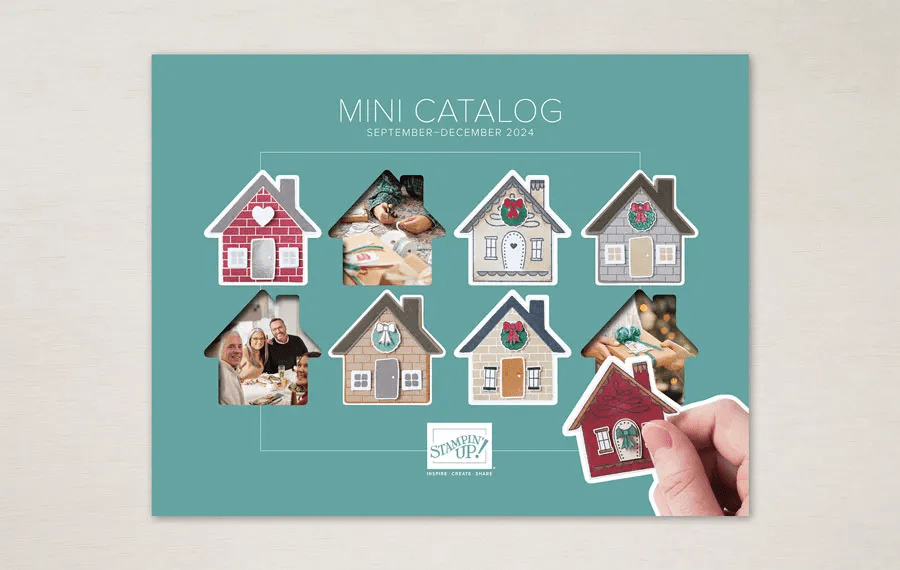
Click here to take you to the Sep-Dec 2024 Mini Catalog

Promotion Period: October 1–31
Ordering Deadlines
- Phone: October 31 2024, at 6:59 p.m. (MT)
- Online: October 31 2024, at 11:59 p.m. (MT)
Become a demonstrator between October 1–31 can get $125 USD | $165 CAD $155 USD | $206 CAD worth of products for just $99 USD | $135 CAD.
Being a part of Stampin’ Up!’s creative community also comes with several perks, including early access to products, special discounts, a chance to earn product credits, access to exclusive trainings, demonstrator-only events, and so much more.
As a demonstrator, I am here to help you through the join process and beyond. Join with me here.

Click the image above to take you to the ONLINE EXCLUSIVES!
Want to just shop? You can do that too. I appreciate your business and welcome any questions regarding sales or creating or joining my team. Make sure when shopping with me, that you see my name at the top as your demonstrator. That way I can send you a Stampin’ Up! giftie and you can earn rewards – with a $50 order or more. You also receive the monthly tutorial for that particular month – for October, it is More Than Autumn bundle.
HOST CODE … SEP 26- OCT 15 NDADFHMR
Thanks for stopping by. May you have a beautiful day!