Hi Everyone… My box for this fantabulous product medley came some time ago and I simply had to wait to open it until I had played with many of the other new products that arrived – all at the same time! Let me say – this medley is OVER THE TOP! Gorgeous, gorgeous papers, fun stamp set and coordinating dies, two ribbons, adorable little paper flowers, stickers. Just. plain. wonderful… Today’s card uses many of the products in this medley – here ’tis.

Boho Indigo stamp set
Last a Lifetime stamp set
Lasting Elegance Dies, Stitched So Sweetly Dies
Boho Indigo DSP
#1
First of all, I love blue/ white together – this is blue/ very vanilla, but no matter – the papers are wonderful, a nice variety of design. I need to make a masculine card and there are papers in this pack that will be perfect. Here’s what I did…
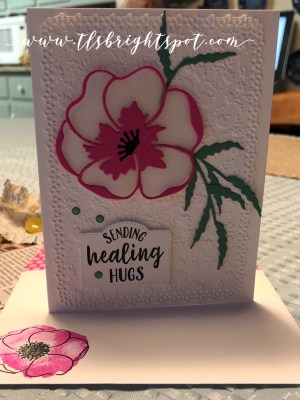
Cut a panel of one of the Very Vanilla embossed papers included in the medley and adhere to the center of the Night of Navy card base. Cut a panel from one of the papers from this medley using the Stitched So Sweetly Dies. I cut another piece of Night of Navy to adhere to the DSP as to me, it needs a bit of strength when used the way this is. These were adhered witgh liquid glue as well, but only in the center, not on the ends extending beyond the embossed piece. I stamped the sentiment in Night of Navy on one of the labels included in the kit. ( I made a booboo when stamping on the right side of the sticker, so I just turned it over! Then it needed a bit of dressing up…) I adhered three Holiday Rhinestone Gems and put the label on dimensionals and set it aside.
I stamped the sweet flower from Last A Lifetime stamp set, then colored it with several Stampin’ Blends: Mango Melody, Granny Apple Green, Poppy Parade (dark only) and Bronze for the flower center. I then die cut the flower with the matching dies, Lasting Elegance Dies. This I adhered with liquid glue to the label, then added dimensionals to the portion over-hanging the label. I cut a length of the ribbon from the medley, Frayed Grosgrain Very Vanilla/ Gold 1/4″, added a bit of Tear n Tape to the back and attached it to the DSP. I adhered the flower and label and the card front was done!

Boho Indigo Product Medley
Last a Lifetime stamp set
Lasting Elegance Dies
#2
For the inside, I used one of the gorgeous corner dies to die cut two corners from a panel of Very Vanilla cs – Lasting Elegance Dies. This I adhered to the Night of Navy inside panel of the card and the card was complete…

Lasting Elegance Dies
#3
For the envelope, I adhered the same DSP from the Boho Indigo Product medley to the envelope flap. I then stamped a vase from the Boho Indigo stamp set in Night of Navy. Then I stamped the sweet set of three flowers in Mango Melody so it looked like a bouquet. Voila..

Boho Indigo Product Medley
Last A Lifetime stamp set, Lasting Elegance Dies
#4
What do you think? I love this medley and can’t wait to sit down and create, create, create…
Want to know how to get this medley – reach out to me if you do not have a demonstrator and we can make this happen! This medley can be found on pg 9 of the 2020-2021 Annual Catalog. If you don’t have a current catalog, please refer to this PDF file. 2020 AC US
Thanks for stopping by.
May you have a beautiful day.
Make someone happy by sending them a handmade card.