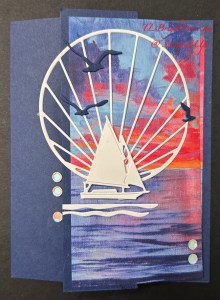
Oh yes – ’tis almost time for sailing season! For some it’s already here… and I’m all ‘a flutter’ over this new bundle & it’s coordinating Scenic Coast SDSP & the Sunset Sparkle Sequins. ❤️ The theme for this hop is to make something for the ‘men/ boys’ in our lives. This card relates to that as we sold our sailboat last year & it was tough. But we have such fond memories of our sailing days that it’s ok. 👍
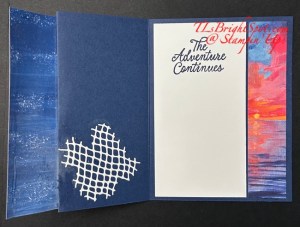
On the inside I added the second panel of the Scenic Coast DSP to the inside on the right of the card. Next to it is a Basic White stamped panel 2 3/4 x 5 1/4. The sentiment is from the Sunset Coast stamp set & I used Night of Navy ink.
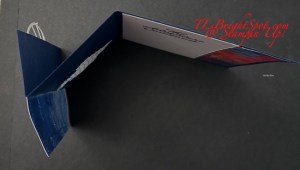
Final touch on the inside was this fabulous die cut that looks like netting, and I added it with dabs of liquid glue to the left portion of the card. – And done! The card looks like this from the top.
See below for the list of products to make this card. Consider too, joining my team for that 20% Stampin’ Up! discount after joining – for ALL ORDERS!!! There are other reasons to join as well & you can some of those below the list of products – so look for that info!
Now, time to visit the others participating in today’s hop. Click the next button or click on a name. Enjoy!
Join as a demonstrator now & get our new 2026–2028 In Color Stampin’ Pads FREE along with your Starter Kit! Or if you’d rather have different products instead of ink pads, you’re covered there, too—you can add an extra $35 USD | $50 CAD worth of products to their Starter Kit.
As a Demonstrator, you will also enjoy all the perks that come with being a demonstrator, like a 20–25% product discount, early access to the latest products and catalogs, the opportunity to earn a modest commission, the chance to attend incredible training and crafting events, and so much more.
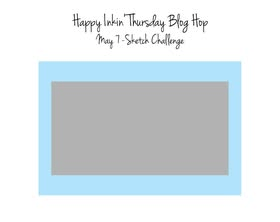
Welcome to our Happy Inkin’ Thursday Blog Hop! We have a sketch challenge today & I’m showing off a new Specialty Designer Series Paper for it. I’ve created three cards but the first is the first is my favorite. Why is it special – because it has raised areas that feel like velvet!!! Hence the name – Velvet Meadows
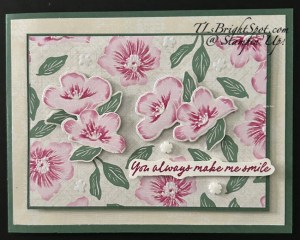
This card began with one of the new IN COLOR card stocks – Peaceful Pine 11 x4 1/4 scored at 5 1/2 (side fold). I used a SDSP layer 4 x 5 1/4 from Velvet Meadows SDSP.. The next layer is another Peaceful Pine with the gorgeous velvet side of the Velvet Meadows SDSP – adhered together & added with dimensionals. I then die cut some of the flowers from the SDSP using the coordinating Flowering Meadows Dies. I fussy cut several leaves: leaves & flowers were added to the card front with dimensionals. Now we have two layers of dimensionals in total. The sentiment is stamped in Berry Burst using the Flowering Meadows stamp set and fussy cut, then added with dimesnionals. Final step – two stunning embellishments: Dreaming Flowers in whiten – yep, from the suite!
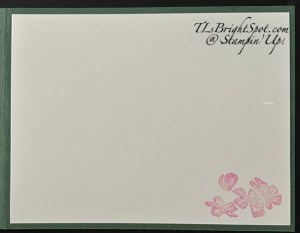
For the inside… I stamped this floral image from the Flowering Meadows stamp set in Berry Burst on a Basic White panel 4 x 5 1/4. This was attached to the inside side of the card.
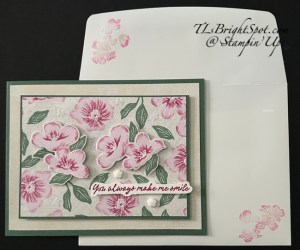
For the envelope… I stamped this same image in Berry Burst on both the flap & the front of the envelope. This just ties everything together making it look so perfect!
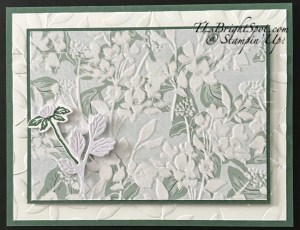
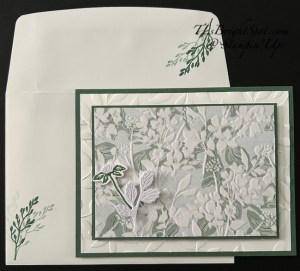
My next card is again a card base of Peaceful Pine5 1/2 x 8 1/2 scored at 4 1/4 (top fold). I embossed a Basic White panel 4 x 5 14 with the Paradise Garden 3D embossing Folder & attached it to the card front. The next layer is Peaceful Pine with a layer of the Velvet Meadows SDSP & attached with dimensionals. In this suite of products is the Velveteen Assortment Special Paper – this one used is white. I die cut these gorgeous small leaves using the Flowering Meadows Dies. On Basic White I stamped the daisyin Peaceful Pine ink, then die cut the center with the Velveteen Assortment Specialty Paper in White and attached this by adhering the stem with liquid glue & a mini dimensional on the back of the daisy flower.
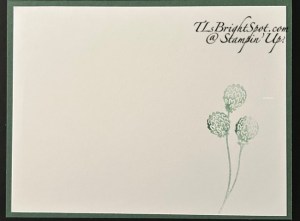
For the inside, I stamped off the stems & image in Peaceful Pine on the Basic White panel 4 x 5 14 & attached it – no sentiment!
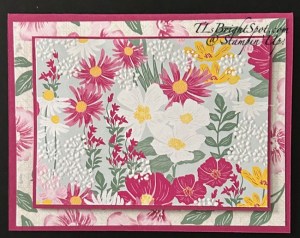
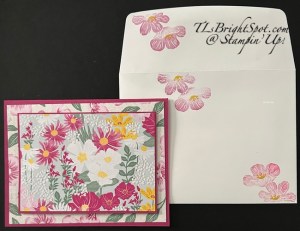
For this last card, I used Berry Burst for the card base (5 1/2 x 8 1/2 scored at 4 1/4 – top fold). I layered this with Velvet Meadows SDSP 4 x 5 1/4. The next is Berry Burst & another of the papers in Velvet Meadows SDSP – I LIKE this contrast! I’ve added no sentiment or any kind of embellishment. The SDSP speaks for itself.
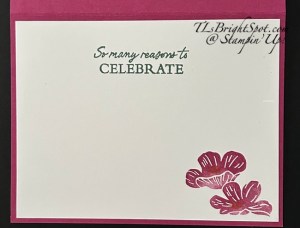
For the inside, I stamped the double flower image in Berry Burst ink on the Basic White panel (5 1/4 x 4) & adhered this to the inside of the card. The sentiment is stamped in Peaceful Pine ink using the Flowering Meadows stamp set.
Here are the envelopes for the two additional cards: the left stamped with Peaceful Pine ink: full strength then stamped again & once more without re-inking. This was sone on the envelope front & the flap. The envelope on right is stamped off erry Burst ink and the same double flowers image from Flowering Meadows stamp set.
Now… check out what others on the hop are creating. I had extra fun making cards with the same layout but each with different layers/ embellishments or very simple & just paper, Each is so different from the next, which makes it extra fun. Click the ‘next’ button or click on a name to vist the other participants.
To purchase the products used to make this card – see below. 😀 If your order is $50 or more, you will qualify for the special tutorial of the month from me. See my page about Daisy Patch Rewards!
Also please note… SU! has a generous JOIN PROMOTION and I would love to have you JOIN MY TEAM. See that link below as well. All kinds of benefits & fun when you join with me.
Join as a demonstrator now & get our new 2026–2028 In Color Stampin’ Pads FREE along with your Starter Kit! Or if you’d rather have different products instead of ink pads, you’re covered there, too—you can add an extra $35 USD | $50 CAD worth of products to their Starter Kit.
As a Demonstrator, you will also enjoy all the perks that come with being a demonstrator, like a 20–25% product discount, early access to the latest products and catalogs, the opportunity to earn a modest commission, the chance to attend incredible training and crafting events, and so much more.
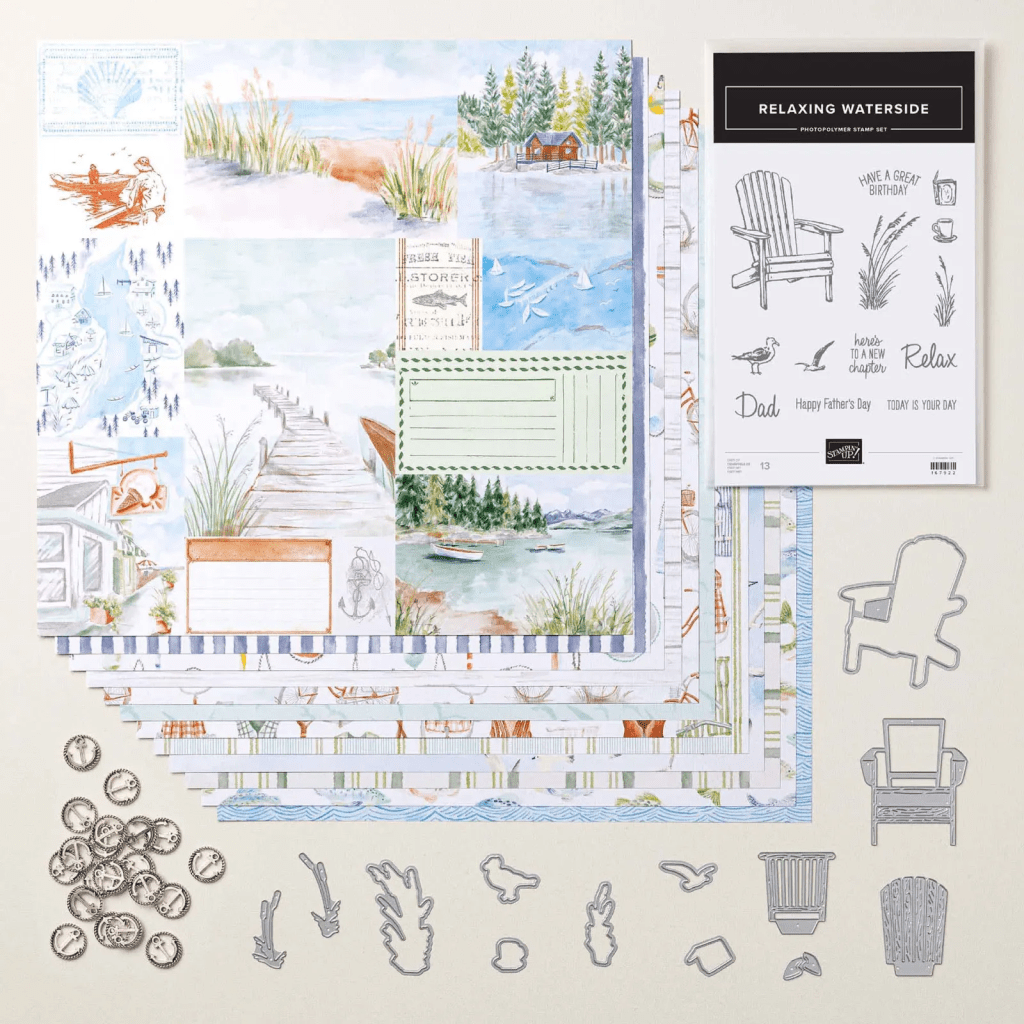
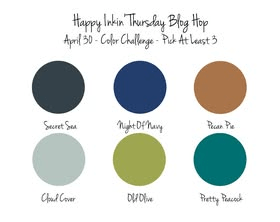
Welcome to our HOP! We have a color challenge today… I’m using a NEW product available May 5 called the Relaxing Waterside bundle & it’s coordinating Designer Paper called Waterside Retreat. Let’s take a peek…
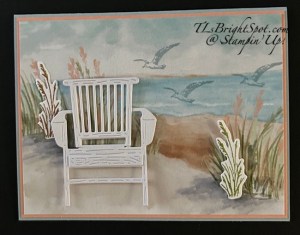
I used Cloud Cover for my card base (8 1/2 x 5 1/2 scored at 4 1/4) then layered a panel of a new IN Color called Crisp Cantaloupe (4 1/8 x 5 38) then a layer of the Waterside Retreat DSP. I die cut the chair from Wood Textured Specialty Paper & added it with dimensionals. I also stamped grass images in both Pecan Pie & Old Olive onto Basic White scraps & die cut them. They are part of the Relaxing Waterside bundle & just add wonderful dimension to the card. Last thing was to stamp the seagulls in Cloud Cover ink – and the card front was complete.
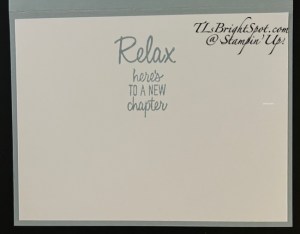
For the inside – on a Basic White piece (4 x 5 1/4) I stamped these sentiments in Cloud Cover ink and attached the panel to the inside.
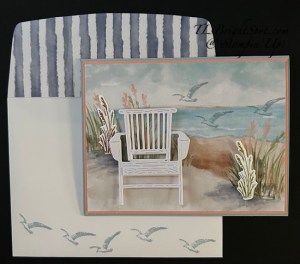
For the envelope… On the backside of this particular sheet is this wonderful stripe pattern – I used that for the flap then stamped more seagulls on the front with Cloud Cover ink. Here on the East coast, seagulls swarm wherever there are people with food. They get quite aggressive in taking food, sometimes right out of one’s hand!!!
SHOP WITH ME HERE... FOR KITS, PAPER PRODUCTS, LAST CHANCE ITEMS – ALL OF IT!
Sales Period: May 2, 2026, from 12:00 a.m. to 11:59 p.m. (MT)
Ordering Deadlines
Online: May 2, 2026, at 11:59 p.m. (MT)
Note: Because this 24-hour sale takes place on a Saturday, Demonstrator Support will be closed and unavailable to answer questions or take phone orders.
Details:
24 hours only
20% off select memory keeping products
Items available while supplies last
See and shop all qualifying products in the online store
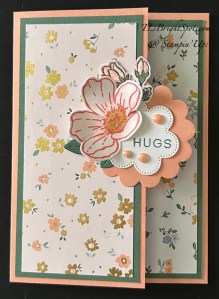
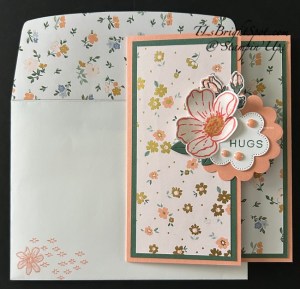
Good morning! I’m so excited to share this card with you – it’s a beauty, I used some new products that will be coming out in the May-August 2026 Catalog that you can order on May 5.
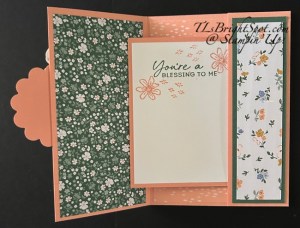
The card base is Crisp Cantaloupe. Don’t you just love that name of a color? The layers are Peaceful Pine and various papers from the Bloom Boutique Specialty Paper Pack. The flowers & leaves come from a new bundle – Boutique Blossoms and the scalloped die cuts use the Scalloped Blooms bundle. Before I share all the details about how to make this card, let’s see the inside where the slider is.
More gorgeous paper shown here from the same Bloom Boutique SDSP. And the slider? That’s the sentiment panel – and it slips inside the panel on the right.
So, directions… I chose to do the inside first so let’s start there.
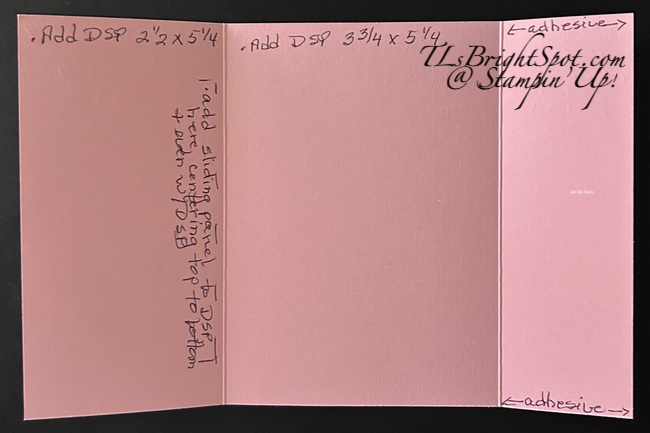
The card base is the standard 8 1/2 x 5 1/2 scored on the long side @ 2 3/4 & 6 3/4. Burnish the score lines as both will fold to the inside.
Cut the left DSP panel 2 1/2 x 5 1/4 and adhere
Cut the center DSP panel 3 3/4 x 5 1/4 and adhere
Fold the last panel inwards with a narrow line of adhesive at just the top & bottom (see photo)
Decorate this folded over section with contrasting card stock (Peaceful Pine 1 1/2 x 5 1/4) then an overlay of DSP (1 1/4 x 5)
Creating the Slider for the card:
Cut a piece of card stock same color as card base (Crisp Cantaloupe) 3 3/4 x 4 1/4 & score 1/2″ on short side. Burnish & add adhesive to the scored end
Add this to the left inside panel even with the DSP & equidistant top to bottom
Fold this to the right, add a stamped Basic White piece 3 x 4 to the ‘slider’ front, then slip it into the opening on the right (I stamped the sentiment in Peaceful Pine ink – new In Color! and the flowers in Crisp cantaloupe – also new In Color! The sentiment is from Scalloped Blooms & the flowers are from Boutique Blossoms)
Now let’s decorate the front, which is really only the left panel 😀 Cut a contrasting card stock (Peaceful Pine) 2 1/2 x 5 1/4 and a DSP panel 2 1/4 x 5. Add to card front.
Die cut two panels of Scalloped Blooms Dies (Crisp Cantaloupe & Basic White) Stamp the BW piece in Peace Pine ink using a stamp from the Scalloped Blooms stamp set
Stamp small flowers in Peaceful Pine ink & the medium flower outline stamp in Crisp Cantaloupe. Stamp the filler stamp for both flowers in Barely Blush ink (another new IN COLOR!) Use the Light Peaceful Pine Stampin’ Blend to add color to the leaves of the small flowers. Die cut & set aside.
Die cut the small group of leaves (Peaceful Pine)
Add each of these die cuts to the die cut scallops and attach to card front.
Final touch… add three (3) 2026-2028 In Color Dots
Envelope… Add another piece of the Bloom Boutique SDSP 2 1/4 x 6 to the flap & trim to fit. Stamp the front with flowers from the Bloom Boutique stamp set with Crisp Cantaloupe ink. YAY – this is ready to send to someone special!
To purchase the items shown to make this card look at pages. in the new May-August 2026 catalog.
Do you remember the adorable stuffed animals of Winnie the Pooh, Eyeore and Piglet? There are others animals produced as well, but I have to say – I loved these animals and the stories that went with them. So when this suite of products became available to demonstrators, I had this suite at the top of my list.
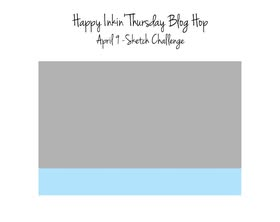
Welcome to the Happy Inkin ‘ Thursday Blog Hop. We have a sketch challenge today & I chose to play with this Silly Old Bear Suite of products available to customers May 5.
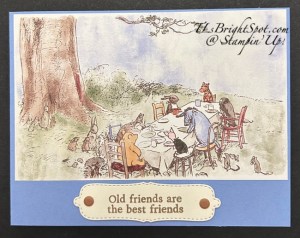
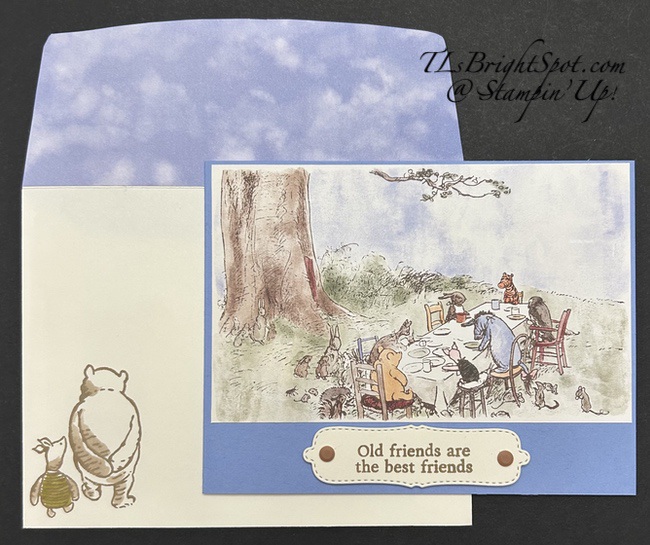
I am really appreciating the new IN COLORS! This card base is Hydrangea Hue 4 1/4 x 11 scored at 5 1/2. I added this awesome picture panel, cut directly from the 12×12 Silly Old Bear Designer Series Paper. On the lower part of the card front is this stunning label, die cut from Very Vanilla card stock using the Sweet Words & Labels bundle. The sentiment? from the same stamp set – Sweet Words & Labels – stamped in Crumb Cake ink. The embellishments are Neutral Matte Dots.
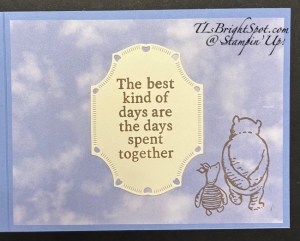
For the inside of the card I used another sentiment from the Sweet Words & Labels stamp aet, stamped in Crumb Cake ink on Very Vanilla card stock. It was die cut using the Sweet Words & Labels Dies. I adhered it to a the inside of the card after attaching a piece of the Silly Old Bear 12×12 DSP. I then stamped the image of Silly Old Bear & Piglet walking together – using the Sweet Old Friends stamp set. This set also has coordinating dies – and they die cut images straight from the DSP. You are so going to LOVE THIS suite of products. This suite is a May ONLINE EXCLUSIVE and will be available May 5.
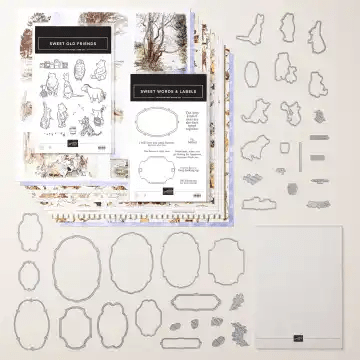
For the envelope, more of the Silly Old Bear DSP on the flap trimmed to fit and for the front, this sweet Pooh Bear & Piglet walking along. I did use Crumb Cake Stampin’ Blends to add some shading – and for Piglet a bit of Old Olive for the top he’s wearing. Below is an image of the suite collection – look at those fun dies! Oh my gosh… so much fun! This takes me back to earlier years for sure.
This is a suite you will definitely want to add to your wish list for ordering May 5. More info about ordering from me is listed below. For now, I want to encourage you to visit others participating in today’s hop. Get ready to see some fabulous creations.
If you do not have a demonstrator, connect with me – I can fix that, get you a catalog and set you up for success & fun! Even show you how to be a demonstrator 😀 You can, you know!
Shopping with me is easy.. click here to see all the goodies. What’s nice about a single link is you’re able to slip around the site, see the current Annual Catalog, Online Exclusives and Last Chance products – all in one link. And when you shop with me, not only do you receive extra Daisy Patch Points (visit my rewards page for more info), but Stampin’ Up! provides benefits as well. And when you decide to be a Demonstrator – oh my goodness – LOTS of benefits there… an automatic discount for every time you shop, you join a community of crafters that inspire & stimulate your creativity, view & have the opportunity to purchase new products before they are available to the general public – AND attend conventions. There’s more, there’s always more… JOIN MY TEAM HERE
Thanks for stopping by. Make someone’s day by sending them a handmade card filled with ❤️


![Scenic Coast Suite Collection (English) [ 167786 ]](https://assets1.tamsnetwork.com/images/EC042017NF/167786s.jpg "Scenic Coast Suite Collection (English) [ 167786 ]")
![Night Of Navy 8-1/2" X 11" Cardstock [ 100867 ]](https://assets1.tamsnetwork.com/images/EC042017NF/100867s.jpg "Night Of Navy 8-1/2\" X 11\" Cardstock [ 100867 ]")
![Night Of Navy Classic Stampin' Pad [ 147110 ]](https://assets1.tamsnetwork.com/images/EC042017NF/147110s.jpg "Night Of Navy Classic Stampin' Pad [ 147110 ]")
![Basic White 8 1/2" X 11" Cardstock [ 166780 ]](https://assets1.tamsnetwork.com/images/EC042017NF/166780s.jpg "Basic White 8 1/2\" X 11\" Cardstock [ 166780 ]")
![Basic White Medium Envelopes [ 159236 ]](https://assets1.tamsnetwork.com/images/EC042017NF/159236s.jpg "Basic White Medium Envelopes [ 159236 ]")
![Stampin' Cut & Emboss Machine [ 149653 ]](https://assets1.tamsnetwork.com/images/EC042017NF/149653s.jpg "Stampin' Cut & Emboss Machine [ 149653 ]")
![Paper Trimmer [ 152392 ]](https://assets1.tamsnetwork.com/images/EC042017NF/152392s.jpg "Paper Trimmer [ 152392 ]")
![Stampin' Dimensionals [ 104430 ]](https://assets1.tamsnetwork.com/images/EC042017NF/104430s.jpg "Stampin' Dimensionals [ 104430 ]")
![Multipurpose Liquid Glue [ 110755 ]](https://assets1.tamsnetwork.com/images/EC042017NF/110755s.jpg "Multipurpose Liquid Glue [ 110755 ]")
![Mini Glue Dots [ 103683 ]](https://assets1.tamsnetwork.com/images/EC042017NF/103683s.jpg "Mini Glue Dots [ 103683 ]")
![Paper Snips [ 103579 ]](https://assets1.tamsnetwork.com/images/EC042017NF/103579s.jpg "Paper Snips [ 103579 ]")
![Take Your Pick [ 144107 ]](https://assets1.tamsnetwork.com/images/EC042017NF/144107s.jpg "Take Your Pick [ 144107 ]")
![Clear Wink Of Stella Glitter Brush [ 141897 ]](https://assets1.tamsnetwork.com/images/EC042017NF/141897s.jpg "Clear Wink Of Stella Glitter Brush [ 141897 ]")


![Velvet Meadow Suite Collection (English) [ 167917 ]](https://assets1.tamsnetwork.com/images/EC042017NF/167917s.jpg "Velvet Meadow Suite Collection (English) [ 167917 ]")
![Flowering Meadow Bundle (English) [ 167912 ]](https://assets1.tamsnetwork.com/images/EC042017NF/167912s.jpg "Flowering Meadow Bundle (English) [ 167912 ]")
![Dreamy Flowers [ 167916 ]](https://assets1.tamsnetwork.com/images/EC042017NF/167916s.jpg "Dreamy Flowers [ 167916 ]")
![Peaceful Pine 8 1/2" X 11" Cardstock [ 167691 ]](https://assets1.tamsnetwork.com/images/EC042017NF/167691s.jpg "Peaceful Pine 8 1/2\" X 11\" Cardstock [ 167691 ]")
![Berry Burst Classic Stampin' Pad [ 147143 ]](https://assets1.tamsnetwork.com/images/EC042017NF/147143s.jpg "Berry Burst Classic Stampin' Pad [ 147143 ]")
![Bubble Bath Classic Stampin' Pad [ 161664 ]](https://assets1.tamsnetwork.com/images/EC042017NF/161664s.jpg "Bubble Bath Classic Stampin' Pad [ 161664 ]")
![Velveteen Assortment 12" X 12" (30.5 X 30.5 Cm) Specialty Paper [ 167915 ]](https://assets1.tamsnetwork.com/images/EC042017NF/167915s.jpg "Velveteen Assortment 12\" X 12\" (30.5 X 30.5 Cm) Specialty Paper [ 167915 ]")
![Paradise Garden Hybrid Embossing Folder [ 167120 ]](https://assets1.tamsnetwork.com/images/EC042017NF/167120s.jpg "Paradise Garden Hybrid Embossing Folder [ 167120 ]")
![Peaceful Pine Classic Stampin Pad [ 167679 ]](https://assets1.tamsnetwork.com/images/EC042017NF/167679s.jpg "Peaceful Pine Classic Stampin Pad [ 167679 ]")
![Berry Burst 8-1/2" X 11" Cardstock [ 144243 ]](https://assets1.tamsnetwork.com/images/EC042017NF/144243s.jpg "Berry Burst 8-1/2\" X 11\" Cardstock [ 144243 ]")


![Cloud Cover 8 1/2" X 11" Cardstock [ 165621 ]](https://assets1.tamsnetwork.com/images/EC042017NF/165621s.jpg "Cloud Cover 8 1/2\" X 11\" Cardstock [ 165621 ]")
![Cloud Cover Classic Stampin' Ink Refill [ 165279 ]](https://assets1.tamsnetwork.com/images/EC042017NF/165279s.jpg "Cloud Cover Classic Stampin' Ink Refill [ 165279 ]")
![Uninked Stampin' Spots [ 141822 ]](https://assets1.tamsnetwork.com/images/EC042017NF/141822s.jpg "Uninked Stampin' Spots [ 141822 ]")
![Old Olive Classic Stampin' Pad [ 147090 ]](https://assets1.tamsnetwork.com/images/EC042017NF/147090s.jpg "Old Olive Classic Stampin' Pad [ 147090 ]")
![Pecan Pie Classic Stampin' Pad [ 161665 ]](https://assets1.tamsnetwork.com/images/EC042017NF/161665s.jpg "Pecan Pie Classic Stampin' Pad [ 161665 ]")