Hello Everyone – a very special blessing and thank you to those who follow my crafting habit. I really enjoy what I do and hope it shows in my posts. I’m showcasing a few of the cards etc. I made this holiday season ~ all have gone to family and friends who are special to me/ us. Thank you for your support and encouragement this past year. I’m looking forward to continued sharing in 2021.
Money Holders
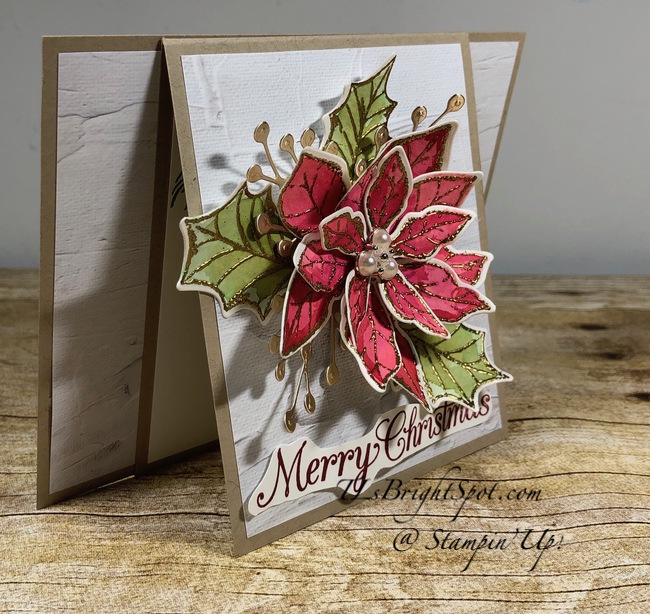
Poinsettia Petals
In the Pines Bundle
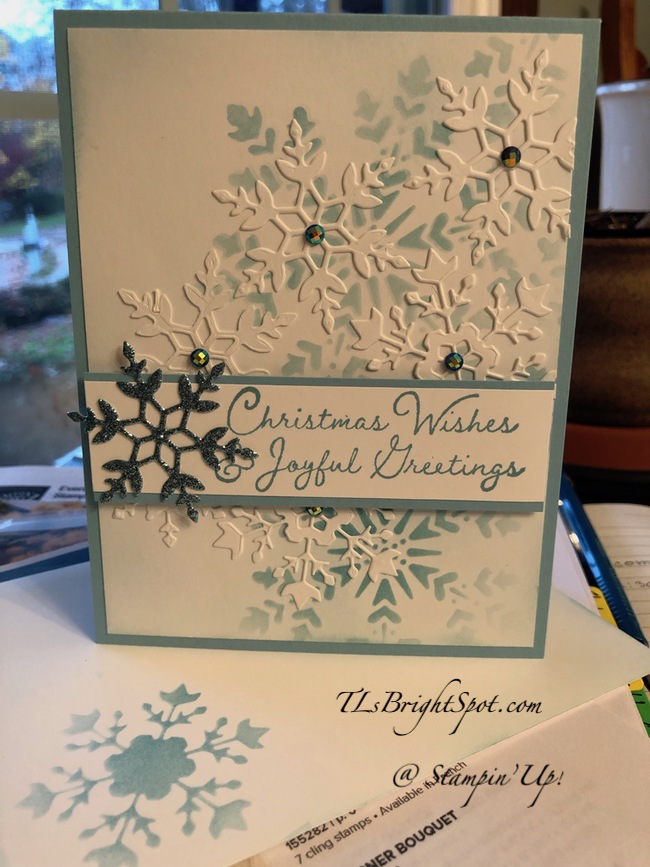
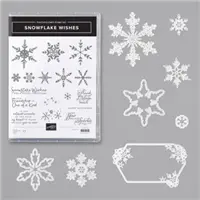
Snowflake Wishes Bundle
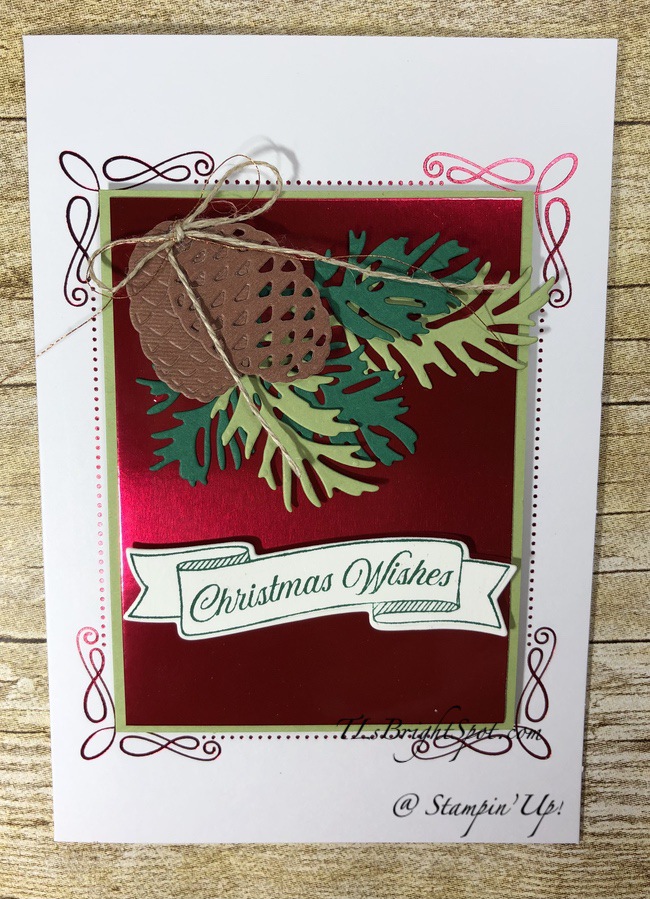
Peaceful Boughs
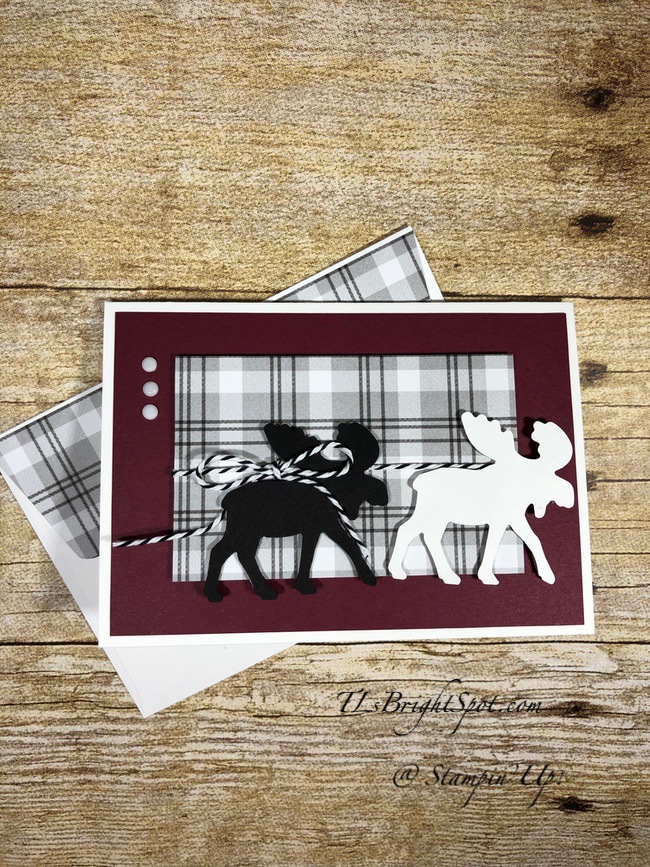
Merry Moose
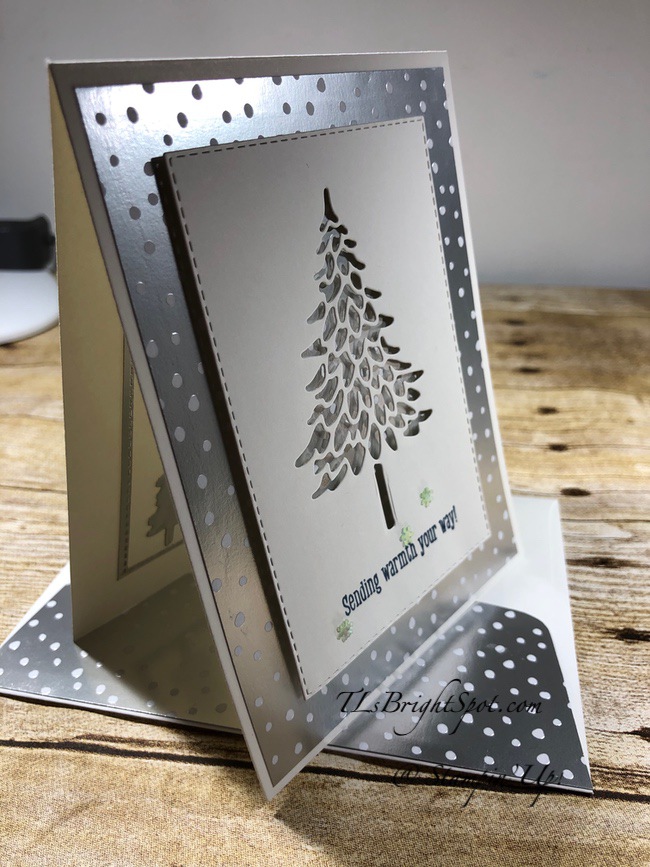
Christmas Gleaming fun fold
Freezin Fun
Wreath builder
Dove of Hope
Tag Buffet
#5
May the Spirit of the Season bring you peace, comfort and joy! Merry Christmas!
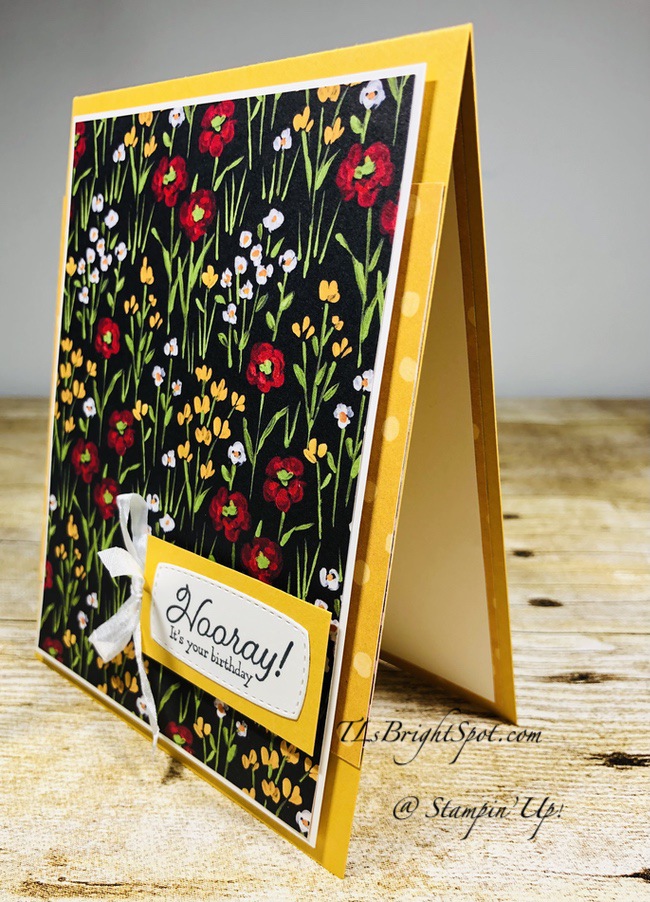
The real focus of today’s card is the fun FREE DSP (with a $50 purchase of Stampin’ Up! product beginning Jan 5, 2021). This is such fun DSP – full of flowers and various backgrounds on the opposite side.
Birthday w/ Flowers & Fields DSP – #1 & 2
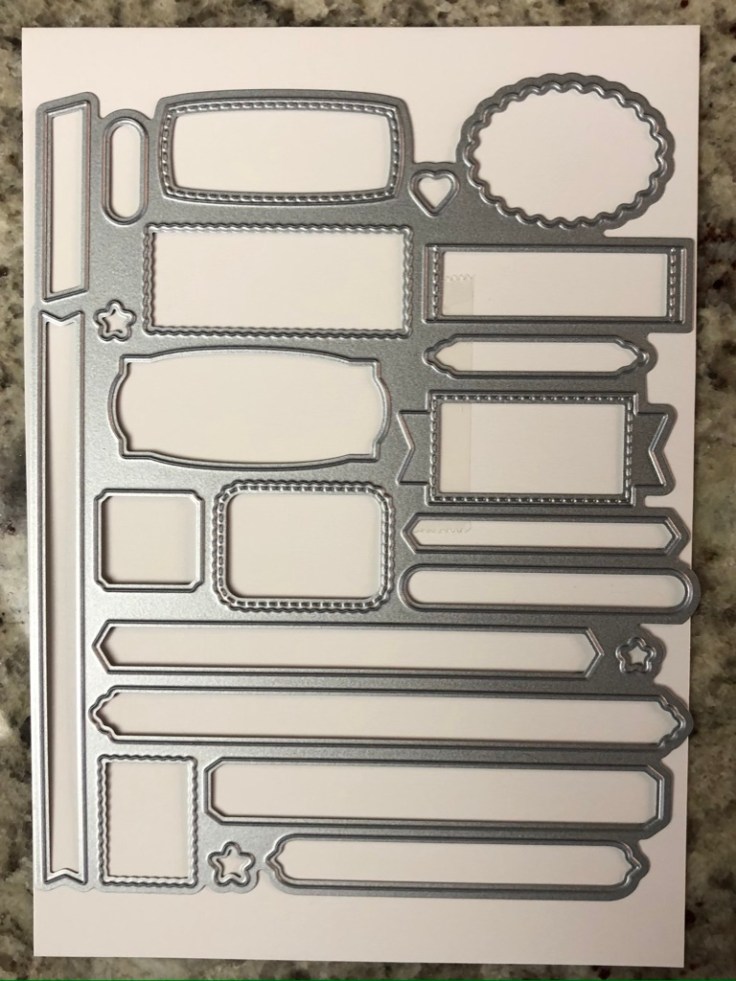
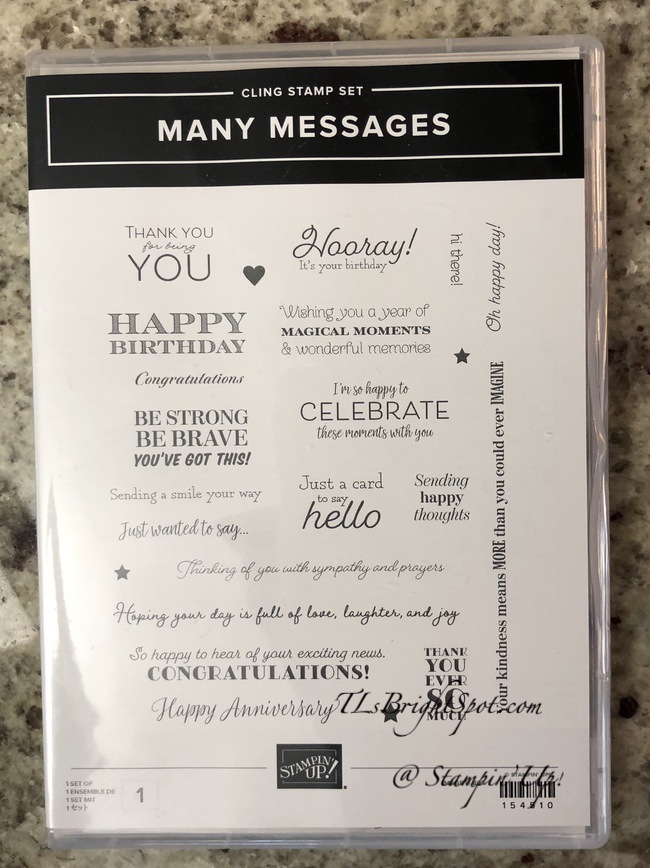
It begins with Bumblebee card stock then a layer of the Flowers & Fields DSP, adhered with liquid glue. I cut another layer of DSP and adhered it to a Whisper White panel with liquid glue before adding to the card base with dimensionals. The Many Messages stamp set and coordinating Messages Dies has lots of sentiments and I had several cut out. They had been stamped on Whisper White card stock in Tuxedo Black Memento ink and die cut with the Messages Dies – which goes perfectly with the paper! I adhered this particular sentiment on a piece of Bumblebee, put it on dimensionals and added it to the card front. A simple bow using the 1/4″ Whisper White Crinkled Ribbon was the final touch for the front.
Birthday w/ Flowers & Fields DSP – #3
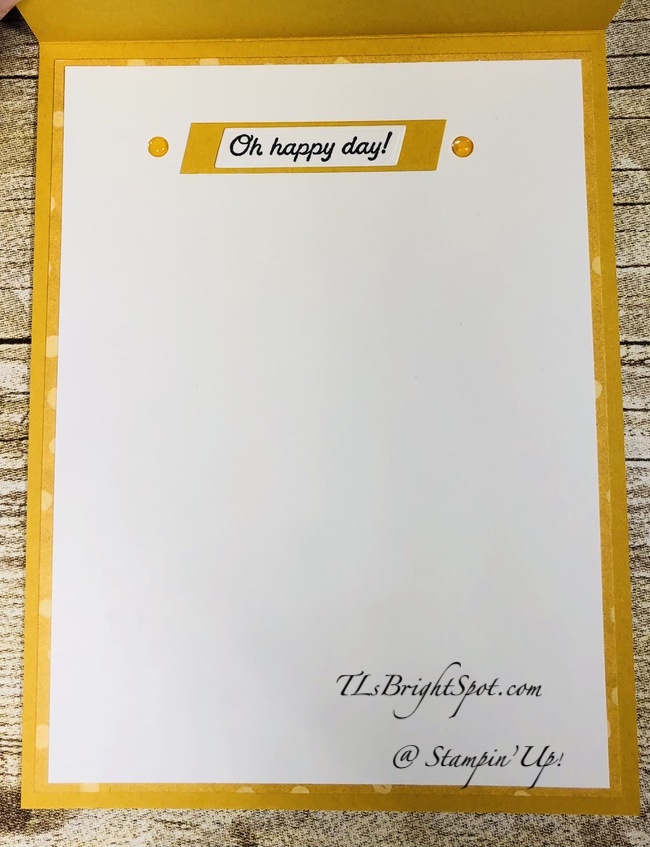
For the inside, I adhered another panel of the Flowers & Fields DSP with liquid glue to the card base. To that a Whisper White panel was adhered with liquid glue. Another sentiment from the Many Messages stamp set was used after die cutting with the Messages Dies. This was adhered to a small piece of Bumblebee with liquid glue, then to the Whisper White panel. Two fun 2020-2022 Enamel Dots were added for a sweet touch – in Bumblebee of course. And the card was DONE!
Birthday w/ Flowers & Fields – #4
For the envelope I adhered a strip of the Flowers & Fields DSP and called it ready to send 😁 Such a bright cheery card for someone special!
Birthday w/ Flowers & Fields DSP – #5
Card stock cuts may be found at the end of this post. Products used for today’s project may be found below. As a thank you to my customers, when the order is between $50-$150 I offer a SU! item of your choice valued at $10. Remember to use MY CURRENT HOST CODE SAZV3JTK– good until Jan 3. When the order is over $150, you still receive that free gift from me, but SU! has Stampin’ Rewards that may be used for additional products 😁
Bumblebee 4 1/4 x 11 scored at 5 1/2, 1 x 2 & scrap (about 3/8 x 2 1/4 for inside
Whisper White 3 7/8 x 5 1/8 + scrap for sentiment)
Flowers & Fields DSP 3 3/4 x 4 1/4(bottom layer on front), 3 3/4 x 5 (large front panel), 4 x 5 1/4 + envelope flap
Christmas is just two days away…. remember the yearend sale Stampin’ Up! has going on and check the clearance rack as well. Sale-a bration and the new Jan-Jun 2021 Mini catalog go live Jan 5, 2021 – just FYI!
WooHoo! Stampin’ Up! has gone over the top… check out the Giant Year-end sale here
Sale Dates: December 8, 2020 through January 4, 2021
No minimum purchase required.
Retiring items are available while supplies last.
Exclusions apply: Carryover items will not be discounted.
Due to increased shipping times and possible shipping delays during the month of December, we can’t guarantee delivery before Christmas.
Ordering Deadlines: January 4, 2021 at 11:50 PM (MT)
Thanks for stopping by.
May you have a beautiful day.
Make someone happy sending them a handmade card filled with love.
It’s beginning to look a lot like Christmas… packages under the tree now means I did some wrapping yesterday! Ha – a bit more to do but feeling good about where I am in the process right now. How about you – you ready? Don’t wait, don’t hesitate…
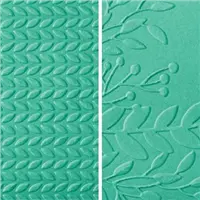
Today’s card is made with new products available to customers beginning Jan 5, 2021. This is called Art Gallery & Floral Gallery Dies. It’s part of a suite that includes a 3D Embossing Folder that is awesome, some super ribbon, Gilded Leafing (which I haven’t played with yet!), Heat & Stick powder to adhere the leafing, and some incredible Golden Garden acetate & Fine Art Floral DSP. As I mentioned, the only product I haven’s used yet is the Gilded Leafing – so guess that’s on my ‘to do’ list, but maybe not today!
Art Gallery #2 – 1
I’ve used two coordinating papers from the Fine Art Floral DSP to create a fun background for the flower from the Art Gallery stamp set. The larger piece was adhered directly to the Thick Whisper White card base. My next step was to stamp the flower on Whisper White card stock in Merry Merlot, then the 2nd step stamp in Rococco Rose. I know, interesting combination… and the Rococco Rose doesn’t show much, which is ok. I then stamped the leaves & stem (one stamp) in Old Olive ink and die cut them both at the same time with the Floral Gallery Dies. I then die cut a second piece of the Fine Art Floral DSP using the third from largest die in Rectangle Stitched Dies. I adhered this stitched rectangle to a slightly larger panel of Flirty Flamingo card stock with liquid glue. This was attached to the floral card base with liquid glue. I adhered the flower with dimensionals to this panel, then the leaves/ stem with liquid glue, slipping it under the flower just a bit. I stamped the sentiment from the Art Gallery stamp set in Tuxedo Black Memento ink and die cut it with one of the dies in the Floral Gallery Dies. Don’t you love the fun edge? I adhered it with dimensionals, trimmed the end, added three Pearl Basic Jewels and called the front done.
Art Gallery #2 – 2 & 3
For the inside of the card, I used the outline from the stitched rectangle die cut and adhered it to the inside of the card with liquid glue. I love this effect ~ it brings the colors of the front to the inside and creates boundaries as well. For the envelope I kept it very simple. I cut another piece of the Fine Art Floral DSP that coordinated with the two front DSP panels and adhered that with liquid glue to the flap. Here’s abetter photo.
Art Gallery #2 – 3
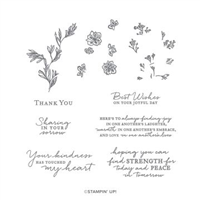
Art Gallery stamp set
Art Gallery #1
Above on the left is a picture of the stamp set. On the right is a photo of a previous card using the Pained Texture Embossing Folder, the gorgeous Golden Garden Designer Specialty Acetate and the gold Fine Art Ribbon. I thought you might like to see those products in use 😁
Card stock cuts may be found at the end of this post. Products used for today’s project may be found below. As a thank you to my customers, when the order is between $50-$150 I offer a SU! item of your choice valued at $10. Remember to use MY CURRENT HOST CODE SAZV3JTK– good until Jan 3. When the order is over $150, you still receive that free gift from me, but SU! has Stampin’ Rewards that may be used for additional products 😁
It is so fun to work with new product… I don’t know why that is ~ learning curve, different inspiration, just new ~ who knows! A Touch of Inkstamp set will be available as part of Sale-a-bration beginning Jan 5, 2021. It’s FREE with a $100 purchase from any Stampin’ Up! catalog. The Jan-Jun 2021 Mini Catalog goes live that day as well, so there will be lots to choose from. If you do not have a demonstrator, feel free to contact me.
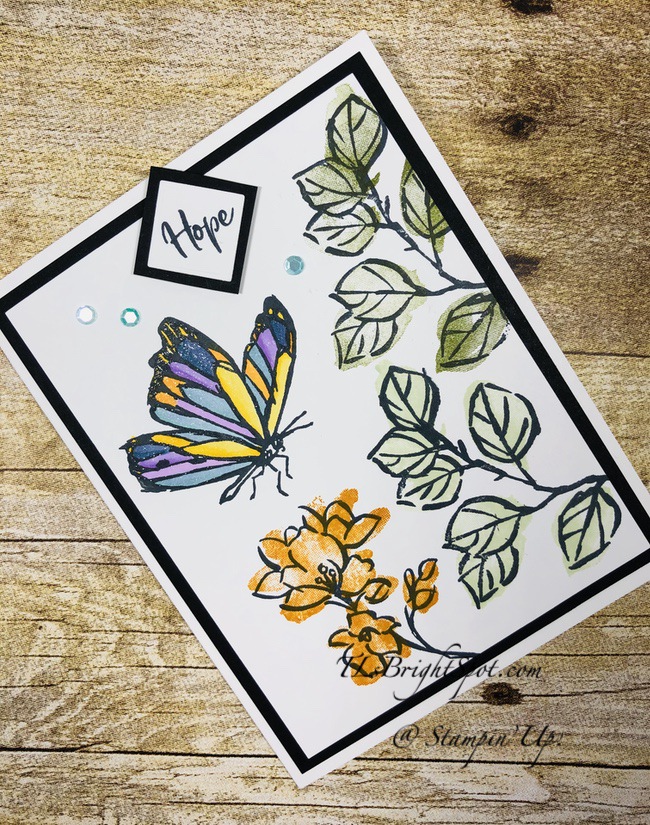
A Touch of Ink – #1
All the images and sentiments are from this new stamp set, A Touch of Ink. It’s a 2-step set, meaning the outline then the ‘coverage’ stamp. And just so you know, the second step is not meant to stay within the lines. It’s artsy and definitely not solid. I hope you can tell that by what you see in the photo above. I did not use the two-step for the butterfly, I chose to use Stampin’ Blends. Let me give you the details…
Stamp the leaves, flower, and butterfly with Tuxedo Black ink on a Whisper White panel
Stamp the 2nd step for the leaves: top set in Old Olive ink, the lower set of leaves in Soft Sea Foam
Stamp the 2nd step for the flowers in Crushed Curry ink
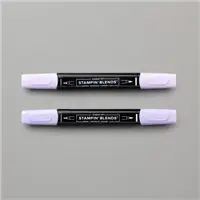
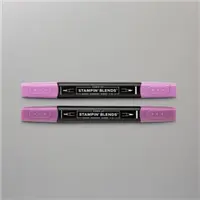
Color the butterfly using various Stampin’ Blends: Daffodil Delight, Mango Melody, Purple Posy, Highland Heather, Seaside Spray and Misty Moonlight. Cover with Wink of Stella
Adhere the panel to Basic Black card stock with liquid glue
Adhere Artistry Blooms Adhesive-Backed Sequins
Stamp the word ‘Hope’ in Tuxedo Black Memento ink on Whisper White scrap. Cut square about 3/4″, make it a diamond in lieu of a square, creating interest. Adhere to Basic Black card stock and trim to desired diamond. Adhere to the card with dimensionals
Adhere completed panel to Thick Whisper White card stock and your card front is complete
A Touch of Ink – #2 & 3
In the left photo I was hoping you could tell I added Wink of Stella to the butterfly ~ does it show up sparkly? I made sure I did each individual color with a single stroke of the brush, otherwise the colors could possibly bleed into one another.
In the photo at right, inside of the card…. On a piece of Whisper White card stock I stamped the butterfly 2nd step with Soft Sea Foam ink, just wanting to create a background for the sentiment. The sentiment is from A Touch of Ink stamp set as mentioned, stamped in Tuxedo Black memento ink. This was adhered to the inside of the card weithn liquid glue – and finis for the card!
A Touch of Ink – #4
For the envelope, I covered the flap with Ornate Garden DSP and trimmed it to fit. I then stamped the leaves from A Touch of Ink in Old Olive ink and stamped the 2nd step in Soft Sea Foam ink and the card was done.
Card stock cuts may be found at the end of this post. Products used for today’s project may be found below. As a thank you to my customers, when the order is between $50-$150 I offer a SU! item of your choice valued at $10. Remember to use MY CURRENT HOST CODE SAZV3JTK– good until Jan 3. When the order is over $150, you still receive that free gift from me, but SU! has Stampin’ Rewards that may be used for additional products 😁
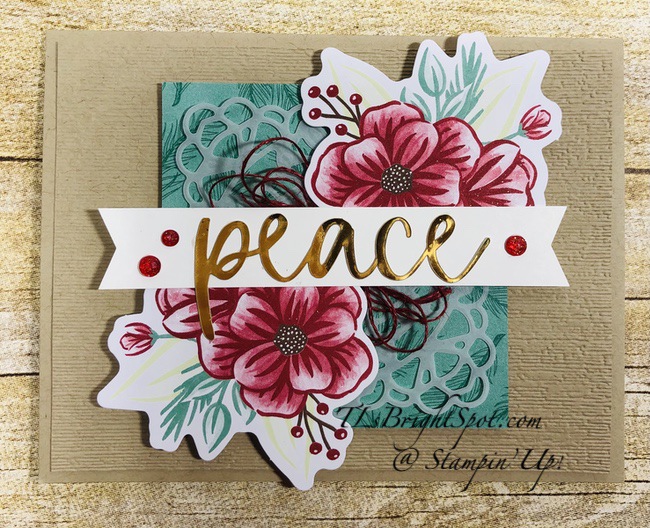
Sometimes when we make our Paper Pumpkin kits, there are left overs, remains, pieces. Yesterday I was doing a little tidying (and boy did it need it!) and came across the November PP box. Inside were some parts to the kit, not many, but my mind clicked and I made one more Christmas card. Here it is…
November PP leftovers
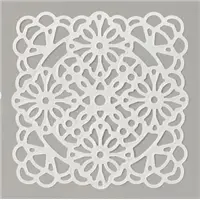
Recognize those flowers? I really like how this turned out… Crumb Cake card base & layer, ‘Tis the Season 6×6 DSP, Square Vellum Doilies, the flowers, Cherry Cobbler Linen Thread from the kit, Whisper White banner and the foil sentiment from the kit ~ three major items from the kit made this card! I’m pleased as punch. 😏
I began with the Crumb Cake card base 8 1/2 x 5 1/2, scored at 4 1/4. I had another piece of Crumb Cake card stock handy (4 x 5 1/4) and ran it through the Subtle 3D Embossing Folder and adhered it with liquid glue to the card front. Next I took one of the papers in ‘Tis the Season 6×6 DSP and cut it to a bit larger than the Square Vellum Doily (3 1/4 square). I adhered the vellum to the paper with Stampin Seal. Next I added the two flowers left over from the November Paper Pumpkin kit – on dimensionals, and covered just the flower in Wink of Stella. Between them is a several looped bow using the Cherry Cobbler Linen Thread from the kit, adhered with a glue dot. I cut a Whisper White banner 5/8 x about 4 3/4 and trimmed the ends with the Banner Pick a Punch. To this I added the foil sentiment piece – again from the November PP kit – with tiny dots of liquid glue. The banner was adhered to the flowers with liquid glue. This whole 3 1/4″ square was adhered to the Crumb Cake card with dimensionals – and the front was complete. OH! I did add three Wonderful Gems to the banner :}
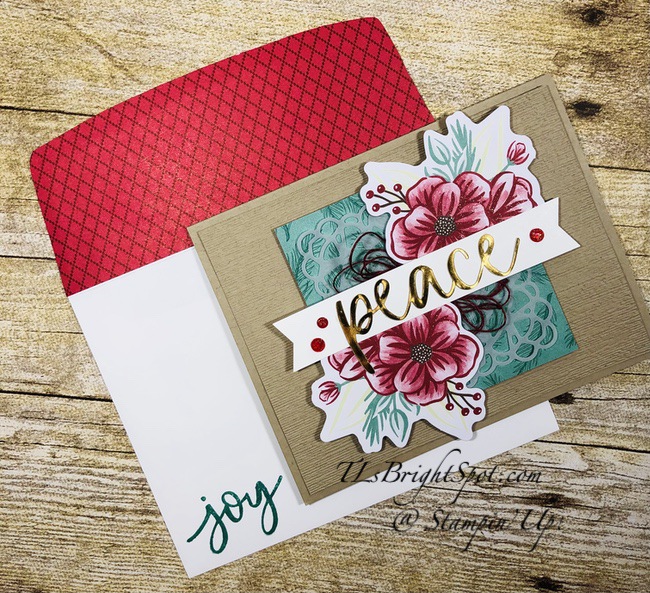
Although I forgot to take a picture (and the card is mailed already!) for the inside, I had a panel of Whisper White 4 x 5 1/4 stamped in Just Jade ink with a portion of one of the sentiments from the Joy to the World stamp set from the November Paper Pumpkin kit. This was adhered with liquid glue to the inside of the card. For the envelope, I simply took another piece of the ‘Tis the Season 6×6 DSP (2 1/2 x 6) and adhered it to the envelope flap & trimmed to fit. I stamped the word ‘Joy’ from the Joy to the World stamp set in Just Jade ink and the card/ envelope were done.
November PP leftovers
The December Paper Pumpkin kit arrived in my mailbox yesterday and I can’t wait to work on it. Paper Pumpkin is just full of surprises ~ sometimes cards to put together, sometimes boxes or bags. Stampin’ Up! is very creative in all their kits and I encourage you to try it. You don’t necessarily have to purchase a full year, try a month or three month membership. The January Paper Pumpkin kit is available to order through Jan 10, 2021, so think about it, just not too long! Below are more details about that kit. Click on the Sending Hearts photo to subscribe. ❤️
ABOUT THE JANUARY KIT
Name Sending Hearts
Details
Kit contains enough supplies to create eight cards—four each of two designs—and coordinating envelopes.
Add-on contains 20 printed mini boxes and 24 die-cut decorative pieces and sentiment labels.
Item number: 156842
Price: $8 USD/$11 CAD
Available 1 January, while supplies last!
Products used for today’s project may be found below. As a thank you to my customers, when the order is between $50-$150 I offer a SU! item of your choice valued at $10. Remember to use MY CURRENT HOST CODE SAZV3JTK– good until Jan 3. When the order is over $150, you still receive that free gift from me, but SU! has Stampin’ Rewards that may be used for additional products 😁
How are you doing with your Christmas shopping? Odd doing most of it online – at least for me it is. I like to touch and see in person and that just isn’t possible right now. Let’s say, it isn’t like it was ~ and leave it at that. And mailing everything ~ well it’s done. I love the excitement and joy, the being together and am going to miss that terribly. With the vaccine coming out, I’m hopeful. So… on with it.
The Dragonfly Garden Bundle is so versatile and friends of ours have a 70th anniversary in a few days – I couldn’t resist using the bundle to create this card.
Dragonfly Anniversary ~ #1
What do you think? The large dragonfly is created by stamping on vellum and coloring from the back side with Stampin’ Blends. I really like how it turned out. And the little one ~that was a new process that will take some practice before explaining it. So… let’s get to this card.
Products used:
Dragonfly Garden Bundle
Subtle 3D Embossing Folder
Greenery Embossing Folder
Squares Dies
Ornate Frames Dies
Pearl Basic Jewels
Path of Petals stamp set (inside sentiment)
Itty Bitty Greetings stamp set (also inside)
Flowers for Every Season Ribbon Combo Pack -Misty Moonlight & Silver
Stampin Blends: Lt Bermuda Bay, Dk Night of Navy, Rich Razzleberry
Ok – the how to… stamp the dragonfly from the Dragonfly Garden stamp set in Tuxedo Black Memento ink on Vellum. Allow to dry or you may heat set gently. You don’t want to burn the paper or make it warp from the heat. Once dry, turn the vellum over and color using the Stampin Blends. I used the Light Bermuda Bay then the Dark Night of Navy, followed by Rich Razzleberry. Dragonflies often appear irridescent to me and I was aiming for that look. The body is Dark Night of Navy. Again, making sure it was dry, I punched it with the Dragonfly Punch, put a dimensional on it and set it aside.
I die cut this Whisper White scalloped edge with the largest of the Squares Dies, then ran it through my Greenery Embossing Folder. I definitely wanted the dragonflies hovering over a field of something and I didn’t want a solid look – I wanted some white space. Next I adhered this panel to a square of Rich Razzleberry card stock. I adhered the large dragonfly – remember he’s on a dimensional, then added the small dragonfly with just a dot of liquid glue – and set this panel aside.
I ran a piece of Whisper White card stock through the Subtle Embossing Folder and adhered it to a Thick Whisper White card base with liquid glue. I took the Rich Razzleberry panel, put dimernsionals on the back and adhered it to the card.
Next I took a scrap of Whisper White card stock, stamped the sentiment from Dragonfly Garden stamp set in Tuxedo Black Memento ink and die cut it with one of the dies from Ornate Frames Dies. I took a length of the Misty Moonlight/ Silver bakers Twine and tied it through the created hole and made a bow. This also got dimensionals and I adhered off-set on the front of the card.
Dragonfly Garden Anniversary – #2 & 3
For the inside, I stamped the longer sentiment using the Path of Petals stamp set on Whisper White card stock with Tuxedo Black memento ink. Then I stamped the shorter sentiment on a scrap of Whisper White card stock in the same ink but using the Itty Bitty Greetings stamp set. I die cut it with one of the Ornate Frames Dies and added it to the card with liquid glue. I added a Pearl Basic Jewel at each end. This Whisper White panel was adhered to a slightly larger piece of Rich Razzleberry card stock with liquid glue and that was added to the inside of the card and voila – card complete!
For the envelope, I kept it very simple. I ran a piece of Rich Razzleberry card stock through the Subtle Embossing Folder and adhered it to the envelope flap with liquid glue & trimmed to fit ~ and that was it.
Dragonfly Garden Anniversary
Remember… the Dragonfly Garden Bundle will be available to customers as of Jan 5, ordering from the incredible Jan – Jun 2021 Mini Catalog. If you do not have a demonstrator and need a catalog, please reach out to me!
Card stock cuts may be found at the end of this post. Products used for today’s project may be found below. As a thank you to my customers, when the order is between $50-$150 I offer a SU! item of your choice valued at $10. Remember to use MY CURRENT HOST CODE SAZV3JTK– good until Jan 3. When the order is over $150, you still receive that free gift from me, but SU! has Stampin’ Rewards that may be used for additional products 😁
Hi there! I’ve been mailing catalogs to my customers and including a card with instructions as part of the package. All of a sudden I realized I needed two more… so got busy and created these. I blogged about this fun fold some time ago and you can find that post here.
Heartwarming Hugs Easel card – #1
The directions and card stock cuts are the same, I just used different DSP and I like this too! I’ll list the card stock cuts again for your convenience. 🙂
Products used:
Wrapped in Christmas stamp set (circular stamp)
Freezin’ Fun stamp set (banner for easel)
1 1/2″ Circle Punch
Starburst Punch or 2″ Circle punch
Classic Label Punch
Heartwarming Hugs DSP
Red Foil Sheets
Mossy Meadow card stock
Whisper White card stock
Real Red ink
Card stock cuts:
Card base: 8 1/2 x 5 1/2, scored at 4 1/4. Make cuts in card front panel to the score line at 1 1/2″ & 4″
DSP side strips: ~ (2) 1 3/8 x 4 1/8
DSP center panels ~ (2) 2 3/8 x 2
Whisper White card stock ~ 3 x 4 1/8 + scraps for circular stamp and banner sentiment
Red Foil Sheets – punch 2″ circle
Directions:
Prepare card base as described in cardstock cuts
Adhere DSP strips to side panels of card front with liquid glue
Adhere Whisper White panel to inside card with liquid glue
Adhere side panels to card back with liquid glue, overlapping the Whisper White panel
Fold the center (loose) panel in half and burnish well
Adhere the remaining 2 DSP panels to top & bottom sections just folded in half
Stamp banner sentiment (for the easel) in Real Red ink using the Freezin’ Fun stamp set. Punch with the Classic Label Punch. Adhere to a strip of Mossy Meadow 5/8 x 2 ¼. Put dimensionals on back and adhere to the Whisper White panel of the card about ¾” from bottom
Stamp circle sentiment using the Wrapped in Christmas stamp set in Real Red ink on Whisper White card stock and punch with 1 ½” circle punch
Punch a 2” circle from Red Foil Sheets paper.
Adhere stamped circle to this glimmer paper. HINT: suggest using Stampin’ Seal to adhere stamped piece to the foil – no slippage! Put dimensionals on the LOWER HALF of this circle and adhere just at the fold
Your card is complete ~ enjoy!
Heartwarming Hugs Easel card – #2
So I’m curious which card you prefer ~ the DSP combination on the left, or the one on the right? Truly, I can’t decide!
Products used for today’s project may be found below. As a thank you to my customers, when the order is between $50-$150 I offer a SU! item of your choice valued at $10. Remember to use MY CURRENT HOST CODE SAZV3JTK– good until Jan 3. When the order is over $150, you still receive that free gift from me, but SU! has Stampin’ Rewards that may be used for additional products 😁
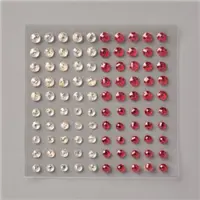
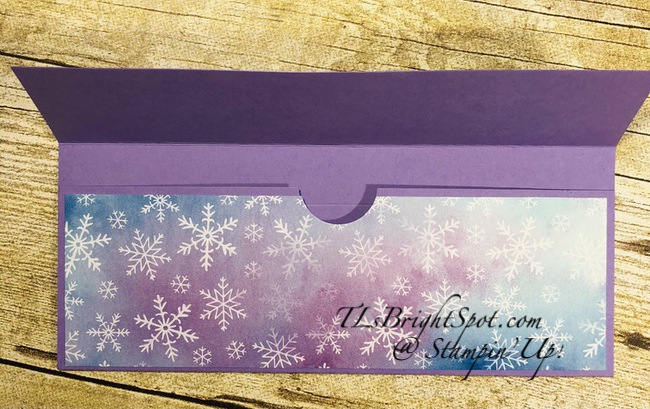
It’s that time of year, isn’t it – for giving gifts of appreciation and thanks. Today’s post shares gift holders I made to hold cash or a check or a gift certificate. If you wanted to use a gift card, it will certainly fit.
Money holder
Aren’t these pretty? Details? Here ya go!
Card base… 7 1/4 wide x 7 in height
score ON SHORT SIDE @ 1 5/8 & 4 5/8
mark the bottom center ON THE LONG SIDE and punch with 3/4″ punch
burnish score line
adhere tear n tape to the bottom section on the inside to create a pocket
Money holder – #1 & 2
Cut and add DSP:
7 x 2 1/4; 7 x 1 3/8 and 7 x 2 3/4 for the back (not shown completed above)
the lower panel needs a punch as well – I suggest after adhering, simply use the same punch in the same spot
all panels were adhered with liquid glue
remove tear n tape covering and adhere the lower section to the middle and voila!
Money holder – #3
All you need to do now is a belly band…
card stock 1 x about 6- 61/4
beginning at the back of the envelope, wrap the strip around to the front so the lower portion of the strip is under the upper portion of the strip. I tried to make the upper strip meet at the edge of tghe upper strip.
Adhere the two ends together with liquid glue. Once good and dry, remove the band, burnish the folds and decorate.
Each sentiment panel width and length varied depending on the sentiment used. I embellished with a punched image or a die cut image then adhered that to the strip and the strip adhered to the band, covering the area where the two ends meet. Make sense?
Starting with the top pocket hold, here are the various products used:
Pretty Peacock card stock for the base, covered with Brightly Gleaming Specialty DSP. The sentiment panel is Very Vanilla card stock using the Christmas Gleaming stamp set for the sentiment and the ornament. The ornament was punched with the Gleaming Ornaments Punch Pack. Pretty Peacock ink. The banner was trimmed on the end with the Banners Pick a Punch.
#2 pocket holder begins with Pacific Point card stock covered with the Snowflake Splendor DSP. The sentiment panel is Whisper White card stock stamped with the Snowflake Wishes stamp set in Pacific Point ink. The snowflake was first stamped with a snowflake in Pacific Point ink on Whisper White card stock from the same stamp set then die cut with the So Many Snowflake Dies.
#3 pocket holder begins with Highland Heather card stock covered with another piece of this fabulous Snowflake Splendor DSP. The sentiment panel is Whisper White card stock stamped with a sentiment from Christmas Gleaming stamp set in Pacific Point ink. The snowflake is Balmy Blue Glimmer Paper die cut with So Many Snowflake Dies.
And there you have it – a great project that doesn’t take a huge chunk of time and is beautiful to give and receive! Products used for today’s project may be found below. As a thank you to my customers, when the order is between $50-$150 I offer a SU! item of your choice valued at $10. Remember to use MY CURRENT HOST CODE SAZV3JTK– good until Jan 3. When the order is over $150, you still receive that free gift from me, but SU! has Stampin’ Rewards that may be used for additional products 😁
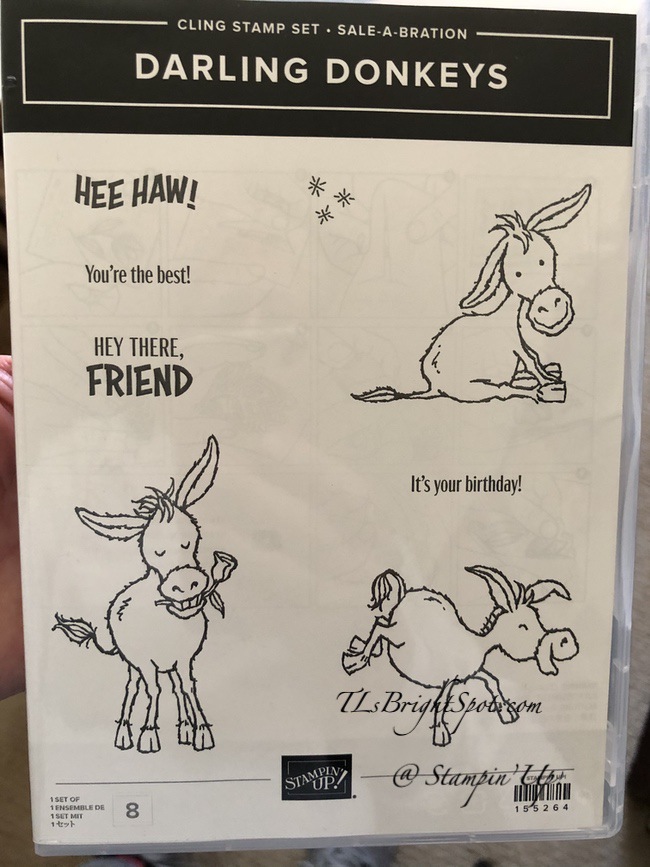
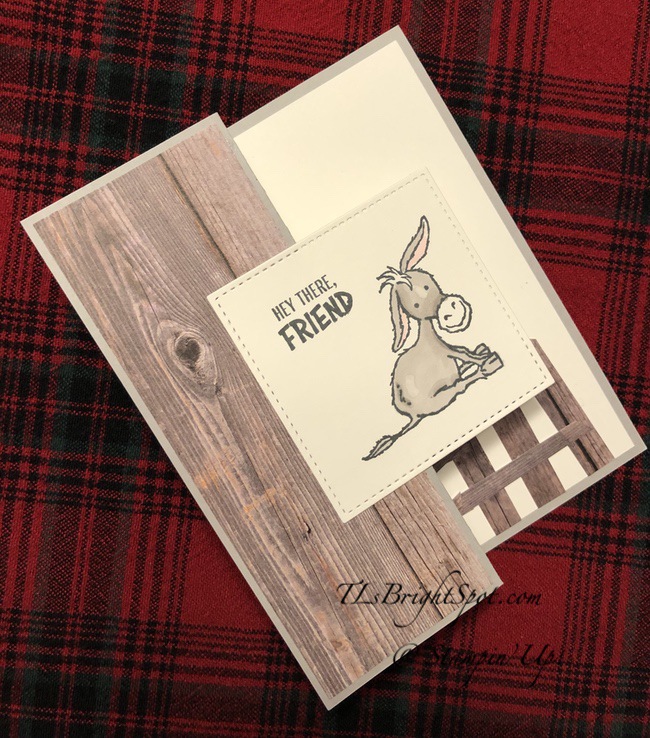
Hello again… Today’s card is full of fun – a birthday card using the Darling Donkey stamp set that will be available Jan 5, 2021 as a FREE ITEM when you purchase $50 in product – it’s Sale-a-bration time Jan 5 – end of Feb 2021. Woohoo! :O)
Darling Donkey stamp set available Jan 5, 2021 – Sale-a bration item
This little donkey is just too cute – love the impish smile… that square needs a back to it though so I may take that off, add a backing and put it on again. But let’s talk through how I did this. It’s a z-fold, so scored in the center and the front panel folded back on itself exactly in half, then the square added. Here’s what you need to create this card…
Fold card base (Gray Granite) in half and fold the front flap in half back on itself – to create a z-fold
Cover the front fold using In Good Taste DSP
Stamp the front donkey in Tuxedo Black Memento ink on Whisper White card stock; color with Stampin’ Blends – light & dark Gray Granite. Use the Color Lifter to highlight – between the eyes & near his backside. (Yes – this one is definitely a male donkey!) Die cut with largest Stitched Shapes Dies (largest square). Here’s where I should have cut a scalloped square out of Basic Black card stock for a backing. Adhere to the front panel with liquid glue, centering.
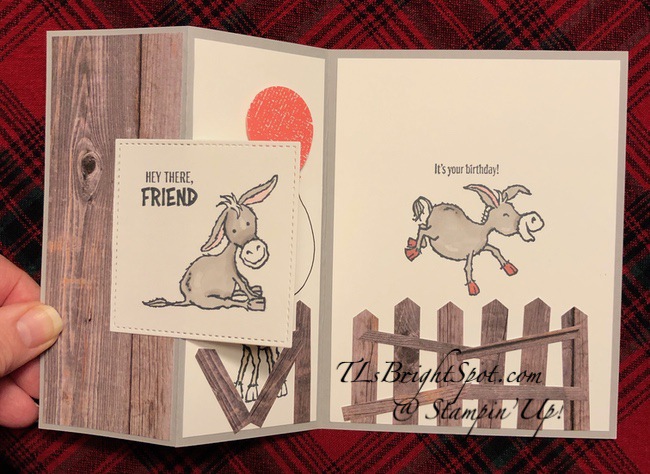
For the inside: there are two panels, the far right and the folded ‘in’ . Often the ‘in fold’ is not covered but for this card, I definitely wanted to do that.
Right panel ~ stamp the donkey from Darling Donkey stamp set in Tuxedo Black Memento ink in the center of the Whisper White panel, making certain it will be covered when the card is closed. Color in Stampin’ Blends: light & dark Gray Granite, light Flirty Flamingo for the ears, dark Flirty Flamingo for the hooves – after all this is a girl donkey 🙂 Stamp the sentiment above it from the same stamp set and in Tuxedo Black Memento ink. Adhere to the right panel of the card base with liquid glue, creating the inside of the card. It was at this point I decided the donkey need a fence and punched several ‘fencing’ using the Classic Label Punch and more of the same In Good Taste DSP. I punched various heights and widths then adhered to the panel with liquid glue.
Folded in panel ~ stamp the donkey from Darling Donkey stamp set in Tuxedo Black Memento ink on a Whisper White panel, blocking off the flower so it doesn’t get ink. Color in Stampin’ Blends light & dark Crumb Cake, light Flirty Flamingo for the ears. And yes, I used a bit of Color Lifter for highlight. Punch a small balloon using the Balloon Punch from Bright 6×6 DSP – Flirty Flamingo. Adhere with dimensionals and color with Wink of Stella. Add a balloon ‘tail’ from the balloon to the donkeys mouth. Cute right? Adhere this panel to the card and the card is complete. OOPS! I did add some more fencing to this guy.
Darling Donkey Birthday Fun Fold – #4
For the envelope… I used more of the same In Good Taste DSP to the envelope flap & trimmed to fit. For the envelope front I stamped the sentiment and the ‘sparkels’ in Tuxedo Black Memento ink and called it done.
Card Cuts are listed at the end of this post. Products used for today’s project may be found below. As a thank you to my customers, when the order is between $50-$150 I offer a SU! item of your choice valued at $10. Remember to use MY CURRENT HOST CODE SAZV3JTK– good until Jan 3. When the order is over $150, you still receive that free gift from me, but SU! has Stampin’ Rewards that may be used for additional products 😁
Oh Goodness – I AM enjoying the new products being offered in the new Jan-Jun 2021 Mini Catalog! Today’s project features the Oval Occasions Bundle: Oval Occasions stamp set + Double Oval Punch. These can be ordered Jan 5, 2021 ~ unless of course if you join my team 😏, then you can order these products as part of your demonstrator order. Hint, hint.
Oval Occasions Bundle
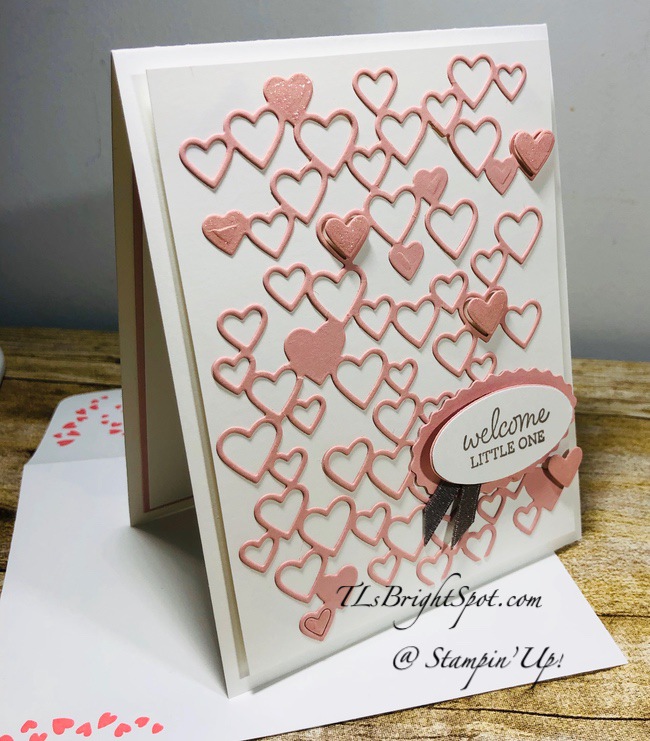
I have also used the Detailed Hearts Die, which is kinda fun to work with. It’s in the 2020 Annual Catalog. Are you ready to take a peek?
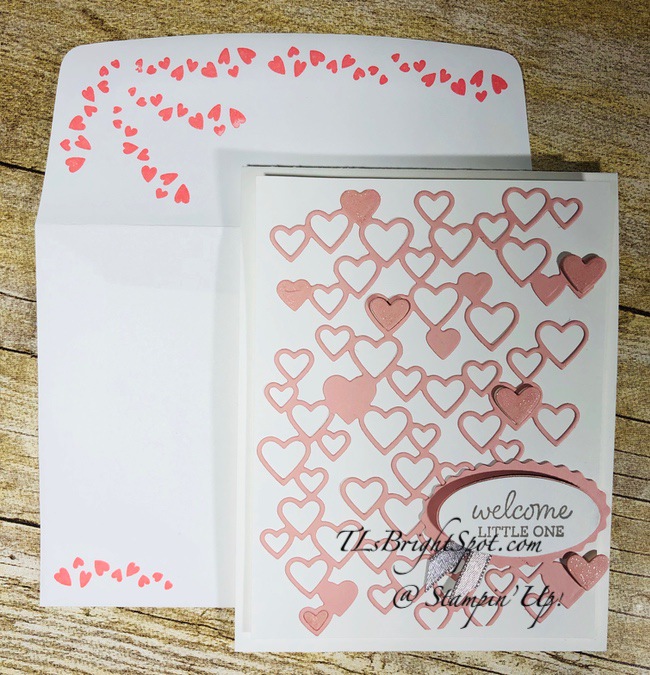
Oval Occasions Bundle – Baby Card – #1
Here’s what I did…
Adhere an Adhesive sheet to the back of Blushing Bride card stock. Die cut using the Detailed Hearts Die: peel the backing and adhere to a panel of Whisper White card stock. Yes, remove the hearts. Some will be adhered to this card, others will be saved in a small ziploc bag for later use.
I put some of the hearts on dimensionals and covered them in Wink of Stella. This adds a bit of glam 🙂
I punched a scalloped oval from Blushing Bride card stock using the Double Oval Punch thewn added a length of Grayb Granite 1/4″ Shimmer Ribbon with Stampin Seal.
I then stamped the front sentiment on a Whisper White panel with Gray Granite ink, punched it out using the Double Oval Punch from the Jan-Jun 2021 Mini Catalog (can be ordered Jan 5!) I put dimensionals on the back and adhered it to the scalloped oval punched with the ribbon. This was adhered to the card front with liquid glue
This Whisper White panel is ready for dimensionals and to be adhered to the Thick Whisper White card base – and the card front is done…
For the inside…
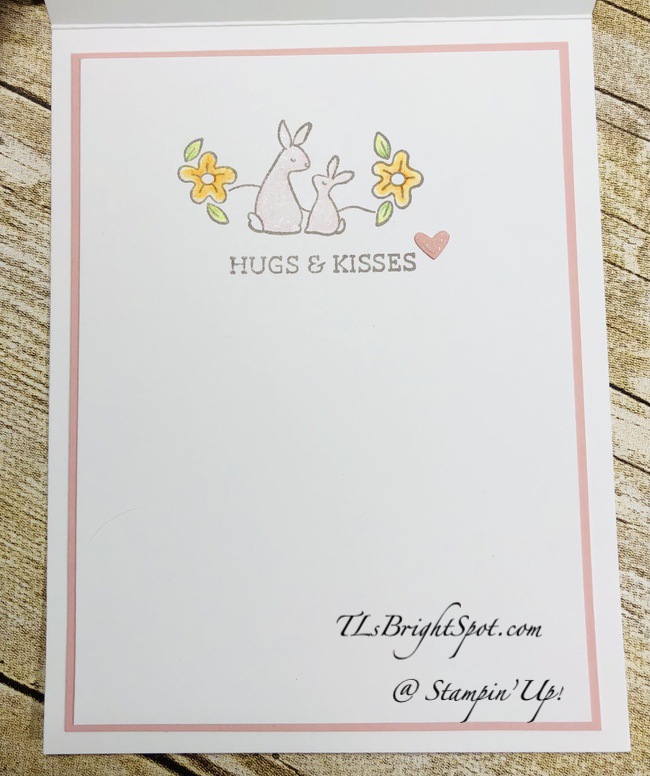
Oval Occasions stamp set – baby #2
I stamped the bunny/floral image in Gray Granite ink on a Whisper White panel. I colored it using the ‘fun to use’ Watercolor Pencils and Blending Pen: Flirty Flamingo for the bunnies (lightly), Granny Apple Green for the leaves then shaded with Garden Green, Daffodil Delight for the flowers and shaded with Pumpkin Pie – each blended with the Blending Pen. This really smooths the pencil lines and blends the shading nicely. I added Wink of Stella to the bunnies. I then stamped the sentiment in Gray Granite ink. The heart was added from one of the leftover hearts from the Detailed Hearts Die. I simply peeled the adhesive backing and put it right on the card. Adhere this Whisper White panel to a piece of Blushing Bride with liquid glue then add to the inside of the card, again with liquid glue. Voila – the card is finis!
For the envelope…
Oval Occasions Bundle Baby Card – #3
I stamped the heart stamp from the Oval Occasions stamp set in Flirty Flamingo and this set is ready to be sent to a friend who just had a bay girl. LOVE that I can create and send right away.
Card Cuts are listed at the end of this post. Products used for today’s project may be found below. As a thank you to my customers, when the order is between $50-$150 I offer a SU! item of your choice valued at $10. Remember to use MY CURRENT HOST CODE SVFB9YJY – good until Dec 10, 2020. When the order is over $150, you still receive that free gift from me, but SU! has Stampin’ Rewards that may be used for additional products 😁