
How are you doing with your Christmas shopping? Odd doing most of it online – at least for me it is. I like to touch and see in person and that just isn’t possible right now. Let’s say, it isn’t like it was ~ and leave it at that. And mailing everything ~ well it’s done. I love the excitement and joy, the being together and am going to miss that terribly. With the vaccine coming out, I’m hopeful. So… on with it.
The Dragonfly Garden Bundle is so versatile and friends of ours have a 70th anniversary in a few days – I couldn’t resist using the bundle to create this card.

What do you think? The large dragonfly is created by stamping on vellum and coloring from the back side with Stampin’ Blends. I really like how it turned out. And the little one ~that was a new process that will take some practice before explaining it. So… let’s get to this card.
Products used:
- Dragonfly Garden Bundle
- Subtle 3D Embossing Folder
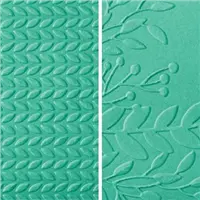
- Greenery Embossing Folder
- Squares Dies
- Ornate Frames Dies
- Pearl Basic Jewels
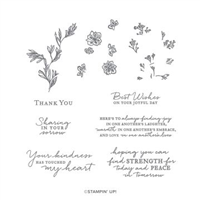
- Path of Petals stamp set (inside sentiment)
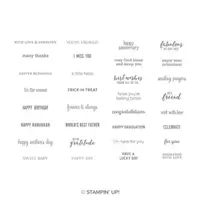
- Itty Bitty Greetings stamp set (also inside)
- Flowers for Every Season Ribbon Combo Pack -Misty Moonlight & Silver
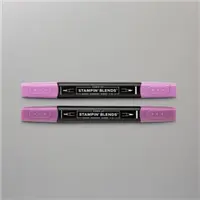
- Stampin Blends: Lt Bermuda Bay, Dk Night of Navy, Rich Razzleberry
Ok – the how to… stamp the dragonfly from the Dragonfly Garden stamp set in Tuxedo Black Memento ink on Vellum. Allow to dry or you may heat set gently. You don’t want to burn the paper or make it warp from the heat. Once dry, turn the vellum over and color using the Stampin Blends. I used the Light Bermuda Bay then the Dark Night of Navy, followed by Rich Razzleberry. Dragonflies often appear irridescent to me and I was aiming for that look. The body is Dark Night of Navy. Again, making sure it was dry, I punched it with the Dragonfly Punch, put a dimensional on it and set it aside.
I die cut this Whisper White scalloped edge with the largest of the Squares Dies, then ran it through my Greenery Embossing Folder. I definitely wanted the dragonflies hovering over a field of something and I didn’t want a solid look – I wanted some white space. Next I adhered this panel to a square of Rich Razzleberry card stock. I adhered the large dragonfly – remember he’s on a dimensional, then added the small dragonfly with just a dot of liquid glue – and set this panel aside.
I ran a piece of Whisper White card stock through the Subtle Embossing Folder and adhered it to a Thick Whisper White card base with liquid glue. I took the Rich Razzleberry panel, put dimernsionals on the back and adhered it to the card.
Next I took a scrap of Whisper White card stock, stamped the sentiment from Dragonfly Garden stamp set in Tuxedo Black Memento ink and die cut it with one of the dies from Ornate Frames Dies. I took a length of the Misty Moonlight/ Silver bakers Twine and tied it through the created hole and made a bow. This also got dimensionals and I adhered off-set on the front of the card.


For the inside, I stamped the longer sentiment using the Path of Petals stamp set on Whisper White card stock with Tuxedo Black memento ink. Then I stamped the shorter sentiment on a scrap of Whisper White card stock in the same ink but using the Itty Bitty Greetings stamp set. I die cut it with one of the Ornate Frames Dies and added it to the card with liquid glue. I added a Pearl Basic Jewel at each end. This Whisper White panel was adhered to a slightly larger piece of Rich Razzleberry card stock with liquid glue and that was added to the inside of the card and voila – card complete!
For the envelope, I kept it very simple. I ran a piece of Rich Razzleberry card stock through the Subtle Embossing Folder and adhered it to the envelope flap with liquid glue & trimmed to fit ~ and that was it.

Remember… the Dragonfly Garden Bundle will be available to customers as of Jan 5, ordering from the incredible Jan – Jun 2021 Mini Catalog. If you do not have a demonstrator and need a catalog, please reach out to me!
Card stock cuts may be found at the end of this post. Products used for today’s project may be found below. As a thank you to my customers, when the order is between $50-$150 I offer a SU! item of your choice valued at $10. Remember to use MY CURRENT HOST CODE SAZV3JTK– good until Jan 3. When the order is over $150, you still receive that free gift from me, but SU! has Stampin’ Rewards that may be used for additional products 😁


Card stock cuts:
- Thick Whisper White 8 1/2 x 5 1/2 scored at 4 1/4
- Whisper White 4 x 5 1/4 (2) [one is used for the three die die cuts]
- Rich Razzleberry 3 1/2 square, 4 1/8 x 5 3/8
Thanks for stopping by.
May you have a beautiful day.
Make someone happy sending them a handmade card filled with love.

Lovely! I love the dragonflies and especially love your choice of embossing and its placement on the square. What a special card for the happy couple. TFS
LikeLiked by 1 person
Oh thank you so much Susan!
LikeLike
So pretty Terry Lynn! The embossing under your dragonflies is perfect! Love your design! 🙂
LikeLiked by 1 person
Thanks so much!
LikeLike