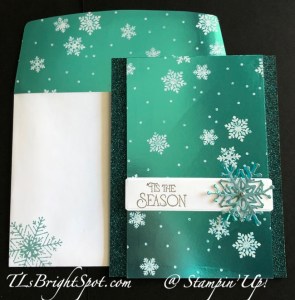
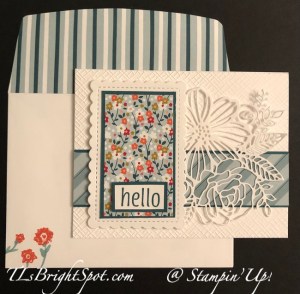
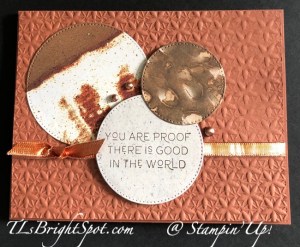
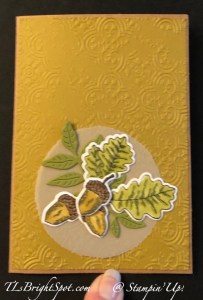
Good Friday morning! Ok, December 1 it is and the countdown begins to Christmas or end of year 2023. I hosted a card class yesterday and we have been making cards with the Kraft Note Card & box set. I shared the box some time ago, but I think not this shadow-box card. Click here to see the box post. We used the Fruitful Blessings bundle (includes coordinating dies), Distressed Tile 3D embossing folder, several Stampin’ Blends, Vellum, Deckled Circles Dies, O Holy Night DSP, Wild Wheat and Old Olive card stock.
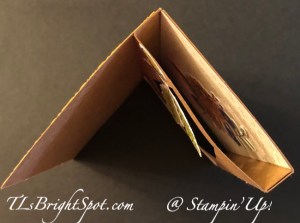
From the front it is not obvious this is a shadow box card. And, I’ve used two note cards adhered together to make this work. For the front, here’s what we did…
- Stamp the image: acorns w/ leaves & additional acorn using the Fruitful Blessings stamp set & Memento ink on Basic White card stock.
- Color the acorns with Wild Wheat & Pumpkin Pie Stampin’ Blends. Color the leaves with Stampin’ Blends Old Olive.
- Die cut a few leaves from Old Olive card stock using the Fruitful Blessings Dies.
- Die cut a circle from Vellum using the Deckled Circles Dies (these may be found as part of the ONLINE EXCLUSIVES).
- Die cut stamped images using Fruitful Blessings Dies.
- Run a panel of Wild Wheat through the Distressed Tile 3D embossing folder.
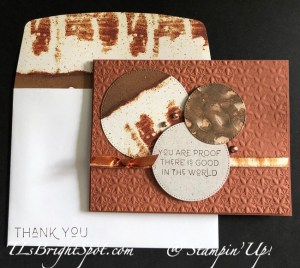
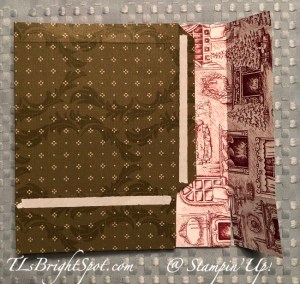
The Kraft Note cards are 7 x 5 scored @ 3 1/2. Score again @ 6 1/2. Take another Kraft Note Card and cut to just shy of 4 x 5 and score @ 1/2 at each long side. Adhere the two note card together so they measure 5 x 10 1/2 and score marks appear @ 3 1/2, 6 1/2, 7 & 10. Adhere Tear n Tape between score mark 10 to end of card @ 10 1/2. Die cut 3rd full panel with the Nested Essentials Dies. (For this card I used the Nested Essentials Dies, but would prefer the Countryside Corners Dies.)

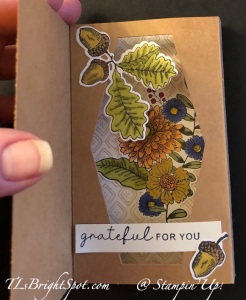
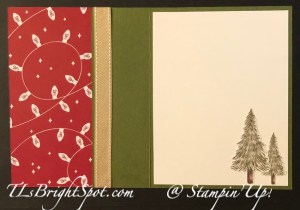
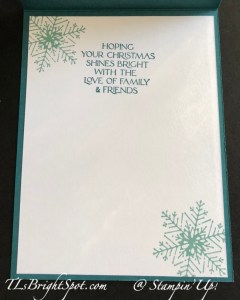
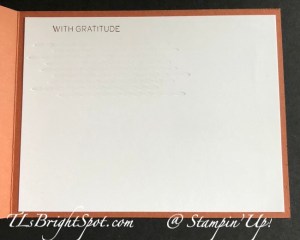
I got too excited aboput putting this together that I didn’t take enough photos!!! But here’s the inside. On the 2nd panel is the O Holy Night DSP cut just slightly less than 3 1/2 x 5. The stamped image is from Fruitful Blessings stamped on Basic White, colored with various Stampin’ Blends and adhered in place. Colors are: Wild Wheat, Light Pumpkin Pie, Light Copper Clay, Dark Cherry Cobbler, Old Olive, and Orchid Oasis. After adhering this colored piece in place, remove seal on Tear n Tape, close card so this adheres to the back of the card front. The single acorn die cut & the acorn w/ leaves were done same as the card front. The sentiment is stamped in Early Espresso ink using the Fruitful Blessings stamp set. The finished card will look like this from a top view.
The finished envelope… more of the O Holy Night DSP for the flap and this wonderful leaf image stamped in Old Olive ink from Fruitful Blessings stamp set.
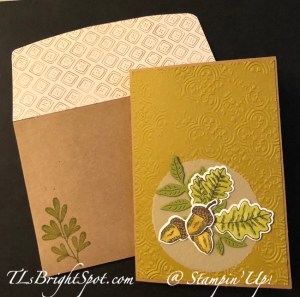
The class LOVED this card. The images are just wonderful and could be used any time of year – fall or spring.

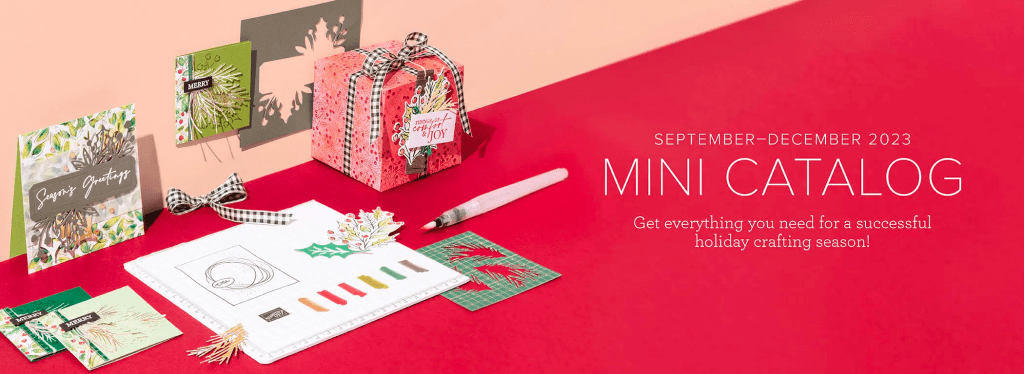
It’s hard to believe products in the Sep-Dec 2023 Mini Catalog are retiring… but they are. Making room for new products means letting go of others. If there is something you have been wanting – get it quickly as products seem to sell very fast.
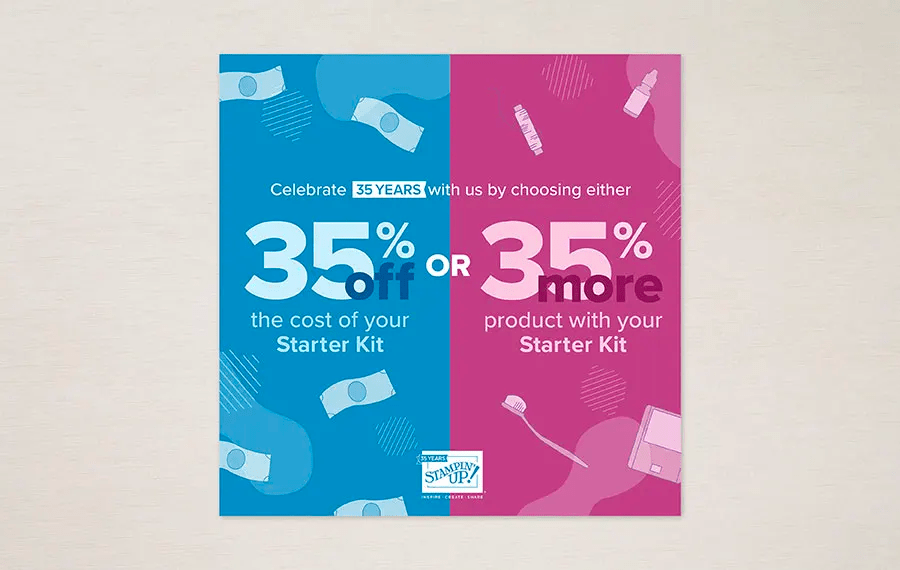
From 21 November 2023–3 January 2024, you can stock up on your favorite seasonal products and save up to 60% on essential craft supplies! So, what are you waiting for? Start shopping and selling! After all, a selection of Last Chance Products will only be available while supplies last.
CLICK HERE to view the Carryover list and you should be able to print it as well
CLICK HERE to view the Last Chance Products List – print this one too
When ordering from me please use my NEW HOST CODE HSJD7BR6 so that I receive proper notification and YOU GET THE Benefits of a FREE SU! item valued up to $10 :O) AND the Monthly Card Tutorial. (I like to treat my customers!) If your order is over $150, please don’t use the host code as SU! has benefits. I’ll still be notified and you can receive that FREE ITEM!
Note: Make sure that you can see my name on the final checkout page listed as your Demonstrator when you order so that you know that you’re ordering with me and you’ll get my rewards! PLUS… the monthly Online Tutorial when your order is over $50. The November Tutorial features the beautiful Winter Meadow suite of products which can found in the Sep-Dec 2023 Mini Catalog on pages 36-38!
Join my team here and still order these products as part of your starter kit – wow! Great time to join!!!
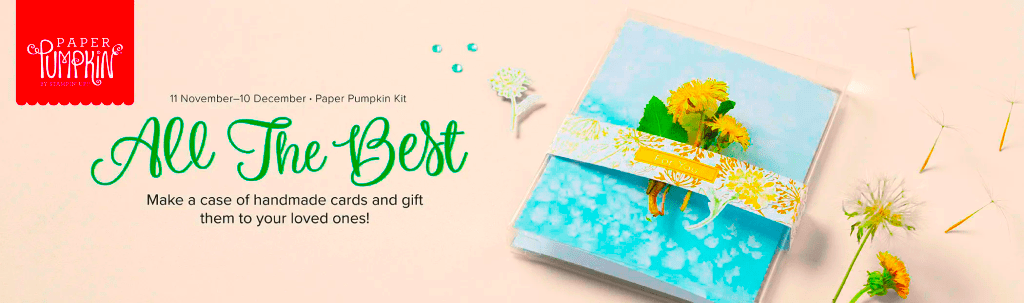
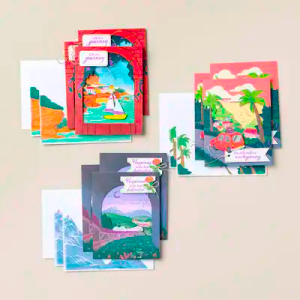
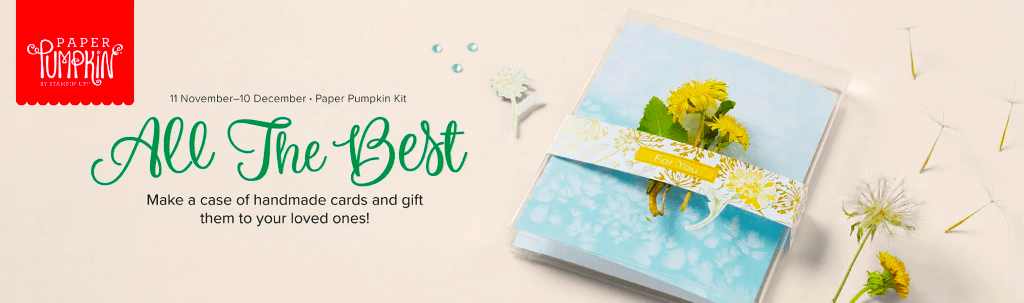
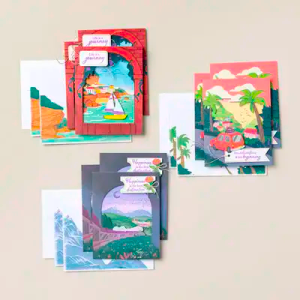
Paper Pumpkin is an all time favorite for many. Each month something new appears in your mailbox. Nov 11 to Dec 10 is the ALL THE BEST PP Kit. Send a wish to all your loved ones with the December Paper Pumpkin Kit! It comes with nine card fronts, three each of three designs, and nine coordinating envelopes. It has paper pieces detailed with gold foil, embellishments, an all-occasion stamp set, and an acetate box where you can store your finished cards! You can gift the kit itself or the finished product in the acetate box; either way, it’s the perfect last minute gift for any occasion.
ACETATE BOX
The All the Best Paper Pumpkin Kit comes with an acetate box that fits your finished cards and envelopes! This makes easy storage of a finished product or allows you to gift your cards to someone. The kit also comes with a belly-band, so you can add your own personal touch to the box. Subscribe by 10 December to make a handmade gift for those you love.
GOLD FOIL DETAILS
The paper pieces in the December Paper Pumpkin kit have gold foil detailing. Whether it’s an elegant boarder, or woven into the floral artwork, it’s a detail that will surely catch your recipient’s eye! It’s the perfect way to take any paper craft to the next level.
HAND DRAWN ARTWORK
The beauty of the December Paper Pumpkin Kit lies in the hand drawn artwork. The bright blue skies and elegant yellow flowers compliment the different design elements perfectly. It’s a simple yet sophisticated design that will catch any recipient’s eye!
Subscribe to the December Paper Pumpkin Kit between 11 November and 10 December by clicking here!
Thanks for stopping by. Hope you liked the card today. Would love to hear from you. If I can be of help, please connect with me.