Stampin’ Up! Pop-Up Gift Card Fun Fold

Oh I’ve a fun gift card for you today using both the Spotlight on Nature Dies (one of my favorite die sets!) and the gorgeous Nests of Winter DSP.

Stampin' Up! Pop-Up Gift card

We start with a card base of Pool Party, score, burnish and adhere layers of Basic Black and Nests of Winter DSP to the top section and the lower section. Next I used one of thew gorgeous Spotlight on Nature Dies to die cut the black circle and also this sweet chickadee from the Nest of Winter DSP. I adhered the bird image to the Basic Black circle with dimensionals. I used the Stampin’ Seal+ to the back of this larger circle and added this wonderful Silver 1/8″ Trim then adhered the circle to the upper section of the card. I added three Drusy Adhesive-Backed Dots and the front was complete :O)

Stampin' Up! Pop-up Gift Card inside

For the inside… here you can see that lower front section is folded up for the inner ‘liner’ to slide into – like a pocket. And, that inner liner also has a ‘pocket’ – this time for the gift card. This basic White panel has two score lines, one at the top where it adheres to the upper section of the card and another to create the pocket for the gift card. It is also stamped using the Spotlight on Nature stamp set and Memento Black ink. What’s nice is this card can be used for Christmas or birthday or anything really. The measurements are listed below.

Measurements:

  • Card base: Pool Party – 4 1/4 x 11 scored @ 3 1/2 & 9, burnishing both inward
  • Upper layers: Basic Black 4 1/8 x 3 3/8; DSP 4 x 3 3/4
  • Lower layers: Basic Black 4 1/8 x 1 7/8; DSP 4 x 1 3/4 – – once layers are in place, fold up lower section and secure in place with glue dots in each bottom inside corner. This allows the insert to slide easily.
  • Pop-up insert: Basic White 3 1/2 x 7 1/4, score @ 1/2 & 5 3/8. Burnish score lines so the 1/2″ score goes back and the bottom score is forward. Stamp upper sentiment. Decorate bottom panel of insert.
    • Basic Black: 33/8 x 1 7/8
    • DSP: 3 1/4 x 1 3/4
  • Add glue dots to bottom inside corners and close to create pocket.
  • Insert into card base pocket; add tear ‘n tape to the 1/2″ area at top and with this section open and flat, close the top of the card. Bingo – the card opens with the insert in place and ready for the gift card.

Stampin’ Up! Shining Christmas and Merriest Trees Dies Gift Card Holder

Good Monday morning! Gosh – here we are really INTO December. Have you decorated the house yet? We are in the midst and it is so very messy with all the boxes of decorations. The tree is the last thing to do… as we purchase a live cut tree. So we wait so it doesn’t become too dry and a hazard. :O)

Today’s post is all about gift card holders – and I have one to share that’s different. I like it!

Stampin' Up! Shining Christmas SDSP & Merriest Trees Dies

Love this little gift card holder and I’m in the process of making a few. This SDSP is shiny and of course, two-sided. The panel is 4 x 12 scored at 3, 6, & 9 1/8. Burnish gently. On last panel mark 1/2″ from the last score line at the top of the segment; make another 1/2″ mark up from the bottom of the end panel and cut diagonally.

Stampin' Up! Shining Christmas & Merries Trees Dies, cutting lines

Add Tear n Tape where the white strips are. Cut a panel of Basic White 2 7/8 x 3 7/8, stamp with sentiment (here I used the Brightest Glow stamp set and Cherry Cobbler ink) and adhere to second panel of SDSP (between 2nd & 3rd score lines). Remove Tear n Tape & close.

Stampin' Up! Shining Christmas & Merriest Trees Dies gift card.3

Cut about 20″ length of ribbon (here I used Real Red from the Real Red & Garden Green combo pack); add Stampin’ Seal to ribbon about 6 1/2 from one end and for about 6″.; add to front panel and to second panel, centering from top to bottom. Now decorate!

Stampin' Up! Shining Christmas SDSP & Merriest Trees Dies

I used the various sections of the Merriest Trees Dies to die cut the layers for the tree in Basic White. I attached each layer with dimensionals and added it over the ribbon – with dimensionals. I used the Silver & Gold Adhesive Backed Glimmer Paper and Merriest Trees Dies to die cut the trim and the star atop the tree and added these ever to easily to the complete the tree. I die cut a banner to add a name with the Tailor Made Tags Dies in Basic White and two circles over the hole in Cherry Cobbler. I colored a length of white twine with Cherry Cobbler Stampin’ Blends and tied it in a bow. This tag was attached with dimensionals. I die cut another tag jst as an illustration of where the gift card or check could be placed in the enclosure. And done!

This could so easily be used as a birthday gift card holder or graduation, or anniversary – just change up the Designer Series Paper and decorating the front panel – and there ya go.

Stampin' Up! Last Chance Products

It’s hard to believe products in the Sep-Dec 2023 Mini Catalog are retiring… but they are. Making room for new products means letting go of others. If there is something you have been wanting – get it quickly as products seem to sell very fast.

From 21 November 2023–3 January 2024, you can stock up on your favorite seasonal products and save up to 60% on essential craft supplies! So, what are you waiting for? Start shopping and selling! After all, a selection of Last Chance Products will only be available while supplies last.

CLICK HERE to view the Carryover list and you should be able to print it as well

CLICK HERE to view the Last Chance Products List – print this one too

When ordering from me please use my NEW HOST CODE HSJD7BR6 so that I receive proper notification and YOU GET THE Benefits of a FREE SU! item valued up to $10 :O) AND the Monthly Card Tutorial. (I like to treat my customers!) If your order is over $150, please don’t use the host code as SU! has benefits. I’ll still be notified and you can receive that FREE ITEM!

Note: Make sure that you can see my name on the final checkout page listed as your Demonstrator when you order so that you know that you’re ordering with me and you’ll get my rewards! PLUS… the monthly Online Tutorial when your order is over $50. 

Join my team here and still order these products as part of your starter kit – wow! Great time to join!!!

Stampin' Up! Paper Pumpkin

Paper Pumpkin is an all time favorite for many. Each month something new appears in your mailbox. Nov 11 to Dec 10 is the ALL THE BEST PP Kit. Send a wish to all your loved ones with the December Paper Pumpkin Kit! It comes with nine card fronts, three each of three designs, and nine coordinating envelopes. It has paper pieces detailed with gold foil, embellishments, an all-occasion stamp set, and an acetate box where you can store your finished cards! You can gift the kit itself or the finished product in the acetate box; either way, it’s the perfect last minute gift for any occasion. 

ACETATE BOX

The All the Best Paper Pumpkin Kit comes with an acetate box that fits your finished cards and envelopes! This makes easy storage of a finished product or allows you to gift your cards to someone. The kit also comes with a belly-band, so you can add your own personal touch to the box. Subscribe by 10 December to make a handmade gift for those you love. 

GOLD FOIL DETAILS

The paper pieces in the December Paper Pumpkin kit have gold foil detailing. Whether it’s an elegant boarder, or woven into the floral artwork, it’s a detail that will surely catch your recipient’s eye! It’s the perfect way to take any paper craft to the next level. 

HAND DRAWN ARTWORK 

The beauty of the December Paper Pumpkin Kit lies in the hand drawn artwork. The bright blue skies and elegant yellow flowers compliment the different design elements perfectly. It’s a simple yet sophisticated design that will catch any recipient’s eye! 

Subscribe to the December Paper Pumpkin Kit between 11 November and 10 Decembeby clicking here!

Thanks for stopping by. Hope you liked the card today. Would love to hear from you. If I can be of help, please connect with me.

Stampin’ Up! 6 x 3 Gift Cards

Good morning! I have some small gift cards for you today. I was inspired by a. post by Artisan Design Team member Tammy White who made 3 x 3 cards. I happen to like something a bit larger in order to write my message, whatever that is. And, I like it in an envelope. Stampin’ Up! has envelopes for 3″ size creations and they really are quite perfect for a 6 x 3 gift card.

Stampin' Up! 6 x 3 Gift Cards
Stampin' Up! 6 x 3 Gift Cards.2

Aren’t these fun? The card stock base is Thick Basic White cut 6 x 3 and scored @ 3. Each uses a panel of Winter Meadow DSP, some torn and one attached on an angle. I like this particular panel of DSP – shades of Pebbled Path & Smoky Slate, trees and deer. It’s comforting and not bold and can be used for a masculine gift as well. Supplies to make these were not a lot, but the list may seem long – I just don’t do two exactly alike and there’s the rub!

For the gift card on the far left: I ran the bottom Winter Meadow DSP through the Snowflake Sky 3D embossing folder and die cut the pine bough from Shaded Spruce card stock using the Joy of Noel Dies. Embellishments the Adhesive-Backed Glitter Sequins. I also used the remaining glitter from the October Paper Pumpkin on the pine bough. It doesn’t show in this photo, but in real life it does! The stamp on the envelope front is from the Magical Meadow stamp set and stamped in Lost Lagoon ink.

The gift card next to it has a piece of the Snowflake Magic SDSP as the bottom layer. The two die cut pieces are from Shimmer Paper and Snowflake Magic SDSP die cut with Magical Meadow Dies. They are held in place with a glue dot and a Metallic Ribbon In Tahitian Tide was added over top. Three Adhesive-Backed Glitter Sequins were added for a bit of bling.

In the next photo, the gift card on the left the Winter Meadow DSP is added at an angle and on dimensionals. The die cuts use the Magical Meadow Dies, Shimmer Paper and Snowflake Magic SDSP. You can see one of the die cuts was trimmed and peeking out from the left side under the DSP. Over top is a double bow tied with separated black twine from the Baker’s Twine Essentials Pack. The envelope front was stamped in Pebbled Path ink using the same stamp from Magical Meadow stamp set.

Stampin' Up! 6 x 3 Gift Card.4
Stampin' Up! 6 x 3 Gift Card 4 inside

The last card is probably my favorite: it has the Snowflake Sky 3D EF embossed panel of Winter Meadow DSP on the card with the layer of the trees/ deer from Winter Meadow DSP on dimensionals. Before attaching the top layer, I wrapped separated black twine around one end and tied a bow, securing it with a glue dot. The twine is from the Baker’s Twine Essentials Pack. On this card I added three gems from the Faceted Gems Trio Pack. I also stamped a portion of the sentiment in Memento ink using the Stars At Night stamp set, then stamped the rest of the sentiment on the inside of the gift card on the adhered torn DSP. The envelope front got the same tree stamp from Magical Meadow stamp set in Lost Lagoon ink.

Want to purchase the supplies for this card? Supplies can be ordered using this link to my online store. You will find ONLINE EXCLUSIVES, Clearance Rack, Sep-Dec Mini Catalog, the Annual Catalog, kits, Paper Pumpkin – you name it. Shop at your convenience :O)

When ordering from me please use my NEW HOST CODE HSJD7BR6 so that I receive proper notification and YOU GET THE Benefits of a FREE SU! item valued up to $10 :O) AND the Monthly Card Tutorial. (I like to treat my customers!) If your order is over $150, please don’t use the host code as SU! has benefits. I’ll still be notified and you can receive that FREE ITEM!

Note: Make sure that you can see my name on the final checkout page listed as your Demonstrator when you order so that you know that you’re ordering with me and you’ll get my rewards! PLUS… the monthly Online Tutorial when your order is over $50. The November Tutorial features the beautiful Winter Meadow suite of products which can found in the Jul-Dec 2023 Mini Catalog on pages 36-38!

NEW KIT (THE BEST DESTINATION KIT) ADDED AS OF NOVEMBER 1!

Stampin' Up! Best Destination kit
Stampin' Up!! Best Destination Kit stamps

163186

THE BEST DESTINATION KIT

$20.00 USD | $28.00 CAD

Available starting 1 November 1

This kit lets you make nine tri-fold cards with a colorful, nostalgic, travel vibe.

  • Enough supplies to create 9 cards—3 each of 3 designs
  • 9 coordinating envelopes
  • Best Destination Photopolymer Stamp Set
  • One Gorgeous Grape Ink Spot
  • Printed card bases, printed die cuts, adhesive, embellishments, and a clear block
  • Finished card size: 5-1/2″ x 4-1/4″ (14 x 10.8 cm)
  • Coordinating colors: Balmy Blue, Boho Blue, Cajun Craze, Calypso Coral, Coastal Cabana, Crushed Curry, Daffodil Delight, Early Espresso, Flirty Flamingo, Fresh Freesia, Gorgeous Grape, Granny Apple Green, Misty Moonlight, Pecan Pie, Petal Pink, Pretty Peacock, and Shaded Spruce

Supplies can be ordered using this link to my online store.

Thanks for stopping by. I hope you enjoyed my card today. Would love to hear from you. If I can be of help in some way, please let me know.

Stampin’ Up! Shaded Summer Circle Card

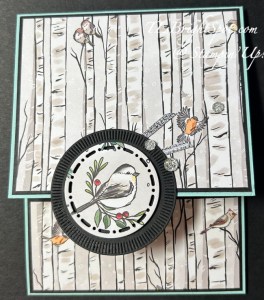
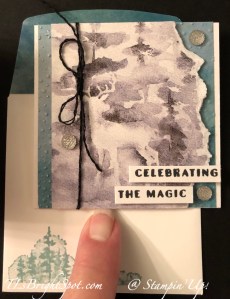
Happy Sunday ~ or is it Sad Sunday since the weekend is, you know, almost over. :O( Whatever you’re up to today, stay safe and be wise… My card for you today is a small one, but oh so sweet. It’s less than 3 1/4″. Here it is…

Stampin' Up Shaded Summer Circle Card.1

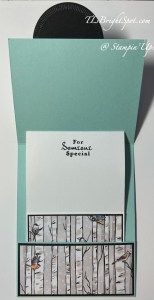
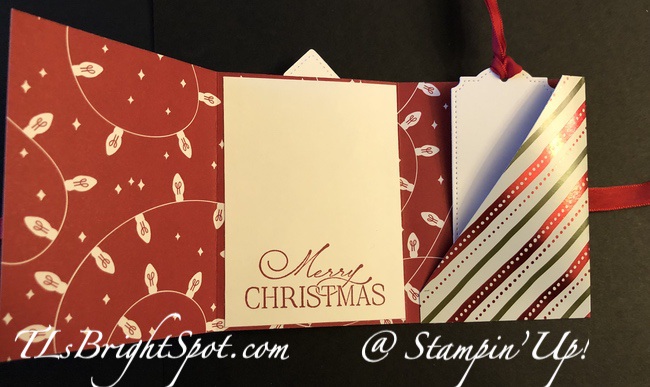
And here it is open.

Stampin' Up! Shaded Summer Circle Card.2

Isn’t this just adorable. So perfect for a special gift – birthday or even wedding. And, this is not hard to do.

  • On a 3 1/2 x 11 card stock, fold over one end larger enough for the largest scallop circle. Place this scallop die just slightly over the fold so it does not cut a full circle, but does allow for a circle ‘fold’ cut. Then die cut one full circle at other end of paper. I used Coastal Cabana. It should look like this…
Stampin' Up! Shaded Summer Circle Card.3

Notice how the one ‘set’ is die cut on the fold? And one side is then folded in half.

  • The extra circle will be adhered to the folded front half, matching the scallops.
  • Die cut three circles, (largest circle die) from Basic White card stock.
  • Cut one of those circle in half.
  • Stamp near the straight edge the desired sentiment and any additional stamp. I used the sweet leaf stamp in Garden Green ink from Shaded Summer stamp set. The sentiment is from…….
  • Adhere this stamped half circle to another full circle with dimensionals. This portion on dimensionals becomes the ‘stand’ for the upper portion.
Stampin' Up! Shaded Summer Circle Card.4

The next part is decorating the front – and you can do just about anything! I chose to use the Summer Shadow Dies, Daffodil Delight & So Saffron card stock, then Flirty Flamingo and Basic White for another flower and Pear Pizzazz for the leaves. The background is a piece of 2022-2024 In Color 6×6 DSP in Petal Pink. Here’s another look.

Stampin' Up! Shaded Summer Circle Card.1

Because this is slightly larger than 3″, I DID have to make an envelope – and I used a piece of very retired Envelope Paper in Mint Macaron.

Stampin' Up! Shaded Summer Circle Card envelope. 5

You can easily see how it is trimmed and shaped in the photo above and where I used Tear ‘n Tape to adhere it together. Dimensions: 4 3/4 width, 7 1/4 in length. When slipping the card in the envelope, I found it easier to slip in face down, so the die cuts do not snag on the envelope :O)

Some of the products to make this card are from the Jul- Dec 2022 Annual Catalog. If you do not have a demonstrator and need catalogs please reach out to me – happy to send one to you. The other two catalogs available right now are the 2022 -2023 Annual Catalog and the Sale-a-bration Catalog which shows all the FREE items offered by Stampin’ Up! Jul 1-Aug 31. When ordering, please also use my current host code: TXBWJTMW. I offer my customers a free item from Stampin’ Up! item valued to $10 with your order of $50 and above. Click here to go my store. When the order is over $150, you still receive that free gift from me, but SU! has Stampin’ Rewards that may be used for additional products, so don’t use the host code at that time. If you have questions just let me know. If you would like to be able to order products early from catalogs AND enjoy that 20% discount, join my team now… you may do that here. WooHoo! We have lots of fun and are a creative bunch that encourages & supports one another. Would love to have you. :O)

Star Special kicking off the new Jul-Dec 2022 Mini Catalog

OK – DOUBLE STAR REWARDS ended a bit ago ~ I’m sorry you missed the deal. BUT – With the start of this new catalog I am beginning a STAR REWARDS program ~ YAY! This will continue from this day forth and below is the informations about those customer rewards.

Here’s how my STAR REWARDS work:

  • For each $50 that you order from my online store (before shipping & taxes) and when you add my current Host Code, you will earn 1 STAR Reward.  Orders of $49.99 or below DO NOT earn any rewards.
    • Example $50 = 1 STAR Reward, $100 = 2 STAR Rewards, $150 = 3 STAR Rewards etc.
  • When you have earned 8 STAR Rewards you will get a FREE product order valued up to $40.00, your choice, and mailed directly to you! Is that a deal or what???
  • You also earn my monthly Online Class Tutorial of exclusive projects when you place an order.
  • For any order $50 or more you will also receive 1 free gift from me valued up to $10.

And remember too, during this time of Sale-a-bration, for every $50 order from any catalog, you’ll earn free Sale-a-bration goodies from Stampin’ Up!

Remember to use MY current HOST CODE: TXBWJTMW Click here to go my store.

HAPPY SHOPPING!!

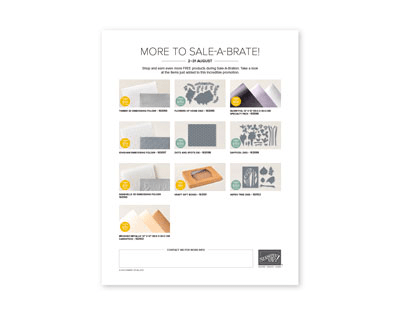
NEW FREE ITEMS ADDED when making purchases during Sale-a-bration

Since this flyer is hard to read… photos from top left to right

  • Timber 3D Embossing Folder 163094 – free w/ $50 purchase
  • Flowers of home Dies 163095 – free w/ $100 purchase
  • Silver Foil Specialty Pack 163096 – free w/ $50 purchase
  • Gingham Embossing Folder 163097 – free w/ $50 purchase
  • Dots & Spots Die 163098 – free w/ $100 purchase
  • Daffodil Dies 163099 – free w/ $100 purchase
  • Seashells 3D Embossing Folder 163100 – free w/ $50 purchase
  • Kraft Gift Boxes 163101 – free w/ $50 purchase
  • Aspen Tree Dies 163102 – free w/ $100 purchase
  • Brushed Metallic Card Stock 163103 – free w/ $50 purchase

Be sure to use the items numbers listed for these products to be redeemed as Sale-a-bration items. These products have different numbers in the catalog and therefore don’t register as part of

Sale-a-bration.

If you have questions about this – connect with me!

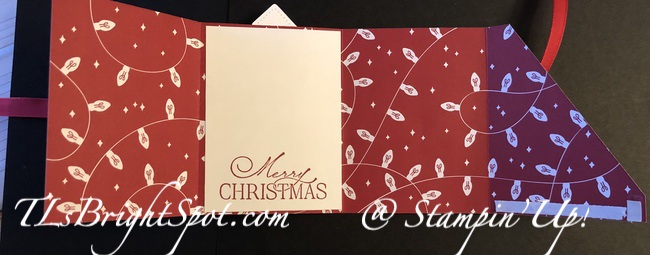
NEW COZY & BRIGHT CARD KIT AVAILABLE Aug. 3 – 160338!

Celebrate the season with a card kit that has everything you need wish those you love a merry Christmas and a joyous New Year. Don’t let the holidays overwhelm you–get your all-inclusive kit and make quick multiples everyone will love! Available NOW!

DEMO_LDPG_NKA_1_NA_0822_COZY_BRIGHT
DEMO_LDPG_NKA_2_NA_0822_COZY_BRIGHT
DEMO_LDPG_NKA_3_NA_0822_COZU_BRIGHT


160338

COZY & BRIGHT KIT

$23 USD | $32 CAD

Available starting August 3!

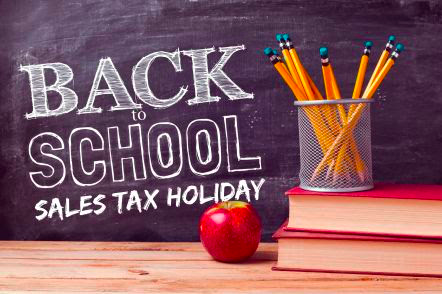
The Back To School Sales Tax Holiday is going on until August. For those of you living in Alabama, Arkansas, Florida, Illinois, Massachusetts, Missouri, New Mexico, Ohio, Puerto Rico, South Carolina, Tennessee, Texas, Virginia and West Virginia…you’ve got sales tax holidays coming up!! The good news is that some items in the Stampin’ Up! Catalogs qualify for the sales tax holidays!  The list of sales tax holidays by state and items in that state that qualify Here on a printable PDF. Check it out to see when your state has the Sales Tax Holiday.

Stampin' Up! Back to School Sales Tax Holiday

Thanks for stopping by. May you have a beautiful day.

Make someone happy sending them a handmade card filled with love.

Inspire. Create. Share.