Stampin’ Up! W-V Fun Fold w/ Abstract Beauty and Butterflies

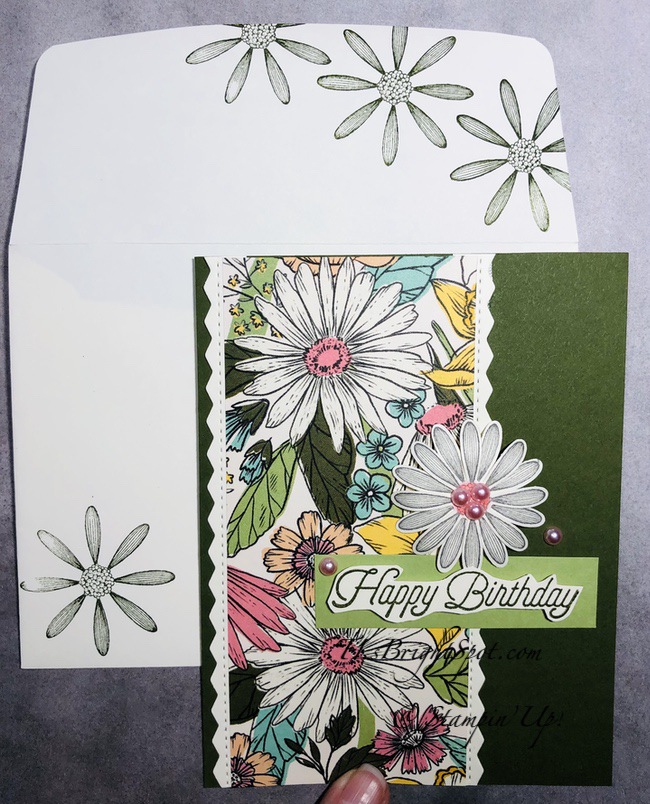
Fun Folds are just that – f-u-n to create. And this one is so easy, although it looks complicated, it isn’t. I’m continuing with a theme of sorts, Bugs or Butterflies using the Abstract Beauty 4 x 6 DSP to attract the butterflies. Let’s take a peek…

Brilliant Wings Dies & Abstract Beauty.1

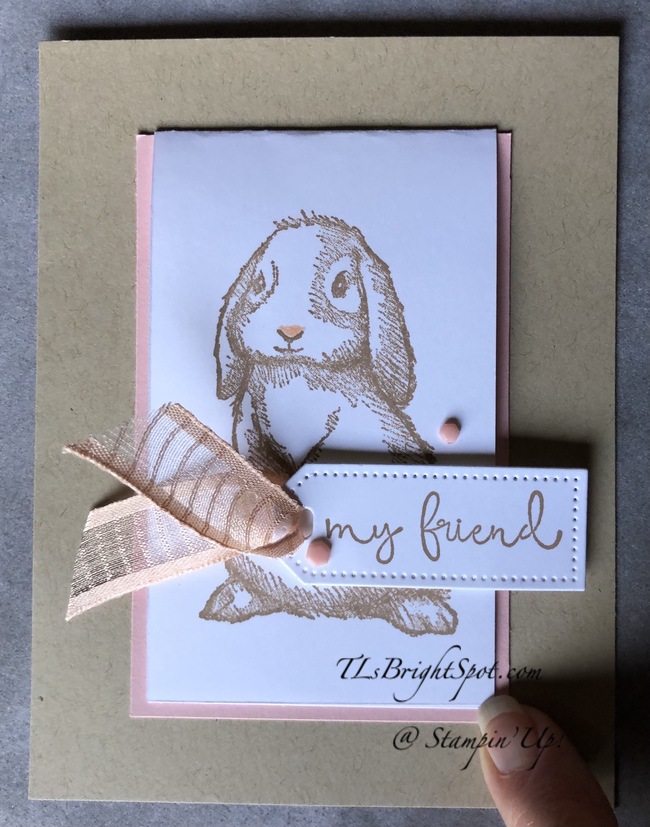
Here you can easily see the W-V fold of the card and I’ve added three of the Brilliant Wings Dies in various places. Cut out of the DSP or vellum or combining the two papers, the butterflies appear almost real. Here’s another photo with the card flat.

Brilliant Wings Dies & Abstract Beauty.2

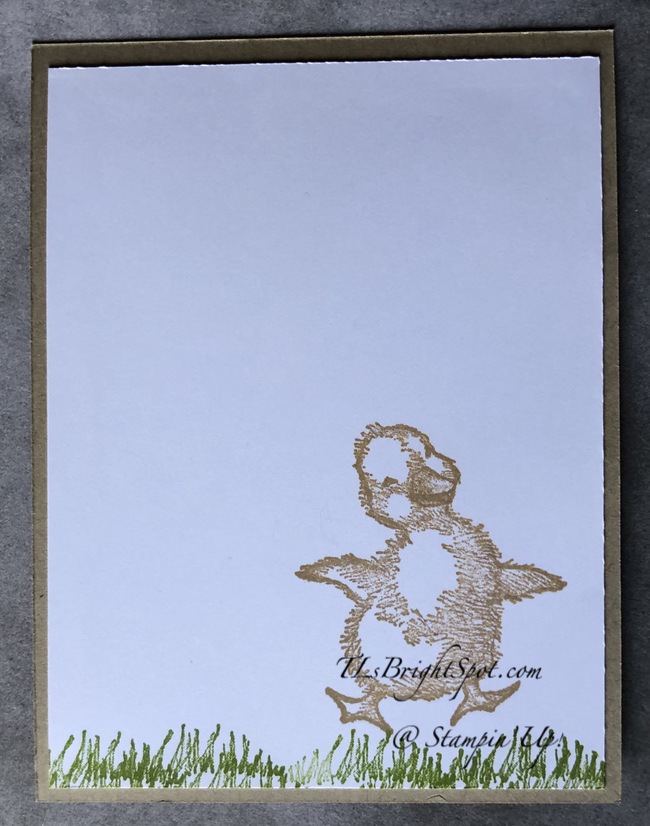
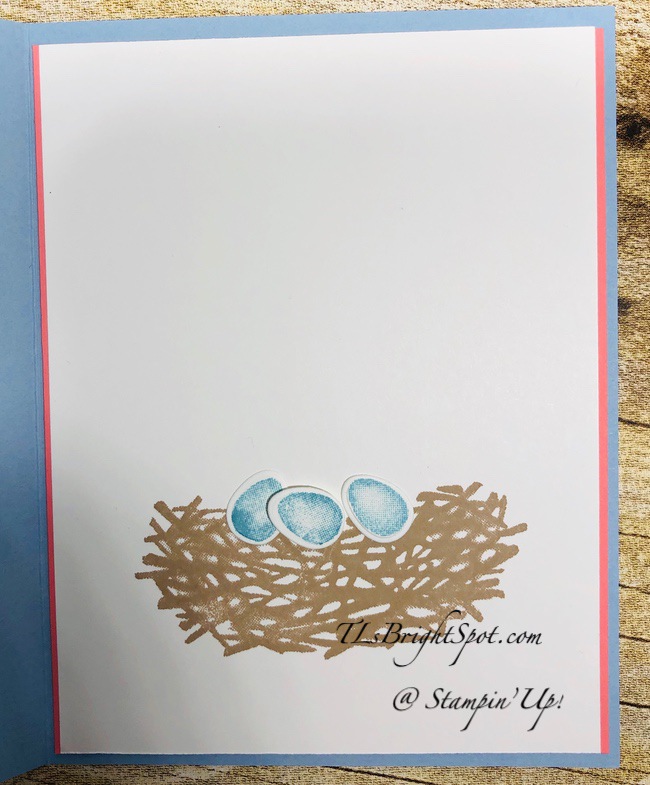
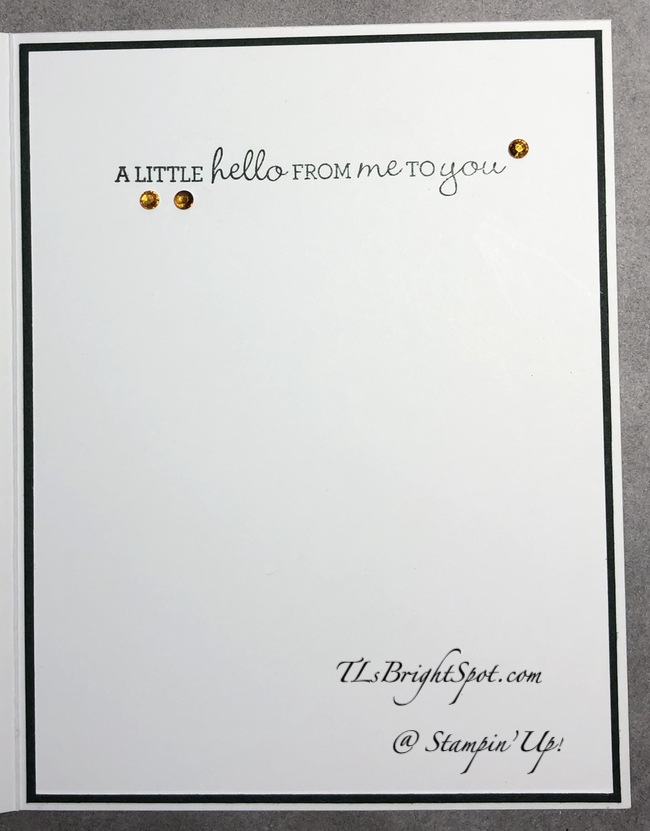
You may be saying, but there’s no place write… so flip the card over and this is the perfect place for notes.

W-V Fun Fold, back.3

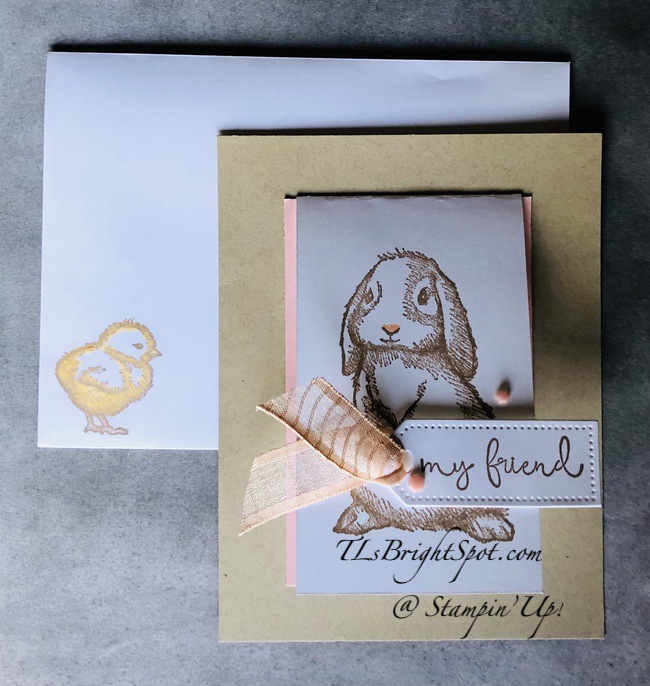
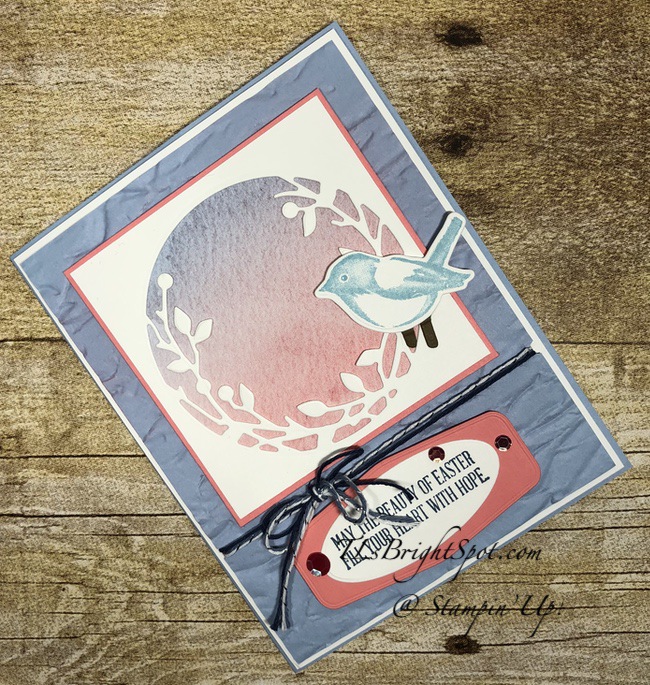
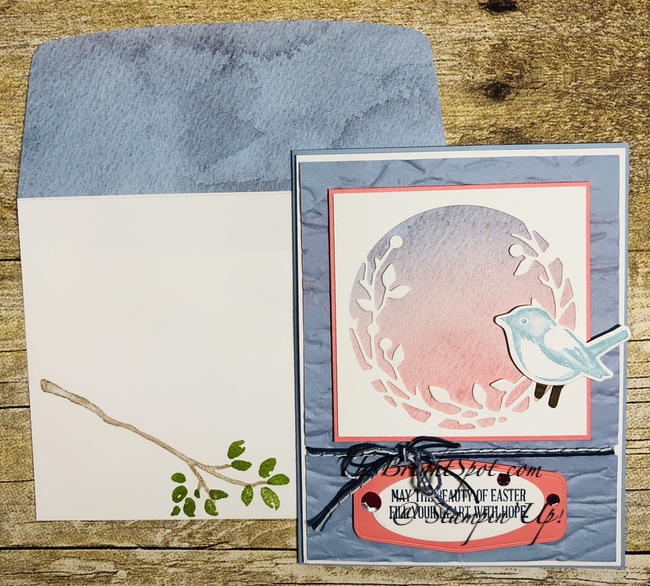
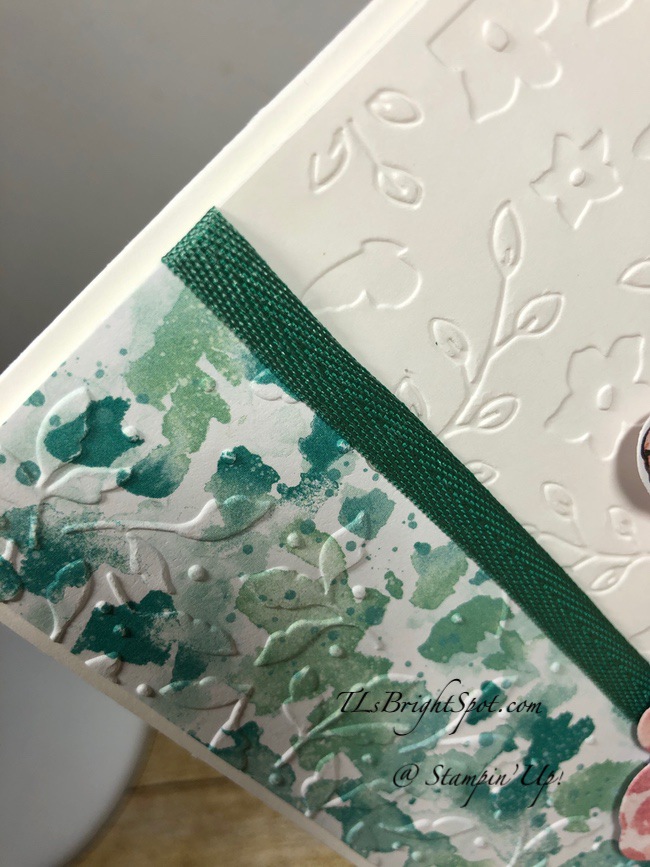
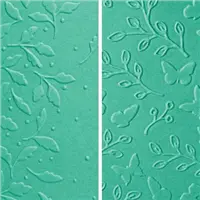
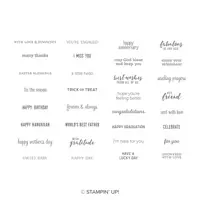
Night of Navy was used for the card base, and Crushed Curry card stock to coordinate with the DSP. In these photos, it almost looks orange! On the butterflies are holiday Rhinestone Basic Jewels to add some glam; Basic White for the sentiments stamped in Night of Navy ink come from Artfully Layered stamp set. I embossed the Crushed Curry card stock using the Hive 3D EF prior to adhering them. Here are a few more photos… and yes, there are two cards, so you will notice the butterflies are cut from other papers in the Abstract Beauty 4 x 6 DSP pack and the envelope flaps are other papers in the pack.

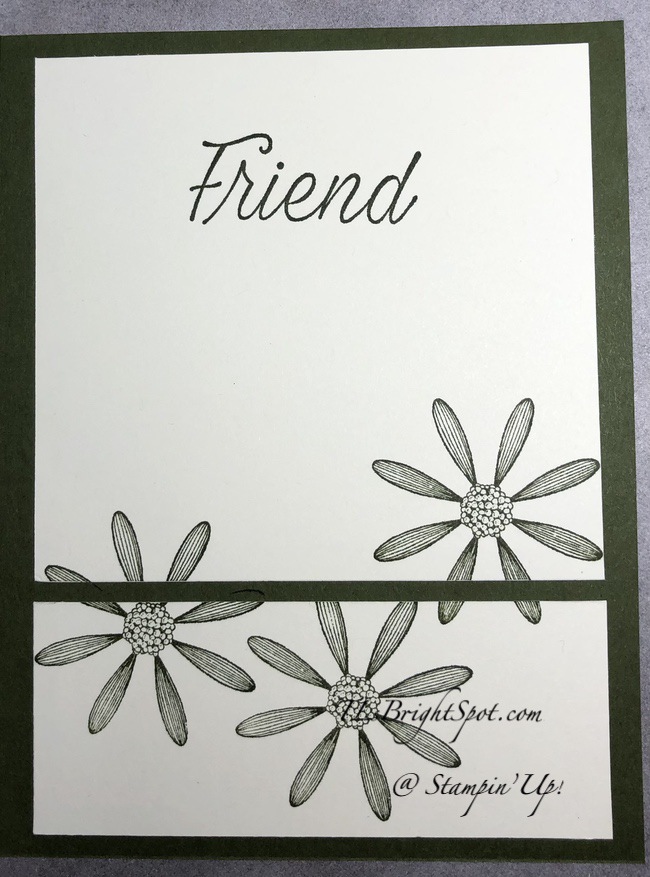
This is a really fun card to make ~ let me see if I can give you some pointers for putting it together. Card cuts are listed below. One of the important parts is making certain that sentiment on the back panel is centered. I tend to use my grid paper to line things up just right.

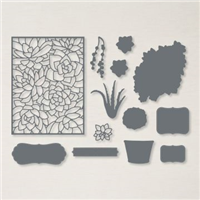
Adhere the floral panel and the embossed pieces in the appropriate places using the photos above as your guide. Adhere the sentiment panels (the Night of Navy square) to the far right panel, again using your grid paper to make certain it is centered. The reason for this is… the V panel when the card is closed, covers this completely, so you want it just right. :O)

Adhering the V panel before decorating the card is next: lay the V panel on top of the sentiment panel, centering it. No glue at this point! Now close that inner W to see where it will ‘sit’ on the W (you are adhering the V to the fold that is closest to the flat portion of the card!); then lift the W, add a bit of glue to the V on the portion that will be adhered to the card and close that first W on the V. Once that dries sufficiently, close the card completely and fold the embossed portion of the V onto the card front panel (the floral piece). Note where that will ‘sit’, open the card and add liquid glue to that portion of the V, close the card again and adhere. Bingo! Now decorate as desired. YAY!!! You did it 😏

Abstract Beauty 4 x 6 DSP is not carrying over to the new cattie. Nor are the Holiday Rhinestone Basic Jewels. Brilliant Wings Dies IS carrying over, just not in the bundle with the Butterfly Brilliance stamp set. Night of Navy & Crushed Curry card stocks ARE in the new cattie, as are Basic White products. Do share with me what you create with this wonderful fun fold :O).

Products to make this card are listed below so feel free to order away. :O) If you do not have a demonstrator and need an Annual Catalog please reach out to me (the 2022-2023 AC) – happy to send one to you. AND… I have the Jan-Jun 2022 Mini Catalog and can send that as well – ordering from that catalog ends May 2! When ordering, please also use current host code: 22R4JPCG. I offer my customers a free item from Stampin’ Up! item valued to $10 with your order of $50 and above. Click here to go my store. When the order is over $150, you still receive that free gift from me, but SU! has Stampin’ Rewards that may be used for additional products, so don’t use the host code at that time. If you have questions just let me know. If you would like to be able to order products early from catalogs AND enjoy that 20% discount, join my team now… you may do that here. WooHoo! We have lots of fun and are a creative bunch that encourages & supports one another. Would love to have you. :O)

You can reserve your copy of this catalog by contacting me ~ just let me know and I’ll get in touch with you :O). Be a part of this amazing community! I received my copy of the catalog yesterday… and the preorder for demonstrators has begun… guess who got their order in early … me, me, me! Can’t wait! And I want to share it with you – so stay tuned. 👍😁😉

What else is going on… oh yes… with the upcoming launch of a new catalog, there are also items RETIRING, for a real bargain. It is always bittersweet to see some of these items go away. Remember too, only available while supplies last.

You may click here to see the list of last chance products.

After making your list, click here to go my store. Happy, happy shopping!

Thanks for stopping by. May you have a beautiful day.

Maker someone happy by sending them a handmade card filled with love.

Inspire. Create. Share.

Card cuts for today’s project:

Night of Navy card base: 11 x 5 1/2, scored at 1 3/4, 3 1/2, 5 1/4 & 7: folds are mountain, valley, mountain, valley

Night of Navy: 5 x 2 1/2 scored at 2 1/2 for the V; 2 1/4 x 2 1/4 for the sentiment panel

DSP: 1 1/2 x 5 1/4 (2) preferably not the same but coordinating

Crushed Curry: 2 1/4 x 2 1/4 (embossed for the V panel); 1 1/2 x 5 1/4 (also embossed); 3 3/4 x 5 1/4 (embossed)

Basic White:4 x 5 1/4 for the card back; 2 x 2 for the sentiment panel + scrap for the front sentiment

Stampin’ Up! Pansy Patch for the Happy Inkin’ Thursday Blog Hop

Happy Thursday! Today is the Happy Inkin’ Thursday Blog Hop and the challenge is flowers – a real spring thing, right? And here’s my card…

Pansy Patch.1

This is the right time of year for pansies isn’t it… when it’s still a bit cool and not wicked hot that makes everything melt. I began by embossing with the Greenery folder and a Basic White panel. This is a narrow embossing folder and therefore with a wider sheet of card stock it’s important to match the embossed portion when running it through again. I think you can see that the embossing matches perfectly – yay! That panel was adhered directly to the Thick Basic White card base.

Next I took the beautiful Pansy Petals 12 x 12 DSP and cut three panels 1 x 4 1/4. These were adhered with liquid glue to an Evening Evergreen panel just slightly larger than the three when put side by side with just a bit of space in between (3 1/4 x 4 3/8). I wrapped that with the the beautiful (and springy) Grossgrain Ribbon in Highland Heather and tied a knot, securing it with a glue dot.

Stamp the more solid pansy in Pale Papaya ink, stamping off once. Stamp the shading stamp in full strength Pale Papaya. Stamp the inner in Blushing Bride and color the center with Daffodil Delight. That doesn’t really show as I ended up adding a jewel in the center :O). Die cut with the Pansy Dies; put dimensionals on the back and attach over the ribbon. Now die cut the two leaf pieces with Soft Succulent card stock and Evening Evergreen, putting them together with liquid glue. Slip this leaf behind the pansy adhering with liquid glue. Add the Holiday Gems as centers for the two pansies as shown – and the card front is done!

Pansy Patch, inside

For the inside I stamped the sentiment from the Pansy Patch stamp set in Evening Evergreen ink on a Basic White panel. I adhered that to an Evening Evergreen piece slightly larger and those two were attached to the inside of the card. I added three more of the Holiday Basic Jewels and the card was complete.

On the envelope front I stamped the smaller pansy from the Pansy Patch stamp set: background is Pale Papaya stamped off once; shading is Pale Papaya full strength; center shading is Calypso coral and the very center is Daffodil Delight. The envelope back got more of the Pansy Petals 12 x 12 DSP. LOVE this card ~ so friendly and fresh… and versatile!

Products to make this card are listed below so feel free to order away :O) If you do not have a demonstrator and need an Annual Catalog please reach out to me – happy to send one to you. AND… I have the Jan-Jun 2022 Mini Catalog and can send that as well! When ordering, please also use current host code: Y4NW3AK. I offer my customers a free item from Stampin’ Up! valued to $10 with your order of $50 and above. Click here to go my store. When the order is over $150, you still receive that free gift from me, but SU! has Stampin’ Rewards that may be used for additional products, so don’t use the host code at that time. If you have questions just let me know. If you would like to be able to order products early from catalogs AND enjoy that 20% discount, join my team now… you may do that here. WooHoo! We have lots of fun and are a creative bunch that encourages & supports one another. Would love to have you. :O)

There are some amazing projects being highlighted today on the Happy Inkin’ Thursday Blog Hop so don’t miss a one! You may hit the next button to go directly to Amy Koenders or click on the name whose blog you would like to visit. Either way – enjoy!

Amy Koenders

Mary Deatherage

Kristi Gray

Jaimie Babarczy

Sue Prather

Karen Finkle

Akiko Sudano

Karen Ksenzakovic

Tara Carpenter

Terry Lynn Bright ~ YOU ARE HERE

Beginning 1 March and through 31 March, Stampin’ Up! has a promotion that is hard to pass. See below for details. This is such a sweet deal and the bundles available are extraordinarily priced. This COULD BE part of a STARTER KIT!!! hint hint hint. AND – The bundle I used today is part of the sale below :O)

The Mini Stampin’ Cut & Emboss Machine will be available for purchase at a 20% discount.
A number of select stamp-and-die bundles that are compatible with the Mini Stampin’ Cut & Emboss Machine will also be available for purchase at a 20% discount.
For this promotion only, we’ve brought back the previously popular Art Gallery, Celebrate Sunflowers, and Garden Wishes bundles. They will only be available in their bundle form during this promotion, so make sure to snag ‘em while you still can!
The Mini Stampin’ Cut & Emboss Machine and select compatible bundles can be bought together or separately.
There is no limit on the number of Mini Stampin’ Cut & Emboss Machines you can purchase during this promotion. In fact, having more than one machine is ideal for workshops, classes, and other events!
Products are available in all markets while supplies last. Offer may vary from market to market based on product availability. No backorders or substitutions will be allowed.
The stamp-and-die bundles that can be found in a current catalog will be replenished until they retire. When they do retire, the bundles will be added to the Retiring List.

itemPrice
150673Mini Stampin’ Cut & Emboss Machine$60.00 $48.00 USD
$82.00 $65.50 CAD
158382All Squared Away Bundle$50.00 $40.00 USD
$68.00 $54.25 CAD
156227Art Gallery Bundle$56.00 $44.75 USD
$76.00 $60.75 CAD
155834Beauty of Friendship Bundle$58.00 $46.25 USD
$79.00 $63.00 CAD
154065Celebrate Sunflowers Bundle$57.00 $45.50 USD
$78.00 $62.25 CAD
156220Garden Wishes Bundle$57.00 $45.50 USD
$78.00 $62.25 CAD
159519Hydrangea Haven Bundle$58.00 $46.25 USD
$79.00 $63.00 CAD
155674Pansy Patch Bundle$57.00 $45.50 USD
$78.00 $62.25 CAD
155847Quiet Meadow Bundle$59.00 $47.00 USD
$81.00 $64.75 CAD
158359Seascape Bundle$52.00 $41.50 USD
$70.00 $56.00 CAD
155823Sweet as a Peach Bundle$41.00 $32.75 USD
$55.00 $44.00 CAD
159529Welcoming Window Bundle$56.00 $44.75 USD
$76.00 $60.75 CAD
155845What’s Cookin’ Bundle$51.00 $40.75 USD
$69.00 $55.00 CAD
155507Wild Cats Bundle$43.00 $34.25 USD
$58.00 $46.25 CAD

Now let me tell you a bit about this stunning Waves of the Ocean Collection ~ some parts of which are only available while supplies last. The Waves of Inspiration stamp set and coordinating Waves Dies will be available in the 2022-2023 Annual Catalog, but not the DSP or the jewels. So you know, get them now! More info below… Click here to go my store.

ITEMDESCRIPTIONPRICEIMAGES (CLICK TO ENLARGE)
158833WAVES OF INSPIRATION CLING STAMP SET
Early-release product from the 2022–2023 Annual Catalog.7 cling stampsSuggested clear blocks: a, c, f, g, hCoordinates with Waves DiesLimit 1
$23.00 USD | $32.00 CAD
158840WAVES DIESEarly-release product from the 2022–2023 Annual Catalog.10 diesLargest die: 5-1/2″ x 2-1/4″ (14 x 5.7 cm)Coordinates with Waves of Inspiration Cling Stamp Set
Limit 1
$34.00 USD | $47.00 CAD
158841WAVES OF INSPIRATION BUNDLE Includes the Waves of Inspiration Cling Stamp Set and Waves Dies (at a 10% discount).Early-release product from the 2022–2023 Annual Catalog.
Limit 1
$51.25 USD | $71.00 CAD
159982WAVES OF THE OCEAN 12″ X 12″ (30.5 X 30.5 CM) DESIGNER SERIES PAPERExclusive Designer Series Paper only available during the Waves of the Ocean promotion.12 sheets: 2 each of 6 double-sided designs
Acid free, lignin free
Calypso Coral, Coastal Cabana, Daffodil Delight, Granny Apple Green, Night of Navy, Pacific Point, Petal Pink
Only available while supplies lastLimit 2
$11.50 USD | $15.75 CAD 
159983 BLUE FOILS 12″ X 12″ (30.5 X 30.5 CM) SPECIALTY PAPERExclusive specialty paper only available during the Waves of the Ocean promotion. 6 sheets: 2 each of 3 colors
Coastal Cabana, Night of Navy, silver
Only available while supplies last
Limit 2
$10.00 USD | $13.75 CAD
159396RHINESTONE WAVES BASIC JEWELSExclusive embellishments only available during the Waves of the Ocean promotion.168 adhesive-backed rhinestones
3 mm: 20 each of 6 colors
4 mm: 4 each of 6 colors
5mm: 4 each of 6 colors
Coastal Cabana, Night of Navy, Pacific Point
Only available while supplies last
Limit 2
$6.50 USD | $9.00 CAD
161797WAVES OF THE OCEAN COLLECTIONThe entire exclusive, early-release collection!Explore an ocean of inspiration with tropical tones, marble-painted paper, and splashes of sparkle! The Waves of the Ocean Collection includes:
Waves of Inspiration Bundle (10% off)
Waves of the Ocean 12″ x 12″ (30.5 x 30.5 cm) Designer Series Paper
Blue Foils 12″ x 12″ (30.5 x 30.5 cm) Specialty Paper
Rhinestone Waves Basic JewelsOnly available while supplies lastLimit 1
$79.25 USD | $109.50 CAD

Thanks for stopping by. May you have a beautiful day.

Make someone happy sending them a handmade card filled with love.

Inspire. Create. Share.

Stampin’ Up! Easter Friends Fun Card

Hello again! It’s a cold Tuesday morning and I have a fun, quick and easy card for you today that just shouts SPRING. It’s made with the Easter Friends stamp set (the bunny) and it’s cute.

Easter Friends, front.1

I began by stamping the bunny in Crumb Cake ink on a Basic White panel 2 1/2 x 4 1/2 scored at the top 1/2″ I colored his nose with a Petal Pink marker. I adhered this to a Blushing Bride piece 2 3/4 x 4 1/4, wrapping the Basic White OVER the Blushing Bride. This was attached to a panel of Crumb Cake 4 1/4 x 5 1/2. I stamped the front sentiment in Crumb Cake ink on a Basic White scrap and die cut it with the Tailor Made Tags dies, then took a length of the Petal Pink Organdy Ribbon and slipped it through the opening, securing the ribbon together with a glue dot. With dimensionals on the back, this was adhered to the bunny. I added Adhesive-Backed Hexagons in Blushing Bride for a bit more pink.

Easter Friends, inside.2

I stamped the sentiment from the same stamp set – Easter Friends, masking off a portion of the sentiment, in Crumb Cake ink. At the bottom of this Basic White panel I stamped several grasses in Granny Apple Green ink and layered them. Yep m- still Easter Friends stamp set. The white panel is 2 3/8 x 4. This was adhered to the Blushing Bride panel.

Easter Friends, back.3

Now turn the entire piece over… again with Granny Apple Green ink, I stamped the grasses, layering as I went, onto the Basic White panel (4 x 5 1/4). I then stamped the frolicking duck in Crumb Cake ink. Doesn’t it look as though the duck is dancing? I adhered this to the back of the Crumb Cake and the card was done.

Easter Friends.4

For the envelope I used Subtles 6×6 DSP for the flap, trimming it to fit and stamped the baby chick in Crumb Cake ink. I colored it with So Saffron Blends – not my best! And the card is ready to send!

Easter Friends.5

Products are listed below so feel free to order away :O) If you do not have a demonstrator and need an Annual Catalog please reach out to me – happy to send one to you. AND… I have the Jan-Jun 2022 Mini Catalog and can send that as well! When ordering, please also use current host code: Y4NW3AK. I offer my customers a free item from Stampin’ Up! valued to $10 with your order of $50 and above. Click here to go my store. When the order is over $150, you still receive that free gift from me, but SU! has Stampin’ Rewards that may be used for additional products, so don’t use the host code at that time. If you have questions just let me know. If you would like to be able to order products early from catalogs AND enjoy that 20% discount, join my team now… you may do that here. WooHoo! We have lots of fun and are a creative bunch that encourages & supports one another. Would love to have you. :O)

Thanks for stopping by. May you have a beautiful day.

Make someone happy sending them a handmade card filled with love.

Stampin’ Up! Daffodils for the Happy Inkin’ Blog Hop

Hello Friends… it’s happy Thursday.

Welcome to the Blog Hop! There will be some gorgeous creations on the hop today – enjoy – and be sure to go through everyone’s blog. I’m using one of the springy Designer Series Papers for my card today – Daffodil Afternoon 12×12 that is FREE during Sale-a-bration. This is only available through Feb 28, 2022 with any order of $50 – get yours before it ends! Here’s my card.

Daffodils for the Blog Hop 2/24.1

And here’s our sketch challenge.

This is a very feminine card – and I love the combination of Designer Papers. Daffodils are one of the first signs of Spring and this just feels so ‘right.’ Here are the details…

  • Cut card base 8 1/2 x 5 1/2, score at 4 1/4. This is Pear Pizzazz
  • Cut DSP 4 x 5 1/4 and adhere w/ liquid glue
  • Cut coordinating DSP 2 5/8 x 3 7/8. Adhere to card stock panel (Crushed Curry here) 2 3/4 x 4. Adhere these to a Very Vanilla panel 3 x 4 1/4. Add dimensionals to the back and center on card front.
  • Stamp sentiment in Mossy Meadow ink using the Art Gallery stamp set on a Very Vanilla scrap. Die cut with the Tailor Made Tag Dies.
  • Add ribbon to tag: Bumblebee Gingham ribbon, securing together with a glue dot
  • Put dimensionals on back of tag & attach to card front. Done!
Daffodils for Blog Hop 2/24.2 (inside)

For the inside…

  • Cut DSP 4 x 5 1/4 and adhere to the inside of the card.
  • Cut Very Vanilla panel 3 1/8 x 4 1/8.
  • Stamp with butterfly from the Daffodil Daydream stamp set in Memento ink and color with Daffodil Delight Blends & Black Blends.
  • Stamp the ‘pollen’ from the Daffodil Daydream stamp set in Crushed Curry ink ~ the butterfly is scattering pollen from his legs ass he flies from flower to flower. :O)
  • Add this panel to a piece of Crushed Curry 3 3/8 x 4 3/8, then to the inside of the card. Finis!

For the Very Vanilla envelope…

Daffodils for Blog Hop 2/24.3
  • More DSP added to the envelope flap
  • Stamp the daffodil from the Daffodil Daydream stamp set in Memento black ink.
  • Color leaves with both Old Olive Stampin’ Blends
  • Color the daffodil with both Daffodil Delight Stampin’ Blends

I love how ‘fresh’ this looks. It’s cheerful too. Hope you like it as well. Remember the Daffodil Afternoon DSP is only available to the end of Sale-a-bration, 28 Feb., with any $50 order. Dont’ wait, don’t hesitate ~ get it now :O)

Sale-a-bration is from 4 Jan to 28 Feb ~ that means placing orders during this time can earn you some FREE PRODUCTS. What are you waiting for??? Products are listed below so feel free to order away :O) If you do not have a demonstrator and need an Annual Catalog please reach out to me – happy to send one to you. AND… I have the Jan-Jun 2022 Mini Catalog and the 4 January to 28 February 2022 Sale-a-bration catalogs and can send those as well! When ordering, please also use current host code: Y4NW3AK. I offer my customers a free item from Stampin’ Up! valued to $10 with your order of $50 and above. Of course, right now you get all those fabulous FREE Sale-a-bration items too. Click here to go my store. When the order is over $150, you still receive that free gift from me, but SU! has Stampin’ Rewards that may be used for additional products, so don’t use the host code at that time. If you have questions just let me know. If you would like to be able to order products early from catalogs AND enjoy that 20% discount, join my team now… you may do that here. We have lots of fun and are a creative bunch that encourages & supports one another. Would love to have you. :O)

Now that you’ve seen my card, I hope you’ll take a minute to continue along the hop to see the rest of the beautiful creations. Use the button to get to Amy Koenders or click on a name to visit their blog.

Amy Koenders

Mary Deatherage

Kristi Gray

Jaimie Babarczy

Karen Finkle

Akiko Sudano

Karen Ksenzakovic

Tara Carpenter

Terry Lynn Bright

Thanks for stopping by. May you have a beautiful day.

Make someone happy sending them a handmade card filled with love.

Inspire. Create. Share.

Stampin’ Up! Daffodil Afternoon DSP and Daisy Punch

It’s Friday ~ TGIF! It’s amazing how quickly the days pass. I hope you have plans to do some creative fun this weekend. Whatever your plans, may you be safe. My card today shines with the Daffodil Afternoon 12 x 12 DSP that is free during Sale-a-bration when you place an order of $50 or more. It also uses the Medium Daisy Punch. Let’s take a look.

Daffodil Afternoon DSP & Daisy Punch.1

I’ve used several items to create this card, but really love how they worked together. The zig zag elements are cut with the Tropical Layers Dies and create this wonderful trim to make the DSP pop. The die has what I’m calling a stitched edge that also enhances the lines on the DSP daisy. I used Daisy Lane Stamp set for stamping the daisy with Basic Gray ink on Very Vanilla, colored the center with Flirty
Flamingo Stampin’ Blends then popped three Pastel Pearls on it for glam. I layered two dimensionals on top of one another before adding it to the card front. The sentiment comes from another FREE Sale-a-bration item called Special Moments stamp set and was stamped in Mossy Meadow on Very Vanilla card stock and fussy cut. I put it on dimensionals and added it to a piece of Pear Pizzazz card stock. (This also comes with an order of $50 or more.) Two more Pastel Pearls were added to pull this together.

For the inside…

Daffodil Afternoon inside.2

This seems like a modern type of card to me, and since I had these pieces that fit so nicely inside, I used them! They are Very Vanilla card stock adhered to the Mossy Meadow card base. I then stamped the daisy with Mossy Meadow ink using the Daisy Lane stamp set. The sentiment (Friend) also comes from Daisy Lane and is stamped in Mossy Meadow ink.

For the envelope…

Daffodil Afternoon DSP & Daisy Punch.3

I stamped the daisy randomly on the envelope flap in Mossy Meadow ink, then stamped a single daisy on the front ~ and the card was done. Love this layout!

Sale-a-bration is from 4 Jan to 28 Feb ~ that means placing orders during this time can earn you some FREE PRODUCTS. What are you waiting for??? Products are listed below so feel free to order away :O) If you do not have a demonstrator and need an Annual Catalog please reach out to me – happy to send one to you. AND… I have the Jan-Jun 2022 Mini Catalog and the 4 January to 28 February 2022 Sale-a-bration catalogs and can send those as well! When ordering, please also use current host code: R6D2 7PHD. I offer my customers a free item from Stampin’ Up! valued to $10 with your order of $50 and above. Of course, right now you get all those fabulous FREE Sale-a-bration items too. Click here to go my store. When the order is over $150, you still receive that free gift from me, but SU! has Stampin’ Rewards that may be used for additional products, so don’t use the host code at that time. If you have questions just let me know. If you would like to be able to order products early from catalogs AND enjoy that 20% discount, join my team now… you may do that here. We have lots of fun and are a creative bunch that encourages & supports one another. Would love to have you. :O)

Now that you have all the products to make this fun card, continue reading for more Stampin’ Up! info.

SAB FLYER

When you as a customer reach the qualifying purchase amount required to earn a free Sale-A-Bration item, Stampin’ Up! will let you know by highlighting the “rewards” icon. This will allow you to choose from multiple reward options depending on the total amount of your shopping cart. Before checking out, you can easily select which products you want! 

SAB FLYER

If you decides to sign up as a Stampin’ Up! demonstrator during Sale-A-Bration, you will receive two free stamp sets after picking all of the products you want in your Starter Kit. The stamp sets need to be live at the time of picking them, so anything you see in a current catalog or at stampinup.com is eligible.  Remember, the two free stamp sets are available if you join now through the end of February.

DEMO_MKTL_SHB_1_NA_0122_ALLTO

The Natural Tones Stampin’ Blends are an early-release product from the 2022—2023 Annual Catalog, while the collection’s additional products are exclusive and only available while supplies last. Get yours NOW! And get it here.

  • The Here Together Stamp Set, Here for You Dies, Here Together, and the All Together Collection are available in English and French.
  • Items available during this promotion can be added to demonstrator, customer, workshop, and online orders.
  • No limits apply during the customer sales period. (1 Feb – 2 May, 2022)
  • Qualifying orders are eligible for Stampin’ Rewards. (Except for the All Together Collection)
  • All Together items can be added to a starter kit.
  • The following exclusive products are only available while supplies last:
    • Here for You Dies
    • Here Together Bundle
    • All Together Collection
Waves of the Ocean

This coastal collection includes an inspiring set of stamps and detailed dies, both early-release products from the upcoming 2022–2023 Annual Catalog. Plus, a pack of paper made from images of hand-poured paint, blue-hued foil sheets for a sea of shine, and radiant rhinestones for a splash of sparkle—each an exclusive product you can only purchase during the promotion period!

  • The Waves of Inspiration Stamp Set and Waves Dies can be ordered separately, if desired.
  • The Waves of Inspiration Stamp Set and Waves of the Ocean Collection are available in English, French, and German.
  • The following exclusive products are only available while supplies last:
    • Waves of the Ocean 12″ x 12″ (30.5 x 30.5 cm) Designer Series Paper
    • Blue Foils 12″ x 12″ (30.5 x 30.5 cm) Specialty Paper
    • Rhinestone Waves Basic Jewels
  • Qualifying orders are eligible for Stampin’ Rewards. (Except for the Waves of the Ocean Collection)
  • Waves of the Ocean items can be added to a starter kit.
  • Available March 1, 2022! And get it here.

Thanks for stopping by. May you have a beautiful day.

Make someone happy sending them a handmade card filled with love.

Inspire. Create. Share.

Stampin’ Up! Daisy Lane

We are beginning to have longer days here on the East Coast and some warmer days as well. Our Helebores are budding, there are a couple of purple crocus showing and some little white flowers whose name I forget. These temps have inspired me to create something bright and colorful. I’ve used the Daisy Lane stamp set and coordinated Flowers for Every Season DSP and both Medium and Large Daisy Punches. Let’s take a peek…

Daisy Lane Fun Fold

Preparation:

  • Card base is Misty Moonlight 4 1/4 x 11, trim off 1 3/4 from one end, then score 1 7/8 from each end. Reserve the removed piece for the vertical front panel.
  • DSP panels Flowers for Every Season DSP (2) 1 3/4 x 4 1/8 and (1) 1 5/8 x 4 1/8 + (1) 4 1/8 x 5 3/8; (2) coordinating pieces 1 5/8 x 4 1/8; (1) 1 1/2 x 4
  • Basic White (inside panel) 4 x 5 1/4 + enough for daisies: (3) medium , (2) large
  • Gather inks: Night of Navy, Just Jade, So Saffron, and Blushing Bride
  • Embellishment: Gilded Gems

How to:

  • Adhere the appropriate two DSP pieces together for each panel using liquid glue, then adhere to the card stock pieces. Does that make sense? It seems obvious to me but let’s see if I can make it more clear: (2) 1 5/8 x 4 to (2) 1 3/4 x 4 1/8 and (1) 1 1/2 x 4 to the (1) 1 5/8 x 4 1/8. This last piece is adhered to the Misty Moonlight reserve panel 1 3/4 x 4 1/4. The others are adhered to the card base folded over panels. Yes, I think you get it!
  • Adhere this last panel to the right and just to the bottom portion of the fold-over. (If you adhere it to the top and bottom it will not open!!!)
  • Stamp the Basic White panel using the Stamparatus and Night of Navy ink, with the sentiment, realizing that the open section is what you want to see. I used the Daisy Lane stamp set for the sentiment. Now stamp the leaf in Just Jade ink in various places around the edge, keeping in mind what ism going to be seen when the card is closed (just the sentiment!). Adhere the Basic White panel to the slightly larger DSP panel and then into the inside of the card and wow- nearly done…
  • Stamp the daisies… for the Medium daisy – stamp in So Saffron ink three (3) times, stamping off each time, then punch using the Medium Daisy Punch. Curl the petals using a bone folder, then adhere together with liquid glue, off-setting the petals. Stamp the larger daisy with Blushing Bride ink, stamping off at least once, maybe twice, then punch with the Large Daisy Punch. Curl the petals as before then adhere together with liquid glue. Attach to the card as shown, with liquid glue. Add Gilded Gems to the centers of the daisies.
  • Voila – the card is done!
Daisy Lane Fun Fold, inside

Now for the envelope… I used what DSP pieces were left over for the envelope flap, adhering with liquid glue and trimming to fit. Stamp the leaf along the bottom of the envelope and some on the edge of the envelope using the same Just Jade ink. Adn yep – done, done, done!

Daisy Lane Fun Fold

Fun card… bright and cheery. If you so desired you could add a Basic White panel on the back to do some writing, cuz there isn’t much space to say much. Depends on the recipient, right?

OK… Products for todays card are from the 2020-2021 Annual Catalog as well as the Jan- Jun Mini Catalog ~ and those products are available now for purchase. You will find them in the product list below. As a reminder… I’ve made it easy for you to simply ‘add all to cart’. If I can help you in any way to order these items, or others, please give me a holler. As a thank you to my customers, when the order is between $50-$150 I offer a SU! item of your choice valued at $10. Remember to use MY CURRENT HOST CODE QDCUDHDC – good Mar 1 – 15. When the order is over $150, you still receive that free gift from me, but SU! has Stampin’ Rewards that may be used for additional products, so don’t use the host code at that time. If you have questions just let me know.

Now is the perfect time to become a team member of Stampin’ Up! – with your choice of items in your $99 Starter Kit (valued at $125!) Act quickly… JOIN MY Team here. Being a part of the Stampin’ community brings all kinds of fringe benefits ~ early access to new catalogs, guaranteed 20% (or more) discount on all Stampin’ Up! products, free tutorials, access to web sites that will encourage and strengthen your abilities. Join my team now… Again – you may do that here.

Thanks for stopping by.

May you have a beautiful day.

Make someone happy sending them a handmade card filled with love.

Stampin’ Up! Celebrate Spring

The theme for todays Blog Hop is Celebrate Spring… woohoo. When we walk early in the morning we are hearing the cardinals singing as though there is no tomorrow and the woodpeckers are at it as well. And here on the East Coast we have these adorable frogs we call ‘peepers’ that start their magical mating calls. And bulbs are beginning to show their green stems – so excited to see what’s coming. And oh yes, it’s daylight before 6 AM!!! Oh my goodness, can you tell I REALLY like this time of year?! But… back to the Hop ~ there should be some very special cards on the hop today.

My card to Celebrate Spring…

Birds & Branches – Celebrate Spring

I began by die cutting the ‘wreath’ from Basic White card stock using the Birds & More Dies. Using liquid glue I adhered this to a very slightly smaller panel of Sand & Sea DSP – using paper that looked like a sunrise. As the morning begins there is this glorious pink that melts into the blue sky. I adhered these to a slightly larger piece of Flirty Flamingo card stock, again with liquid glue. I stamped this sweet bird in Balmy Blue ink on Basic White card stock using the Birds & Branches stamp set. I die cut it with another die from the Birds & More Dies. The feet are die cut from the same dies using Soft Suede card stock scrap and adhered with liquid glue. I adhered it with a mini dimensional making it look as though the bird was watching the morning sky.

Next I took a panel of Seaside Spray card stock and ran it through the Old World Paper 3D embossing folder. I used my Blending Brush and Flirty Flamingo ink to color the upper portion of this piece – as though the sky was all around. I adhered the square panel and bird with dimensionals to this Seaside Spray panel. I then notched each edge using the ___________ Punch. I tied a double ribbon using the Flowers for Every Season Combo pack (Seaside Spray & Silver twine) and the Navy twine from Well-Suited Twine Combo Pack, tied a bow and added a glue dot at the knot to hold it in place.

I stamped the sentiment from A Wish for Everything stamp set in Misty Moonlight ink on a Basic White strip and die cut it with the Layering Ovals Dies. I die cut another panel from Flirty Flamingo card stock using the Tasteful Labels Dies and mounted the sentiment oval on it using liquid glue. This sentiment banner got dimensionals and was adhered to the embossed panel. I added three Artistry Blooms Adhesive-Backed Sequins to the sentiment banner. I adhered the embossed panel with Seal + to a larger panel of Basic White card stock. I put dimensionals on the back and adhered it to the card base of Seaside Spray. Card front is done!

For the inside…

Birds & Branches – Celebrate Spring, inside

I stamped the nest in Crumb Cake ink from the Birds & Branches stamp set on a Basic White panel. I then stamped the eggs in Balmy Blue ink on a Basic White scrap and die cut them with the Birds & More Dies. I adhered the two outer eggs with liquid glue and the third egg with a mini dimensional.. I adhered the Basic White panel to a Flirty Flamingo piece with liquid glue and attached this to the Seaside Spray card base inside ~ and the card was complete.

For the envelope….

Birds & Branches – Celebrate Spring

I adhered a panel of Sand & Sea DSP to the envelope flap & trimmed it to fit. I then stamped the branch from the Birds & Branches stamp set in Crumb Cake ink. I followed that by stamping the leaves in Granny Apple Green ink and the set was fait accomplis!

You can find the card cuts listed at the bottom of this post. Products for todays card are from the 2020-2021 Annual Catalog as well as the Jan- Jun Mini Catalog ~ and those products are available now for purchase. You will find them in the product list below. As a reminder… I’ve made it easy for you to simply ‘add all to cart’. If I can help you in any way to order these items, or others, please give me a holler. As a thank you to my customers, when the order is between $50-$150 I offer a SU! item of your choice valued at $10. Remember to use MY CURRENT HOST CODE QDCUDHDC – good Mar 1 – 15. When the order is over $150, you still receive that free gift from me, but SU! has Stampin’ Rewards that may be used for additional products, so don’t use the host code at that time. If you have questions just let me know.

In case you get lost, below is the list of those participating in todays Blog Hop. Click on the appropriate link to either move forward or go to the previous blog. Enjoy!

  1. Jaimie Babarczy: https://wp.me/p79UhD-4VN
  2. Karen Ksenzakovic: https://wp.me/paaNf4-4e9
  3. Mary Deatherage: https://wp.me/p5snyt-h1y
  4. Sue Prather: https://wp.me/p5yitZ-2tQ
  5. Donna Leonard: http://stampdabbles.com/?p=4619
  6. Jillian Good: http://dyedwith.love/?p=139
  7. Tara Carpenter: https://tarabethstamps.blogspot.com/2021/03/stampin-up-arrange-wreath-happy-easter.html
  8. Leslie Larkin https://leslielarkin.com/ice-cream-corner-suite/
  9. Terry Lynn Bright: https://tlsbrightspot.com/2021/03/09/stampin-up-celebrate-spring/
  10. Akiko Sudano: https://wp.me/paOv8E-2ww
  11. Karen Finkle: https://karenscardkorner.blogspot.com/2021/03/stampin-up-wildly-happy-for-amys-inkin.html
  12. Amy Koenders: https://wp.me/p2SFwf-moQ
  13. Krista Yacgi: https://www.thestampingnook.com/post/stampin-up-jar-of-flowers-welcome-spring-card

Thanks for stopping by.

May you have a beautiful day.

Make someone happy sending them a handmade card filled with love.

Card cuts for todays project:

Seaside Spray – 8 1/2 x 5 1/2 scored at 4 1/4, 4 x 5 1/4 (embossed)

Basic White 4 1/8 x 5 3/8, 3 1/8 square, 1 1/2 x 3 (oval), scrap for bird, 4 x 5 1/4 (inside)

Flirty Flamingo 3 1/4 square, 2 x 3 1/4 (banner), 4 1/8 x 5 1/4 (inside)

Stampin’ Up! Sent with Love, Pretty Perennials

Today is President’s Day! What does that mean to you? What I think of is Abraham Lincoln… and hubby just finished reading a book titled Abe that was really good. He was an amazing man and an incredible president. If you like history – this is an excellent read. I have my hands wrapped around the book Eleanor right now and keep learning how incredible she was as a First Lady of our country. These thingsd have nothing to do with today’s card, so maybe I should just get on with it…

Sent with Love, Pretty Perennials – #1

Can you see in the photo the embossing on the card front? I’ve used two folders, one for the DSP and another for the Basic White card stock. They come together and are called Meadow Moments Embossing Folder. Here’s better photo to share the delicasy of these two.

Sent with Love, Pretty Perennials – #2

I think you can see the embossing better, right? So delicate and beautiful. And here’s how I put this card together…

  • Emboss the Butterfly Bijou 6×6 DSP with the leaf portion of the Meadow Moments Embossing Folder set.
  • Emboss the Basic White panel with the floral, butterfly and leaf portion of the Meadow Moments Embossing Folder set.
  • Adhere the DSP strip to the Basic White panel with liquid glue.
  • Add the Just Jade 20-22 In Color Ribbon by wrapping to the back and hold in place with Stampin Seal
  • Die cut the flower from Hydrangea Hill DSP and the petals for the flower in Basic White card stock. Adhere the flower together with liquid glue and a mini dimensional. Add an Opal Rounds to the center. (Truth be told… this flower was sitting on my desk from a previous project and I liked the color contrasts of the green and pink.😊)
  • Adhere the flower to the card front with a dimensional.
  • Also sitting on my desk was this butterfly die cut with the Butterfly Dies (new product! this will be available in the 2021 Annual Catalog.) I adhered this butterfly with dimensionals as well.
  • Stamp the sentiment with Memento Black ink on Basic White card stock and die cut with the Potted Succulents Dies. The sentiment comes from Itty Bitty Greetings stamp set. I attached the sentiment to the card front with dimensionals and trimmed the end.
  • Adhere this panel to another layer of Basic White card stock for strength then to the Thick Basic White card base with dimensionals ~ and your card front is done!
Sent with Love, Pretty Perennials – #3

For the inside… I wanted to carry both the green and pink to the inside so adhered a strip of the same Butterfly Bijou 6×6 DSP (new product available soon to customers!) to the right side of the Basic White panel. I die cut another flower with the Perennial Petals Dies, this time from the Paper Blooms DSP (FREE during Sale-a-bration with a $50 order). I also die cut petals from Basic White card stock and a scrap I had on my desk of…. for the center of the flower. All were adhered together with liquid glue and another Opal Rounds was added as well. This was adhered to the inside of the card with liquid glue. This Basic White card stock panel was adhered to a Mint Macaron piece then to the inside of the card – all with liquid glue. and the inside was complete!

Sent with Love, Pretty Perennials – #4

For the envelope… I adhered a panel of the Butterfly Bijou 6×6 DSP to the envelope flap and trimmed it to fit. For the front of the envelope, I stamped the flower background from the Pretty Perennials stamp set, in Roccco Rose ink stamped off once, then the detail flower stamp in full strength Rococo Rose ink – and the card was finis!

This card is so versatile – it could easily be a sympathy card or birthday or simply thinking of you, depending on if you stamped something special inside. I like that it is cheery and bright too.

Products for todays card are from the new Jan-Jun 2021 Mini Catalog and the 2020-2021 Annual Catalog ~ and those products are available now for purchase. You will find them in the product list below. As a reminder… I’ve made it easy for you to simply ‘add all to cart. If I can help you in any way to order these items, or others, please give me a holler. As a thank you to my customers, when the order is between $50-$150 I offer a SU! item of your choice valued at $10. Remember to use MY CURRENT HOST CODE WZBPZ7N4- good Feb 4 – Feb 28. When the order is over $150, you still receive that free gift from me, but SU! has Stampin’ Rewards that may be used for additional products, so don’t use the host code at that time. Now is also Sale-a-bration – a time from now through the end of February when Stampin’ Up! offers FREE items with $50 and $100 purchases. Those products are shown below today’s product list as well. Happy shopping!

Now is the perfect time to become a team member of Stampin’ Up! – with your choice of items in your $99 Starter Kit (valued at $125!) you will receive five packs of new 6×6 DSP paper packs – only during Sale-a-bration though!!! Act quickly… JOIN MY Team here. Being a part of the Stampin’ community brings all kinds of fringe benefits ~ early access to new catalogs, guaranteed 20% discount on all Stampin’ Up! products, free tutorials, access to web sites that will encourage and strengthen your abilities. Join now… Again – you may do that here.

Sale-a-bration items FREE with $50 purchase – Level 1

Sale-a-bration items FREE with $100 purchase – Level 2

And if you HOST a party or place an order of $300 or more during Sale-a-bration

Thanks for stopping by.

May you have a beautiful day.

Make someone happy sending them a handmade card filled with love.

SU! Lovely You w/ Artistry Blooms DSP

Hello again! It’s raining here today and I have a meeting OUTSIDE tomorrow for 18 folks! Please pray it stops raining so I can get yard furniture dried and moved for physically distancing… This group hasn’t been together since March and we desperately need to see one another. We lost the president of our group recently (yes, to Covid-19) and we are anxious to share with one another that loss of a special woman. She was giving and caring, a gentle spirit, gracious, and laughter came easily to her. She will be greatly missed… I’ve gotten off track – pray for the rain to stop so we can gather together.

Today’s creation is… four creations – each the same and yet, well, not.

Artistry Blooms DSP w/ Lovely You
Card #1

Artistry Blooms DSP w/ Lovely You
Card #2


Artistry Blooms w/ Lovely You
card #3

Artistry Blooms DSP w/ Lovely You
Card #4


Card #1 is the base card – no dimensionals, no extras, just papers adhered to the card base and a sentiment – a perfect beginner card.DSP is adhered to the Whisper White panel, a strip added to cover the seam and stamped. Perfect for a beginner! The card base is Bermuda Bay; the strip is Night of Navy; sentiment stamped in Bermuda Bay.

Card #2 is only slightly different… DSP is adhered to a Whisper White panel, an strip isn added to cover the seam, then stamped. Now two additions: 1-splatter the sentiment section using the Night of Navy Marker and the lid and tap the longer tip end to create the light splatters. 2- put this panel on dimensionals. This is a step up due to the Marker and the dimensionals, but still a good beginner project. The card base is Night of Navy and the strip is Coastal Cabana; sentiment is stamped in Night of Navy.

Card #3 is another step up by adding ribbon (Just Jade 3/8″ Gingham Ribbon from the Flowers for Every Season Ribbon Combo Pack) and these wonderful Iridescent Pearls, dimensionals behind the main panel AND an additional layer of card stock. The card base is Coastal Cabana, the layering panel is Granny Apple Green; the sentiment is stamped in Night of Navy.

Card #4 is similar to #3 BUT – the layering panel is the one on dimensionals. This then is the DSP adhered to the Whisper White panel, ribbon added to cover the seam (Boho Indigo Product Medley – Night of Navy 1/2″ Frayed Grosgrain Ribbon) and Artistry Blooms Adhesive-Backed Sequins in Coastal Cabana). The card base is Granny Apple Green and the layering panel is Coastal Cabana; the sentiment is stamped in Coastal Cabana.

The DSP is… Artistry Blooms – 3 x 3 adhered to Whisper White panel 3 x 4 1/2; lkayering panels are 3 1/4 x 4 3/4.

The envelopes all have the Artistry Blooms DSP on the envelope flap 2 1/4 x 6, adhered with liquid glue and trimmed to fit. For the front I pulled another stamp set as it has this rather modern stamp in it, Tasteful Touches stamp set. I used a sponge dauber, one for each color of ink, and dabbed the color on the stamp, varying it each time I stamped it. I did not clean the stamp in between. Inks used were Night of Navy and Coastal Cabana.

Thanks for stopping by.

May you have a beautiful day.

Make someone happy by sending them a handmade card filled with love.


I’m trying out a new program. Below is a way to click the items used for todays project and it will take you right to my online store so you can purchase right away. Hope this works!!! AND I hope it helps you, the customer really SEE the products used. Thanks for shopping with me…

<div><div><div id=”3fdd91af-91fe-441c-8fa5-c5f6aeaa4acc”>https://mystampinblog.com/Showcase/Details/5981b84f-d507-41c1-846f-940400e5899e?layout=Tiled&showSku=True&showPrice=True&showSalePrice=True&showAddToCart=False&showAddAllToCart=True&showDownload=True&transparent=True&bordered=True&hFontHeight=14&rFontHeight=13&imageHeight=120&middleContent=False</div>https://mystampinblog.com/Script/ShowcaseDetailsScript</div></div>


  • SU! has a promotion going on for new recruits that is a win-win for everyone… for $99 you will get a starter kit worth of products valued at $125 – plus two card sets with instructions & an additional stamp set & Rhinestones. What’s not to like about that? Join my team- and yes, do it NOW so you get all the benefits of this awesome deal. More details below.

.

  • In addition to the regular starter kit (for $99 USD/$135 CAD, new recruits choose $125 USD/$165 CAD-worth of products) new recruit will also receive enough card stock pieces to make 16 cards, a pack of Rhinestone Basic Jewels, the So Much Love stamp set, and the Queen Anne’s Lace stamp set—all for their first event.
  • 8 packs of precut card stock of the coastal cabana pack will be provided, and 8 packs of precut card stock of the Granny Apple Green pack, for a total of 16 cards (packs include envelopes). The new recruit can choose what samples to replicate and how to distribute the packs to their customers.
  • Important note: Ink, adhesive, cutting tool, and clear block for stamping must be purchased separately. However, these products may be included as part of the Starter Kit product selection.

SU! Dog Builder Punch and Playful Pets DSP

Hi Everyone. It has been so stiflingly hot lately – the humidity is super high and it just makes it real uncomfortable to have to be outside. I feel so fortunate to have air conditioning – didn’t grow up with it and I remember those days… Let’s see, I told about our S-I-L shattering his elbow in a cycling accident. He’s home now, good spirits and positive attitude. So so thankful for so many things. There does not appear to be nerve damage; he can move all his fingers! Essentially they had to remove the elbow – now he has three metal plates instead… what they can do now is just amazing. So thankful – God was at work (and continues to be!) throughout this in so many ways.

Card for today… for a friend whose dog passed away recently. Pets are such an important part of our lives… and she had this fella 18 years, longer than most.

Playful Pets DSP and Dog Builder Punch
#1

The card base is Gray Granite… layer Real Read then the Playful Pets DSP. This layer has dimensionals. The banners were punched with the Banners Pick a Punch. Those little paws and hearts in the DSP are just sweet, aren’t they? The dog is punched with the Dog Builder punch in Basic Black cs and he’s on dimensional too. I tied a piece of crochet yarn around that little doggies neck before attaching him to the card front.(I know, not a SU! item…) And that heart is part of the punch – and it’s in Real Red. Those little Black Rhinestone Jewels are a retired item (unfortunately!) The ‘Thinking of You’ sentiment is from the Blossoms in Bloom stamp set.

Playful Pets DSP and Dog Builder Punch
#2

Playful Pets DSP and Dog Builder Punch
#3

Thanks for stopping by.

May you have a beautiful day.

Make someone happy by sending them a handmade card.