Stampin’ Up! Paper Pumpkin Alternatives, Jan ’22

Happy Monday! New week, new day, new start to whatever. I like to think of it as a new beginning each day, a start-over. Gratitude, praise, thanks, then go… Howe do you like to start your day ~ besides with a cup of coffee or tea?

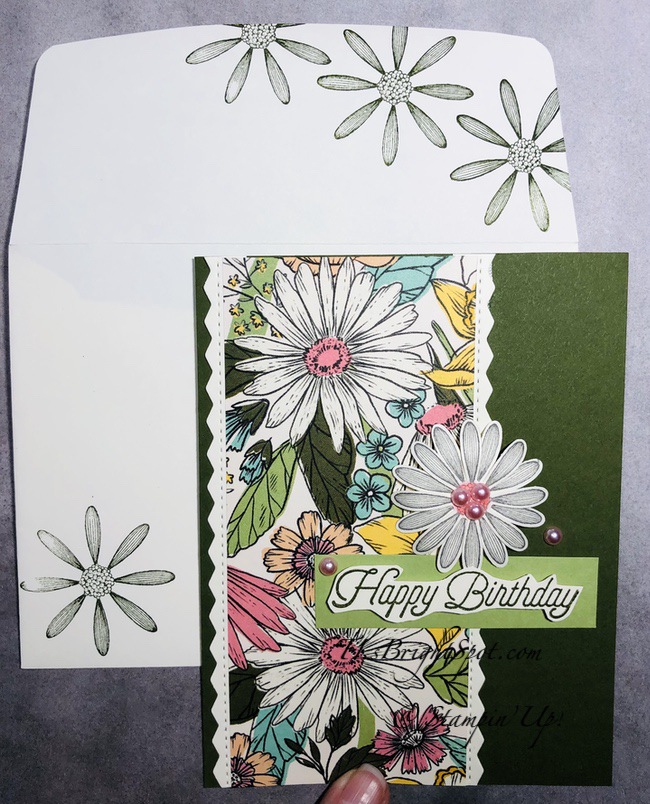
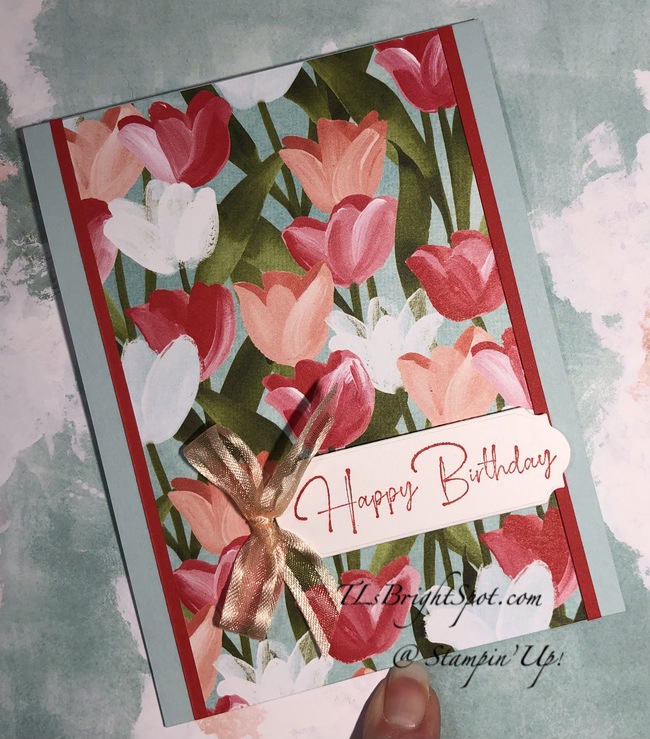
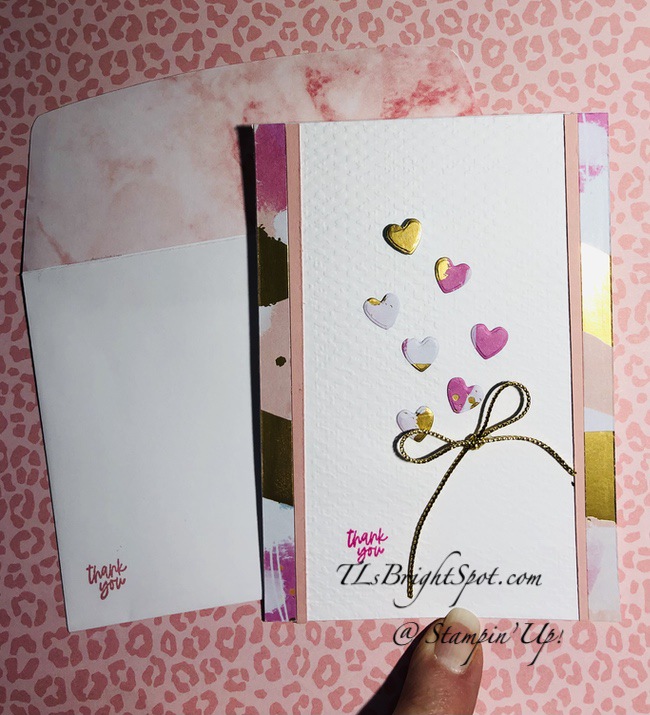
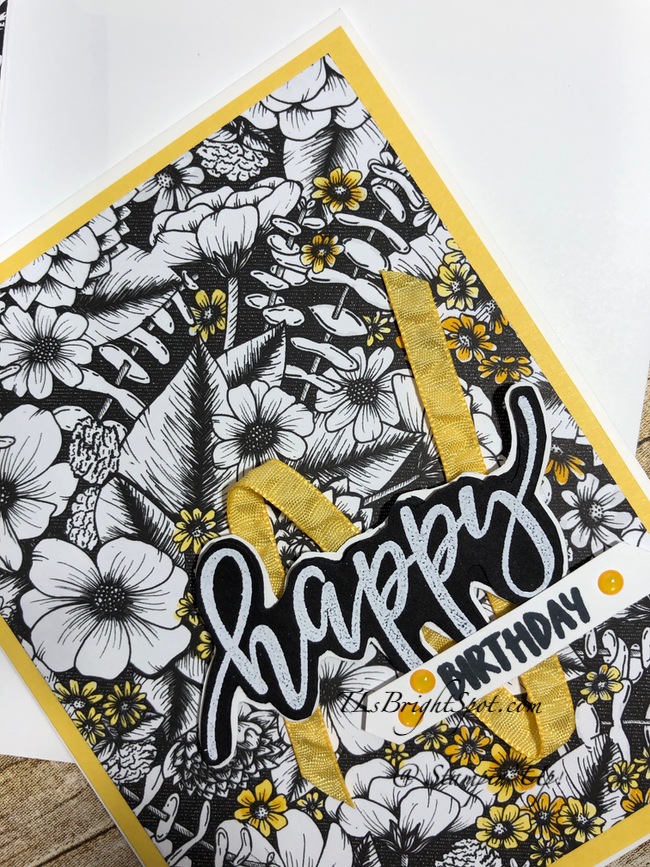
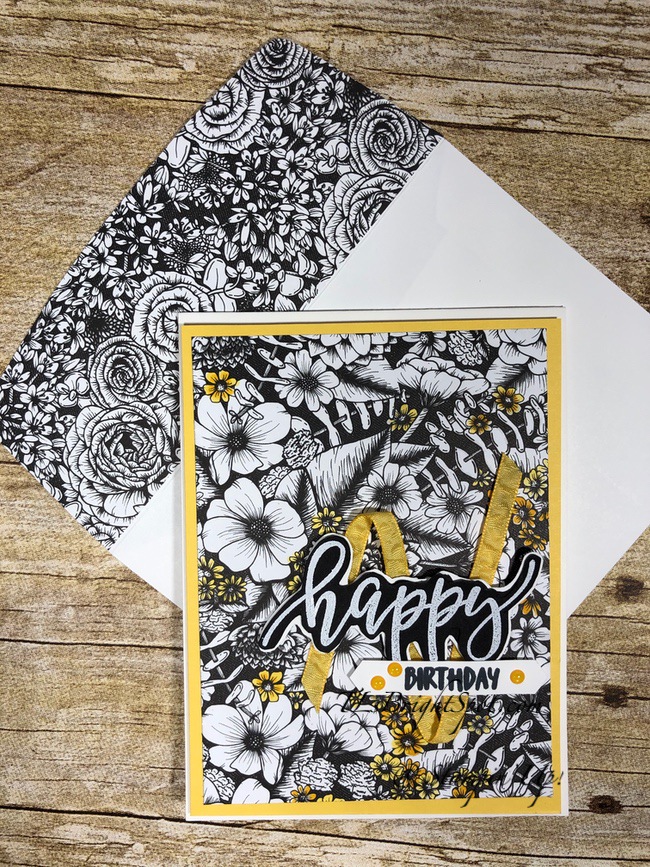
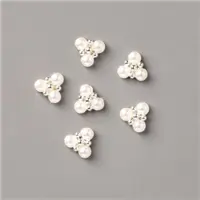
My Paper Pumpkin arrived the other day and since our grandkids are coming this weekend (it’s my birthday weekend:) I thought, what better time than now to put these adorable cards together & give them to our “Grands” to share with their classmates or teachers. So I set to work. I limited myself to additional Stampin’ Up! products as I needed to keep these simple. I chose Sweet Talk 12 x 12 DSP, Daffodil Afternoon 12 x 12 DSP and Gold Foil Sheets for decorative papers; the Heart Punch and the Scalloped Heart punch, Basic White, Flirty Flamingo and Petal Pink card stocks + all the PP kit ingredients. So – lots of pictures in this post…

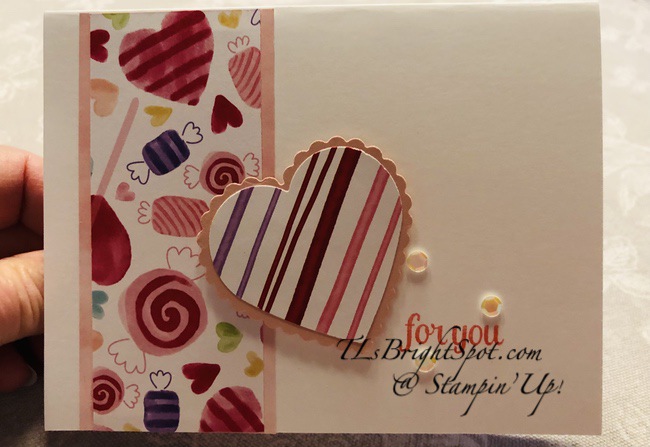
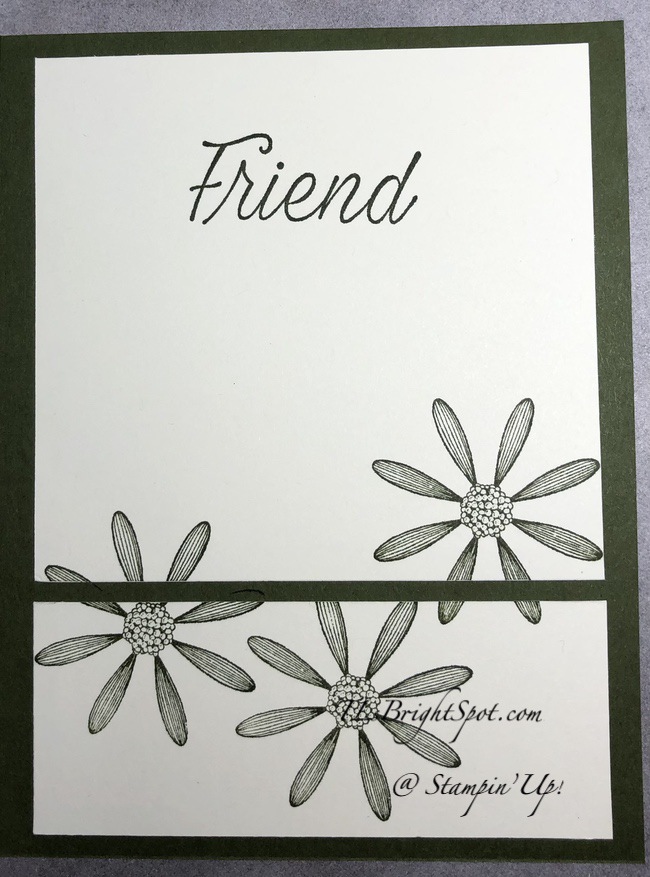
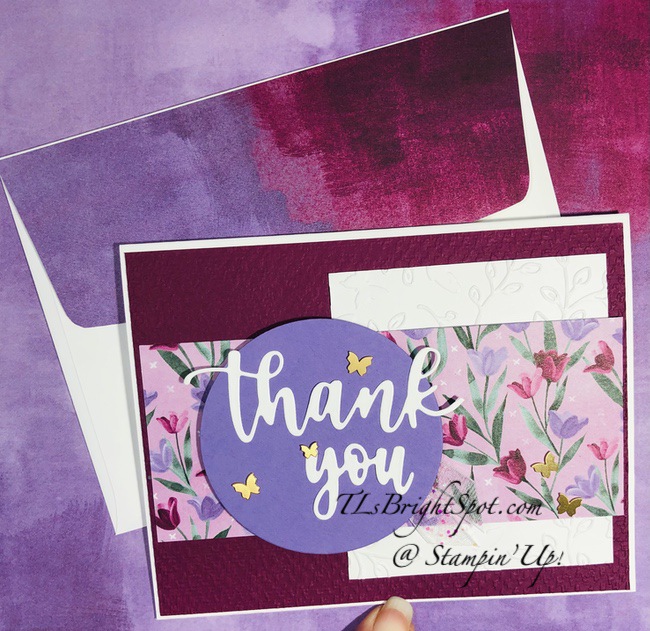
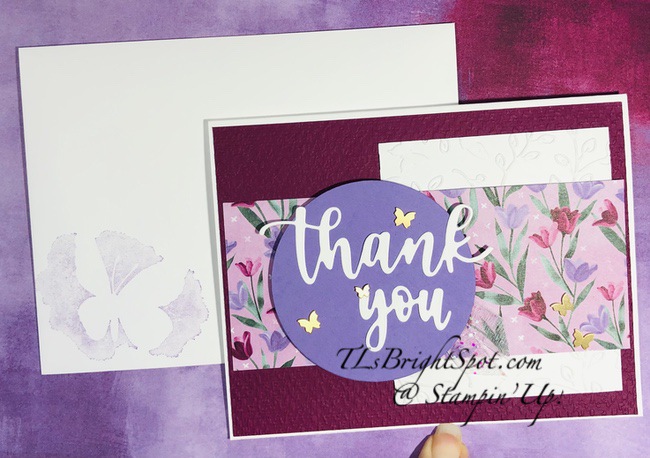
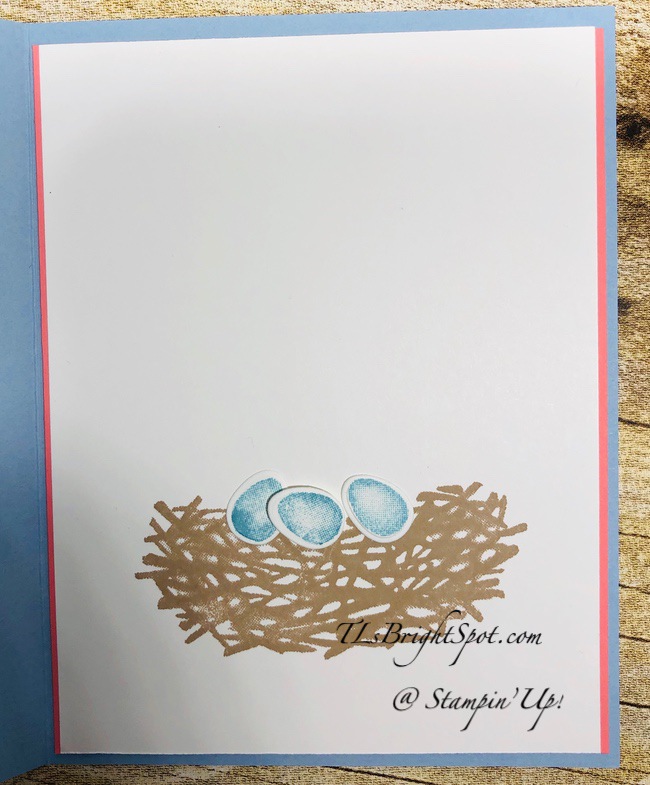
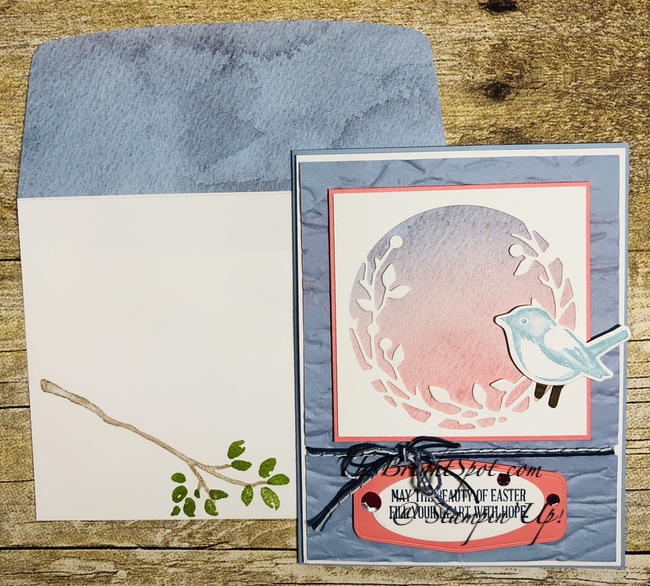
And a couple of photos of the inside of the alternative cards…

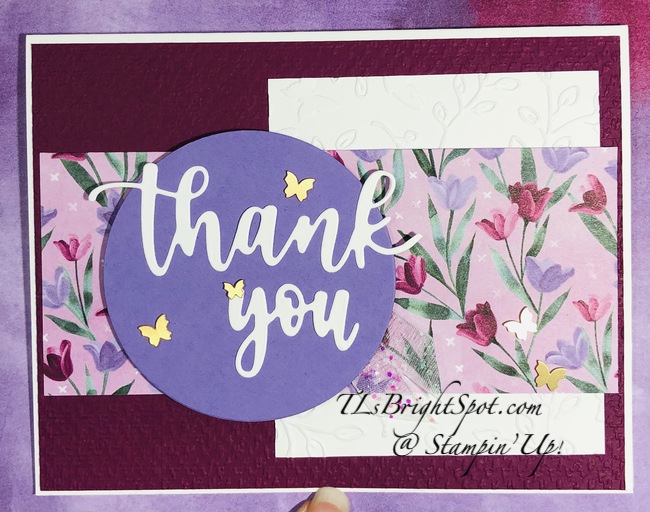
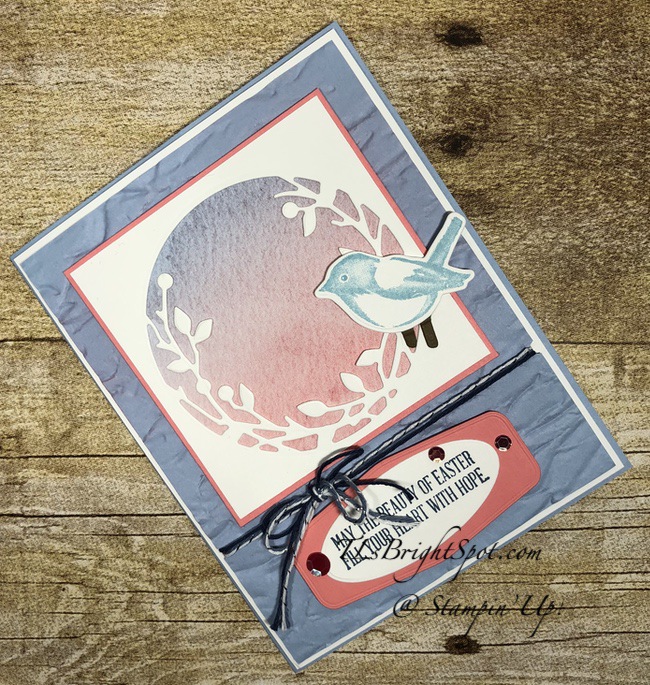
Additional inks used were Blushing Bride & Flirty Flamingo + the ink in the kit, Gray Granite. 17 cards in all ~ that’s a lot of cards with minimum product added to the Paper Pumpkin kit. Such a good deal – just sayin’. And these kits come monthly with each one different from the last. Some make cards, some are boxes or treats, it varies, which is kinda fun. This way a person doesn’t get bored :O) Now is a good time to join Paper Pumpkin too, ‘cuz prices increase just a bit as of Mar 1, 2022. And if you get the entire year subscription, that becomes a fixed price before Mar 1… Get your Paper Pumpkin, click here.

PREPAID PAPER PUMPKIN SUBSCRIPTIONS DURING SALE-A-BRATION
3-month prepaid subscription1 FREE $50 USD | $60 CAD
Sale-A-Bration item
 6-month prepaid subscription2 FREE $50 USD | $60 CAD
Sale-A-Bration items
OR1 FREE $100 USD | $120 CAD 
Sale-A-Bration item
12-month prepaid subscription4 FREE $50 USD Sale-A-Bration items
5 FREE $60 CAD Sale-A-Bration items
OR 2 FREE $100 USD | $120 CAD 
Sale-A-Bration items
(Plus host benefits!)

This offer is only available during Sale-A-Bration, from 4 January to 28 February 2022.

Sale-a-bration is from 4 Jan to 28 Feb ~ that means placing orders during this time can earn you some FREE PRODUCTS. What are you waiting for??? Products are listed below so feel free to order away :O) If you do not have a demonstrator and need an Annual Catalog please reach out to me – happy to send one to you. AND… I have the Jan-Jun 2022 Mini Catalog and the 4 January to 28 February 2022 Sale-a-bration catalogs and can send those as well! When ordering, please also use current host code: R6D2 7PHD. I offer my customers a free item from Stampin’ Up! valued to $10 with your order of $50 and above. Of course, right now you get all those fabulous FREE Sale-a-bration items too. Click here to go my store. When the order is over $150, you still receive that free gift from me, but SU! has Stampin’ Rewards that may be used for additional products, so don’t use the host code at that time. If you have questions just let me know. If you would like to be able to order products early from catalogs AND enjoy that 20% discount, join my team now… you may do that here. We have lots of fun and are a creative bunch that encourages & supports one another. Would love to have you. :O)

Stampin’ Up! Daffodil Afternoon DSP and Daisy Punch

It’s Friday ~ TGIF! It’s amazing how quickly the days pass. I hope you have plans to do some creative fun this weekend. Whatever your plans, may you be safe. My card today shines with the Daffodil Afternoon 12 x 12 DSP that is free during Sale-a-bration when you place an order of $50 or more. It also uses the Medium Daisy Punch. Let’s take a look.

Daffodil Afternoon DSP & Daisy Punch.1

I’ve used several items to create this card, but really love how they worked together. The zig zag elements are cut with the Tropical Layers Dies and create this wonderful trim to make the DSP pop. The die has what I’m calling a stitched edge that also enhances the lines on the DSP daisy. I used Daisy Lane Stamp set for stamping the daisy with Basic Gray ink on Very Vanilla, colored the center with Flirty
Flamingo Stampin’ Blends then popped three Pastel Pearls on it for glam. I layered two dimensionals on top of one another before adding it to the card front. The sentiment comes from another FREE Sale-a-bration item called Special Moments stamp set and was stamped in Mossy Meadow on Very Vanilla card stock and fussy cut. I put it on dimensionals and added it to a piece of Pear Pizzazz card stock. (This also comes with an order of $50 or more.) Two more Pastel Pearls were added to pull this together.

For the inside…

Daffodil Afternoon inside.2

This seems like a modern type of card to me, and since I had these pieces that fit so nicely inside, I used them! They are Very Vanilla card stock adhered to the Mossy Meadow card base. I then stamped the daisy with Mossy Meadow ink using the Daisy Lane stamp set. The sentiment (Friend) also comes from Daisy Lane and is stamped in Mossy Meadow ink.

For the envelope…

Daffodil Afternoon DSP & Daisy Punch.3

I stamped the daisy randomly on the envelope flap in Mossy Meadow ink, then stamped a single daisy on the front ~ and the card was done. Love this layout!

Sale-a-bration is from 4 Jan to 28 Feb ~ that means placing orders during this time can earn you some FREE PRODUCTS. What are you waiting for??? Products are listed below so feel free to order away :O) If you do not have a demonstrator and need an Annual Catalog please reach out to me – happy to send one to you. AND… I have the Jan-Jun 2022 Mini Catalog and the 4 January to 28 February 2022 Sale-a-bration catalogs and can send those as well! When ordering, please also use current host code: R6D2 7PHD. I offer my customers a free item from Stampin’ Up! valued to $10 with your order of $50 and above. Of course, right now you get all those fabulous FREE Sale-a-bration items too. Click here to go my store. When the order is over $150, you still receive that free gift from me, but SU! has Stampin’ Rewards that may be used for additional products, so don’t use the host code at that time. If you have questions just let me know. If you would like to be able to order products early from catalogs AND enjoy that 20% discount, join my team now… you may do that here. We have lots of fun and are a creative bunch that encourages & supports one another. Would love to have you. :O)

Now that you have all the products to make this fun card, continue reading for more Stampin’ Up! info.

SAB FLYER

When you as a customer reach the qualifying purchase amount required to earn a free Sale-A-Bration item, Stampin’ Up! will let you know by highlighting the ā€œrewardsā€ icon. This will allow you to choose from multiple reward options depending on the total amount of your shopping cart. Before checking out, you can easily select which products you want!Ā 

SAB FLYER

If you decides to sign up as a Stampin’ Up! demonstrator during Sale-A-Bration, you will receive two free stamp sets after picking all of the products you want in your Starter Kit. The stamp sets need to be live at the time of picking them, so anything you see in a current catalog or at stampinup.com is eligible.Ā Ā Remember, the two free stamp sets are available if you join now through the end of February.

DEMO_MKTL_SHB_1_NA_0122_ALLTO

The Natural Tones Stampin’ Blends are an early-release product from the 2022—2023 Annual Catalog, while the collection’s additional products are exclusive and only available while supplies last. Get yours NOW! And get it here.

  • The Here Together Stamp Set, Here for You Dies, Here Together, and the All Together Collection are available in English and French.
  • Items available during this promotion can be added to demonstrator, customer, workshop, and online orders.
  • No limits apply during the customer sales period. (1 Feb – 2 May, 2022)
  • Qualifying orders are eligible for Stampin’ Rewards. (Except for the All Together Collection)
  • All Together items can be added to a starter kit.
  • The following exclusive products are only available while supplies last:
    • Here for You Dies
    • Here Together Bundle
    • All Together Collection
Waves of the Ocean

This coastal collection includes an inspiring set of stamps and detailed dies, both early-release products from the upcoming 2022–2023 Annual Catalog. Plus, a pack of paper made from images of hand-poured paint, blue-hued foil sheets for a sea of shine, and radiant rhinestones for a splash of sparkle—each an exclusive product you can only purchase during the promotion period!

  • The Waves of Inspiration Stamp Set and Waves Dies can be ordered separately, if desired.
  • The Waves of Inspiration Stamp Set and Waves of the Ocean Collection are available in English, French, and German.
  • The following exclusive products are only available while supplies last:
    • Waves of the Ocean 12″ x 12″ (30.5 x 30.5 cm) Designer Series Paper
    • Blue Foils 12″ x 12″ (30.5 x 30.5 cm) Specialty Paper
    • Rhinestone Waves Basic Jewels
  • Qualifying orders are eligible for Stampin’ Rewards. (Except for the Waves of the Ocean Collection)
  • Waves of the Ocean items can be added to a starter kit.
  • Available March 1, 2022! And get it here.

Thanks for stopping by. May you have a beautiful day.

Make someone happy sending them a handmade card filled with love.

Inspire. Create. Share.

Stampin’ Up! Whitewash Technique with Daisy Garden

This is a new technique for me ~ and I loved it. For one thing, I enjoy coloring and that’s helpful with so many flowers to do – lol. And I’ve prepared two cards… one is silver embossed while the other is stamped with Misty Moonlight ink. Both are done on Misty Moonlight card stock.

Whitewash w/ Daisy Garden & Embossing.1

With the photo on the left, I inked the Daisy Garden stamp with my VersaMark ink pad then stamped it on the Misty Moonlight card stock that had first been rubbed with my embossing buddy to remove any static or finger prints. I sprinkled the image with silver embossing powder and heat set it. While it was cooling, I prepared my acrylic block by placing it on the White stamp pad to get a good amount of ink on it. I also added a dab of White reinker to the same block. Then I set to coloring using my blender pen as the tool of choice. I colored all the flowers with a basic layer of white ink then followed by adding more white where I wanted it. I used the reinker for additional highlights. I attached this to a Basic White panel with liquid glue, put dimensionals on the back then added that to the Misty Moonlight card base.

Whitewash Technique w/ Daisy Garden.2

With this photo, I stamped the Daisy Garden (yes, using my Stamparatus) with Misty Moonlight ink. I then took an acrylic block and ‘inked’ it on the White stamp pad. I did this by simply putting the acrylic block directly to the ink pad and lifting it. I also added a drop of White reinker to the block. I used my my blender pen as a paint brush to add color to the flowers. As the ink dries it becomes more pale and therefore more coloring is needed to get the desired amount of white to the flowers. I used the drop of reinker when I wanted more highlights in detail and this shows nicely in this photo. it does not show as well on the silver embossed card – at least not in the photo. I added the panel to a Night of Navy piece, wrapped a length of Seam

Binding ribbon around it and tied a knot. I put dimensionals on the back and adhered it to a Basic White card base. I added another small bow with a glue dot, then three Pearl Basic Jewels. I will do the same sentiment as the above card, but use Misty Moonlight ink in lieu of embossing. It will get dimensionals & be added on top of the ribbon. I simply forgot!!!

On the embossed card I made what I call a ‘fussy bow’ using the Seam Binding Ribbon in White and the Silver Cording from the Simply Elegant Trim pack. (This is a great bow for hand delivered cards!) For the sentiment on the front, I used the Love & Happiness stamp set, stamped it in VersaMark ink then sprinkled with Silver Embossing powder and heat set. I put dimensionals on the back and and added it appropriately. For a final touch, I added three Pearl Basic Jewels and the card front was done.

For the inside of these cards…

Whitewash Daisy Garden, inside.3
Whitewash daisy garden, inside.4

For both cards I stamped the sentiment from Love & Happiness stamp set in Misty Moonlight ink on a Basic White panel. For the card on the left, the panel was adhered directly to the inside of the Misty Moonlight card base. For the card on the right, I adhered the panel to a Night of Navy piece then into the Basic White card.

Love this technique and can’t wait to do it again, using another floral stamp!

Sale-a-bration is from 4 Jan to 28 Feb ~ that means placing orders during this time can earn you some FREE PRODUCTS. What are you waiting for??? Products are listed below so feel free to order away :O) If you do not have a demonstrator and need an Annual Catalog please reach out to me – happy to send one to you. AND… I have the Jan-Jun 2022 Mini Catalog and the 4 January to 28 February 2022 Sale-a-bration catalogs and can send those as well! When ordering, please also use current host code: R6D2 7PHD. I offer my customers a free item from Stampin’ Up! valued to $10 with your order of $50 and above. Of course, right now you get all those fabulous FREE Sale-a-bration items too. Click here to go my store. When the order is over $150, you still receive that free gift from me, but SU! has Stampin’ Rewards that may be used for additional products, so don’t use the host code at that time. If you have questions just let me know. If you would like to be able to order products early from catalogs AND enjoy that 20% discount, join my team now… you may do that here. We have lots of fun and are a creative bunch that encourages & supports one another. Would love to have you. :O)

SAB FLYER

When you as a customer reach the qualifying purchase amount required to earn a free Sale-A-Bration item, Stampin’ Up! will let you know by highlighting the ā€œrewardsā€ icon. This will allow you to choose from multiple reward options depending on the total amount of your shopping cart. Before checking out, you can easily select which products you want!Ā 

SAB FLYER

If you decides to sign up as a Stampin’ Up! demonstrator during Sale-A-Bration, you will receive two free stamp sets after picking all of the products you want in your Starter Kit. The stamp sets need to be live at the time of picking them, so anything you see in a current catalog or at stampinup.com is eligible.Ā Ā Remember, the two free stamp sets are available if you join now through the end of February.

Thank you for stopping by! May you have a beautiful day.

Make someone happy sending them a handmade card filled with love.

Inspire. Create. Share.

Stampin’ Up! Flowering Fields DSP Birthday

I have a beautiful card for you today, one in which the Designer Series Paper does all the work. The DSP is called Flowering Fields 12 x 12 and it truly is something else.

Flowering Fields DSP b’day.1

I inked two new stamp sets today – and one is called Flowing Flowers – see the sentiment on the card? That’s from Flowing Flowers. I love this font! It’s fresh & light. Here’s what I did to make the card…

  • Card base is Pool Party 4 1/4 x 11 scored at 5 1/2
  • Flowering Fields DSP is 3 1/2 x 5 1/2; adhere to the card front
  • Poppy Parade 1/8 x 5 1/2 (cut 4); adhere one length on each side of the DSP
  • Using the Flowing Flowers stamp set, stamp sentiment in Poppy Parade ink on a Basic White scrap; die cut with an Ornate Frames die; adhere with dimensionals as shown
  • Tie a bow using the Open Weave Ribbon in Pale Papaya and adhere with a glue dot. Done!

For the inside….

Flowering Rain Boots for Flowering Fields DSP B’day, inside
  • Cut a Basic White panel 3 1/2 x 5 1/2
  • Using the Flowering Rain Boots stamp set, stamp the stems/ leaves in Pear Pizzazz ink. Stamp the coordinating flowers in Blushing Bride ink
  • Adhere the panel to the inside of the card base.
  • Add the two lengths of Poppy Parade strips to each side – done!

For the envelope…

Flowering Fields DSP B’day.3

Using the Flowering Rain Boots stamp set, stamp the stems/ leaves in Pear Pizzazz ink. Stamp the coordinating flowers in Blushing Bride ink.

This birthday card is like a breath of fresh air and so perfect for this time of year. It just says happy. :O)

Sale-a-bration is from 4 Jan to 28 Feb ~ that means placing orders during this time can earn you some FREE PRODUCTS. What are you waiting for??? Products are listed below so feel free to order away :O) If you do not have a demonstrator and need an Annual Catalog please reach out to me – happy to send one to you. AND… I have the Jan-Jun 2022 Mini Catalog and the 4 January to 28 February 2022 Sale-a-bration catalogs and can send those as well! When ordering, please also use current host code: R6D2 7PHD. I offer my customers a free item from Stampin’ Up! valued to $10 with your order of $50 and above. Of course, right now you get all those fabulous FREE Sale-a-bration items too. Click here to go my store. When the order is over $150, you still receive that free gift from me, but SU! has Stampin’ Rewards that may be used for additional products, so don’t use the host code at that time. If you have questions just let me know. If you would like to be able to order products early from catalogs AND enjoy that 20% discount, join my team now… you may do that here. We have lots of fun and are a creative bunch that encourages & supports one another. Would love to have you. :O)

SAB FLYER

When you as a customer reach the qualifying purchase amount required to earn a free Sale-A-Bration item, Stampin’ Up! will let you know by highlighting the ā€œrewardsā€ icon. This will allow you to choose from multiple reward options depending on the total amount of your shopping cart. Before checking out, you can easily select which products you want! 

SAB FLYER

If you decides to sign up as a Stampin’ Up! demonstrator during Sale-A-Bration, you will receive two free stamp sets after picking all of the products you want in your Starter Kit. The stamp sets need to be live at the time of picking them, so anything you see in a current catalog or at stampinup.com is eligible.  Remember, the two free stamp sets are available if you join now through the end of February.

Thanks for stopping by. May you have a beautiful day.

Make someone happy sending them a handmade card filled with love.

Inspire. Create. Share.

Stampin’ Up! Flowering Fields DSP and Amazing Thanks Dies

The January to June 2022 Mini Catalog is full of absolutely amazing project ideas, new stamp & die sets AND new Designer Series Papers. I hadn’t played much with the Flowering Fields DSP, so when I began doing so, well, I fell in love with it. I saw a layout on Pinterest that I decided to use and adapted it to this card.

Flowering Fields / Amazing Thanks Dies.1

Isn’t that DSP beautiful? I love how gentle the flowers look, sort of blowing in the breeze. And here’s how I made this card.

  • Cut a panel of Rich Razzleberry 4 1/8 x 5 3/8; run it through the Tasteful Textile 3D Embossing Folder; adhere with liquid glue to the Basic White Thick card base
  • Cut a panel of Basic White 3 x 3 1/2 and run it through the Meadow Moments embossing folder; adhere as shown with liquid glue
  • Cut a length of Flowering Fields DSP 2 1/4 x 5 1/4 and adhere, centering on the card front.
  • Using the Layering Circles Dies, cut a circle from Highland Heather card stock. Put dimensionals on the back and attach where shown
  • Using the Amazing Thanks Dies, die cut the sentiment from Basic White and adhere with liquid glue.
  • Attach several (here I used 5) Brushed Brass Butterflies.
  • And just one more touch of sparkle was needed… cut a length of the Glittered Organdy Ribbon in White and attached with a glue dot under the circle. Love…ā¤ļø

For the inside…

Flowering Fields / Amazing Thanks, inside

With the Amazing Thanks Dies comes this wonderful stamp set, Amazing Silhouettes, and this butterfly is absolutely perfect for the inside of this card. Stamp it in Highland Heather ink as shown, on a Basic White panel and adhere to the inside of the card. Done!

For the envelope, I turned this tulip panel over and saw this wonderful color spray from Highland Heather to Rich Razzleberry, and adhered it to the flap. For the envelope front, I stamped the same butterfly from Amazing Silhouettes in Highland Heather ink.

Flowering Fields / Amazing Thanks Dies

I had such fun creating this card. It’s going in my stash, but I do love it and can’t wait to send it to just the right person. :O)

Sale-a-bration is from 4 Jan to 28 Feb ~ that means placing orders during this time can earn you some FREE PRODUCTS. What are you waiting for??? Products are listed below so feel free to order away :O) If you do not have a demonstrator and need an Annual Catalog please reach out to me – happy to send one to you. AND… I have the Jan-Jun 2022 Mini Catalog and the 4 January to 28 February 2022 Sale-a-bration catalogs and can send those as well! When ordering, please also use current host code: R6D2 7PHD. I offer my customers a free item from Stampin’ Up! valued to $10 with your order of $50 and above. Of course, right now you get all those fabulous FREE Sale-a-bration items too. Click here to go my store. When the order is over $150, you still receive that free gift from me, but SU! has Stampin’ Rewards that may be used for additional products, so don’t use the host code at that time. If you have questions just let me know. If you would like to be able to order products early from catalogs AND enjoy that 20% discount, join my team now… you may do that here. We have lots of fun and are a creative bunch that encourages & supports one another. Would love to have you. :O)

Thursday I shared a card that in the end I wasn’t completely satisfied – so I worked on it latter and made some additions, a stepped up version . You may see the original post by clicking the photo.

Sweet Hearts Dies

Thanks for stopping by. May you have a beautiful day.

Make someone happy sending them a handmade card filled with love.

Inspire. Create. Share.

Stampin’ Up! Sweet Hearts Dies for the Happy Inkin’ Thursday Blog Hop

WooHoo ~ it’s Thursday and time for another Happy Inkin’ Thursday Blog Hop. You’re going to see some wonderful ideas from this group, so let’s get on with it.

This image has an empty alt attribute; its file name is 18034290_10213018857694437_1570318010991291595_n.jpg

And we have a sketch challenge this week that is kinda fun – and you will see many ideas for making this sketch shine.

May be an image of text that says 'Happy Inkin Thursday Blog Hop January 20- Sketch Challenge'

My card is a Note card and I’v e chosen to work with the Abstract Beauty 4 x 6 SDSP and the Sweet Hearts Dies. Let’s take a peak.

Sweet Hearts Dies.1

Are these tiny hearts sweet or what?! The die I used cuts four of these at a time which makes it really easily to die cut multiples. As I look at this, I’m wondering why I didn’t add another strip of color to the inside of the Abstract Beauty 4×6 SDSP… Hmmm. A bit of ribbon maybe. Well, another card another day šŸ™‚ These note cards are 3 1/2 x 5, so I cut a panel of Basic White card stock just that size, stamped the sentiment (from Rainbow of Happiness stamp set) in Magenta Madness ink, then ran this through the Tasteful Textile 3D Embossing Folder. I added the two narrow strips of the Abstract Beauty 4×6 SDSP to each side. I die cut the hearts from the same SDSP. The top gold heart is on a mini dimensional cut down to fit. The other hearts are added with dabs of liquid glue, and I put the dot of glue right on the card front in lieu of the heart.

For the inside of the card….

Sweet Heart Dies.2

I added another strip of the Abstract Beauty 4×6 SDSP to the right inside of the card and final heart die cut. Sweet, simple.

Sweet Heart Dies.3

For the envelope I stamped the front with the same sentiment from Rainbows of Happiness stamp set buty used Blushing Bride ink. And for envelope flap, a piece of Simply Marbelous 6×6 DSP (FREE during Sale-a-bration!) adhered with liquid glue and trimmed to fit.

Sale-a-bration is from 4 Jan to 28 Feb ~ that means placing orders during this time can earn you some FREE PRODUCTS. What are you waiting for??? Products are listed below so feel free to order away :O) If you do not have a demonstrator and need an Annual Catalog please reach out to me – happy to send one to you. AND… I have the Jan-Jun 2022 Mini Catalog and the 4 January to 28 February 2022 Sale-a-bration catalogs and can send those as well! When ordering, please also use current host code: R6D2 7PHD. I offer my customers a free item from Stampin’ Up! valued to $10 with your order of $50 and above. Of course, right now you get all those fabulous FREE Sale-a-bration items too. Click here to go my store. When the order is over $150, you still receive that free gift from me, but SU! has Stampin’ Rewards that may be used for additional products, so don’t use the host code at that time. If you have questions just let me know. If you would like to be able to order products early from catalogs AND enjoy that 20% discount, join my team now… you may do that here. We have lots of fun and are a creative bunch that encourages & supports one another. Would love to have you. :O)

Those participating in our blog hop are listed below. Feel free to click on their name or use the next button to go to Amy Koenders. Enjoy the hop!

Amy Koenders

Mary Deatherage

Kristi Gray

Jaimie Babarczy

Sue Prather

Karen Finkle

Akiko Sudano

Karen Ksenzakovic

Tara Carpenter

Terry Lynn Bright ~ YOU ARE HERE!

Stampin’ Up! Celebrate Spring

The theme for todays Blog Hop is Celebrate Spring… woohoo. When we walk early in the morning we are hearing the cardinals singing as though there is no tomorrow and the woodpeckers are at it as well. And here on the East Coast we have these adorable frogs we call ‘peepers’ that start their magical mating calls. And bulbs are beginning to show their green stems – so excited to see what’s coming. And oh yes, it’s daylight before 6 AM!!! Oh my goodness, can you tell I REALLY like this time of year?! But… back to the Hop ~ there should be some very special cards on the hop today.

My card to Celebrate Spring…

Birds & Branches – Celebrate Spring

I began by die cutting the ‘wreath’ from Basic White card stock using the Birds & More Dies. Using liquid glue I adhered this to a very slightly smaller panel of Sand & Sea DSP – using paper that looked like a sunrise. As the morning begins there is this glorious pink that melts into the blue sky. I adhered these to a slightly larger piece of Flirty Flamingo card stock, again with liquid glue. I stamped this sweet bird in Balmy Blue ink on Basic White card stock using the Birds & Branches stamp set. I die cut it with another die from the Birds & More Dies. The feet are die cut from the same dies using Soft Suede card stock scrap and adhered with liquid glue. I adhered it with a mini dimensional making it look as though the bird was watching the morning sky.

Next I took a panel of Seaside Spray card stock and ran it through the Old World Paper 3D embossing folder. I used my Blending Brush and Flirty Flamingo ink to color the upper portion of this piece – as though the sky was all around. I adhered the square panel and bird with dimensionals to this Seaside Spray panel. I then notched each edge using the ___________ Punch. I tied a double ribbon using the Flowers for Every Season Combo pack (Seaside Spray & Silver twine) and the Navy twine from Well-Suited Twine Combo Pack, tied a bow and added a glue dot at the knot to hold it in place.

I stamped the sentiment from A Wish for Everything stamp set in Misty Moonlight ink on a Basic White strip and die cut it with the Layering Ovals Dies. I die cut another panel from Flirty Flamingo card stock using the Tasteful Labels Dies and mounted the sentiment oval on it using liquid glue. This sentiment banner got dimensionals and was adhered to the embossed panel. I added three Artistry Blooms Adhesive-Backed Sequins to the sentiment banner. I adhered the embossed panel with Seal + to a larger panel of Basic White card stock. I put dimensionals on the back and adhered it to the card base of Seaside Spray. Card front is done!

For the inside…

Birds & Branches – Celebrate Spring, inside

I stamped the nest in Crumb Cake ink from the Birds & Branches stamp set on a Basic White panel. I then stamped the eggs in Balmy Blue ink on a Basic White scrap and die cut them with the Birds & More Dies. I adhered the two outer eggs with liquid glue and the third egg with a mini dimensional.. I adhered the Basic White panel to a Flirty Flamingo piece with liquid glue and attached this to the Seaside Spray card base inside ~ and the card was complete.

For the envelope….

Birds & Branches – Celebrate Spring

I adhered a panel of Sand & Sea DSP to the envelope flap & trimmed it to fit. I then stamped the branch from the Birds & Branches stamp set in Crumb Cake ink. I followed that by stamping the leaves in Granny Apple Green ink and the set was fait accomplis!

You can find the card cuts listed at the bottom of this post. Products for todays card are from the 2020-2021 Annual Catalog as well as the Jan- Jun Mini Catalog ~ and those products are available now for purchase. You will find them in the product list below. As a reminder… I’ve made it easy for you to simply ‘add all to cart’. If I can help you in any way to order these items, or others, please give me a holler. As a thank you to my customers, when the order is between $50-$150 I offer a SU! item of your choice valued at $10. Remember to use MY CURRENT HOST CODE QDCUDHDC – good Mar 1 – 15. When the order is over $150, you still receive that free gift from me, but SU! has Stampin’ Rewards that may be used for additional products, so don’t use the host code at that time. If you have questions just let me know.

In case you get lost, below is the list of those participating in todays Blog Hop. Click on the appropriate link to either move forward or go to the previous blog. Enjoy!

  1. Jaimie Babarczy: https://wp.me/p79UhD-4VN
  2. Karen Ksenzakovic: https://wp.me/paaNf4-4e9
  3. Mary Deatherage: https://wp.me/p5snyt-h1y
  4. Sue Prather: https://wp.me/p5yitZ-2tQ
  5. Donna Leonard: http://stampdabbles.com/?p=4619
  6. Jillian Good: http://dyedwith.love/?p=139
  7. Tara Carpenter: https://tarabethstamps.blogspot.com/2021/03/stampin-up-arrange-wreath-happy-easter.html
  8. Leslie Larkin https://leslielarkin.com/ice-cream-corner-suite/
  9. Terry Lynn Bright: https://tlsbrightspot.com/2021/03/09/stampin-up-celebrate-spring/
  10. Akiko Sudano: https://wp.me/paOv8E-2ww
  11. Karen Finkle: https://karenscardkorner.blogspot.com/2021/03/stampin-up-wildly-happy-for-amys-inkin.html
  12. Amy Koenders: https://wp.me/p2SFwf-moQ
  13. Krista Yacgi: https://www.thestampingnook.com/post/stampin-up-jar-of-flowers-welcome-spring-card

Thanks for stopping by.

May you have a beautiful day.

Make someone happy sending them a handmade card filled with love.

Card cuts for todays project:

Seaside Spray – 8 1/2 x 5 1/2 scored at 4 1/4, 4 x 5 1/4 (embossed)

Basic White 4 1/8 x 5 3/8, 3 1/8 square, 1 1/2 x 3 (oval), scrap for bird, 4 x 5 1/4 (inside)

Flirty Flamingo 3 1/4 square, 2 x 3 1/4 (banner), 4 1/8 x 5 1/4 (inside)

Stampin’ Up! True Love & Happy

It is Super Bowl weekend! Woohoo! And what are YOU doing during Super Bowl? I’ll probably color something while watching the game – it’s the perfect time. Or fussy cut… but that’s not my preference. Speaking of coloring, todays card uses the Stampin Blends and it gives a bolder look than the card of yesterday with the pencils. I used another one of the True Love DSP papers too. Let’s take a look…

True Love Happy #1

This card incorporates the Pretty Perennials stamp set in the sentiments on the card front and the word ‘happy’ just pops! I colored just the smallest of the flowers using both the Light & Dark Daffodil Delight Stampin Blends – just enough to tie in the Daffodil Delight card stock it sits on and the Ruched Ribbon, also in Daffodil Delight.

I stamped the word ‘happy’ in VersaMark ink on a piece of Basic Black card stock after using the embossing buddy to clear it of any static, then sprinkled White embossing powder over the ink and heat set it. Once it cooled a bit I fussy cut the word. I then adhered it to a piece of Basic White card stock and fussy cut around it again, giving it a white border. I stamped the word ‘birthday’ also from the Pretty Perennials stamp set, in Memento Black ink on a Basic White scrap and punched it with the Classic Label Punch. After deciding where I wanted to place the larger word, I ran a strip of Stampin’ Seal across and wove the Ruched Ribbon to just the way I wanted it, and the Stampin Seal held it nicely in place. I put dimensionals on both sentiments, adhering the larger word first, then the ‘birthday just over the ends, also on dimensionals. I added three 2020-2022 Enamel Dots in Bumblebee for the final touch.

The True Love DSP panel was adhered to Daffodil Delight card stock, put on dimensionals then added to the Thick Basic White card base and the card front was complete.

True Love Happy #2

For the inside I added a 3/4″ strip of the same True Love DSP to the bottom of the Basic White panel after coloring with the Daffodil Delight Stampin blends. This panel was adhered to a Daffodil Delight panel with liquid glue then to inside of the card base, also with liquid glue – and the card was done. Easy peasy…

True Love Happy #3

For the envelope I did no coloring, just added a strip of the True Love DSP to the envelope flap and that’s it. A bright, cheery card ready to send to someone special.

Products for todays card are from the new Jan-Jun 2021 Mini Catalog and the 2020-2021 Annual Catalog ~ and those products are available now for purchase. You will find them in the product list below. As a reminder… I’ve made it easy for you to simply ‘add all to cart. If I can help you in any way to order these items, or others, please give me a holler. As a thank you to my customers, when the order is between $50-$150 I offer a SU! item of your choice valued at $10. Remember to use MY CURRENT HOST CODE WZBPZ7N4- good Feb 4 (today) – Feb 28. When the order is over $150, you still receive that free gift from me, but SU! has Stampin’ Rewards that may be used for additional products, so don’t use the host code at that time. Now is also Sale-a-bration – a time from now through the end of February when Stampin’ Up! offers FREE items with $50 and $100 purchases. Those products are shown below today’s product list as well. Happy shopping!

Sale-a-bration items FREE with $50 purchase – Level 1

Sale-a-bration items FREE with $100 purchase – Level 2

Host a group of orders from your buddies and if it is over $300 – receive this Host Set!

Now is the perfect time to become a team member of Stampin’ Up! – with your $99 Starter Kit (valued at $125!) you will receive five packs of new 6×6 DSP paper packs – only during Sale-a-bration though!!! Act quickly… join my Team here. Being a part of the Stampin’ community brings all kinds of fringe benefits ~ early access to new catalogs, guaranteed 2-% discount on all Stampin’ Up! products, free tutorials, access to web sites that will encourage and strengthen your abilities. Now is the perfect time… Again – you may do that here.

Thanks for stopping by.

May you have a beautiful day.

Make someone happy sending them a handmade card filled with love.

Card cuts for todays project…

  • Basic White Thick card base 4 1/4 x 11 scored at 5 1/2
  • Daffodil Delight 4 x 5 1/4 (2)
  • True Love DSP 3 3/4 x 5 + 3/4 x 3 3/4 + 2 1/4 x 6 (envelope flap)
  • Basic White 3 3/4 x 5 + scrap for sentiments
  • Basic Black scraps for sentiment

SU! Poinsettia Petals Bundle

Hi again – DO HOPE you have taken the opportunity to purchase stamp sets during today’s 24 hr STAMP SALE!Ā If not, get on it šŸ˜


Today’s card is another using the Poinsettia Petals Bundle – I just love this set… so FUN to create using different colors, either on the bloom (bract) itself or the background. I’ve done both today…

Poinsettia Petals Bundle
#1

Is this gorgeous or what?! Now that I look at it, I guess I could have added some linen thread behind the poinsettia for more texture – that might have been very nice. What I DID add was Shimmery Crystal Effects to the berries. It adds a wonderful sheen in real life – not certain it shows in this photo though. I also add the same Shimmery Crystal Effects to the center of the flower on the envelope. Again, it doesn’t show but I did do it. So, steps, how to..

  • Thick Whisper White for the card base
  • Crumb Cake layer both inside and out
  • ‘Tis the Season 6×6 DSP – die cut with second largest Stitched Rectangles Dies
  • Whisper White for stamping/ die cutting the poinsettia, leaves & sentiment: Stamp everything using Tuxedo Black Memento ink. Color the Poinsettia layers with Crumb Cake Blends; color the leaves with Just Jade Blends, color the berries with Cherry CobblerBlends. Die cut all: 2 small leaves, 1 large leaf, 4 layers of poinsettia bracts and 3 berry clumps. Curl the poinsettia bracts and leaves with a bone folder.
  • Adhere the DSP layer to the Crumb Cake with liquid glue.
  • Adhere the poinsettia together with liquid glue. Adhere flower to the DSP/ Crumb Cake panel with liquid glue. Place leaves and adhere with liquid glue. Lastly add the berry clumps, again with liquid glue.
  • Cover the berries with Shimmery Crystal Effects and set aside to dry.
  • Stamp the sentiment from the Poinsettia Petals stamp set with Tuxedo Black Memento Ink and fussy cut. Place on Mini dimensionals and adhear to the card.
  • If the Crumb Cake/ DSP panel with the poinsettia/ berries is now dry, put dimensionals on the back and adhere to the card base.
  • Add a single Beaded Pearl to the poinsettia center then add Pearl Basic Jewels for the final touch completing the card front.

The inside…

Poinsettia Petals, inside
#2

  • Stamp the sentiment from the Poinsettia Petals stamp set in TuxedoĀ 
    Black Memento InkĀ on a panel of Whisper White
  • With a leaf stamp from Poinsettia Petals stamp set, stamp off twice with Just Jade ink and stamp in center of the sentiment.
  • Adhere theĀ Whisper White panel to the Crumb Cake panel with liquid glue then add this to the inside of the card.

Envelope…

Poinsettia Petals Bundle
#3

  • Cover the envelope flap with a strip of the ‘Tis the Season 6×6 DSP (I used the same pattern). Add a strip of Crumb Cake cs to complete the flap. Trim.
  • On the front, stamp the poinsettia from the Poinsettia Petals stamp set in Tuxedo Black Memento Ink.
  • Color with Blends: Crumb Cake for the bracts, Cherry Cobbler for the center. TIP: be sure to slip a piece of scrap card stock inside the envelope when coloring the poinsettia – otherwise it will bleed through to the back of the envelope – and that’s a no-no.
  • Cot the center of the flower with the Shimmery Crystal Effects and let dry.

Poinsettia Petals Bundle
#4

Whee! This gorgeous card is ready to sending to someone special in December! Card cuts are listed at the bottom of this post.


p style=”text-align: center;”>Thanks for stopping by.

May you have a beautiful day.

Make someone happy by sending them a handmade card filled with love.

Card stock cuts for today’s project…

  • Thick Whisper White 8 1/2 x 5 1/2 scored at 4 1/4
  • Crumb Cake 3 3/4 x 5 (2)
  • Whisper White 3 5/8 x 4 3/4 (inside) probably 5 1/2 x 8 1/2 for die cuts
  • ‘Tis the Season 6×6 DSP cut with Stitched Rectangles Dies OR… 4 5/8 x 3 3/8


SU! Birthday Triple Cube Pop Up Fun Fold

Hellooooo 😁 It’s F-A-L-L, officially… and today’s card is sort of fall and definitely a birthday card. It was, I confess, my first attempt at making this fun fold, and I’m generally pretty pleased with it. We learn from mistakes, hopefully, and I should make another real soon as to remember what I would do differently… Here ’tis…

Triple Box Fun Fold
#1

The gorgeous Gilded Autumn Specialty DSP is the highlight of this card – and the background to it is the Brushed Metallic card stock in copper and the card base is Cinnamon Cider. I used the Ornate Frames Dies to frame the sentiment and Fancy Phrases stamp set for the sentiment. I added the Gilded Gems on the sentiment label.

Ornate Frames Dies, Gilded Gems
#2

The Butterfly Gala Bundle (stamp set/ butterfly punch) were used for the butterflies (3 of them) and several Blends for coloring: Lt Purple Posy, Lt Bermuda Bay and Lt Mango Melody. To add as bit of glam on the butterflies, I added Champagne Rhinestone Basic Jewels. I also used gold metallic trim for the butterfly antennae – this is from the Forever Greenery Trim Combo Pack.

For the “inside” decorations I used the Forever Gold Laser-Cut Specialty DSP and the Boho Indigo Dies for the vases.

Triple Fun Fold, inside
#3

On another of the ‘inside panels” I created a banner/ tag using the Fancy Phrases Bundle (stamp set and Fancy Tag Topper Punch).

Fun Fold, inside
#4

Fancy Tag Topper Punch
#5

The tag was stamped in Tuxedo Black Memento ink, then the flowers colored with Calypso Coral and Just Jade Blends. Champagne Rhinestone Basic Jewels were centered on the two flowers. Basketweave & Metallic Ribbon Combo Pack – copper metallic for the trim + Forever Greenery Ribbon Combo Pack using the Vanilla. I did trim the width to allow it to slip inside the prepared sleeve.

Here are photos in general preparation of this FUN FOLD… card cuts will be. listed at the end of this post.

Triple Box Fun Fold
#6

Triple Box Fun Fold
#7


tabs for holding the sentiment
#8

This is great picture of the tabs to hold the sentiment… each is about 1/2″ width x 2″ in length then folded in half. Adhere tear n tape to each side. Adhere the folded side to the fold of the lower ‘boxes’, centering. Remove tear n tape and carefully apply sentiment tag.

sentiment added to tabs
#9


Triple Box Fun Fold
#10

What a fun project… I suggest/ highly recommend doing a You Tube search before beginning this project. That will be very helpful – and there are several out there. Find what works best for you.

Thanks for stopping by.

May you have a beautiful day.

Make someone happy by sending them a handmade card filled with love.

The above card was made for our daughters birthday and given to her yesterday. She’s a sweetheart – and of course we are not prejudiced at all. šŸ˜

Shop with me? Below are the products used for today’s card.

Current Host Code from now through Sep 30 GNH9MVXK

Earn a SU! item worth $10 when your order is over $50

(one free item per month please/ thank you!

<div><div><div id=”0a60eb34-89c3-4b03-8256-27c9ee4261f7″>https://mystampinblog.com/Showcase/Details/294f4087-cb28-464e-9dd3-d2000942d8f7?layout=Tiled&showSku=True&showPrice=True&showSalePrice=True&showAddToCart=False&showAddAllToCart=True&showDownload=True&transparent=True&bordered=True&hFontHeight=14&rFontHeight=13&imageHeight=120&middleContent=False</div>https://mystampinblog.com/Script/ShowcaseDetailsScript</div></div>


Card Cuts for today’s project:

  • Cinnamon Cider : 5 1/2 x 11 1/2 (main cube) scored at 2 3/4, 5 1/2, 8 1/4 and 11; (side cubes) 2 3/4 x 11 1/2 scored at 2 3/4, 5 1/2, 8 1/4 and 11 – cutĀ  & prepare 2
  • Card stock mats (I used Brushed Metallic) 2 1/2 square (6)
  • DSP: 2 1/4 square (6) I used Gilded Autumn SDSP
  • DSP for inside coverings: 2 1/2 square (6) I used Gilded Autumn SDSP
  • Card stock for tabs, 1/2 x 2 (2)
  • Card stock for sentiment banner – depends on what banner/ sentiment chosen
  • addition… sleeve for tag – 2 5/8 x 5 1/4; tag – 2 x 5