Star Special kicking off the new Jul-Dec 2022 Mini Catalog
With the start of this new catalog I am beginning a DOUBLE STAR REWARDS program ~ YAY! This begins today and goes through Thursday Jul 7!
Here’s how my STAR REWARDS work for now:
For each $50 that you order from my online store (before shipping & taxes) and when you add my current Host Code, you will earn 2 STAR Rewards. Orders of $49.99 or below DO NOT earn any rewards.
Example $50 = 2 STAR Rewards, $100 = 4 STAR Rewards, $150 = 6 STAR Rewards etc.
When you have earned 8 STAR Rewards you will get a FREE product order valued up to $40.00, your choice, and mailed directly to you!
You also earn my monthly Online Class Tutorial of exclusive projects.
For any order $50 or more you will also receive 1 free gift from me valued up to $10.
And remember too, during this time of Sale-a-bration, for every $50 order from any catalog, you’l earn free Sale-a-bration goodies from Stampin’ Up!
Remember to use MY current HOST CODE: YM6ZTUJE Click here to go my store.
HAPPY SHOPPING!!
Here are photos of some of my recent projects from the Jul-Dec 2022 Mini Catalog.
It’s that time of week for the Happy Inkin’ Thursday Blog Hop. You may have come from the fun creation of Tara Carpenter or just hopped in right here. Whatever the case… welcome!
Perched In A Tree.1
Our challenge is a color one: Black & White + color of choice. I chose Balmy Blue, which you can see in the background between the trees. Snow gets a fun tinge to it when it’s falling at dusk :O) The challenge is below.
Back to my card… I die cut the Basic White front panel with the Aspen Trees Dies. It coordinates with Perched In A Tree stamp set and comes as a bundle (which means 10% off!). Remember, this bundle is available Jul 1 – which is Friday – woohoo!!! OK, card… I keep getting distracted. I used a Blending Brush to shade the aspens and Basic Gray ink. I love the look it gave. I set that aside and took another panel of Basic White and stamped the ‘snowflakes’ in Balmy Blue. I stamped the sweet bird in Memento ink and colored it with Watercolor Pencils in Balmy Blue and Early Espresso. I used a Blender Pen to smooth the pencil lines. I die cut the bird with the Aspen Trees Dies and adhered it with liquid glue. I did move it around a bit before I found the right spot, cuz wanted him peeking out of the trees. The Aspen die cut got lots of dimensionals & was adhered to the snow-stamped panel. That was added to the Thick Basic White card base. I stamped the sentiment in Basic Gray ink – love, love the font! – and fussy cut it. I used Stasmpin’ Seal on the back and wrapped a length of the Simply Elegant Trim in Silver on the back, then added dimensionals and placed it on the front. Final touch – a bit of glam with three Adhesive-Backed Seasonal Sequins in white.
Perched In A Tree, inside
For the inside… Using a Blending Brush I added Balmy Blue all around the edges of the Basic White panel, then stamped the sentiment from Perched In A Tree stamp set in Basic Gray ink. This was added to the inside of the card.
Perched In A Tree.3
For the envelope, more Balmy Blue ‘snowflakes’ to the flap and the wonderful Aspen branch stamped in Basic Gray to the front. I really, really like this. And yes, I took some liberties and substituted Basic Gray for the Black for the challenge. :O) Now – it’s time to get on with the hop! Use the ‘next button to move on to Amy Koenders or… click on a name to go to their blog. Enjoy the hop!
All this week I’m sharing cards made with products from the Jul-Dec 2022 Mini Catalog. I hope you like the inspiration. Products to make this card are from the Jul-Dec 2022 Mini Catalog and Sale-a-bration Catalog and can’t be shown below. They CAN be ordered Jul 1!!! If you do not have a demonstrator and need those catalogs or an Annual Catalog please reach out to me (the 2022-2023 AC) – happy to send one to you. When ordering, please also use current host code:H7EUAMXD. I offer my customers a free item from Stampin’ Up! item valued to $10 with your order of $50 and above. Click here to go my store. When the order is over $150, you still receive that free gift from me, but SU! has Stampin’ Rewards that may be used for additional products, so don’t use the host code at that time. If you have questions just let me know. If you would like to be able to order products early from catalogs AND enjoy that 20% discount, join my team now… you may do that here. WooHoo! We have lots of fun and are a creative bunch that encourages & supports one another. Would love to have you. :O)
So what else??? Oh yes… some great opportunities for BOGO Kits Collection and Last Chance Products. Read on about those.
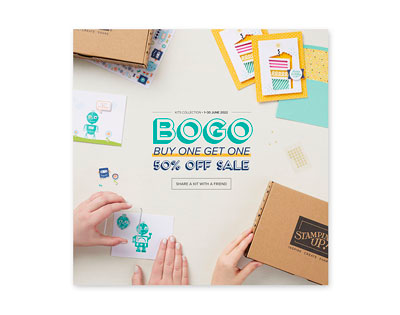
Share a Kit with a Friend with the Kits Collection BOGO 50% Off Promotion
Get ready—the Kits Collection is having a buy one, get one 50% off promotion. This is the perfect time to #ShareYourMoment and share a kit from the Kits Collection with a friend! As always, the kit selection is based on availability. You can see what’s available in the Kits Collection selection here.
Ordering info:
Sale runs through 1–30 June 2022. All kits in the Kits Collection by Stampin’ Up! qualify for this sale. Kit selection is based on availability. You will need at least two kits in your cart for the discount to automatically apply at checkout. There are no order limits on this promotion. On the customer store, the discount will automatically apply to the most expensive kit in your cart.
The January–June 2022 Mini Catalog will be retiring soon! It’s always bittersweet to see a classic Stampin’ Up! catalog take a trip to retirement. But, we’re looking forward to all the new products on their way—and we hope you are, too!
Thanks for stopping by. May you have a beautiful day.
Make someone happy sending them a handmade card filled with love.
Hi everyone… I didn’t post yesterday, silly me. But I had a REALLY good read of the most recent National Geographic magazine AND worked outside. But… here’s a promised card done in Parakeet Party – one of the new In Colors. It may seem a bit bright, but I have to say, I really, really like it. :O)
C’mas Banners Bundle.1
The card base as you can see, is Parakeet Party with a die cut in the same color die cut with Candy Canes Dies and adhered to the card base with liquid glue. The next is a grouping created on the 2022-2024 In Color 6×6 DSP (Sweet Sorbet). Layers attached to the DSP are die cuts in Garden Green card stock,Lovely Layers Vellum, Soft Suede, and the berries are die cut from 2022-2024 In Color 6×6 Glimmer Paper, Sweet Sorbet. The holly is stamped in both Garden Green ink & Parakeet Party ink on Basic White. The sentiment banner is stamped in Sweet Sorbet ink with the words in Garden Green ink. This was die cut with the Christmas Banner Dies and is on dimensionals. The fabulous die cut background is a die from the Candy Canes Dies, cut from Parakeet Party card stock and adhered with liquid glue to the same color card base. Isn’t that die wonderful? The Parakeet Party is a non-traditional color for Christmas, but I really like how it all ties together. Hubby is a conservative man and I wasn’t sure what he would think either, but he liked it a lot! The last touch for the card front was three Adhesive-Backed Seasonal Sequins in white.
C’mas Banners Bundle, inside
For the inside… the pine frond stamp from the Christmas Banners stamp set, first in Parakeet Party, then in Garden Green on the basic white panel.
C’mas Banners Bundle.3
As you can see, the envelope got the same treatment: pine frond from the C’mas Banners stamp set, stamped first in Parakeet Party ink, then in Garden Green ink. What do you think of the colors? It’s hard to tell the Sweet Sorbet is not Real Red! And I have to say, I like the contrasts of color.
All this week I’m sharing cards made with products from the Jul-Dec 2022 Mini Catalog. I hope you like the inspiration. Products to make this card are from the Jul-Dec 2022 Mini Catalog and Sale-a-bration Catalog and can’t be shown below. They CAN be ordered Jul 1!!! If you do not have a demonstrator and need those catalogs or an Annual Catalog please reach out to me (the 2022-2023 AC) – happy to send one to you. When ordering, please also use current host code:H7EUAMXD. I offer my customers a free item from Stampin’ Up! item valued to $10 with your order of $50 and above. Click here to go my store. When the order is over $150, you still receive that free gift from me, but SU! has Stampin’ Rewards that may be used for additional products, so don’t use the host code at that time. If you have questions just let me know. If you would like to be able to order products early from catalogs AND enjoy that 20% discount, join my team now… you may do that here. WooHoo! We have lots of fun and are a creative bunch that encourages & supports one another. Would love to have you. :O)
Sweetest Christmas Suite… 159579 includes the Christmas Banners Bundle, Sweet Candy Canes Bundle, Adhesive-Backed Seasonal Sequins and more! The items I used for this card, I listed. :O)
So what else??? Oh yes… some great opportunities for BOGO Kits Collection and Last Chance Products. Read on about those.
Share a Kit with a Friend with the Kits Collection BOGO 50% Off Promotion
Get ready—the Kits Collection is having a buy one, get one 50% off promotion. This is the perfect time to #ShareYourMoment and share a kit from the Kits Collection with a friend! As always, the kit selection is based on availability. You can see what’s available in the Kits Collection selection here.
Ordering info:
Sale runs through 1–30 June 2022. All kits in the Kits Collection by Stampin’ Up! qualify for this sale. Kit selection is based on availability. You will need at least two kits in your cart for the discount to automatically apply at checkout. There are no order limits on this promotion. On the customer store, the discount will automatically apply to the most expensive kit in your cart.
The January–June 2022 Mini Catalog will be retiring soon! It’s always bittersweet to see a classic Stampin’ Up! catalog take a trip to retirement. But, we’re looking forward to all the new products on their way—and we hope you are, too!
Thanks for stopping by. May you have a beautiful day.
Make someone happy sending them a handmade card filled with love.
Good Saturday morning! It’s a goin’ to be a hot one today. I’ll need to get outdoor chores done ASAP, but I do want to share this card with you first. It’s yesterday’s card in different colors – monochromatic if you will, and I like it even better.
Decorated w/ Happiness #2.1
The card base is Smoky Slate, inks for pine boughs & sentiment are also Smoky Slate; Silver Foil for the bell, pine boughs and stars; Shaded Spruce for the small boughs & Cherry Cobbler for the ‘smoosh’ behind the bell; and Whisper White for the snowflakes. And – you can see the Jingle Bell Trinket – I love the added touch and it doesn’t bother me that it contrasts with the foil.
Decorated w/ Happiness #2, inside
The inside I did just a bit differently from yesterdays card – by adding the pine bough. Inks are Smoky Slate, Cherry Cobbler & Shaded Spruce stamped on a Basic White panel.
Decorated w/ Happiness #2.3
The envelope is very similar to yesterday’s card – just using Shaded Spruce and Cherry Cobbler. And here are the photos for yesterday’s card…
Decorated w/ Happiness
Decorated w/ Happiness
Products to make this card are from the Jul-Dec 2022 Mini Catalog and Sale-a-bration Catalog and can’t be shown below. They CAN be ordered Jul 1!!! If you do not have a demonstrator and need those catalogs or an Annual Catalog please reach out to me (the 2022-2023 AC) – happy to send one to you. When ordering, please also use current host code:H7EUAMXD. I offer my customers a free item from Stampin’ Up! item valued to $10 with your order of $50 and above. Click here to go my store. When the order is over $150, you still receive that free gift from me, but SU! has Stampin’ Rewards that may be used for additional products, so don’t use the host code at that time. If you have questions just let me know. If you would like to be able to order products early from catalogs AND enjoy that 20% discount, join my team now… you may do that here. WooHoo! We have lots of fun and are a creative bunch that encourages & supports one another. Would love to have you. :O)
Decorated with Happiness Bundle… 159711
Jingle Bell Trinkets… 159980
So what else??? Oh yes… some great opportunities for BOGO Kits Collection and Last Chance Products. Read on about those.
Share a Kit with a Friend with the Kits Collection BOGO 50% Off Promotion
Get ready—the Kits Collection is having a buy one, get one 50% off promotion. This is the perfect time to #ShareYourMoment and share a kit from the Kits Collection with a friend! As always, the kit selection is based on availability. You can see what’s available in the Kits Collection selection here.
Ordering info:
Sale runs through 1–30 June 2022. All kits in the Kits Collection by Stampin’ Up! qualify for this sale. Kit selection is based on availability. You will need at least two kits in your cart for the discount to automatically apply at checkout. There are no order limits on this promotion. On the customer store, the discount will automatically apply to the most expensive kit in your cart.
The January–June 2022 Mini Catalog will be retiring soon! It’s always bittersweet to see a classic Stampin’ Up! catalog take a trip to retirement. But, we’re looking forward to all the new products on their way—and we hope you are, too!
Thanks for stopping by. May you have a beautiful day.
Make someone happy sending them a handmade card filled with love.
Happy Friday! We have had some stunning weather here on the East Coast… and we have taken advantage! I hope you are able to ‘get out & enjoy’ in your area of the country :O) My card for today is… guess what… a Christmas card! Whoweee! The stamp bundle comes from the upcoming, soon to be order-able Jul-Dec 2022 Mini Catalog. I was inspired by a card on page 27, just changed up a bit.
Decorated w/ Happiness.1
The card base is Garden Green and I’ve used Garden Green ink to stamp the pine branches in a couple of different directions. They don’t show much as the are nearly covered with the die cut pine branches from the Decorated Pine Dies from Gold Foil. (cut 2 and add to card front with dabs of liquid glue) I then stamped the ‘snow’ in Whisper White ink all over the card. Truthfully, this stamp was too busy for me – I much prefer the snowflake stamp in the Decorated with Happiness stamp set! So use that if you decide to CASE this card. Next step was to die cut the Basic White banner using the Painted Label Dies. I die cut three small pine fronds in Garden Green card stock, adhered them w/ liquid glue to the banner, stamped the ‘smoosh’ in Real Red ink as a background to the bell. Die cut the bell and several gold stars using more of the dies in this bundle. Adhere the bell with liquid glue over the ‘smoosh’, then the very cute Jingle Bell Trinket with a glue dot.. Put dimensionals on the back of the banner and add to the card front. Adhere stars with dabs of liquid glue – and the card front is done!
Decorated w/ Happiness, inside
For the inside… stamp the sentiment from Decorated with Happiness in Garden Green ink on the Basic White panel, then add the darling ornament stamp in Real Red ink – also from the same stamp set; adhere to the inside of the card :O)
Decorated with Happiness.3
The envelope is just wonderful – at least I think so. The same pine fronds from Decorated w/ Happiness stamp set were stamped on the envelope front & flap. I stamped the same ornament from inside the card in Real Red ink to bring the card & envelope together. L-o-v-e!
Products to make this card are from the Jul-Dec 2022 Mini Catalog and Sale-a-bration Catalog and can’t be shown below. They CAN be ordered Jul 1!!! If you do not have a demonstrator and need those catalogs or an Annual Catalog please reach out to me (the 2022-2023 AC) – happy to send one to you. When ordering, please also use current host code:H7EUAMXD. I offer my customers a free item from Stampin’ Up! item valued to $10 with your order of $50 and above. Click here to go my store. When the order is over $150, you still receive that free gift from me, but SU! has Stampin’ Rewards that may be used for additional products, so don’t use the host code at that time. If you have questions just let me know. If you would like to be able to order products early from catalogs AND enjoy that 20% discount, join my team now… you may do that here. WooHoo! We have lots of fun and are a creative bunch that encourages & supports one another. Would love to have you. :O)
Decorated with Happiness Bundle… 159711
Jingle Bell Trinkets… 159980
So what else??? Oh yes… some great opportunities for BOGO Kits Collection and Last Chance Products. Read on about those.
Share a Kit with a Friend with the Kits Collection BOGO 50% Off Promotion
Get ready—the Kits Collection is having a buy one, get one 50% off promotion. This is the perfect time to #ShareYourMoment and share a kit from the Kits Collection with a friend! As always, the kit selection is based on availability. You can see what’s available in the Kits Collection selection here.
Ordering info:
Sale runs through 1–30 June 2022. All kits in the Kits Collection by Stampin’ Up! qualify for this sale. Kit selection is based on availability. You will need at least two kits in your cart for the discount to automatically apply at checkout. There are no order limits on this promotion. On the customer store, the discount will automatically apply to the most expensive kit in your cart.
The January–June 2022 Mini Catalog will be retiring soon! It’s always bittersweet to see a classic Stampin’ Up! catalog take a trip to retirement. But, we’re looking forward to all the new products on their way—and we hope you are, too!
Thanks for stopping by. May you have a beautiful day.
Make someone happy sending them a handmade card filled with love.
Hello Friday! Christmas must be on my mind this week… Yesterday’s blog hop was a Christmas Fun Fold, today is a very cute (well two) treat bag. Our out of town daughter came last weekend bringing her family and a couple of fun ‘gifties’. The laser-cut wooden stars were one of the treats and not a Stampin’ Up! product. As I was trying to decide what to do with them, she said she would like to use them in a window or on a tree… or something. Here’s what I did.
Sale-a-bration Treat Bags.1
Sale-a-bration Treat Bags.2
The paper is from – what else – the Sale-a-bration Catalog and is a FREE Item with a $50 purchase. You can get your hands. on this paper Jul 3!!! It’s called Silver & Gold 6×6 DSP. This is obviously the gold. And I’ve used ribbon from the Jul-Dec Mini Catalog: Real Red & Garden Green 3/8″ Ribbon Combo Pack. It’s part of a Suite of products called the Sweetest Christmas Suite on pages 9-11. Behind each star is a glimmer paper: Real Red & White 6×6 Glimmer Paper – also part of the Sweetest Christmas Suite. The Glimmer paper was die cut with Layering Circles Dies and added to a Basic White piece cut with Layering Circles Dies, but with a scallop. I slipped a White Baker’s Twine through the star, tied a knot and when tying the Real Red or Garden Green Ribbon, I slipped it in between to hold it in place.
Here’s how to do the treat bag.
6×6 piece of card stock or DSP, scored at the top: 1 3/8, 2 3/4, 4 1/8 & 5 1/2
Turn paper to right to score for the bottom: 1 3/8
Trim as shown in photo
Sale-a-bration Treat Bags.3
Add Tear n Tape to narrow strip ~ see photo
Burnish score lines with fingers, fold in half along middle score line and seal after removing Tear n Tape covering.
Fold in bottom pieces and seal with Tear n Tape or adhesive of choice.
Pinch top together; tie ribbon around the top. This can just slip off to get to the treats inside :O)
Fun, right? The fun part about making a treat bag like this, is that it can be decorated to fit the occasion: hearts, banners stamped & layered ~ the possibilities are endless. It’s up to you. Would love to see your creations, so please share.
Products to make this card are from the Jul-Dec Mini Catalog and Sale-a-bration Catalog and can’t be listed below. If you do not have a demonstrator and need those or an Annual Catalog please reach out to me (the 2022-2023 AC) – happy to send one to you. When ordering, please also use current host code:H7EUAMXD. I offer my customers a free item from Stampin’ Up! item valued to $10 with your order of $50 and above. Click here to go my store. When the order is over $150, you still receive that free gift from me, but SU! has Stampin’ Rewards that may be used for additional products, so don’t use the host code at that time. If you have questions just let me know. If you would like to be able to order products early from catalogs AND enjoy that 20% discount, join my team now… you may do that here. WooHoo! We have lots of fun and are a creative bunch that encourages & supports one another. Would love to have you. :O)
So what else??? Oh yes… some great opportunities for BOGO Kits Collection and Last Chance Products. Read on about those.
Share a Kit with a Friend with the Kits Collection BOGO 50% Off Promotion
Get ready—the Kits Collection is having a buy one, get one 50% off promotion. This is the perfect time to #ShareYourMoment and share a kit from the Kits Collection with a friend! As always, the kit selection is based on availability. You can see what’s available in the Kits Collection selection here.
Ordering info:
Sale runs through 1–30 June 2022. All kits in the Kits Collection by Stampin’ Up! qualify for this sale. Kit selection is based on availability. You will need at least two kits in your cart for the discount to automatically apply at checkout. There are no order limits on this promotion. On the customer store, the discount will automatically apply to the most expensive kit in your cart.
The January–June 2022 Mini Catalog will be retiring soon! It’s always bittersweet to see a classic Stampin’ Up! catalog take a trip to retirement. But, we’re looking forward to all the new products on their way—and we hope you are, too!
Thanks for stopping by. May you have a beautiful day.
Make someone happy sending them a handmade card filled with love.
Welcome to the Happy Inkin’ Thursday Blog Hop! You may have come over from visiting the creative Tara Carpenter – didn’t she have something fun? OR… you may be just ‘hopping’ in :O). Whatever the case, may you enjoy the creations you see today.
Our challenge this week is ‘Critters’ and we can interpret that any way we like. I chose Caroling Mice, which is a new HOST stamp set in the July – December Mini Catalog. You should have received yours from me by now… if not and you don’t have a demonstrator, let me know!
And here’s my card. Hubby & I are in a choir and this just seemed too fun to pass up – and a Christmas card already!
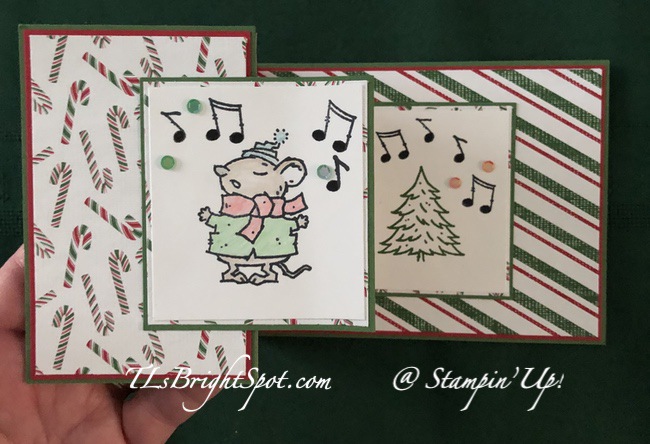
Caroling Mice Z-Fold.1
The larger Z-fold card base is Garden Green, scored and with Real Red card stock added to the two end panels. The middle panel is Real Red Glimmer Paper, part of the Real Red & White 6×6 Glimmer Paper pack. The DSP adhered to the two end panels is Sweetest Christmas 12 x 12 cut to size. Card cuts are at the end of this post.
The smaller z-fold is a card base of Garden Green again, but this time I used the Sweetest Christmas 12 x 12 DSP for base layers on all three panels then a stamped panel of Basic White. Of course the stamped panels are from the Caroling Mice stamp set, stamped in Memento ink for the mouse and Garden Green ink for the tree. I colored the mouse with Watercolor Pencils and used the Blender Pen to smooth the pencil lines. :O) The music notes are stamped in Memento ink & colored with the Basic Black Marker. I added Adhesive-Backed Seasonal Sequins in both Sweet Sorbet & Garden Green to enhance those stamped panels.
To adhere the two Z-folds together, I centered the smaller Z-Fold (closed) on the largest of the large Z-fold and adhered it in place. I closed the larger Z-Fold card and adhered the smaller Z-Fold to the front panel with liquid glue just on the left portion of the smaller Z-fold. Voila! done… When the card is closed, the smaller Z-fold totally covers itself :O) See photo 1
Caroling Mice Z-Fold.2
Caroling Mice Z-Fold.3
I turned the card over and adhered another Real Red panel to the largest of the sections on the back. I stamped the three Caroling Mice in Memento ink, then VersaMark ink, then sprinkled it with Clear Embossing Powder and heat set with the Heat Tool. I ran it through the Stitched With Whimsy Dies to give it a fun border, then colored the singing mice with Watercolor Pencils and the Blender Pen. I stamped the sentiment in Memento ink using the Sweet Candy Cane stamp set from the same July-December Mini Catalog. I adhered this completed Basic White panel to the back of the card and my first Christmas Card of the 2022 season is done!!! Who would have guessed… here it is only Jun 16!!!
Caroling Mice Z-Fold.4
Fun card, right? The Z-fold is so easy… The main trick is centering the first panel, then the other goes on easily… bing, bang, boom.
Products to make this card are listed below. If you do not have a demonstrator and need an Annual Catalog please reach out to me (the 2022-2023 AC) – happy to send one to you. When ordering, please also use current host code:H7EUAMXD. I offer my customers a free item from Stampin’ Up! item valued to $10 with your order of $50 and above. Click here to go my store. When the order is over $150, you still receive that free gift from me, but SU! has Stampin’ Rewards that may be used for additional products, so don’t use the host code at that time. If you have questions just let me know. If you would like to be able to order products early from catalogs AND enjoy that 20% discount, join my team now… you may do that here. WooHoo! We have lots of fun and are a creative bunch that encourages & supports one another. Would love to have you. :O)
Please visit the others on the hop by using the ‘next’ or ‘previous’ buttons. You may also choose a name & click on that to take you to their post. Have fun Hopping! Now visit the fabulous Amy Koenders.
So what else??? Oh yes… some great opportunities for BOGO Kits Collection and Last Chance Products. Read on about those.
Share a Kit with a Friend with the Kits Collection BOGO 50% Off Promotion
Get ready—the Kits Collection is having a buy one, get one 50% off promotion. This is the perfect time to #ShareYourMoment and share a kit from the Kits Collection with a friend! As always, the kit selection is based on availability. You can see what’s available in the Kits Collection selection here.
Order info…
Sale runs through 1–30 June 2022. All kits in the Kits Collection by Stampin’ Up! qualify for this sale. Kit selection is based on availability. You will need at least two kits in your cart for the discount to automatically apply at checkout. There are no order limits on this promotion. On the customer store, the discount will automatically apply to the most expensive kit in your cart.
The January–June 2022 Mini Catalog will be retiring soon! It’s always bittersweet to see a classic Stampin’ Up! catalog take a trip to retirement. But, we’re looking forward to all the new products on their way—and we hope you are too!
Larger Z-Fold
Card base – Garden Green: 4 1/4 x 11 scored at 2 3/4, 5 1/2
Real Red panels: 2 5/8 x 4 1/8; 4 1/8 x 5 3/8
Sweet Candy Cane DSP: 2 1/2 x 4; 4 x 5 1/4
Smaller Z-Fold
Card Base – Garden Green: 3 x 8 1/4 scored at 2 3/4, 5 1/2
Hi again – DO HOPE you have taken the opportunity to purchase stamp sets during today’s 24 hr STAMP SALE! If not, get on it 😏
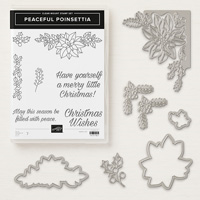
Today’s card is another using the Poinsettia Petals Bundle – I just love this set… so FUN to create using different colors, either on the bloom (bract) itself or the background. I’ve done both today…
Poinsettia Petals Bundle #1
Is this gorgeous or what?! Now that I look at it, I guess I could have added some linen thread behind the poinsettia for more texture – that might have been very nice. What I DID add was Shimmery Crystal Effects to the berries. It adds a wonderful sheen in real life – not certain it shows in this photo though. I also add the same Shimmery Crystal Effects to the center of the flower on the envelope. Again, it doesn’t show but I did do it. So, steps, how to..
Thick Whisper Whitefor the card base
Crumb Cakelayer both inside and out
‘Tis the Season 6×6 DSP – die cut with second largest Stitched Rectangles Dies
Whisper Whitefor stamping/ die cutting the poinsettia, leaves & sentiment: Stamp everything using Tuxedo Black Memento ink. Color the Poinsettia layers with Crumb Cake Blends; color the leaves with Just Jade Blends, color the berries with Cherry CobblerBlends. Die cut all: 2 small leaves, 1 large leaf, 4 layers of poinsettia bracts and 3 berry clumps. Curl the poinsettia bracts and leaves with a bone folder.
Adhere the DSP layer to the Crumb Cake with liquid glue.
Adhere the poinsettia together with liquid glue. Adhere flower to the DSP/ Crumb Cake panel with liquid glue. Place leaves and adhere with liquid glue. Lastly add the berry clumps, again with liquid glue.
Cover the berries with Shimmery Crystal Effectsand set aside to dry.
Stamp the sentiment from the Poinsettia Petals stamp set with Tuxedo Black Memento Inkand fussy cut. Place on Mini dimensionals and adhear to the card.
If the Crumb Cake/ DSP panel with the poinsettia/ berries is now dry, put dimensionals on the back and adhere to the card base.
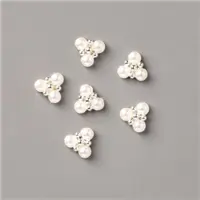
Add a single Beaded Pearl to the poinsettia center then add Pearl Basic Jewelsfor the final touch completing the card front.
The inside…
Poinsettia Petals, inside #2
Stamp the sentiment from the Poinsettia Petals stamp setin Tuxedo Black Memento Ink on a panel of Whisper White
With a leaf stamp from Poinsettia Petals stamp set, stamp off twice with Just Jade ink and stamp in center of the sentiment.
Adhere the Whisper White panel to the Crumb Cake panel with liquid glue then add this to the inside of the card.
Envelope…
Poinsettia Petals Bundle #3
Cover the envelope flap with a strip of the ‘Tis the Season 6×6 DSP (I used the same pattern). Add a strip of Crumb Cake cs to complete the flap. Trim.
On the front, stamp the poinsettia from the Poinsettia Petals stamp setin Tuxedo Black Memento Ink.
Color with Blends: Crumb Cakefor the bracts, Cherry Cobbler for the center. TIP: be sure to slip a piece of scrap card stock inside the envelope when coloring the poinsettia – otherwise it will bleed through to the back of the envelope – and that’s a no-no.
Cot the center of the flower with the Shimmery Crystal Effects and let dry.
Poinsettia Petals Bundle #4
Whee! This gorgeous card is ready to sending to someone special in December! Card cuts are listed at the bottom of this post.
Hi Everyone – it’s Saturday! It’s amazing what cool weather can do…this is that in-between season, before the leaves turn and fall – cool temps, absolutely perfect for sleeping, not quite cool enough for a fire in the fireplace though. We live in a ‘shore community’ and have lots of folks visit due to the many beaches. By now though, the beaches are OURS again….😁
Today I want to share a couple of team projects we created virtually ‘together’ last Sunday. We had been sent pictures and dimensions and instructions via email, but then created them via ZOOM. What a great tool ZOOM has become! Anyhoo – these are fun projects and primarily use the Celebration Tidings Bundle. The stamp set has stamps for Halloween, Thanksgiving, Christmas AND Valentines! Here are three of the projects…
Celebration Tidings Bundle and Poinsettia Petals
Isn’t this beautiful? Yep – the bag is empty – I had no candy to fill it, but the Celebrations Labels Dies create the ‘fold-over’ and background for the Poinsettia Dies. Plaid Tidings 6×6 DSP was used for the ‘label’, Shaded Spruce for the leaves, a bit of Brushed Metallic for the berries, Cherry Cobbler for the poinsettia and the gorgeous Beaded Pearls to accent the center of the poinsettia. . The cello bag pictured here is a retired commodity (unfortunately)n but SU! has Mosaic Gusseted Cello Bags that are very versatile.
celebrations Tidings Bundle Project #2
Project #2 is a Christmas card… Celebration Tidings Bundle, Stitched Rectangles Dies and Winter Snow Embossing Folder were the primary SU! items used. Another pattern from Plaid Tidings 6×6 DSP was a major focus and I love how the Celebration Dieswere used for a fold-over flap for a surprise addition. It was my personal addition of the Linen Thread bow and Red Rhinestone Basic Jewels for the card front. Let me share inside the flap and the card inside as well.
Celebration Tidings Bundle, inside flap
It was my decision to add the Plaid Tidings 6×6 DSP to the top inside of the die cut. And here’s my reasoning… When using the Blends to color, the stamping element, their is some bleeding through and I didn’t like the way that looked. I simply used the smallest die to cut a piece of DSP to cover the bleeding through. It makes it look more complete and professional to me. Now for the inside…
Celebration Tidings C’mas card inside Project #2
I chose to do no coloring for the inside – I liked the simplicity, and no additional sentiment needed – lots of room for sharing a friendly update!
Project #3 is a fall card, again using the Plaid Tidings 6×6 DSP and the Celebration Tidings Bundle.
Celebration Tidings Bundle, Fall Project #3
Celebration Tidings Bundle, Fall Project #3
Another gorgeous project! Plaid Tidings 6×6 DSP takes center stage again, but the stamped Celebration Dieholds its own for sure. Colors here are Cinnamon Cider, Blackberry Bliss, Crumb Cake and Very Vanilla card stocks. Blendsused for coloring are Pumpkin Pie, Shaded Spruce. Markers used are Early Espresso and Bumblebee.
Thanks for letting me share our team projects! They are beautiful and it’s fun to gather, even if virtually, to encourage and learn from one another. Want to be able to do this? Join my team!
SU! has a promotion going on for new recruits that is a win-win for everyone… for $99 you will get a starter kit worth of products valued at $125 – plus two card sets with instructions & an additional stamp set & Rhinestones. What’s not to like about that? Join my team- and yes, do it NOW so you get all the benefits of this awesome deal. More details below.
.
In addition to the regular starter kit (for $99 USD/$135 CAD, new recruits choose $125 USD/$165 CAD-worth of products) new recruit will also receive enough card stock pieces to make 16 cards, a pack of Rhinestone Basic Jewels, the So Much Love stamp set, and the Queen Anne’s Lace stamp set—all for their first event.
8 packs of precut card stock of the coastal cabana pack will be provided, and 8 packs of precut card stock of the Granny Apple Green pack, for a total of 16 cards (packs include envelopes). The new recruit can choose what samples to replicate and how to distribute the packs to their customers.
Important note: Ink, adhesive, cutting tool, and clear block for stamping must be purchased separately. However, these products may be included as part of the Starter Kit product selection.
Thanks for stopping by.
May you have a beautiful day.
Make someone happy by sending them a handmade card filled with love.
Helllooooo. It’s Monday, the start of a new week. What’s your plan – who are you reaching out to? My card today is guess what – a CHRISTMAS CARD! Yep – I’m back to making them and a fun fold is always a bit exciting – and creating a Z-Fold is – just – easy. Let’s take a look…
Fun look, right? I’ve used a few stamp sets on this card to get the sentiments or images I wanted. I love these ornaments and they were so fun to color. But I’m getting ahead of myself… Choose a DSP that will add color to the background but not compete with your main image. Here I chose Snowflake Splendor DSP and adhered it to the card front (that card stock is Pacific Point 4 1/4 x 11 and scored at 5 1/2). With the Celebration Labels Dies, cut one in Whisper White for your stamping and the next size larger for a nice background. You are actually cutting through the card front and the DSP and card stock layers. AND – big tip here, listen carefully – you are cutting from the back side of the card front . The reason for this is to have the plain side behind your main image and to have a decorated side when you open the card. It makes the larger die cut stand out more as well.
Stamp the ornaments from the Ornamental Envelopes stamp set, only using the four ornaments shown. In other words using sticky notes, tape off that section on the stamp you do not want in your image prior to inking, ink the appropriate area in Tuxedo Black Memento ink – then remove the sticky notes and stamp on the die cut Whisper White. Stamp the sentiment using the Itty Bitty Greetings stamp set in Granny Apple Green. Now color the ornaments – I used: Poppy Parade, Granny Apple Green, Daffodil Delight and Shaded Spruce Stampin Blends. Put dimensionals on the back and adhere to the solid color side of the larger die cut.
For the Z-Fold: cut a strip from Whisper White 2 1/2 x 10 and score at 4 & 8. Burnish these score lines well so they make a wonderful Z. This creates ‘panels that are 4″, 4″ and 1 1/2″. The smallest panel is the end that will attach to the Celebration Dies and the opposite end will adhere to the inside of the card. With the 4″ end and the score line against the score line of the card, adhere the two together with liquid glue, centering it from top to bottom. Look at this photo again for reference… Now it is time to adhere the die cuts for the front. With the card closed and the 1 1/2 strip facing you, place the die cut panel right into it’s place and adhere with liquid glue. Voila – the Z-Fold is created! Now you are ready to create the inside.
Z-Fold, Celebration Labels
#1For the inside, cut 2 panels of Seaside Spray cs 2 3/8 x 3 7/8; then cut two panels of Whisper White cs 2 1/4 x 3 3/4. Stamp your Whisper White panels. I used Yuletide Pasture stamp set ‘cuz these animals remind me of those in the stable with baby Jesus. 🙂 I stamped them in Soft Suede ink and then used the smallest of the Water Painters to ‘bleed’ the color. The collar of the sheep was colored with Poppy Parade, the bells with Daffodil Delight and the leaves with Granny Apple Green – all Stampin’ Blends. The sentiment on the sheep panel was from the Itty Bitty Greetings stamp setand stamped in Granny Apple Green ink. The bull got fun ornaments hung from his horns using the Little Treats stamp set and colored with Poppy Parade, Granny Apple Green and the Daffodil Delight Stampin Blends.
Now these Whisper White panels are colored, adhere them to the Seaside Spray panels with liquid glue, then adhere to the inside of the card on the strips. This picture will help you. I apologize it’s in the wrong direction! Should have fixed that… 😦
Z-Fold inside card #3
Now flip the card over and do something for the back – – I cut a panel of Whisper White 4 x 5 1/4, stamped the sentiment from the Little Treats stamp setin Granny Apple Green inkand adhered to the card with liquid glue. And your card is complete!!! Such fun. Love doing this.
Z-Fold, back #5
Z-Fold #4
Thanks for stopping by today.
May you have a beautiful day.
Make someone happy by sending them a handmade card filled with love.