Stampin’ Up!n LAST DAY for Stamp & Die Bundle Sale + Bonus Days

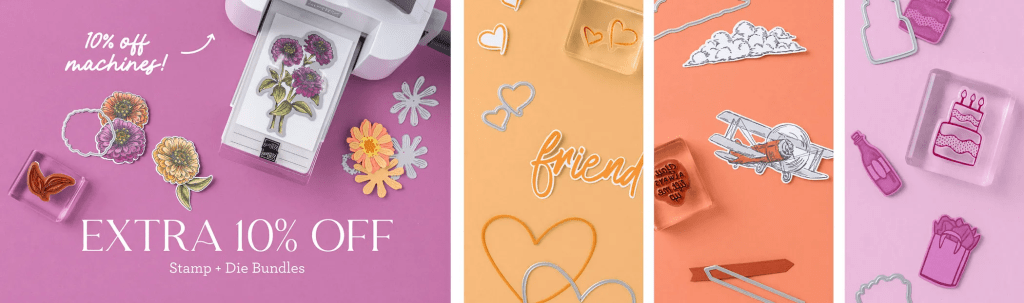
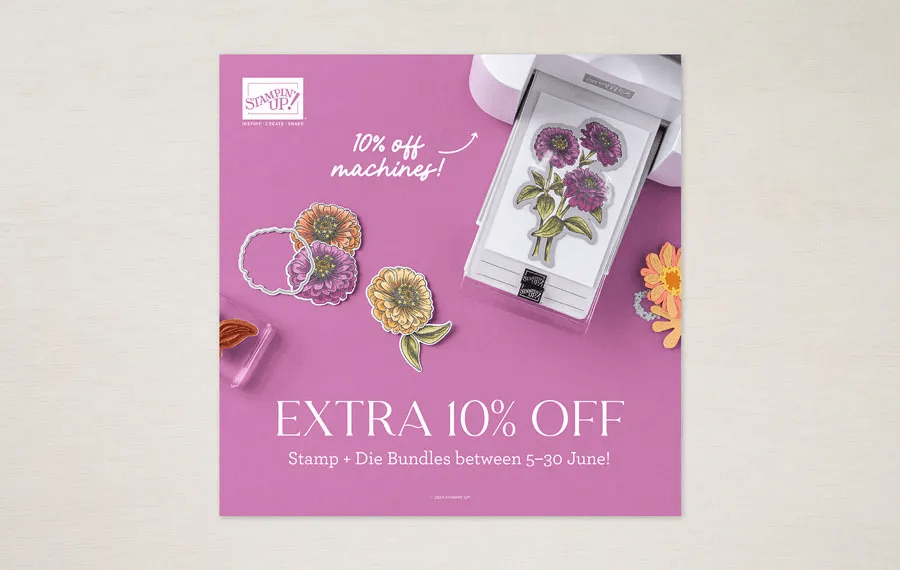
Stamp & Die bundles have been an additional 10% off during this month of June – and today – Jun 30 is the VERY LAST DAY for this promotion. So… if there is a bundle you want/ need/ desire – order it today – right here. Make sure my name is at the top of the page so you know you are ordering from me. :O)

Along with the bundle sale is the 10% off machine sale – the Stampin’ Up! cut & emboss machine in the regular size and the mini machine as well. I certainly took advantage of this offer as I have had my regular size machine for a ‘bit’ (that’s a long time!) and it was getting a little quirky. With the 10% off, it was a super deal!!! Plus my demonstrator discount too :O) Remember – today – Jun 30 is the LAST DAY FOR THIS SALE. Place your order.

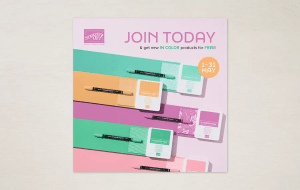
Sometimes in the Stampin’ Up! world there are back to back bargains and fun things happening. Bonus days is one of those bargains – and it begins Wednesday Jul 3. See details below.

PROMOTION DETAILS

Earning Period: 3–31 July 2024
Ordering Deadlines
Phone: 31 July 2024 at 6:59 p.m. (MT) 
Online: 31 July 2024 at 11:59 p.m. (MT) 

  • Earn a $5 USD | $6 CAD coupon for every $50 USD | $60 CAD spent (before shipping and tax). 
  • All coupon codes will be emailed right after a qualifying purchase has been made. Customers must have a customer account with a valid email address to earn coupons when they shop.
  • If a participant earns multiple codes from a single order, they will receive one email with multiple codes. If they earn multiple codes from multiple orders, they will receive separate emails for each code earned.
  • All order types qualify for this promotion. Phone and email orders still require an email address.
  • Orders started before the promotion begins will not count toward earning coupon codes. For example, if you add items to your cart before 3 July and wait to purchase until that date or later, then those items will not qualify towards earning coupons. You must add items to your cart and complete your purchase during the earning period. 
  • There is no limit to the number of coupon codes participants can earn per order or throughout the duration of the earning period. 
  • Coupon codes can only be earned on commissionable items. Non-commissionable items (such as catalogs) do not count towards coupon earnings. 
  • Customers must use a valid email address during checkout in order to receive their coupon code. If a customer places an order over the phone, they must still provide a valid email address to receive their coupon code.
  • Starter Kit orders are excluded from this offer. All other order types qualify.
  • For workshop orders, each customer who reaches a qualifying amount will receive a coupon code to their provided email address. 

Redemption Period: 1–31 August 2024
Ordering Deadlines
Phone: 30 August 2024 at 6:59 p.m. (MT) 
Online: 31 August 2024 at 11:59 p.m. (MT)

  • There is no limit to the number of coupon codes participants can redeem on an order during the redemption period. If using multiple codes, they must be separated by a space. 
  • Coupon codes may be redeemed one time only. They cannot be redeemed after the 31 August. 
  • Coupon codes may be redeemed for any product (excluding Starter Kits and demonstrator supply items). They cannot be used on exchanges.
  • Bonus Days coupon codes can be applied to month-to-month Paper Pumpkin subscriptions and new prepaid subscriptions.
  • Coupon codes will reduce the commissionable amount of an order.

Stampin’ Up! Special Slider Card for the Happy Inkin’ Thursday Blog Hop

Welcome to Thursday and this fun hop… … I made a slider card – something I have not done before. It’s easy enough, I just haven’t done it. We have a color challenge today and I’ve chosen Petal Pink, Pool Party and Smoky Slate. Hope you like…

Stampin' Up! Happy Inkin' Thursday Blog Hop
Stampin' Up! Blog hop color challenge
Stampin' Up! Slider card w/ Country Flowers Bundle& Wildflowers Designs Dies

The Country Flowers bundle has become a favorite. I didn’t think it would, but the coloring is fun and it relaxes me. AND… besides being a bundle and always 10% off when purchased as a bundle, it is on sale at an additional 10% off through end of June (June 30). What’s not to like about that?! I also used the dies of another bundle – Wildflower Designs Dies, but as a bundle, it is also on sale at the additional 10% off.

My first step to create this card was to stamp the images of the flower and container from the Country Flowers stamp set and color them with Stampin ‘ Blends: Petal Pink, Flirty Flamingo, Lemon Lolly, Granny Apple Green, Old Olive, Smoky Slate and Basic Black. I die cut the images with coordinating Country Flowers Dies and set them aside to create the card itself.

My next step was to cut the card stock and DSP pieces:

  • Pool Party – 8 1/2 x 5 1/2 scored at 4 & 8 on the long side; 3/4 x 3 1/4; 3 1/2 x 2 (slider)
  • DSP – Country Woods was my choice for this card – 3 3/4 x 5 1/4, adhered to the card front between the 4 & 8 score lines
  • Basic White – 3 3/4 x 5 14 (for the inside slide); 3 1/2 x 2 1/4 (slider) 2 1/2 x 4 (flowers & container)

Use the Wildflower Designs Dies to die cut the slider sections for flowers & container, adhere the two layers together. Place the flowers & container together adding adhesive just at the base of the flowers, so they are now one piece. Position them for ‘placement purposes’ on the two slider pieces to know where to stamp the sentiment. The sentiment is from Country Flowers stamp set and stamped in Memento ink. Now add dimensionals on the back of the flowers & container only where they will adhere to the slider & attach. Set aside.

For the card base… adhere the DSP (Country Woods DSP) in the area between the 4 & 8 score lines. Burnish all score lines. On the 1/2″ end add tear n’ tape. Now place the small scored end into the paper trimmer to 1 1/2″, cut from the 1″ mark to the 4 1/2″ mark on your paper trimmer. This will be cutting through both the card stock and the DSP. Take the 3/4 x 3 1/4 strip and add a dimensional to one end and slipit into the slit all the way to the bottom of the slit. Turn card over and add tear n’ tape to the back side of the 3/4 x 3 14″ strip – see photo titled … “from inside.1”. Remove cover on tear n’ tape and add Basic White panel so it is even at the top and adhere to that tear n’ tape. It will be rather floppy at this point as it is only attached at the tear n’ tape.

Stampin' Up! Slider card w/ Country Woods DSP
Slider card front
Stampin' Up! Slider card inside
Slider card from inside.1
Stampin' Up! Slider card inside, 2
Slider card from inside.2

Remove Tear n’ tape cover on the 1/2″ side, fold to inside and close back of card over the strip.

Use a 1 3/4″ circle punch to punch only the card front, not the Basic White piece that will slide. Add a length of ribbon – Petal Pink and White Diagonal Trim Combo Pack – and hold in place with a glue dot – staple it to secure. Pull panel up and stamp sentiment – again from Country Flowers stamp set in Memento ink.

Slider card closed and punched
Slider card decorated

Add the decorated piece to the single dimensional for the card front – and done! You will notice that I added another strip of the Pool Party to the inside of my card… I made a booboo and needed to cover it :O)

Inside card slides easily up & down :O). For the envelope, I kept it really simple – covered the flap in more of the Country Woods DSP and trimmed to fit. One & done.

Stampin' Up! Slider card & envelope with Country Flowers bundle

Such a fun card to make… and super easy. Now, don’t forget a couple of things… stamp & die bundles are still on sale through Jun 30. See my link below. Second thing is – check out what everyone has created for today’s hop by following the links below – the ‘next’ button or click on a name. Happy hopping.

Amy Koenders

Mary Deatherage

Karen Finkle

Akiko Sudano

Karen Ksenzakovic

Tara Carpenter

Terry Lynn Bright

Carol Buckalew

Nel Thames

here’s a link to take you directly to the items available in this catalog –

and to shop with me.

STAMPIN’ UP! STAMP & DIE BUNDLE 10% OFF SALE!!

Sales Period: 5–30 June 2024
Ordering Deadlines
Phone: 28 June 2024 at 6:59 p.m. (MT)  
Online: 30 June 2024 at 11:59 p.m. (MT)

Get an additional 10% discount on stamp and die bundles only (that’s a total of 20% discount on stamp and die bundles!). This excludes suite collections, stamp and punch bundles, bundles not yet released to customers, and any other bundles*.

Save 10% on Stampin’ Cut & Emboss Machine and Mini Stampin’ Cut & Emboss Machine (white and Boho Blue). 

The 10% discount applies automatically to stamp and die bundles in all orders… including Starter Kit orders.

See and shop all qualifying bundles in the online store. or click here.

Please note Close to My Heart products are not included in this promotion.

Stampin’ Up! Demonstrators get the SAME discounts and sales that CUSTOMERS do – on TOP OF their demonstrator discount

Keeping that information in the forefront of your mind,

NOW is a perfect time to JOIN THE TEAM!

Join with me by following this link...

To view all the available ONLINE EXCLUSIVES, click here.

Clearance items may be found here

While you’re looking around in my store, remember there are some stunning kits available, for all ages and all seasons – even Christmas! And while you’re shopping, I offer fringe benefits to my customers: free tutorial of the month and a FREE Stampin’ Up! item valued to $10 – all for a $50 order, before shipping and taxes. Use my current host code to receive those benefits – especially when your order does not exceed $150. Make certain my name is listed as your demonstrator when checking out! :O)

HOST CODE  BAQG9RSE

Thanks for stopping by. May you have a beautiful day. Make someone happy when sending them a handmade card filled with love.

Stampin’ Up! Country Birdhouse for Amy’s Inkin’ Krew Blog Hop Group

Welcome! It is the 2nd Tuesday of the month and time for Amy’s Inkin’ Krew Blog Hop. I hope you enjoy the creations you see today. The theme is ‘celebrate summer’ and we can interpret that any way that inspires. I think you may see a lot of different ideas here today. I have chosen to work with the Country Woods Designer Series Paper and the Country Birdhouse bundle to prepare today’s card.

Stampin' Up! AIK Blog Hop Group
Stampin' Up! Country birdhouse card front

This card uses two particular bundles: Country Birdhouse and it’s coordinating dies and Nested Friends and it’s coordinating dies. Nested Friends is now an ONLINE EXCLUSIVE set, while Country Birdhouse is in the new 2024-2025 Annual Catalog. I began by making the birdhouse portion first then the rest of the card followed.

Directions:

  • Fold a piece of the Country Woods DSP (8 1/2 x 11 to 4 1/4 x 11)
  • Lay the birdhouse die (from Country Birdhouse Dies) along the fold line with one side of the roofline extending beyond the cutting line until it is OVER the fold – meaning it will NOT cut along the fold. (You can place either side of the roof beyond the fold). Die cut. You now have a birdhouse that opens & closes along one side of the roof. :O) YAY!
  • Die cut the hole opening using the appropriate die
  • Die cut the additional roof decorations from Country Woods DSP – noting the direction of the grain (this happens to be the Misty Moonlight color in the pack)
  • Die cut the bottom panel on the birdhouse – adhere all pieces. There is one die cut from Basic White and I layered it over the other two, where they are adhered together.
  • See that little small circle piece below the opening – that is supposed to indicate a landing spot for the birds!
  • Stamp the bird on the front in Memento ink and color with Watercolor Pencils: Real Red, Early Espresso, Basic Gray
    • These are house finches – the male has the red head and a bit of red down the front breast. Intermixed is some gray & brown.
    • I used short strokes, not covering the entire bird at once, to make it look more like feathers.
    • I colored the eye with a Basic Black Marker using the fine tip end
    • I clipped the beak down the center of it, cut a short length of Linen Thread, took the fibers apart and ‘encouraged’ them into the cut of the beak. I turned this item over and added a dot of liquid glue to secure the thread in place. I put dimensional on the bird and added it to the birdhouse front. The male finch is helping it’s partner build a nest – it’s what they do!
  • To create the opposite facing bird is called ‘reverse stamping’.
    • Using Memento ink, ink the stamp and stamp a Window Sheet, then turn the window sheet over and place it on a Basic White scrap. Rub over the window sheet without it moving, then lift window sheet. A bird stamped in reverse has been created!
    • Color it with Watercolor Pencils: mostly Early Espresso, Basic Gray, just a bit of real Red and some Crushed Curry. Keep going over this until satisfied with the result. This is a female finch!
Stampin' Up! Step 1 Reverse Stamping
Step 1: stamp window sheet
Stampin' Up! Step 2, turn window sheet over onto card stock, ink side down
Step 2: turn window sheet over, ink side on card stock
Stampin' Up! Reverse stamping - bird

First of all, more photos should have been taken! What you are seeing is the female finch bird already die cut & adhered in place. :O(

I used the Nested Friends stamp set for the nest, inked with Early espresso ink then used a sponge dauber to add a bit of Copper Clay in places, then stamped it directly to the inside of the birdhouse. I adhered the female finch inplace with liquid glue. I diec ut another piece of Country Woods DSP for the bottom strip on the birdhouse inside.

The card base is Early Espresso, 4 1/4 x 11 scored at 5 1/2. Adhered to that is a Country Woods panel 4 1/4 x 5 1/2 that I ran through the Timber 3D embossing folder. I stamped this wonderful branch in Early espresso ink using the Nested Friends stamp set, then die cut it with Nested Friends Dies. I adhered the tree branch in place with mini stampin’ dimensionals. I took a length of Linen Thread and put it over the branch and adhered it in place with Seal+. I adhered the birdhouse over that with liquid glue – to make it appear as though the birdhouse was hanging from the tree branch.

With the card front complete, I worked on the inside of the card.

Stampin' Up! Country Birdhouse card w/ Nested Friends

I began by stamping the branch from Nested Friends in Early Espresso ink on the Basic White panel. Using the Country Birdhouse stamps, I stamped the bird on the left in Memento ink, then stamped the bird on the right using the Reverse Stamping method. I colored the leaves with Stampin’ Blends: Granny Apple Green. I stamped the sentiment from Country Birdhouse in Early espresso ink. With the stamping complete, I adhered this to a slightly larger Misty Moonlight, then to the inside of the card.

Stampin' Up! Country Birdhouse card & envelope

For the envelope, I used more of the Country Woods DSP to add to the flap, trim to fit. I stamped the bird on the right side using the reverse stamping technique as mentioned above.

Now … time to see what the others on the team have created. click the previous button or the next button… or click on a name. Remember to also read more info below on how to purchase these products from me.

  1. Tara Carpenter
  2. Karen Ksenzakovic
  3. Mary Deatherage
  4. Ann Louise Fodgaard
  5. Karen Finkle
  6. Terry Lynn Bright
  7. Carol Buckalew
  8. Christie King
  9. Amy Koenders
Stampin' Up! 10% off Stamp & Die Bundles

here’s a link to take you directly to the items available in this catalog –

and to shop with me.

STAMPIN’ UP! STAMP & DIE BUNDLE 10% OFF SALE!!

Sales Period: 5–30 June 2024
Ordering Deadlines
Phone: 28 June 2024 at 6:59 p.m. (MT)  
Online: 30 June 2024 at 11:59 p.m. (MT)

Get an additional 10% discount on stamp and die bundles only (that’s a total of 20% discount on stamp and die bundles!). This excludes suite collections, stamp and punch bundles, bundles not yet released to customers, and any other bundles*.

Save 10% on Stampin’ Cut & Emboss Machine and Mini Stampin’ Cut & Emboss Machine (white and Boho Blue). 

The 10% discount applies automatically to stamp and die bundles in all orders… including Starter Kit orders.

See and shop all qualifying bundles in the online store.

Please note Close to My Heart products are not included in this promotion.

Stampin' Up! 10% off machine sale

Stampin’ Up! Demonstrators get the SAME discounts and sales that CUSTOMERS do – on TOP OF their demonstrator discount

Keeping that information in the forefront of your mind,

NOW is a perfect time to JOIN THE TEAM!

Join with me by following this link...

To view all the available ONLINE EXCLUSIVES, click here.

Clearance items may be found here

While you’re looking around in my store, remember there are some stunning kits available, for all ages and all seasons – even Christmas! And while you’re shopping, I offer fringe benefits to my customers: free tutorial of the month and a FREE Stampin’ Up! item valued to $10 – all for a $50 order, before shipping and taxes. Use my current host code to receive those benefits – especially when your order does not exceed $150. Make certain my name is listed as your demonstrator when checking out! :O)

HOST CODE  BAQG9RSE

Thanks for stopping by. May you have a beautiful day. Make someone happy when sending them a handmade card filled with love.

Stampin’ Up! Thoughtful Journey Gatefold

Welcome to JUNE! I can’t believe it is the 6th month of the year already… time marches on. :O) The Thoughtful Journey 6×6 DSP has lots of watercolor type images of streams, landscapes with flowers, grasses, etc, and is perfect for cutting apart and piecing back together again. A traditional gatefold uses panels on each ‘gate’, while this uses panels attached to each ‘gate’. Let’s look…

Stampin' Up! Thoughtful Journey Gatefold card front
Stampin' Up! Thoughtful Journey Gatefold, 2

In the two photos at left, you can see how the panels are attached to each side of the card front – or gates – and it allows the card to be opened easily. Here are some simple instructions for re-creating this type of gatefold.

  • The card base is 4 1/4 x 11 scored at 2 3/4 on the long side. You can score again @ 8 1/4 but I prefer to close the scored left side and fold the left side to meet it and burnish well with my bone folder. This guarantees no gap or possible overlapping if you have not been particular about scoring.
  • Layers for the front: cut and adhere together
    • Misty Moonlight: cut 2, 1 3/4 x 5
    • Basic White:: cut 2, 1 5/8 x 4 7/8
    • DSP: cut 2, 1 1/2 x 4 3/4 (in this case Thoughtful Journey 6×6)
      • I stamped my DSP at this point: butterflies on the top are from Sketched Butterflies stamp set, stamped with Pumpkin Pie ink; sentiment on the bottom panel is also from Sketched Butterflies stamp set and is stamped in Misty Moonlight ink.
  • Close left ‘gate’ of card base and adhere top completed layer to the ‘gate’ only, leaving equal distance at top & left at score line
  • Now do the same on the right side. Notice that when the card is closed there are equal distances between the top & bottom panels as well.
Stampin' Up! Sketched Butterflies, card inside

For the inside:

  • Misty Moonlight 4 x 5 1/4 is adhered to the inside of the card
  • On Basic White 3 7/8 x 5 1/8, stamp the butterfly image in the center with Pumpkin Pie ink. This is from Sketched Butterflies stamp set. Add color to specific areas with Stampin’ Blends Peach Peach Pie and Misty Moonlight.
  • I added some doodles around the body of the butterfly with my Basic Black Marker.
  • Stamp the sentiment from Sketched Butterflies stamp set in Misty Moonlight ink; adhere panel to the inside of the card

To complete the card front, I added three Adhesive-Backed Textured Dots.

Stampin' Up! Thoughtful Journey Gatefold card & envelope

For the envelope, I added another panel of Thoughtful Journey 6×6 DSP to the flap and trimmed to fit. I then stamped the butterflies from Sketched Butterflies stamp set in Pumpkin Pie ink on the envelope front. And done!

Interestingly, there is no die cutting on this card! It’s just stamps, ink, paper and an easy fun fold. There are so many ways to make this gatefold different.

Stampin’ Up! has a new offer beginning June 5 – 30, 10% off any Stamp & Die set bundle AND 10% off the Mini Die Cut & Emboss machine as well as the standard size Die Cut & Emboss machine. I encourage you to make your list and take advantage of this generous offering.

Click here to see all SU! bundles available in the Stampin’ Up! 2024-2025 Annual Catalog.

And remember, bundles in the ONLINE EXCLUSIVE SU! store are also part of this offering – click here to see those

Thanks for stopping by. May you have a beautiful day!

Stampin’ Up! Big Sale Coming June 5

Oh my goodness – excitement is in the air – Stampin’ Up! is hosting a 10% off sale of all stamp & die bundles – and that includes the 10% off when purchasing bundles, so an additional 10%! WooHoo… AND 10% off die cut and embossing machines, both the mini and the regular size. Keep reading for more info…

Sales Period: 5–30 June 2024
Ordering Deadlines
Phone: 28 June 2024 at 6:59 p.m. (MT)  
Online: 30 June 2024 at 11:59 p.m. (MT) 

  • Get an additional 10% discount on stamp and die bundles only (that’s a total of 20% discount on stamp and die bundles!). This excludes suite collections, stamp and punch bundles, bundles not yet released to customers, and any other bundles*.
  • Save 10% on Stampin’ Cut & Emboss Machine and Mini Stampin’ Cut & Emboss Machine (white and Boho Blue). 
  • The 10% discount applies automatically to stamp and die bundles in all orders… including Starter Kit orders.
  • See and shop all qualifying bundles in the online store.

*Please note Close to My Heart products are not included in this promotion.

Stampin' Up! 10% off bundles & machines

And here’s the thing… with the joining promotion – you should know

Stampin’ Up! Demonstrators get the SAME discounts and sales that CUSTOMERS do – on TOP OF their demonstrator discount

Keeping that information in the forefront of your mind,

NOW is a perfect time to JOIN THE TEAM!

The 2024-2026 In Color Starter Kit promotion ends on 31 May and here’s the information about that…

Stampin' Up! Joining Promotion

To join is $99 and what comes with joining, besides your 15-20% discount on every order… FOUR FREE IN COLOR PRODUCTS valued to $82 plus your choice of $125 worth of products. Those FREE items – the IN COLOR products – Classic stampin’ pad bundle – 5 of them, package of 8 1/2 x 11 cardstock – 5 of those, 6×6 Designer Series Paper – 5 colors in the pack, and the coordinating Stampin’ Write markers. That’s $82 worth of products – for FREE if you join between now and May 31. You will also receive free shipping on these products + free business supplies. What’s not to like about this joining special!

Join with me by following this link...

To view all the available ONLINE EXCLUSIVES, click here.

Clearance items may be found here

The 24-25 Annual Catalog is now live… here’s a link to take you directly to the items available in this catalog – Happy shopping!

While you’re looking around in my store, remember there are some stunning kits available, for all ages and all seasons – even Christmas! And while you’re shopping, I offer fringe benefits to my customers: free tutorial of the month and a FREE Stampin’ Up! item valued to $10 – all for a $50 order, before shipping and taxes. Use my current host code to receive those benefits – especially when your order does not exceed $150. Make certain my name is listed as your demonstrator when checking out! :O)

HOST CODE  BAQG9RSE

Thanks for stopping by. May you have a beautiful day. Make someone happy when sending them a handmade card filled with love.

Stampin’ Up! Trusty Tools for a Graduation Card

Happy Mother’s Day all you readers… You may remember last weekend I attended a convention, a one of my fellow ‘conventioners’ asked for a special graduation card as the graduate is going into auto mechanics. I pulled out Trusty Tools to see what I could do. I also used a couple of other stamp sets.

Stampin' Up! Trusty Tools graduation card

This doesn’t look much like a graduation card, does it? At least not on the front. Here’s what I did though… I pulled out Boho Blue for the card base (school colors are blue and something else, the woman couldn’t remember) … and stamped the front with what looks like parts welded together, stamped in Smoky Slate. It comes from the new & fabulous Adventurous Sky stamp set. Next I die cut this center panel that looks like a peg board from new Textured Metallic Specialty 12×12 Paper. The color is Tungsten. From the Trusty Tools stamp set and coordinating dies, I pulled out items that I thought an auto mechanic would typically use – wrenches bolts, nuts and an oil can. I stamped in Memento ink the adjustable wrench, the other items I simply die cut. The oil can is from Silver Foil Sheets and cut twice, the other being Blueberry Bushel. I trimmed off the blue oil can top and adhered the blue bottom to the silver oil can – for contrast. I put this on dimensionals and added it to the peg board. The one wrench – the non adjustable one – is adhered directly with liquid glue, the adjustable one is on dimensionals. The screw & bolts are attached with glue as well. I added the peg board to the card front with mini dimensionals.

Stampin' Up! Trusty Tools, card inside

I began the inside by cutting the toolbox bottom from Country Woods DSP. I adhered the base to the Basic White inside panel then attached the leftover hole centers from the peg board to the holes created by the toolbox bottom die cut. (Clever me!!) Using another piece of the Textured Metallic Specialty Paper in Tungsten, I die cut the handle and added it as well. Then it was – now what??? I pulled out Cap & Gown stamp set and stamped the cap in Memento ink & ‘Class of’ in Blueberry Bushel. I stamped the sentiment on the toolbox using the Trusty Toolbox stamp – again in Blueberry Bushel ink. The numbers (Boho Blue ink) & stars (Blueberry Bushel ink) come from Alphabest stamp set, a retired one. The gold hearts are from it’s coordinating dies.

Stampin' Up! Trusty Tools graduation, card back

Since there was noway to send a written greeting on the inside of the card, I added another piece of Basic White to the back of the card. On it is the sentiment stamped in Blueberry Bushel from the Cap & Gown stamp set.

Stampin' Up! Trusty Tools gradiation card & envelope

For the envelope, I did a simple stamp of the cap in Blueberry Bushel and the diploma in Memento black ink – both from the Cap & Gown stamp set.

The 24-25 Annual Catalog is now live… here’s a link to take you directly to the items available in this catalog. The Trusty Tools bundle is in the encore section. The Adventurous Sky bundle is in the Suites section. The cap & Gown stamp set can be found in the ONLINE EXCLUSIVES. Happy shopping!

Stampin’ Up! has a fabulous joining opportunity from May 1-31.

Stampin' Up! Joining Promotion

To join is $99 and what comes with joining, besides your 15-20% discount on every order… FOUR FREE IN COLOR PRODUCTS valued to $82 plus your choice of $125 worth of products. Those FREE items – the IN COLOR products – Classic stampin’ pad bundle – 5 of them, package of 8 1/2 x 11 cardstock – 5 of those, 6×6 Designer Series Paper – 5 colors in the pack, and the coordinating Stampin’ Write markers. You will also receive free shipping on these products + free business supplies. What’s not to like about this joining special – remember it begins May 1! Join with me by following this link...

To view all the available ONLINE EXCLUSIVES, click here.

Clearance items may be found here

While you’re looking around in my store, remember there are some stunning kits available, for all ages and all seasons – even Christmas! And while you’re shopping, I offer fringe benefits to my customers: free tutorial of the month and a FREE Stampin’ Up! item valued to $10 – all for a $50 order, before shipping and taxes. Use my current host code to receive those benefits – especially when your order does not exceed $150.

HOST CODE 4JF6ZWC9

Thanks for stopping by. May you have a beautiful day. Make someone happy when sending them a handmade card filled with love.

Stampin’ Up! Mediterranean Blooms DSP for the Happy Inkin’ Thursday Blog Hop

Welcome to our weekly Happy Inkin’ Thursday Blog Hop. We have a sketch challenge this week and I used some new Mediterranean Blooms 12×12 DSP to show it off and the Cheerful Daisies Dies. Enjoy the hop as progress around to visit the other participants.

Stampin' Up! Happy Inkin' Thursday Blog Hop
Stampin' Up! Mediterranean Blooms DSP, sketch challenge card front

For this DSP I paired Night of Navy for the card base and added a layer of Boho Blue card stock before adding the patterned paper. I used the Nestedf Essential Dies to create the the daisy-patterned banner. Behind it is another banner – in Basic White but die cut with the Stitched Shapes banner die. I actually cut two, trimmed the length of each, added them to the back of the daisy-patterned banner with glue then attached both to the card front with dimensionals. I used the largest circle die from the Stitched Shapes Dies to cut the Basic White circle. I used my Blender Brush and Daffodil Delight ink to add a bit of color to the circle. I die cut the layers for the daisy using the Cheerful Daisies Dies and separated them with paper snips. I added the layer to the daisy with dots of liquid glue, then after removing the leaves from the die cut I slipped it behind the daisy, adhering it to the circle. I added trimmed down to fit dimensionals to the back of the daisy – including many of the petals and added it to the circle. OOPS – forgot a step – I used the Blending Brush to add Daffodil Delight ink to the daisy center. Of course, embellishments are necessary :O) and I added three Rainbow Adhesive-Backed Dots.

Stampin' Up! Mediterranean Blooms dSP, sketch challenge, card inside

For the inside, I wanted to play up the daisy, so added a background daffodil delight then the daisy, then added more color to that with the blending brush. I stamped the sentiment in Night of Navy ink with Citrus Blooms stamp set. This Basic White panel was added to a Boho Blue piece slightly larger, then to the inside of the card.

Stampin' Up! Mediterranean Blooms DSP card & envelope

For the envelope… more of the daisy-lie paper from Mediterranean Blooms DSP for the flap and trimmed to fit. On the front at the bottom left, I stamped this ‘block’ image in Night of Navy ink to bring the colors all together. This is a different kind of cxard for me – and I like the end result. Would love to know what you think as well.

Stampin' Up! Blog Hop 'next' button

Amy Koenders

Mary Deatherage

Jaimie Babarczy

Karen Finkle

Akiko Sudano

Karen Ksenzakovic

Terry Lynn Bright

Carol Buckalew

Nel Thames

The 24-25 Annual Catalog is now live… here’s a link to take you directly to the items available in this catalog. The Mediterranean Blooms DSP and Citrus Blooms bundle are the first in the Suites section. The Cheerful Daisies is in the Encore section and the Nested Essentials Dies & Stitched Shapes Dies can be found in the ONLINE EXCLUSIVES. Happy shopping!

Stampin’ Up! has a fabulous joining opportunity from May 1-31.

Stampin' Up! Joining Promotion

To join is $99 and what comes with joining, besides your 15-20% discount on every order… FOUR free IN COLOR PRODUCTS valued to $82 plus your choice of $125 worth of products. Those FREE items – the IN COLOR products – Classic stampin’ pad bundle – 5 of them, package of 8 1/2 x 11 cardstock – 5 of those, 6×6 Designer Series Paper – 5 colors in the pack, and the coordinating Stampin’ Write markers. You will also receive free shipping on these products + free business supplies. What’s not to like about this joining special – remember it begins May 1! Join with me by following this link...

To view all the available ONLINE EXCLUSIVES, click here.

Clearance items may be found here

While you’re looking around in my store, remember there are some stunning kits available, for all ages and all seasons – even Christmas! And while you’re shopping, I offer fringe benefits to my customers: free tutorial of the month and a FREE Stampin’ Up! item valued to $10 – all for a $50 order, before shipping and taxes. Use my current host code to receive those benefits – especially when your order does not exceed $150.

HOST CODE 4JF6ZWC9

Thanks for stopping by. May you have a beautiful day. Make someone happy when sending them a handmade card filled with love.

Stampin’ Up! 24-26 In Color Peach Pie & Unbounded Love

Good Sunday morning. I’ve been attending a convention the past couple of days asnd while I thought this post went out, it didn’t. :O( Those of you who ordered DSP/ Ribbon shares from me – may have received your package already – or will perhaps on Monday. My overnight order arrived Thursday noon just as I was leaving for convention – so U packed everything up – paper trimmer, boxes for mailing, scissors – all that, & off I went. Timing is everything! Got the packages mailed Friday afternoon. :O) Now – the reason you are on my blog today is to see a creation of some sort – and here it is…

Stampin' Up! 24-26 In Color Peach Pie & Unbounded Love card front

This is such pretty DSP – the 24-26 In Color 6×6 pack. Here’s what I did… I layered one of the Peach Pie designs on the Thick Basic White card front and adhered it in place. I cut the leaf piece 2 3/4 x 4 1/2, then layered it on Pumpkin Pie just slightly larger. I wrapped a length of the B ordered Ribbon in Peach Pie and tied a bow, securing it in place with a glue dot.I added another Peach Pie card stock layer cut larger yet, then added these to the card front. It created a nice layering effect. I pulled out this simple sentiment from the New Unbounded Love stamp set and stamped it in Peach Pie ink, then die cut it with the Unbounded Love Dies., added dimensionals to the back and put in place. Let me just add here, this Unbounded Love Bundle is a sentiment bundle and the stamps & dies are wonderful! There’s nothing like having more sentiments in your stash. As a final touch – a bit of bling with the 24-26 In Color Gems, in Peach Pie of course. Monochromatic card all the way :O)

Stampin' Up! 24-26 In Color Peach Pie, inside card

Using a scrap of the 24-26 In Color DSP 6×6 Peach Pie, I added the 1/2″ strip to the Basic White card panel (4 x 5 1/4) – and that was it.

Stampin' Up! 24-26 In Color Peach Pie and Unbounded Love bundle

For the envelope… another panel of the 24-26 In Color 6×6 Peach Pie was added to the envelope flap & trimmed to fit. Love this card showing off this particular pack of DSP!

The 24-25 Annual Catalog is now live… here’s a link to take you directly to the items available in this catalog.

Stampin’ Up! has a fabulous joining opportunity from May 1-31.

Stampin' Up! Joining Promotion

To join is $99 and what comes with joining, besides your 15-20% discount on every order… FOUR free IN COLOR PRODUCTS valued to $82 plus your choice of $125 worth of products. Those FREE items – the IN COLOR products – Classic stampin’ pad bundle – 5 of them, package of 8 1/2 x 11 cardstock – 5 of those, 6×6 Designer Series Paper – 5 colors in the pack, and the coordinating Stampin’ Write markers. You will also receive free shipping on these products + free business supplies. What’s not to like about this joining special – remember it begins May 1! Join with me by following this link...

To view all the available ONLINE EXCLUSIVES, click here.

Clearance items may be found here

While you’re looking around in my store, remember there are some stunning kits available, for all ages and all seasons – even Christmas! And while you’re shopping, I offer fringe benefits to my customers: free tutorial of the month and a FREE Stampin’ Up! item valued to $10 – all for a $50 order, before shipping and taxes. Use my current host code to receive those benefits – especially when your order does not exceed $150.

HOST CODE 4JF6ZWC9

Thanks for stopping by. May you have a beautiful day. Make someone happy when sending them a handmade card filled with love.

Stampin’ Up! Retiring DSP Thank You Cards

HelIo again – it is April 30 – the final day of two catalogs: the Jan-Apr 2024 catalog and the 2023-2024 Annual Catalog. decided to share one more card – or 3 – of the same layout, but in retiring papers… These cards use Forever Love 12×12 SDSP and Poetic Expressions DSP. + the Color & Contour bundle. Here they are…

Stampin' Up! Forever Love SDSP Thank you card front
Card 1 w/ Forever Love SDSP
Stampin' Up! Poetic Expressions DSP Thank You card front
Cards 3 & 2 w/ Poetic Expressions DSP

Card 1 uses Pretty Peacock card base and is layered with Forever Love SDSP and Gold Adhesive-Backed Glimmer Paper, Pretty Peacock Foil Gems and Gold ribbon. I used Stitched Shapes Dies to create the sentiment .

Card 2 uses Thick Basic White for the card base, a layer of Wild Wheat embossed with the Distressed Tile Embossing Folder, then the layers of Poetic Expressions DSP. This card uses the Textured Ribbon in Wild Wheat, the Color & Contour stamp set for the sentiment, die cut with the same Stitched Shapes Dies circle. This was embellished with the 24-26 In Color Shimmer Gems in pink.

Card 3 is so similar… the difference is Wild Wheat card base and embellishments of 23-25 In Color Dots in Wild Wheat. Everything else is the same as card 2.

Stampin' Up! Forever Love & Pretty Peacock thank you card, inside
Card 1, inside
Stampin' Up! Poetic Expressions Thank You Card, inside
Cards 2 & 3 same inside

The inside of the cards are similar as well… a flower stamped then stamped again with a filler stamp w/ second generation ink. On the Pretty Peacock card, I added a layer of the Forever Love SDSP before adhering the inner panel – and of course the flower is stamped with Pretty Peacock ink. The other two cards have no DSP layer for the inside, just the stamped panel in Wild Wheat and second generation ink for the flower ‘filler’.

Card 1, Pretty Peacock
Poetic Expressions DSP Thank You Card
Cards 3 & 2 w/ Poetic Expressions DSP

The envelopes… Pretty Peacock ink was used to stamp the flower on both the envelope flap and the envelope front. On the other two cards I adhered Poetic Expressions DSP to the flap & trimmed to fit and stampoed the flower image in Wild Wheat ink. Finis.

LAST CHANCE PRODUCTS MAY BE FOUND HERE

Clearance items may be found here

While you’re looking around in my store, remember there are some stunning kits available, for all ages and all seasons – even Christmas! And while you’re shopping, I offer fringe benefits to my customers: free tutorial of the month and a FREE Stampin’ Up! item valued to $10 – all for a $50 order, before shipping and taxes. Use my current host code to receive those benefits – especially when your order does not exceed $150.

HOST CODE 4JF6ZWC9

Tomorrow, May 1, the NEW 2024-2025 Annual Catalog goes LIVE – woohoo! Not only that, but during the month of May – so May 1 – 31, Stampin’ Up! is offering a joining special to become a demonstrator. Here are the details… To join is $99 and what comes with joining, besides your 15-20% discount on every order… FOUR free IN COLOR PRODUCTS valued to $82 plus your choice of $125 worth of products. Those FREE items – the IN COLOR products – Classic stampin’ pad bundle – 5 of them, package of 8 1/2 x 11 cardstock – 5 of those, 6×6 Designer Series Paper – 5 colors in the pack, and the coordinating Stampin’ Write markers. You will also receive free shipping on these products + free business supplies. What’s not to like about this joining special – remember it begins May 1! Join with me by following this link...

Stampin' Up! Joining Promo 1-31 May

The new 2024-2025 Annual Catalog goes live on May 1 as well. Here’s a photo of me receiving my catalog in Houston at the SU! convention.

Stampin' Up! 24-25 Annual Catalog & me - in Houston

I can’t publish any of the photos inside the catalog until May 1 – so stay tuned… What I CAN SAY is there are some awesome new products in the catalog that I’ve been playing with – and if you’ve been following me, you have seen several of them. Absolutely LOVING the new 2024-2025 In Colors!!! If you do not have a demonstrator, connect with me. That new catalog will be on it’s way to you lickety-split!

Thanks for stopping by. May you have a beautiful day. Make someone happy when sending them a handmade card filled with love.

Stampin’ Up! Diagonal Split Fun Fold Cards with Retiring DSP & Joining Special

Good morning! It’s Monday the 29th of April – and in two days the NEW 2024-2025 Annual Catalog goes LIVE – woohoo! Not only that, but during the month of May – so May 1 – 31, Stampin’ Up! is offering a joining special to become a demonstrator. Here are the details… To join is $99 and what comes with joining, besides your 15-20% discount on every order… FOUR free IN COLOR PRODUCTS valued to $82 plus your choice of $125 worth of products. Those FREE items – the IN COLOR products – Classic stampin’ pad bundle – 5 of them, package of 8 1/2 x 11 cardstock – 5 of those, 6×6 Designer Series Paper – 5 colors in the pack, and the coordinating Stampin’ Write markers. You will also receive free shipping on these products + free business supplies. What’s not to like about this joining special – remember it begins May 1! Join with me by following this link...

Stampin' Up! Joining Promo 1-31 May

The new 2024-2025 Annual Catalog goes live on May 1 as well. Here’s a photo of me receiving my catalog in Houston at the SU! convention.

Stampin' Up! 2024 -2025 Annual Catalog & me

I can’t publish any of the photos inside the catalog until May 1 – so stay tuned… What I CAN SAY is there are some awesome new products in the catalog that I’ve been playing with – and if you’ve been following me, you have seen several of them. Absolutely LOVING the new 2024-2025 In Colors!!! If you do not have a demonstrator, connect with me. That new catalog will be on it’s way to you lickety-split!

Now – my card for today uses a retiring DSP and the Sweetly Scripted stamp set available right now as an ONLINE EXCLUSIVE. To view all the available ONLINE EXCLUSIVES, click here. The DSP is a LAST CHANCE PRODUCT and you may see that here

Stampin' Up! Diagonal Split Fun Fold w/ Daisies

Isn’t this pretty? I’m heading to a convention on Thursday and the ‘logo’ is daisies – so what better use of this Delightfully Eclectic DSP and Scalloped Contour Dies? and this fun fold is so quick & easy.

  • Directions
    • * Cut card base – here it is Thick Basic White – 4 1/4 x 10 1/4, score at 5 1/2
    • * Cut Designer Series Paper – Delightfully Eclectic DSP – 4 1/4 x 4 34 and adhere to card front
    • * While this is drying, cut additional pieces of DSP 2 5/8 x 3 15/16 + 2 1/4 x 6 (envelope flap)
    • * Place card front in Paper Trimmer and cut on the diagonal. For my measurements I used 1 1/4 on left upper corner and about 1 1/2 on right lower corner.
    • * Using Basic White card stock and the 2nd largest of the Scalloped Contour Dies, create the scalloped piece. Adhere the small panel(2 5/8 x 3 15/16) of DSP to it’s center. Add dimensionals to the back of this panel, both top & bottom.
    • * Add this panel to the closed card front – top portion only! Remember the cut diagonal removed the bottom :O) It will be about 1/2″ from top of fold and about 5/8″ from each side.
    • * With the card closed, slip the bottom diagonal piece under the scalloped die cut, making it even with the inside of the card bottom & sides. Remove backing on remaining dimensionals and close card.
    • * Using the Sweetly scripted stamp set, Tuxedo Black Memento ink and a 4 1/4 x 1″ strip of Basic White, stamp the preferred sentiment. Add dimensionals to each end and adhere over the die cut panel

Stampin' Up! Diagonal Split card inside

On the inside of the card… on a Basic White 4 x 5 1/4 panel and using the daisy outline stamp from Color & Contour stamp set, stamp in Petal Pink both in the upper right corner and lower left. Now stamp the ‘fill’ image of the flower in stamped off Petal Pink – this is called second generation stamping. Add the panel to the inside of the card – and done! I created at least 3 of these, just like this, then did two others using the Subtles 6×6 DSP in Petal Pink to cover the card front, yet continued with the Delightfully Eclectic Daisy DSP on the Scalloped Contour Die.

Stampin' Up! Diagonal Split Front Fold w/ Scalloped Contour Dies

For the envelope, I used another piece of the Delightfully Eclectic DSP to cover the envelope flap and trimmed it to fit. On the envelope front, I did the same daisy stamp from Color & Contour stamp set with Petal Pink ink. I did the same for all five cards.

Stampin' Up! Diagonal Split Fun Fold with Delightfully Eclectic DSP, card & envelope

LAST CHANCE PRODUCTS MAY BE FOUND HERE This includes the Color & Contour Stamp set, the Scalloped Contour Dies and the Delightfully Eclectic DSP – all used on today’s card.

To view all the available ONLINE EXCLUSIVES, click here. For this card, that includes the

Sweetly Scripted stamp set

Clearance items may be found here

While you’re looking around in my store, remember there are some stunning kits available, for all ages and all seasons – even Christmas! And while you’re shopping, I offer fringe benefits to my customers: free tutorial of the month and a FREE Stampin’ Up! item valued to $10 – all for a $50 order, before shipping and taxes. Use my current host code to receive those benefits – especially when your order does not exceed $150.

HOST CODE 4JF6ZWC9

Thanks for stopping by. May you have a beautiful day. Make someone happy when sending them a handmade card filled with love.