Unknown's avatar

About TL's Bright Spot

I love to be creative - in the garden, crafting, and in leadership roles. There is something wonderful that happens when we design something new and share it with others. It's fun and makes everyone happy.

February Paper Pumpkin from SU!

Extra short post today but I wanted to share with you my current creations with the February PP kit. PP is such a treat to receive with all the embellishments, glue dots, dimensionals, card stock AND directions. I usually create one or two per directions that come with the kit, but not always. Here’s what I’ve done thinking “outside the box” …

Questions about PP? Please contact me for more details… now is a great time to invest in this monthly subscription. If you are interested in the March subscription you may order until Mar 10. One of the ideas SU! is using is coordinating the PP with current stamp sets. WOW, does this make it even more valuable for future use.

For now – ta ta. Enjoy your day… make it better by creating and sharing what you love to do!

2nd Release Items for SAB!

2020 SAB 2nd Release

These items are available beginning Mar 3! Look carefully and start making that wish list. These items tend to go fast, so the sooner you order the more likely you will be able to get AND USE these products. Remember to use my Current Host Code 2TMMA9HX if your order exceeds $50. That way you earn another free product – this one from me – any item in the catalogue not to exceed $10.

Enjoy shopping these 2nd Release items!

Bloom and Grow, matching dies Budding Blooms

I really enjoy coloring, so using the blends is very relaxing to me. How about for you? This card in particular was pretty simple & easy to do. What makes a difference in a card are the details. For instance, did you notice the coloring on the background? That was done oh so casually with both light and dark Stampin Blends. It’s a bit too straight for my liking but for today we’re going with it.

Here are the details:

  • Very Vanilla card base cut to 4 1/4″ x 11″ and scored at 5 1/2″ – opens from the left
  • Poppy Parade layer 4 7/8″ x 3 5/8″, put on card with dimesionals
  • Shimmer card layer 4 3/4″ x 3 3/8″: use Stampin blends Petal Pink to color, alternating light and dark. Adhere Shimmer paper to the Poppy Parade layer with liquid glue.
  • Stamp the flower in Memento black ink; color flowers with Poppy Parade blends light and dark; color leaves with Call Me Clover blends light and dark; color berries with light Poppy Parade; cut out with appropriate die and adhere with dimentionals onto the Shimmer paper.
  • Stamp the sentiment on a scrap of Basic Black cs with Versamark ink. (Use the embossing buddy first to clear the cs of static) Dip into white embossing powder, flicking off excess, and heat emboss. Adhere to card fron with dimensionals.
  • YAY! Front is done…

Inside… I wanted to keep this really simple so stamped one of the flower bouquet on the bottom right side in Memento black ink.

Envelope… Again, wanted it to be simple but eye-catching so dry embossed a 6″ x 2 1/4″ Poppy Parade with the Coastal Weave 3D embossing folder. This was adhered with liquid glue and cut to fit.

This card could so easily be done in most any shade using the Stampin Blends. Whatever color you use for the flower, coordinate the underlying paper and the envelope flap. YAY! Can’t wait to see what you do with this stamp set.

OK, after writing this post, I just had to share the rest of the cards I created. I had a class Monday night and did some extra stamping to share how to move the light and dark blends. Here are several:


Enjoy creating, crafting, sharing. Please use my HOST CODE 2TMMA9HX if your order is over $50 and I will send you a free $10 .item of your choice. One freebie per customer per month, thank you!

Coordination Product Release

These items are so great to have to use with the coordinating stamp sets. Check them out!

Here’s a picture of a card we are making in my Mar 9 and 10 classes. It uses the Budding Blooms dies that coordinate with the Happy Birthday To You stamp set.These items are available now.

Click on the link below for more information.

12.01.19_CUSTOMER_FLYER_OOP_Q1_NA (1)

01.01.20_COORDINATION_FLYER_OOP_Q1_NA

Bloom and Grow with coordinating Budding Blooms dies

Oh my goodness… I think I have shared with you how much I enjoy coloring. If not, well now you know 😏 The weather here was gray, overcast and rainy – a bit on the dreary side to say the least. Hubby was home and wanted a fire in the fireplace so I brought my crafty stuff to that cozy spot and had a “jolly good” time.

The night before I had taught a class and demonstrated coloring with blends. I had stamped and cut some extra pieces so I could demo a different color than what we were making in class. I only did one the night of the class and this set was calling me to do more. With this delightful, cozy setting of the fireplace ablaze, our Springer Spaniel lying close to the fire and my hubby reading, I couldn’t resist staying close by.

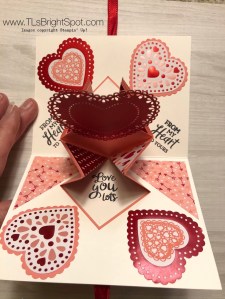
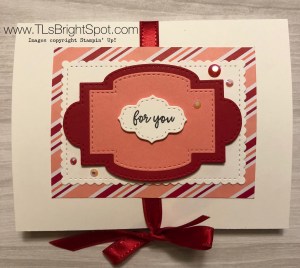
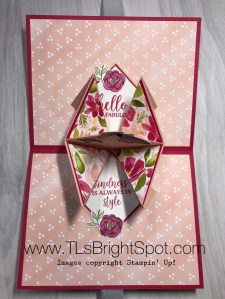
Here are the cards… card 1 is the one created in class. The others are what I completed yesterday afternoon. n

Blends used varied with each card… the first is Poppy Parade and coordinating blends with Petal Pink both light and dark blends for the back ground; and Call Me Clover light and dark for the leaves, Poppy Parade dark for the berries. The next card shows Granny Apple Green light & dark blends for the back ground, Petal Pink light & dark for the flowers, Mint Macaron light & dark blends for the leaves, and light Flirty Flamingo for the berries. The next card was kept very simple – no card stock background and I love it! Highland Heather light & dark blends for the flowers, Granny Apple Green light & dark blends for the leaves, dark Flirty Flamingo for the berries and Soft Seafoam light and dark blends for the back ground. Card four: light Poppy Parade + dark Petal Pink for the flowers, Granny Apple Green light & dark blends for the leaves, soft Seafoam light and dark blends for the background and oh yes, dark Poppy Parade for the berries. Last but not least: the yellow card is affixed to Daffodil Delight card stock but is colored using both light and dark Mango Melody blends, Old Olive light and dark for the leaves and dark Flirty Flamingo for the berries, Mint Macaron light and dark blends for the back ground. Whew – a whole lot of fun!

Remember when using the blends, it’s better to start with the darker shade first and only do a small area then sweep in with the lighter blend to do what – blend together. 😁 The reason for doing small areas is to keep the blend moist so it easily “moves” for the blending process.

I hope you enjoyed todays post. Would you share with me which card you like the most… I’m leaning toward the Highland Heather but I also really like the yellow card. I also liked putting the card stock on an angle as opposed to straight on. Do you have thoughts on that?

When you shop with me and your purchase is over $50, please use my CURRENT HOST CODE – 2TMMA9HX to receive a free gift from me.

May you have a beautiful day – share what you love!


Happy Birthday To You!

What fun it is to have birthdays! Just last week I celebrated a BIG ONE… but hey, it’s only numbers 😉 So today’s card is not a birthday, but an anniversary card using the Happy Birthday To You stamp set. Pretty cool, right? Gotcha!

Here’s the card…

Coloring is so relaxing for me. Have I said that before? Here it’s Petal Pink light and dark blends for the flowers and Mint Macaron light and dark blends for the leaves. I have found it helpful to do the dark first, just a small area at a time, then do the light to blend it in nicely.

The cake was stamped with Versamark ink and heat embossed with Silver Embossing powder. I used the Smokey Slate blend to shade some of lines on the cake for emphasis. The cake stand was colored with the Petal Pink blends also. After cutting out with the matching Birthday dies I put dimensionals on the back and set it aside.

The Smokey Slate card stock piece was cut with the Stitched So Sweetly dies. I put dimensionals on the back of it as well.

Silver thread is a messy business for me – it’s thin and light and slippery as the dickens. However, I have learned to control it just a bit  by wrapping it around my fingers, first a couple of times around two fingers then a couple of times around three fingers, then cut, twist and adhere to the back of the cake with glue dots. I did that twice. Adhere cake and Silver thread to the Smokey Slate piece.

The next layer is Petal Pink (2 1/2″ x 5 1/4″) that has been dry embossed with the Parisian Flourish 3D Embossing Folder. Pretty cool isn’t it? Remember to spritz it lightly with water prior to sending it through the die cutting/ embossing machine. This gives wonderfully deep impressions. Adhere the Petal Pink to a Thick Whisper White card base (4 1/4″ x 11″). Attach the Smokey Slate and you’re almost done with the front. The key here is the Rhinestone Basic Jewels – they add the crowing touch!

The inside…  Stamp the sentiment of choice on a scrap of Whisper White. Here I used the happy from Happy Birthday To You stamp set and the anniversary from the Well Said stamp set. They were stamped in Versamark ink then heat embossed with Silver Embossing powder. I used the Stitched Rectangle dies to cut both a Whisper White and a Smokey Slate piece and adhered with liquid glue to a Whisper White (4″ x 5 1/4″). This was adhered with liquid glue to a Petal Pink (4 1/8″ x 5 3/8″) and all adhered to the card base with liquid glue. Inside… done!

Now for the envelope.. First I stamped the sentiment from Happy Birthday To You in Smokey Slate. Next I dry emboseed a 2 1/4″ x 6″ Smokey Slate with the Parisian Flourish #D embossing folder and adhered that with liquid glue, did a neat trim and voila!

Heart Pop Up Card Revised

Some time ago I posted a picture of this fun pop up card and promised to give directions… never did that! Ugh, ugh and ugh… My apologies and thank you for your patience – or maybe you were ready to unscrew my head. Glad you didn’t do that, thank you very much. Here’s the card from then and a look at the inside as well.


And here’s the card I just created today:

  • Card base is 5 1/2″ x 8 1/2″,scored at 4 1/4″.
  • Prepare the card front first!
    • Adhere 20-22″ ribbon with tear n tape in the center of the card. I find it helps to mark the center of the card with pencil , to keep it straight. This ribbon is retired – so sorry but I liked the shiny look!
    • The DSP is cut at 4 1/4″ x 3″ and adhered with liquid glue. The DSP is from the 6 x 6 pack Dressed to Impress.
    • The next three layers are from the Stitched So Sweetly dies. The second and third layers are adhered together, then added to the card with dimensionals. The top layer with the sentiment (from So Sentimental ) is also on dimensionals. The tiny beads are From My Heart Faceted Gems and available right now.


Now do the inside:

  • Cut 2 pieces at 4″ square: score vertically @ 2″, then horizontally at 2″, then diagonally once. Burnish all fold lines. It should look like this:


  • Cut 2 pieces of 1 3/4″ squares in Whisper White. These are your sentiment pieces.
  • Cut 6 pieces of a contrasting color at 1 7/8″ square,  then cut 4 of those squares on the diagonal
  • Cut 4 pieces of Designer Series paper at 1 3/4″ and cut diagonally. Adhere to the solid triangles created in the previous step.
  • At this point I suggest paper clipping the 4″ squares together that create the center. Do this PRIOR to adhering anything to those 4″ squares. This will make it clear what gets glued together where. It should look like this:

  • Layer 1 7/8″ card stock on the square sections first; followed by the diagonally cut DSP in the folded area. It should look like this once those papers are adhered with liquid glue.
  • Stamp your sentiments on the Whisper White squares and adhere to the 1 7/8″ appropriate squares.
  • Adhere those paper clipped areas together with liquid glue, fold both sections closed, making certain they are well burnished. It should look like this.

  • Cut contrasting DSP at 4″ x 5 1/4″ and adhere to both inside areas.
  • Adhere the card insert on one side only, in the center of the card, near the fold. Again, making a pencil mark to locate the center will keep this pop up in the right place.
  • Use liquid glue on the remaining section and close the card to adhere the panel. This works really well and allows the card to open fully.
  • Decorate your center. Here I used the butterfly from Positive Thoughts (Mini Catalogue), colored with both the light and dark Lovely Lipstick blends and Daffodil Delight blends for the edge of the butterfly. It was cut with the matching dies called Nature’s Thoughts. I cut two small butterflies using Black Foil Sheets with the same dies. Each of these were adhered with liquid glue.i added one small black Faceted Dot to the large butterfly.
  • At this point I simply looked at the nearly completed card and felt something more was needed. Dressed To Impress and matching dies called All Dressed Up came to the rescue. The small flower is just plain cute and easily goes with this Best Dressed 6 x 6 DSP. I colored the flower with light and dark Lovely Lipstick blends and the leaves with light Old Olive blends. The center of the flower was colored with light Daffodil Delight blends.
  • Now the card is complete and I love the finished look. Just think of all the fun ideas you could do with this card.. bees, balloons, birthday cake, shoes, perfume, lipstick – oh my  gosh, the list goes on and on! Have fun creating – would love to see what you do with this.

When you order supplies, remember to use my

current HOST CODE -2TMMA9HX

If your order is $50 or over, you will receive

a free item of your choice not to exceed $10.

One item per customer/ month thank you.


Honey Bee and Matching Detailed Bee Dies

Card Set in the gold foil boxes using the 3″ envelopes and creating cards for them. Fun, right? So cute as a delightful gift set for someone special. The last picture is the inside of one of the cards.Items used to make this fun set:

  • Honey Bee stamp set and matching Detailed Bees Dies
  • Golden Honey Specialty Designer Series Paper
  • Gold Mini Pizza Boxes
  • Memento Black ink
  • Crushed Curry Stampin Blends to color the Honey Bees and flowers on the SDSP
  • Gold embossing powder
  • Metallic Pearls
  • Peaceful Poppies Elements
  • Detailed Hearts Die
  • Card stocks: Basic Black, Real Red, Crushed Curry, Whisper White
  • I encourage you to get creative and have fun with this set from the Mini Catalogue. The Golden Honey SDSP is available as a free item when you purchase $50 of product from this catalogue.
    Have fun, be creative, share with others!
  • When you order from me and your order is over $50, please use my…
  • Current Host Code: 2TMMA9HX
  • Thanks for stopping by😘

Country Club, Father’s Day

Hi there! Today’s card is in preparation of our fathers or brothers or male friend – Father’s Day  -and we are ahead of the game 😉 It could easily be changed to a birthday card using the same stamp set/ dies. The Designer Series Paper that coordinates with this stamp set is so stately, I just really, really like it. You can find these items in the Jan-Jun Mini Catalogue.

Here’s how to do the card cuts…

  • Card base is Garden Green 4 1/4″ x 11″ scored at 5 1/2″.
  • Bottom layer is Pear Pizzaz 1 7/8″ x 5 1/4″,  DSP is adhered with Tombow glue and is 1 3/4″ x 5 1/8″
  • Layer #2 is Pear Pizzaz at 2 1/4″ x 4 1/4″; Garden Green cut at 2 1/8″ x 4 1/8″; then DSP is 2″ x 4″
  • Top layer is Pear Pizzaz 2 3/4″ x 3 1/4″; Garden Green 2 5/8″ x 3 1/8″; Whisper White 2 1/2″ x 3″

Stamp the sentiment in Night of Navy on the Whisper White piece; cut the golf clubs and the balls out of Silver foil, adhering with Tombow glue. Card front is done!

Inside..

Stamp the sentiment in Night of Navy on Whisper White which is cut at 4″ x 5″; adhere another of the golf balls with Tombow glue; adhere to the card base… inside done!

I showed this card to my hubby and he loved it! He said it looked so elegant – made my head swell just a little 😏. Thanks for stopping by. Remember to use my

current Host Code 2TMMA9HX

to receive free goodies from me if your purchase is over $50 but not over $150. The freebie is an item of your choice not to exceed $10 and will be sent at the end of the month. One item per customer, thank you!

Please feel free to contact me if you have questions: tlsbrightspot@gmail.com or comment on my website.

Drapery Fold, Thoughtful Blooms, Small Bloom Punch and More

This card was created with the drapery fold technique – so easy and really shows off the Designer Series Paper and how it is double-sided :o)

How to… DSP of choice… here I used Woven Threads from the Annual Catalogue. It is cut at 4″ x 11 1/2″, then trimmed from the bottom left edge up to 1″ from the top of the right side. Got it? Then score beginning on the longest side at 3″, 4″, 6″, 7″, 9″, 10″. Fold this in an accordian style. Adhere this to a Whisper White piece cut at 4′ x 5 1/4″.

The rest of the card…
* Cardstock base is Terracotta Tile: 5 1/2″ x 8 1/2″, scored at 4 1/4″
* Layer Purple Posy: 4 1/8″ x 5 3/8″ (cut 2 of these, one for the inside)
* Layer the accordian piece that was adhered to Whisper White cs to the Purple Posy.
* Punch several small blooms using the Small Bloom Punch (item 152316 from the sale-a-bration catalogue. It’s a free item with the appropriate purchase!)
* Curl the flowers slightly and adhere two together using Tombow glue. Using glue dots, adhere the flowers to the card randomly placing for a pleasing “show”. Add a 2020-21 In Color Faceted Dot (item 149607) to the center of each flower. I used Purple Posy.
*Stamp the sentiment (from Happy Birthday To You stamp set, also from the Sale-a bration cattie and also a free item with the appropriate purchase) onto a Whisper White scrap with Terrracotta Tile ink and fussy cut. Adhere with mini dimensionals.
* Add smaller faceted gems as you desire to complete the look. I used three.YAY! Your Card front is complete!

Card inside…
* Using the Thoughtful Blooms stamp set (item 152290 from the sale-a-bration cattie and a free item with the appropriate purchase), stamp the leaves in Pretty Peacock, stamping off once on scrap first, on a Whisper White cs pice cut at 4″ x 5 1/4″. I stamped it in the center of the card.
* Adhere to a Purple Posy piece cut at 4 1/8″ x 5 3/8″ as noted above.
* Using one of the flowers in the stamp set, ink with Terracotta Tile, stamping off once and then stamping in the center of the leaves.
* Using a glue dot, adhere a small Purple Posy faceted dot to the center of this flower. Inside done!

Complete this beauty by decorating the envelope: Designer Series Paper for the envelope flap of course, and several stamped flowers in Terracottta Tile ink for the front. Now look at this lovely creation and admire your handiwork. Send to a friend who needs a “pick-me-up”.

Thanks for stopping by. If you have any questions, please reach out to me. The Jan-to Jun Mini Catalogue is in full swing. And then… the NEW ANNUAL Catalogue will be available. Hugs everyone. Happy crafting – enjoy what you do!