
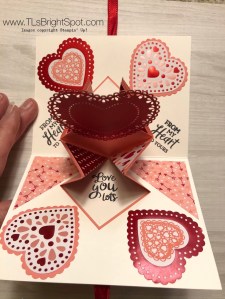
Some time ago I posted a picture of this fun pop up card and promised to give directions… never did that! Ugh, ugh and ugh… My apologies and thank you for your patience – or maybe you were ready to unscrew my head. Glad you didn’t do that, thank you very much. Here’s the card from then and a look at the inside as well.
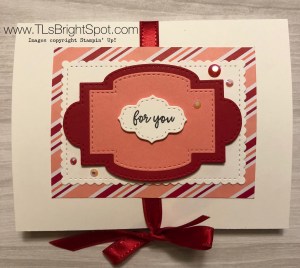
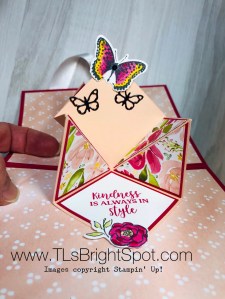
And here’s the card I just created today:

- Card base is 5 1/2″ x 8 1/2″,scored at 4 1/4″.
- Prepare the card front first!
- Adhere 20-22″ ribbon with tear n tape in the center of the card. I find it helps to mark the center of the card with pencil , to keep it straight. This ribbon is retired – so sorry but I liked the shiny look!
- The DSP is cut at 4 1/4″ x 3″ and adhered with liquid glue. The DSP is from the 6 x 6 pack Dressed to Impress.
- The next three layers are from the Stitched So Sweetly dies. The second and third layers are adhered together, then added to the card with dimensionals. The top layer with the sentiment (from So Sentimental ) is also on dimensionals. The tiny beads are From My Heart Faceted Gems and available right now.
Now do the inside:
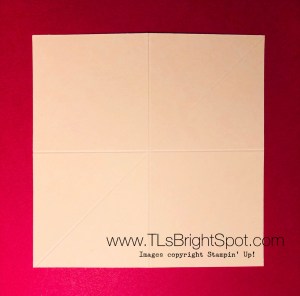
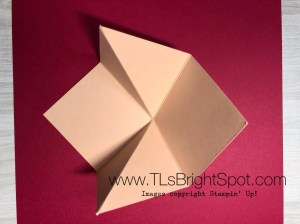
- Cut 2 pieces at 4″ square: score vertically @ 2″, then horizontally at 2″, then diagonally once. Burnish all fold lines. It should look like this:
- Cut 2 pieces of 1 3/4″ squares in Whisper White. These are your sentiment pieces.
- Cut 6 pieces of a contrasting color at 1 7/8″ square, then cut 4 of those squares on the diagonal
- Cut 4 pieces of Designer Series paper at 1 3/4″ and cut diagonally. Adhere to the solid triangles created in the previous step.
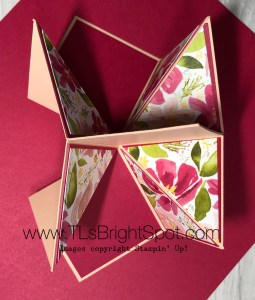
- At this point I suggest paper clipping the 4″ squares together that create the center. Do this PRIOR to adhering anything to those 4″ squares. This will make it clear what gets glued together where. It should look like this:

- Layer 1 7/8″ card stock on the square sections first; followed by the diagonally cut DSP in the folded area. It should look like this once those papers are adhered with liquid glue.
- Stamp your sentiments on the Whisper White squares and adhere to the 1 7/8″ appropriate squares.
- Adhere those paper clipped areas together with liquid glue, fold both sections closed, making certain they are well burnished. It should look like this.

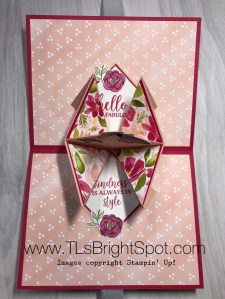
- Cut contrasting DSP at 4″ x 5 1/4″ and adhere to both inside areas.
- Adhere the card insert on one side only, in the center of the card, near the fold. Again, making a pencil mark to locate the center will keep this pop up in the right place.
- Use liquid glue on the remaining section and close the card to adhere the panel. This works really well and allows the card to open fully.
- Decorate your center. Here I used the butterfly from Positive Thoughts (Mini Catalogue), colored with both the light and dark Lovely Lipstick blends and Daffodil Delight blends for the edge of the butterfly. It was cut with the matching dies called Nature’s Thoughts. I cut two small butterflies using Black Foil Sheets with the same dies. Each of these were adhered with liquid glue.i added one small black Faceted Dot to the large butterfly.
- At this point I simply looked at the nearly completed card and felt something more was needed. Dressed To Impress and matching dies called All Dressed Up came to the rescue. The small flower is just plain cute and easily goes with this Best Dressed 6 x 6 DSP. I colored the flower with light and dark Lovely Lipstick blends and the leaves with light Old Olive blends. The center of the flower was colored with light Daffodil Delight blends.
- Now the card is complete and I love the finished look. Just think of all the fun ideas you could do with this card.. bees, balloons, birthday cake, shoes, perfume, lipstick – oh my gosh, the list goes on and on! Have fun creating – would love to see what you do with this.
-
When you order supplies, remember to use my
current HOST CODE -2TMMA9HX
If your order is $50 or over, you will receive
a free item of your choice not to exceed $10.
One item per customer/ month thank you.

Such pretty cards! Thanks for sharing the instructions! 🙂
LikeLike