Unknown's avatar

About TL's Bright Spot

I love to be creative - in the garden, crafting, and in leadership roles. There is something wonderful that happens when we design something new and share it with others. It's fun and makes everyone happy.

SU! Online Store Update!!!!

Stampin’ Up! is updating the look and function of the online store!  Yay!!  The store will be updated beginning tomorrow, August 4 with a new look and feel to help you better navigate it while you shop!  Here is what you need to know so that you’re all set to shop on August 4!

The new online store will go live at 7:00 AM (MT) on 4 August.  Be aware that the online store will be offline temporarily from midnight until around 7:00 AM MT on August 4 as they transition to the new store.  It should be back up and running no later than 7:00 AM MT for ordering from the new August-December 2020 Mini Catalog!

A few things to know:

  1. Your account information and passwords will still work with the new site.
    • Be sure that you know your current login information so that you can log in right away on Tuesday!
    • If you don’t know your login information by heart (or if you do like I do and have it saved to your browser so that you don’t have to remember it every time):
      • Log into your account today and then click on “my account” and then “email/passwords” and either record the information that is shown or, if it’s not shown, update your password and then write it down.
  2. While old bookmarks and links will forward you to the new store, your browser will see it as a “new” site. If you rely on your browser to remember your login information, the first time that you log in, it will not associate the new site with that saved information.
  3. Be sure that you see my name at the top on the right when you are shopping with me to earn my rewards and benefits for ordering!

If you have trouble logging in on Tuesday:

  1. Once the new store is up and running on Tuesday, if you have trouble logging in, you can click the “Forgot Password” link on the new online store’s sign-in page and follow the steps to reset your password. The password reset email will come from noreply@info.stampinup.com. Adding this email address to the contacts list in your email program and/or searching for your email program’s spam settings can help you ensure that you receive the email.
  2. Should you run into any problems, there is a link in the password reset window to a page with additional information.
  3. If you have trouble accessing your account, Stampin’ Up! can also help you reset your password.  Just call them at 1-800-STAMPUP and they’ll be happy to help!  Unfortunately, I’m not able to assist with password changes as it’s a security issue for you. But Stampin’ Up! can definitely help you!

Hopefully this will be a seamless transition for you on August 4!  I’m looking forward to seeing the new site design too!

SU! Tasteful Touches

Hi Everyone – I tried something new for me today – does that surprise anyone? Maybe we shouldn’t go there… I saw a video by Kylie Bertucci, a very creative demonstrator from Australia and had to her ideas a ‘go’. Here’s the completed card…

Tasteful Touchers – Feather
#1

Can you see the sparkly on the background? It’s sprinkled embossing powder! This is done on Basic Gray cs and I love the look. So here’s what I did… First, swipe the card stock with your embossing buddy to remove static and create a ‘clean’ surface. I tapped the Versamark ink pad around the perimeter of the card stock – no need to do the center since it was to be covered. Then I sprinkled the silver embossing powder with my fingers, keeping the powder light and not clumping or globbing – then I heat set it. Fun look. Yes, I SHOULD HAVE taken a picture at that stage – but didn’t really think about it until just now 😳 well – silly me…

The rest of this card is so very simple: using the feather image from the  Tasteful Touches stamp set, stamp randomly in stamped off once Basic Gray ink on Whisper White card stock. I then took a sponge dauber and Gorgeous Grape and did very light sponging on the feathers. I love this color and it gives the feathers a totally different look. This was mounted on Gorgeous Grape card stock with liquid glue. I wrapped a length of the Whisper White 1/4″ Crinkled Seam Binding around these two pieces and tied a knot. I put dimensionals on the back and mounted it on the silver sprinkled, heat embossed panel of Basic Gray. This then was adhered to a panel of Whisper White with liquid glue. This was adhered to the Basic Gray card base. As the final step, I took a 5/8″ strip of Basic Gray, rubbed it with the embossing buddy then stamped the sentiment from the In The Pines stamp set in Versamark. I sprinkled it with silver embossing powder then heat set it. The final length is about 2″. This strip got dimensionals and was placed over the ribbon.

The inside is even simpler yet – a single stamped feather in several times stamped off Basic Gray ink on a Whisper White panel. This was mounted directly to the card base with liquid glue.

Tasteful Touches – inside
#2

I started the main panel with the feathers as a larger piece. Once I cut it down to the size I wanted I saved the strips and adhered one of those to the envelope front. And that was it – the card was complete. This could so easily be a masculine card. It IS however, going to a young woman who is battling cancer – and loves purple. It will be gone by the time you read this post.

Tasteful Touches
#3

Tasteful Touchers – Feather
#3

It is August 2 – and just one day left to use the BONUS DAYS offer by Stampin’ Up

Bonus Days. Earn in July, spend in August.

And when you order from me, please use my Aug host code to receive a SU! item worth $10 when your purchase is $50-$150. Sounds like another good deal, right?! It is…

August Host Code 

4TEZ7HWY

Thanks for stopping by.

May you have a beautiful day.

Make someone happy by sending them a handmade card made with love.

Card cuts for today’s project:

  • Basic Gray 8 1/2 x 5 1/2, scored at 4 1/4; 4 1/8 x 5 3/8 for the heat embossing panel
  • Whisper White 4 1/4 x 5 1/2; 3 x 4 1/4 (both of these for the card front); 4 x 5 1/4 for the inside
  • Gorgeous Grape 3 1/4 x 4 1/2

SU! Love of Leaves Bundle

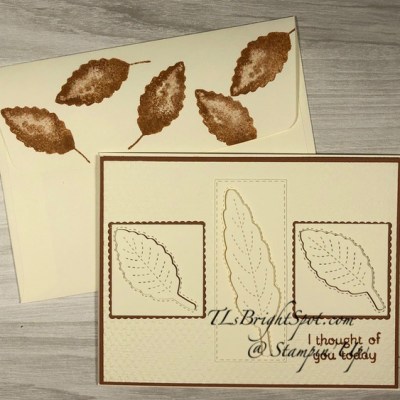
Fall is such a great time of year… and this card says ‘Fall’ all over it. This stamp/ die set is just so lovely – can be used for masculine cards for sure, which I sometimes have a hard time making. But this was so easy peasy and I love how it turned out.

Love of Leaves bundle #1

I kept the look really simple and clean, using the Stitched Leaves Dies as the main focus. Aren’t they stunning? What I especially like about them is the way they have a stitched border around the leaf die cut and the leaf embossing with another die. With one roll through that die cutting machine  I was able to cut the square with the Square Dies AND one set of leaves in Very Vanilla cs! The border color is one of the new In Colors – Cinnamon Cider – a gorgeous shade of golden brown. That was cut with a Square Scalloped Die. The rectangle for the largest leaf was die cut with the Stitched Rectangles Dies, again in Very Vanilla.

I adhered the Very Vanilla square with the leaf ‘hole’ to the Cinnamon Cider with liquid glue. The leaf itself I adhered with dimensionals. I set those aside While I worked on the Very Vanilla background. First I located where the leaf squares would be, then laid the sentiment from Love Of Leaves stamp set in place. I moved the squares off the piece and stamped the sentiment in Cinnamon Cider ink. Then I ran it through the Tasteful Textures. embossing folder. This panel I adhered to a piece of Cinnamon Cider. I laid the leaf dies back on the textured Very Vanilla panel, glued on the squares and the rectangle with liquid glue. Then in the opening, I placed the leaves which had dimensionals on the back.

I put dimesionals on the back of the Cinnamon Cider panel and adhered to a Thick Very Vanilla card base.

Love of Leaves bundle
#2

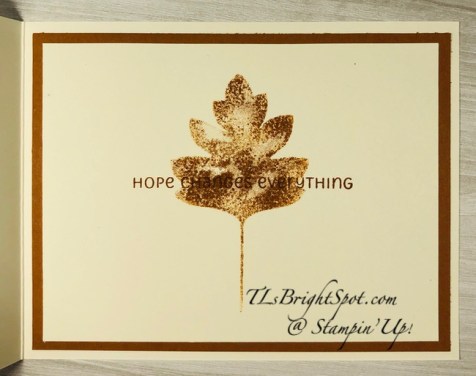
For the inside i stamped another leaf from the Love of Leaves stamp set, stamping off twice, onto Very Vanilla cs in Cinnamon Cider. I then stamped the sentiment from the same stamp set in full strength in Cinnamon Cider. I should probably stamped the sentiment again ass the word ‘changes’ gets a bit lost in the leaf.. ugh.

Love of Leaves bundle #3


Using yet another leaf from the Love of Leaves stamp set, I stamped both the envelope flap and the front as well – in Cinnamon Cider.

This bundle can be found in the new Aug-Dec Mini 2020 catalog that goes live to customers Tue Aug 4. And when purchased as a bundle in lieu of individually, you save 10% I strongly encourage you to. put this on your wish list.

Bonus days are coming to an end soon – now through 3 Aug, just 3 days. That $5 coupon (s) should be eating a hole in your pocket… to use in Aug.


Bonus Days. Earn in July, spend in August.

And when you order from me, please use my Aug host code to receive a SU! item worth $10 when your purchase is $50-$150. Sounds like another good deal, right?! It is…

August Host Code 

4TEZ7HWY

Thanks for stopping by.

May you have a beautiful day.

Make someone happy by sending them a handmade card made with love.

Card cuts for today’s project:

  • Thick Very Vanilla – 4 1/4 x 11, scored at 5 1/2
  • Very Vanilla – 4 x 5 1/4 for the front; 3 3/4 x 5 for the inside + scraps for the die cuts
  • Cinnamon Cider – 4 1/8 x 5 3/8 for the card front; 4 x 5 1/4 for the inside layer

SU! Slimline Diagonal Gatefold Card with Poinsettia Petals Bundle

Hi Everyone… Today’s card is just a gem but I might be a tad prejudiced… I have used this bundle in a previous card and fell in love with the set. Slimline cards seem to be all the rage these days and I had not done any of these. But here I am… and pleased with the results.

Before I get to the card: a couple of days ago I shared two Mini Paper Pumpkin boxes that I had decorated and asked for feedback, comments and said there would be a prize/ gift to one of the ‘commentees’. Karen Andrews – your name “plopped out of the spinner”. Please send your address to my email: tlsbrightspot@gmail.com and I will get that in the mail today Congratulations – hope you like it! The differences in the boxes? All inks, papers and ribbons used were the same; differences listed below. I’ll do a more complete post about the boxes tomorrow, Aug 1.

1) I used a brayer and colored the one box with Pretty Peacock ink

2) That same box was decorated on four sides

3) The top DSP was two (2) pieces

I also want to give an update on our S-I-L: he is doing very well. Recovery will take a while but he is in PT with mostly massage/ stimulation to help reduce the expected swelling in the affected arm. He has an amazing attitude and strong will and that will be to his advantage during the recover. If you are new to my blog, S-I-L had a rather nasty bicycle accident and shattered his right elbow.

Now – to the card of the day: I’m calling it the Slimline Diagonal Gatefold. Card cuts listed at the end of this post.

Slimline Gatefold with Poinsettia Petals
#1

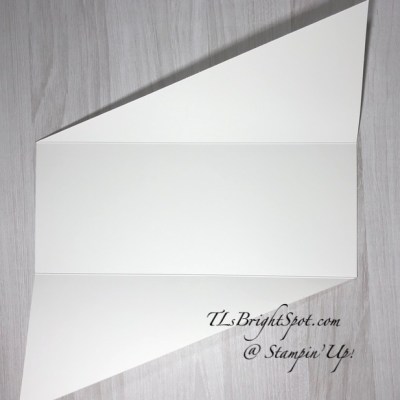
The base is Thick Whisper White, scored in two places, and cut on the diagonal. I then cut a panel of Blushing Bride and cut it on the diagonal – then did the same with the Plush Poinsettia Specialty Paper. TIP: be sure you are cutting the Specialty Paper on the proper diagonal. Ask me how I know that!
Slimline Gate Fold with Poinsettia Petals
#3

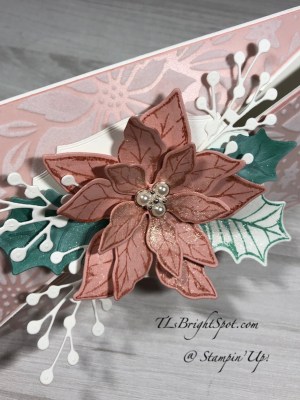
Once those have been adhered to the appropriate diagonal for the card front, you are halfway to completing this gorgeousness. Again using Blushing Bride cs, stamp the three poinsettia in Blushing Bride ink using the Poinsettia Petals stamp set. Die cut those with the coordinating Poinsettia Dies. (This is one fabulous bundle – and 10% off when purchased that way. 😉) With Just Jade cs, die cut two leaves. This die set allows you to not only die cut the outline, but also to ’emboss’ the leaf impression. LOVE THIS! I also took a Whisper White scrap, stamped a leaf in Just Jade ink and using the outline die, cut that out as well. Using additional Whisper White cs, I cut out three berry  sprays. Then I took another die set – the wonderful Tasteful Labels Dies, and cut a label from Whisper White.

Before assembling the poinsettia, I took my Wink of Stella and covered the poinsettia, and the three leaves to give them sparkle. TIP: Be careful not to cover the centers so the glue adheres the layers together better. You can see that pretty clearly in this photo.
Slimline Gate Fold with Poinsettia Petals
#2

Now put the poinsettia together with liquid glue. I did use a dimesnional for the top layer. Add a Beaded Pearl for the center adhering with a glue dot. Are these pretty or what? I layered my poinsettia in the center of the Tasteful Labels die and adhered with liquid glue. Then I added the leaves and finally the berry sprays, adhering with liquid glue.

The last step for the card front is attaching the ‘bouquet ‘to the card. Decide if you want the centerpiece of the card attached to the bottom panel or the top diagonal. It doesn’t really matter. The key is to make certain it is in the middle AND that the adhesive is only on the portion to adhere to the card. You might find it helpful to even mark the back of the label so the adhesive is in the right spot. You don’t want extra adhesive beyond the label.

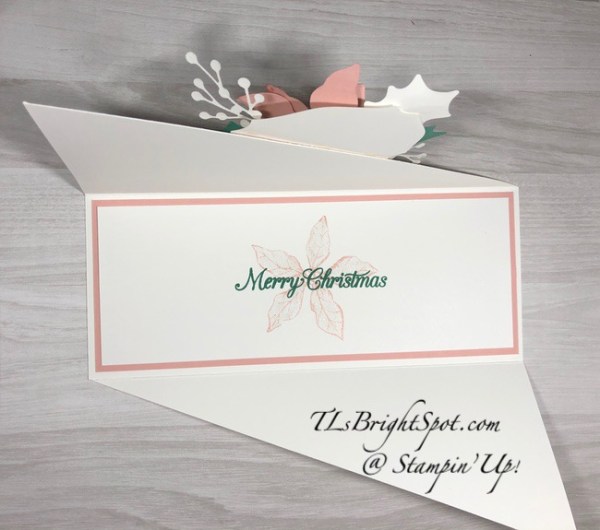
The inside I kept very simple but it is elegant as well.
Slimline Gate fold with Poinsettia Petals
#4

Cut a Blushing Bride panel and set aside. Cut a Whisper White panel: stamp with the next largest poinsettia in stamped off once Blushing Bride ink. Over this stamp the sentiment in full strength Just Jade ink. Adhere the stamped Whisper White panel to the Blushing Bride with liquid glue, then add that to the inside of the card. Voila! Your card is complete…

Slimline Gatefold with Poinsettia Petals
#1

The Poinsettia Petals bundle will be available to customers Aug 4. As demonstrators, we have the opportunity to preorder catalog items to play/ create/ inspire one another to new levels. Interested in being a demo? Join my team and we can create together.

Today is the last day to use my July Host Code – see below. I will post a new Host Code Aug 1

Bonus days are coming to an end soon – now through 3 Aug, just 4 days. That $5 coupon (s) should be eating a hole in your pocket… to use in Aug. Did you make your list?


Bonus Days. Earn in July, spend in August.

And when you order from me, please use my July host code to receive a SU! item worth $10 when your purchase is $50-$150. Sounds like another good deal, right?! It is…

Thanks for stopping by.

May you have a beautiful day.

Make someone happy by sending them a handmade card made with love.

Card cuts for today’s project:

  • Thick Whisper White – 8 1/2 x 10 1/2, scored at 3 1/2 and 7 on the long side
  • Blushing Bride cs – 3 3/8 x 8 for the card front, cut on diagonal + scraps for Poinsettia; 3 1/4 x 8 1/4 for the inside
  • Plush Poinsettia Special Paper – 3 1/8 x 7 3/4, cut on diagonal
  • Whisper White  – scraps for leaf and berry spray; 3 x 8 for inside

SU! Mini PP Box, Forever Fern bundle + Forever Greenery DSP

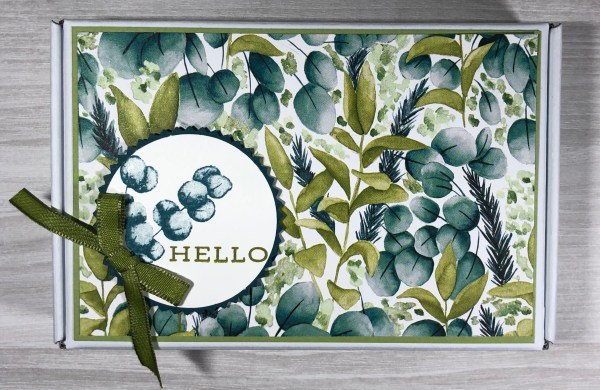
Hello again ! Yesterday afternoon I posted these two fun Mini PP boxes all decorated. One of the neat deals behind these boxes is they are food safe. That means you could make some awesome chocolate dodads – maybe chocolate covered peanut butter. Oh my, that sounds good to me… Anyway, my boxes are filled with, what else, notecards and envelopes. For some reason (don’t ask me what that is, I don’t know) I worked with the Vary Vanilla notecards – and made five. Here they are…

Card #1

Card #2

Card #3

Card #4

Card #5

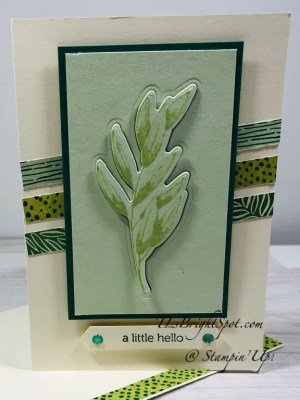
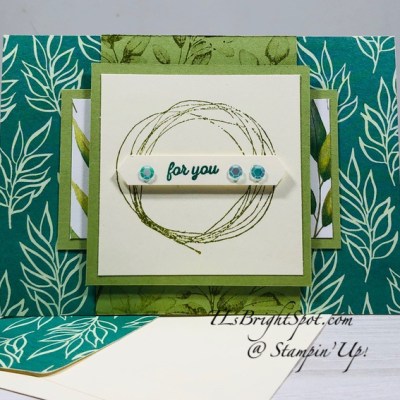
They turned out pretty cute, right? And yes, #3 & #5 are similar – different DSP in the Forever Greenery DSP pack, different sent and ribbon, same sequin pack but different color. My original plan was to make all five the same layout and change a couple of things on each one, but somehow – I got carried away and went in another direction. I’m guessing I’m not the only one that happens to! All papers came from the same Forever Greenery DSP package. I tried ton stay within the Forever Fern stamp set, but I wanted to vary the sentiments so the cards could be a fun gift to someone.

Here is a list of products used to make all these cards:

Stamps…

  • Forever Fern bundle
  • Comfort & Hope stamp set (circle/ wreath on card #4)
  • Itty Bitty Greetings stamp sets (there are two in this set!)

Inks…

  • Pear Pizzazz, Just Jade, Mossy Meadow, Soft Sea Foam, Shaded Spruce

Card stocks…

  • Note cards and envelopes in Very Vanilla
  • Soft Sea Foam
  • Very Vanilla
  • Subtles 6×6 DSP
  • Pear Pizzazz
  • Shaded Spruce
  • and of course… Forever Greenery DSP

Ribbons/ Embellishments

  • 1/4″ Old Olive from the Ornate Garden Ribbon Combo Pack
  • Linen Thread
  • Reversible Ribbon that is a combo of Old Olive/ Pretty Peacock
  • and of course Gold trim from the Forever Greenery Trim Combo Pack
  • Artistry Blooms Adhesive-backed sequins (these are so great! they come in four colors – Calypso Coral, Coastal Cabana, Mango Melody and Rich Razzleberry)
  • 2020-2022 In Color Enamel Dots

SU! Mini PP Box + Forever Fern Bundle + Forever Greenery DSP

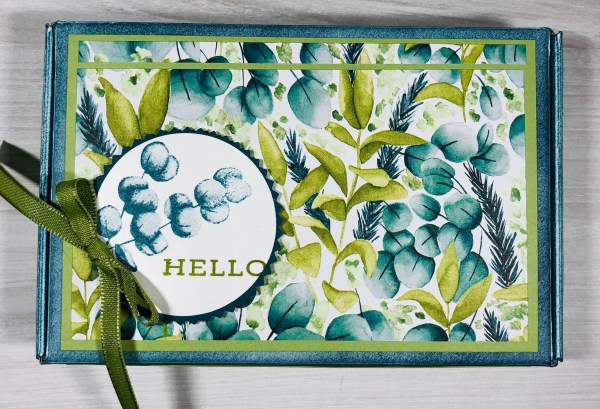
Hi Everyone -no posts for two days – ugh! I was having a crafty ‘blank’ and working outside in this heat did it… how’s that for an explanation? :O) It’s true – 7 am -9 am and I was done in…I DID some good stuff the rest of the day, just not my best… Here’s a teaser… and I’ll post the rest tomorrow.

Mini PP Box & Forever Fern
#1

Mini PP Box & Forever Fern
#2

See these two boxes? What is different between them – and yes, you have to tell me! How do I know you are paying attention if you don’t respond? Hmmm. Does that sound like a parent???? Anyway – when you respond your name goes into a spinner and one name plops out and you get – – – a prize! And I’ll send it right away… won’t that be fun? We have to change things up now and then ya know.

Bonus days are coming to an end soon – now through 3 Aug, just six (6) days. That $5 coupon (s) should be eating a hole in your pocket… to use in Aug. Did you make your list?


Bonus Days. Earn in July, spend in August.

And when you order from me, please use my July host code to receive a SU! item worth $10 when your purchase is $50-$150. Sounds like another good deal, right?! It is…

Thanks for stopping by.

May you have a beautiful day.

Make someone happy by sending them a handmade card made with love.


SU! Tag Buffet Project Kit

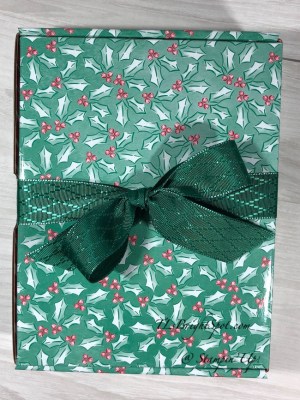
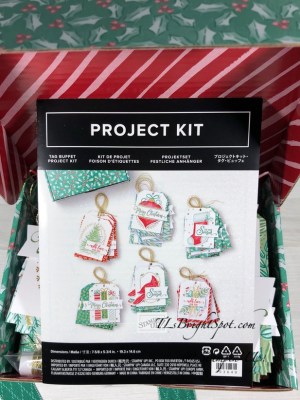
Hello! Welcome… I keep telling myself I am going to stop making Christmas projects, but… once started it’s hard to stop :O) Do you feel a jingle coming on – ha ha ha. The Tag Buffet Project Kit is so cute and fun to put together… and the box to store the completed tags is perfect. The ribbon is from the Wonder of the Season Combo Pack – 1″ Shaded Spruce and it is gorgeous ribbon!

Tag Buffet Project Kit
#1

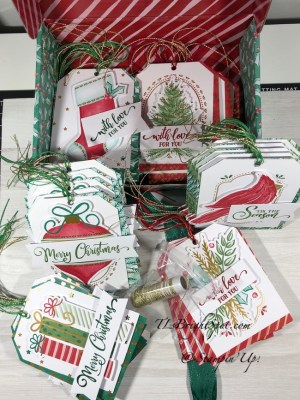
Isn’t this box wonderful? If you didn’t want to use it for tags, it can easily be used to gift a set of cards – just sayin’. So what comes in the kit… enough tags and gold cord to make 30 – yes 30 tags! 5 each for 6 designs and gold cord. And if you wanted you could add some card stock to turn them into cards. You add the Tag Buffet stamp set and inks and bingo – easy peasy. What a fun way to get together – physically distanced of course. You could invite five friends and let them do one of each design. Have them bring their own ink pads and dimensionals if possible: you provide the stamp set, acrylic blocks and wipes for sanitizing. And oh yes, don’t forget the wine, or root beer or your favorite beverage.

Tag Buffet Project kit
#2

Final product…

Tag Buffet Project Kit
#3

If you look closely, you will see more than just gold cord on. my tags. I added either red or green crochet cord with the gold cord provided, just cuz – that’s me… But i9t certainly isn’t necessary. This project kit can be found on page 5 of the August-December 2020 M ini Catalog that goes live to customers 4 Aug. Don’t have a catalog? I can fix that! If you do not have a demonstrator I would be happy to connect with you. During the month of July – yes I know it’s just about over… but when you purchase $50 worth of product SU! sends you an email with a $5 coupon.
For every $50 you spend, you receive another coupon. They are redeemable 4-31 Aug. Such a deal!, what are you waiting for – buy something!


Bonus Days. Earn in July, spend in August.

And when you order from me, please use my July host code to receive a SU! item worth $10 when your purchase is $50-$150. Sounds like another good deal, right?! It is…

Thanks for stopping by.

May you have a beautiful day.

Make someone happy by sending them a handmade card made with love.


SU! Arrange A Wreath and Wreath Builder Dies

Hi Everyone! Rain last night was a welcome relief… S-I-L is progressing after his elbow surgery, especially now that he’s home!

Today I have two cards for you today, both using bits of the Arrange A Wreath stamp set and coordinating Wreath Builder Dies. LOVE THIS WREATH DIE!!! And the little flowers are really cute.

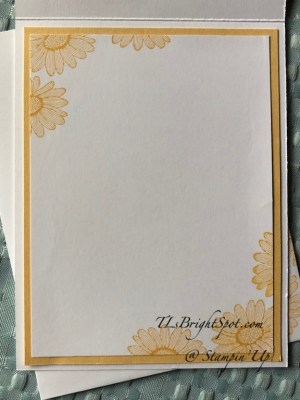
Card #1 uses the Wreath Builder Dies and Small Bloom Punch, also Flowers For Every Season 6×6 DSP. The ribbon is the 1/4″ Gingham in Bumblebee. I added the sweet flower centers from the 20-22 In Color Enamel Dots. Blossoms in Bloom stamp set offered the sentiment “Thinking of You” and Timeless Tulips was used for the sentiment in the circle.  Daisy Lane was used for the inside of the card and front of the envelope.

Wreath Builder Dies
Small Bloom Punch
#1

Daisy Lane for the inside of card #1


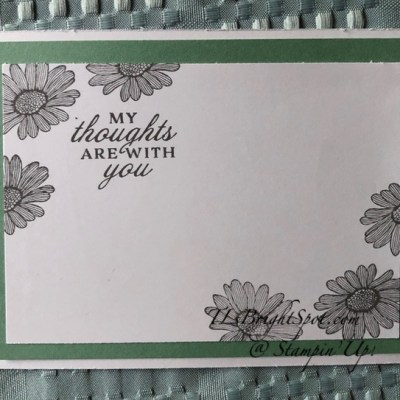
Card #2 uses the Wreath Builder Dies for the wreaths and the flowers: Gold Glitter Enamel Dots for the flower centers; Tasteful Texture 3D Embossing Folder for the Whisper White layer and envelope flap and the Polka Dot Tulle 5/8″ Whisper White ribbon. Ornate Frames Dies was used for the sentiment banner: Prized Peony stamp set for the sentiments.

Wreath Builder Dies
Card #2

Daisy Lane for inside
Card #2

What I like so much about these two is using the same dies but creating two very different cards. Think I’ll have to do a fall card with these wreaths :O) Do you have a favorite of these two. I think mine is #2, but then I often like tone on tone (white on white here). I also like the simplicity. While both are for losing someone special in your life, they are both uplifting – not dour.

That’s is for today… I’m not going to bug you about the Aug-Dec 2020 Mini catalog going live 4 Aug. Hopefully you know that already and have seen a lot of products (just from me) to add to your wish list. Bonus Days are here as well..Here’s a bit more info on that.

For every purchase of $50 from now until 3 Aug. you will receive from SU! by email, a $5 coupon that is redeemable 4-31 Aug. Such a deal!

Bonus Days. Earn in July, spend in August.

And when you order from me, please use my July host code to receive a SU! item worth $10 when your purchase is $50-$150. Sounds like another good deal, right?! It is…

Thanks for stopping by.

May you have a beautiful day.

Make someone happy by sending them a handmade card made with love.


SU! Dog Builder Punch and Playful Pets DSP

Hi Everyone. It has been so stiflingly hot lately – the humidity is super high and it just makes it real uncomfortable to have to be outside. I feel so fortunate to have air conditioning – didn’t grow up with it and I remember those days… Let’s see, I told about our S-I-L shattering his elbow in a cycling accident. He’s home now, good spirits and positive attitude. So so thankful for so many things. There does not appear to be nerve damage; he can move all his fingers! Essentially they had to remove the elbow – now he has three metal plates instead… what they can do now is just amazing. So thankful – God was at work (and continues to be!) throughout this in so many ways.

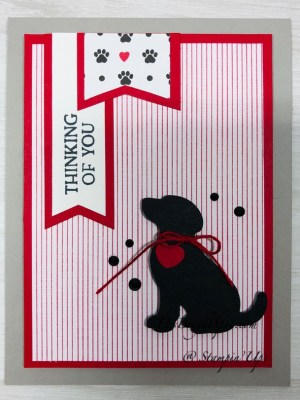
Card for today… for a friend whose dog passed away recently. Pets are such an important part of our lives… and she had this fella 18 years, longer than most.

Playful Pets DSP and Dog Builder Punch
#1

The card base is Gray Granite… layer Real Read then the Playful Pets DSP. This layer has dimensionals. The banners were punched with the Banners Pick a Punch. Those little paws and hearts in the DSP are just sweet, aren’t they? The dog is punched with the Dog Builder punch in Basic Black cs and he’s on dimensional too. I tied a piece of crochet yarn around that little doggies neck before attaching him to the card front.(I know, not a SU! item…) And that heart is part of the punch – and it’s in Real Red. Those little Black Rhinestone Jewels are a retired item (unfortunately!) The ‘Thinking of You’ sentiment is from the Blossoms in Bloom stamp set.

Playful Pets DSP and Dog Builder Punch
#2

Playful Pets DSP and Dog Builder Punch
#3

Thanks for stopping by.

May you have a beautiful day.

Make someone happy by sending them a handmade card.


SU! Prized Peony

Hi Everyone! Things have gotten a bit complicated here… it’s called the “concern zone” but it’s nothing to take lightly… our S-I-L is a competitive cyclist (first in the country in his age group last year and several years prior – so, GOOD at it) and has been practicing inside for the past several months – at least since March. He ventured out about 1 1/2 weeks ago, riding 3 hrs, going at 50 mph speeds. Yeah, not something I would ever do… At any rate, he joined a new team recently and they went for a ride Sunday; didn’t touch, fist bump or anything. These guys are cautious and careful.. And guess what… he hit a nasty pothole and went boom… shattered his right elbow. Surgery was today – 4 1/2 hrs long…It’s complicated due to the nerves that run down the elbow, bone fragments and all that. Anyway – appreciate your prayers for him – and our daughter who has been so strong..,.He’s a dentist by vocation and this is a real setback for them, with Covid 19 and all that. So yes, I am one concerned M-I-L trying to stay calm, cool and collected :O)

Prized Peony
#1


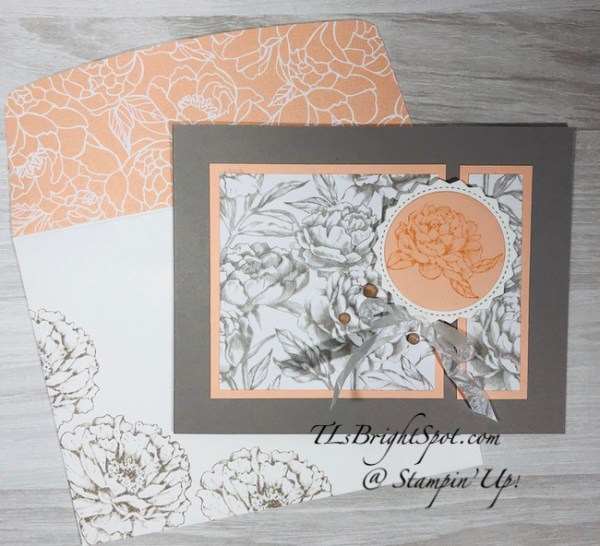
Todays card uses the Prized Peony stamp set and the gorgeous Peony Garden DSP. And while I don’t usually enter challenges, this one is loosely based on the Hand Stamped Sentiments Sketch Challenge #344 (HSSSC344). I tuned it sideways…

Elements for this card:

  • Prized Peony stamp set
  • Peony Garden DSP
  • Gray Granite cs – card base
  • Petal Pink cs – layering
  • Whisper White cs – circle and inside
  • Gray Granite ink
  • Petal Pink ink
  • Wink of Stella
  • North Pole Wonder Dies
  • Crinkled Seam Binding 1/4″ Whisper White
  • Elegant Faceted Gems

Layer the Peony Garden DSP on Petal Pink cs for the front and adhere with liquid glue.Stamp the small peony from the Prized Peony stamp set in Petal Pink and color in Wink of Stella. Die cut using the North Pole Wonder Dies circle. Die cut the pinked circle from the same die set using Whisper White cs. Adhere the two circles together with liquid glue and add dimesnionals: attach. Add a bow from the Crinkled Seam Binding !/4″ Whisper White ribbon with a glue dot. Add three Elegant Faceted Gems in Petal Pink.Your card front is complete!

Prized Peony, inside
#2

For the inside, I adhered Petal Pink cs for a layer then stamped the Whisper White panel with the medium peony from the stamp set in Gray Granite stamped off once. I also stamped the sentiment in Gray Granite from the Prized Peony stamp set. Adhere with liquid glue to the Petal Pink panel. And your inside is complete as well.

For the envelope, I used another strip of the Peony Garden DSP for the flap and stamped the front with the same medium peony in Gray Granite ink. So simple, so elegant – and ready. :O)

Prized peony
#3

Prized Peony
#4

Right now SU! has an awesome deal going on called Bonus Days..For every purchase of $50 from now until 3 Aug. you will receive from SU! by email, a $5 coupon that is redeemable 4-31 Aug. Such a deal!

Bonus Days. Earn in July, spend in August.

And when you order from me, please use my July host code to receive a SU! item worth $10 when your purchase is $50-$150. Sounds like another good deal, right?! It is…

Thanks for stopping by.

May you have a beautiful day.

Make someone happy by sending them a handmade card made with love.

Card Cuts for todays card:

  • Gray Granite 4 1/4 x 11
  • Petal Pink 3 1/4″ square + 1 x 31/4 + 2″ scrap for circle; 4 x 51/4
  • Peony Garden DSP 3″ square + 3/4 x 3; 2 1/4 x 6 for envelope flap
  • Whisper White 2 1/2 square scrap for circle; 3 3/4 x 5 for inside


.