It’s the start of a new week – are you ready for it? I’m a bit psyched as I have a couple of things happening this week – and well, I just have a positive attitude, which helps. I haven’t played with the Dove of Hope Bundle much and decided today was the day to share a card with that as the focus.
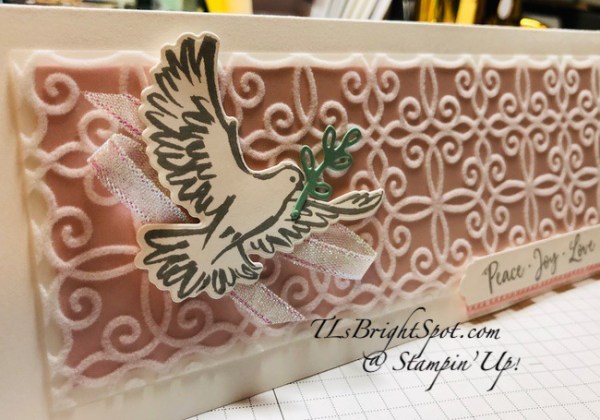
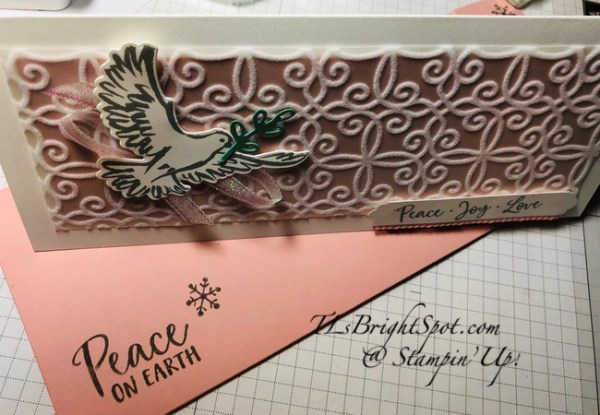
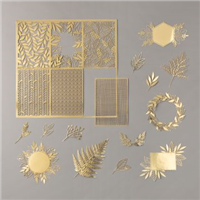
This bundle has some stunning dies, for the wings and for the tail. You can see them in this photo. The dove has a sweet look on it’s face, don’t you think so? The dove practically makes the card all by itself. But I also like the background it’s on – almost like a cloud in it’s softness except of course it’s rectangular.
Let’s get to the deets on this sweet card.
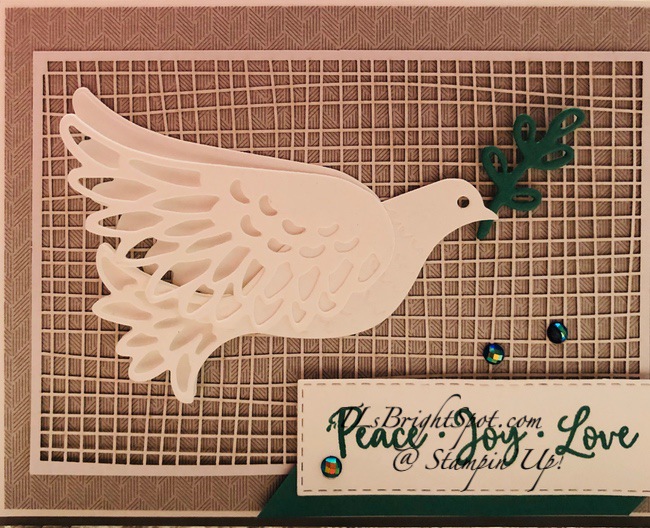
Begin with Gray Granite cs as your card base. Add a layer of Whisper White and Peony Garden DSP which have been placed on dimensionals and added to the card base. Die cut the dove from Whisper White cs using the Stitched Dove Dies that are part of the Dove of Hope Bundle. I used four dies for the dove. Don’t you love the intricateness of the wing die? The background wing is a solid one – could have used the intricate but I wanted this dove flying up and knew it wasn’t going to show much. The intricate tail is all part of the body of the die. Behind it I have added a solid tail for depth and that was added with a mini dimensional so it wouldn’t be flat. The wings were attached with liquid glue. I also die cut a sprig from Just Jade cs. I like how this slight color gives the card a brightness – and hope.
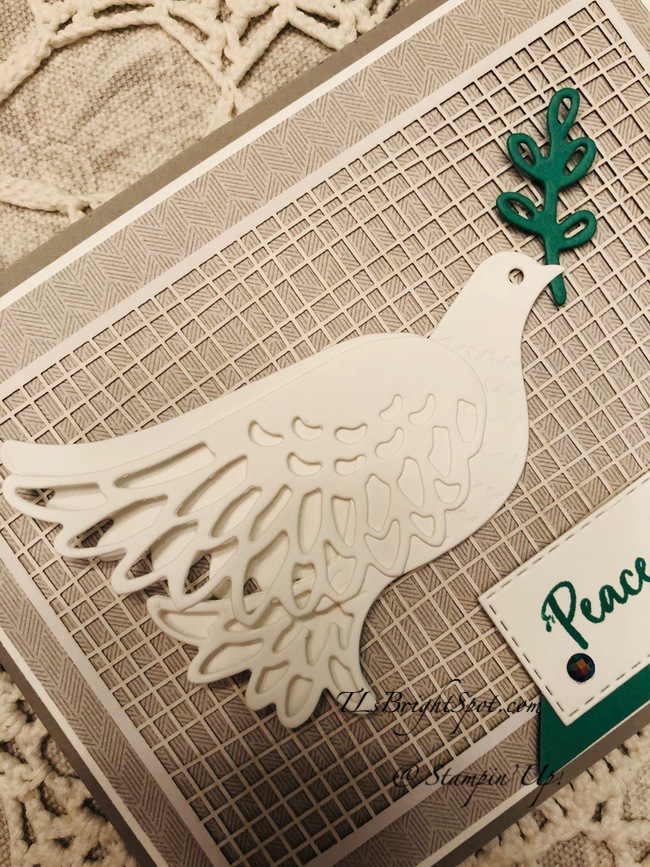
When I was fiddling with placement I decided a layer of texture was needed and pulled out the Forever Gold Laser-Cut Specialty DSP and turned it over to the white side. It was just enough! I used Stampin Seal to adhere the dove to the Laser-Cut paper, then Stampin Seal again just where the dove was to adhere that to the card front. I added a tiny dot of liquid glue to the Just Jade sprig and slipped in under the beak, adhering it to the beak.

For the sentiment panel, I stamped in Just Jade ink on Whisper White cs using a sentiment from the Dove Of Hope stamp set. I die cut this using one of the Stitched Rectangle Dies. I added a Just Jade cs strip to the back of the sentiment banner with liquid glue. I adhered this to the card front with dimensionals. For a final bit of glam I added three Blue Adhesive-Backed Gems – and the card front was done.
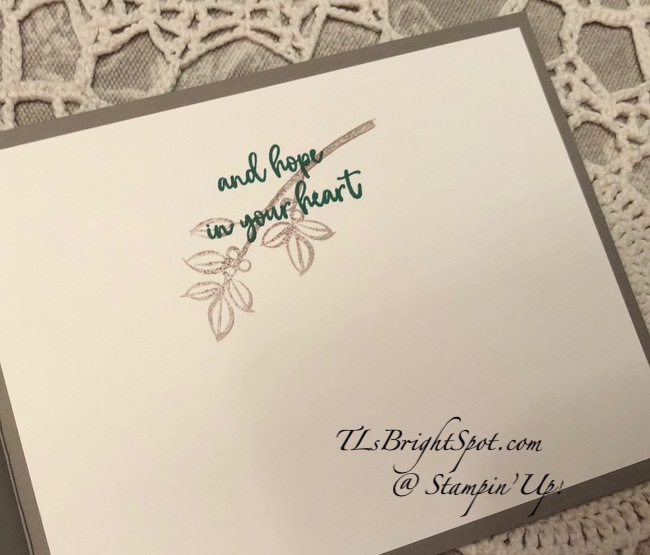
For the inside of the card I stamped the sentiment in Just Jade ink on a Whisper White panel then stamped the larger sprig in stamped off once Gray Granite ink. You probably think these should have been reversed (the sprig in Just Jade ink), but I wanted the sentiment to be the focus.
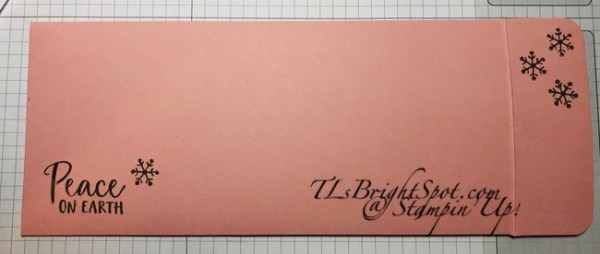
For the envelope I stamped the smaller dove in stamped off once Gray Granite ink and covered the flap with a panel of the same Prized Peony DSP, adhering it with liquid glue. And the card was done… Hope you like!

Thanks for stopping by.
My you have a beautiful day.
Make someone happy by sending them a handmade card filled with love.
The products used in todays project may be found below. Be sure to use my current HOST CODE HXXMKN2X if your purchase is between $50-$150 to receive a free SU! item of your choice valued at $10. Remember there is a serious 15% off certain Designer Series Paper during the month of October – to the very end of the month. Take advantage!

Forever Greenery Designer Series Paper – 152492
Sale: $9.78
Price: $11.50

Artistry Blooms Designer Series Paper – 152495
Sale: $9.78
Price: $11.50

Magic In This Night Designer Series Paper – 153517
Sale: $9.78
Price: $11.50
Whale Of A Time 6″ X 6″ (15.2 X 15.2 Cm) Designer Series Paper – 152460
Sale: $9.78
Price: $11.50
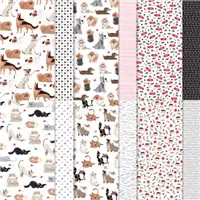
Playful Pets Designer Series Paper – 152489
Sale: $9.78
Price: $11.50

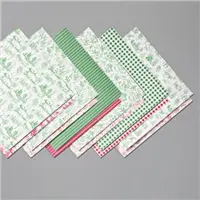
Trimming The Town Designer Series Paper – 153491
Sale: $9.78
Price: $11.50
Toile Tidings Designer Series Paper – 150432
Sale: $9.78
Price: $11.50

Snowflake Splendor Designer Series Paper – 153512
Sale: $9.78
Price: $11.50

Plaid Tidings 6″ X 6″ (15.2 X 15.2 Cm) Designer Series Paper – 153527
Sale: $9.78
Price: $11.50

‘Tis The Season 6″ X 6″ (15.2 X 15.2 Cm) Designer Series Paper – 153489
Sale: $9.78
Price: $11.50

Playing With Patterns 6″ X 6″ (15.2 X 15.2 Cm) Designer Series Paper – 152490
Sale: $9.78
Price: $11.50

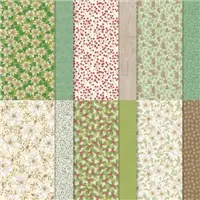
In Good Taste Designer Series Paper – 152494
Sale: $17.85
Price: $21.00

Peony Garden Designer Series Paper – 152483
Sale: $9.78
Price: $11.50
Poinsettia Place Designer Series Paper – 153487
Sale: $9.78
Price: $11.50

Heartwarming Hugs Designer Series Paper – 153492
Sale: $9.78
Price: $11.50 Add All to Cart
Products for todays project. Card cuts are listed at the bottom of this post.
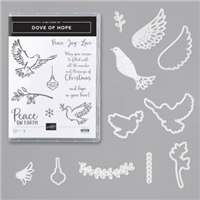
Dove Of Hope Bundle (English) – 155158
Price: $49.50

Rectangle Stitched Dies – 151820
Price: $35.00
Forever Gold Laser-Cut Specialty Paper – 152493
Price: $15.00

Gray Granite 8-1/2″ X 11″ Cardstock – 146983
Price: $8.75

Gray Granite Classic Stampin’ Pad – 147118
Price: $7.50

Just Jade 8-1/2″ X 11″ Cardstock – 153079
Price: $8.75

Just Jade Classic Stampin’ Pad – 153115
Price: $7.50
Peony Garden Designer Series Paper – 152483
Sale: $9.78
Price: $11.50

Blue Adhesive-Backed Gems – 153547
Price: $8.00 Add All to Cart
Card cuts:
Gray Granite CS – 4 1/4 x 11 scored at 5 1/2
Whisper White CS – 4 x 5 1/4 (2) + about 3 1/2 x 5 for dove + scrap for sentiment panel
Peony Garden DSP – 3 7/8 x 5 1/8
Just Jade CS – 3/8 x 3 1/4 + scrap for sprig