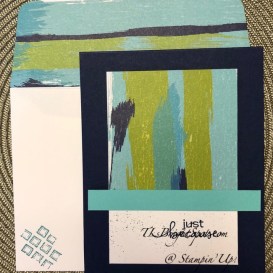
Today’s card is another using the wonderful Tag Buffet stamp set and using the stocking stamp. It’s so cute, that little stocking! Here’s the card…

Tag Buffet stamp set
#1
These are the stamp sets I used for this card:
- Tag Buffet stamp set for the stocking
- Dove of Hope stamp set for the for the sentiment on front.
- Cherish the Season Stamp set for the pine branches and the inside sentiment
I also used:
- Winter Snow Embossing Folder with Whisper White Craft ink
- Adhesive-So Sweetly Dies – the 3rd smallest, the largest and next to largest
- Ornate Layers Dies for the inside
- Wonder of the Season Combo Pack Ribbon – the Gold cord
- Just Jade Stampin Blends for coloring the stocking, fussy cut and placed on dimensionals
- Pick a Punch for the sentiment tag
Papers:
- Just Jade cs 3 3/4 x 5 for the front panel run through the Snowflake embossing folder and 4 x 5 1/4 for the inside (this panel should have been a bit larger 4 x 5 3/8
- Tis the Season 6×6 DSP approx.4 x 2 1/2 + 2 1/4 x 6 for the envelope flap
- Whisper White approx. 3 x 4 1/4 and die cut the background for the stocking out of the center 🙂 and approx .4 1/4 x 5 1/4 for the inside die cut
All the layers are adhered with liquid glue except the stocking, which is on dimensionals. Here are more pictures…

Tag Buffet
#2

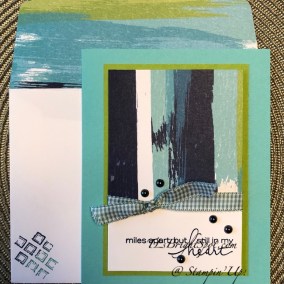
Tag Buffet, inside
#3
And here’s a final picture…

Tag Buffet
#5
This was a bit of a new format for this card, lots of layering and fairly simple, so wasn’t sure tons of directions were necessary.
Thanks for stopping by.
May you have a beautiful day.
Make someone happy by sending them a handmade card filled with love.
Below is a list of the supplies that will take you directly to my online store 😁 Enjoy shopping and creating… When you shop with me, you will receive a SU! item of choice worth $10 when your purchase is over $50. All you have to do is let me know what that is after placing your order (and yes, I WILL reach out to you when your order is placed!)
.<div><div><div id=”635c1263-e56c-4412-8ab8-2603588a2b2c”>https://mystampinblog.com/Showcase/Details/fff0eab3-4155-414f-bdb2-4ee4cf5992db?layout=Tiled&showSku=True&showPrice=True&showSalePrice=True&showAddToCart=False&showAddAllToCart=True&showDownload=True&transparent=True&bordered=True&hFontHeight=14&rFontHeight=13&imageHeight=120&middleContent=False</div>https://mystampinblog.com/Script/ShowcaseDetailsScript</div></div>
And now is the perfect time to join my team as well… SU! has this awesome deal going on until Sep 30… take a peek…
- SU! has a promotion going on for new recruits that is a win-win for everyone… for $99 you will get a starter kit worth of products valued at $125 – plus two card sets with instructions & an additional stamp set & Rhinestones. What’s not to like about that? Join my team- and yes, do it NOW so you get all the benefits of this awesome deal. More details below.
.
- In addition to the regular starter kit (for $99 USD/$135 CAD, new recruits choose $125 USD/$165 CAD-worth of products) new recruit will also receive enough card stock pieces to make 16 cards, a pack of Rhinestone Basic Jewels, the So Much Love stamp set, and the Queen Anne’s Lace stamp set—all for their first event.
- 8 packs of precut card stock of the coastal cabana pack will be provided, and 8 packs of precut card stock of the Granny Apple Green pack, for a total of 16 cards (packs include envelopes). The new recruit can choose what samples to replicate and how to distribute the packs to their customers.
- Important note: Ink, adhesive, cutting tool, and clear block for stamping must be purchased separately. However, these products may be included as part of the Starter Kit product selection.