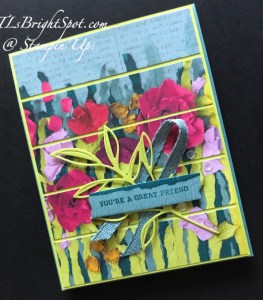
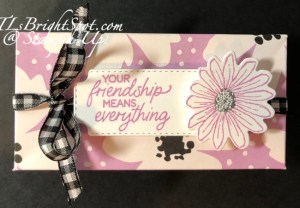
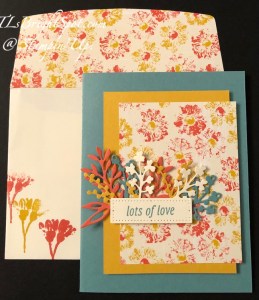
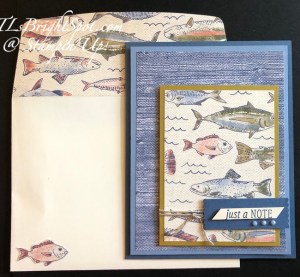
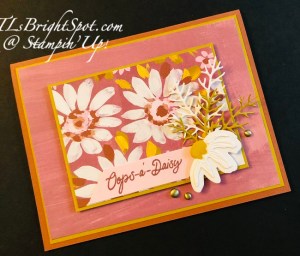
Not long ago I had a card class and we made a card with the Cheerful Daisies bundle. The background for all the cards were from Glorious Gingham DSP. The card I shared with you was done on Blueberry Bushel and it really made the daisies pop. I had an extra left over, but this time in Pecan Pie, so I made that one up as well – and that’s my card for today.

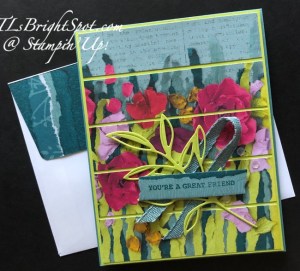
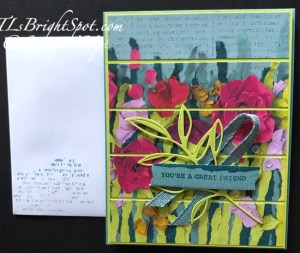
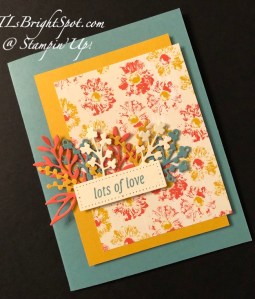
Isn’t this pretty? I used the Daffodil Delight Stampin’ Blends for two of the flower centers and an actual piece of Daffodil Delight card stock for the largest flower. You can see the Blends is slightly darker, so a nice contrast. Behind the leaves is Granny Apple Green card stock. The greeting comes from Go-to Greetings stamp set and was stamped in Pecan Pie on the Basic White strip. A little Linen bow was added for fun and Wild Wheat dots from the 2023-2025 In Color Dots pack. The vellum is from Vellum Basics and is a 2″ wide strip.
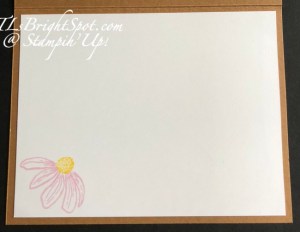
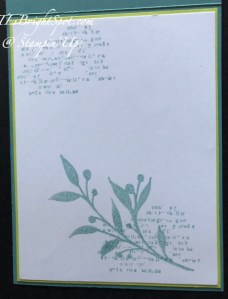
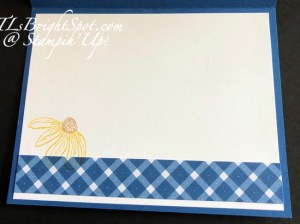
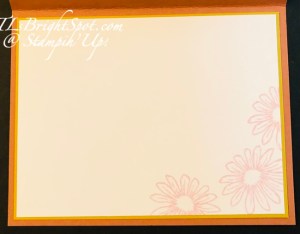
For the inside of this card, I stamped this partial daisy from Cheerful Daisies stamp set in Bubble Bath, then the center in stamped off Daffodil Delight ink. I should have maybe stamped the flower in daisy Delight and the center in Pecan Pie – – – but I didn’t.
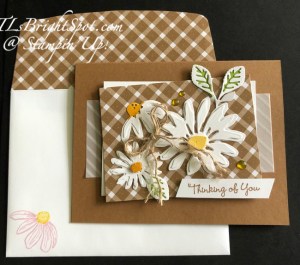
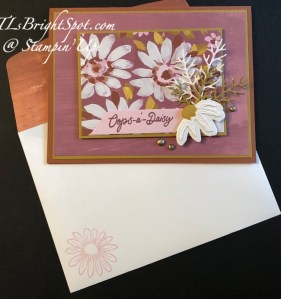
More of the Glorious Gingham on the envelope flap and the same stamped daisy from Cheerful Daisies stamp set on the envelope front: Bubble Bath ink for the petals and stamped off Daffodil Delight for the center. If you want to see the card on Blueberry Bushel -here’s a link to the Blueberry Bushel post. Love this bundle of Cheerful Daisies and the Glorious Gingham DSP together!
If you do not have a demonstrator and would like to order from me or need a catalog, I would like to help you create. When ordering $50 or more in product (before shipping/ taxes), use my HOST CODE 64NDVS4D to receive Star Rewards and a SU! gift valued to $10. Star Rewards build up so that when you have 8 rewards from me, you can receive a stamp set valued to $40. :O) And when your order is $50 or more prior to Shipping/ taxes, you also receive the monthly tutorial. :O)
You may order from me here.
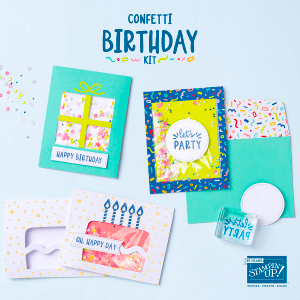
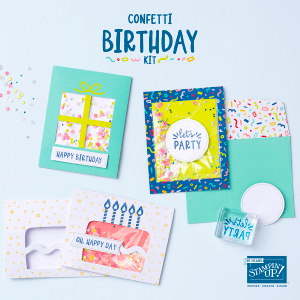
Stampin’ Up! has kits that are super quick and easy to make – great for a gathering as all elements are provided in the kit. Talk about CELEBRATE!

162390
CONFETTI BIRTHDAY KIT
$23.00 USD | $32.00 CAD
Available starting 2 May
Also available in French (item 16239
This month’s kit includes:
- Enough supplies to create 9 cards—3 each of 3 designs
- 9 coordinating envelopes
- Confetti Birthday photopolymer stamp set
- One Blueberry Bushel Ink Spot
- Printed card bases, card fronts, self-adhesive cellophane shaker bags, die-cut pieces, holographic foil labels, adhesive, embellishments, and a clear block
- Finished card size: 5-1/2″ x 4-1/4″ (14 x 10.8 cm)
- Coordinating colors: Blueberry Bushel, Coastal Cabana, Crushed Curry, Flirty Flamingo, Lemon Lime Twist, Poppy Parade

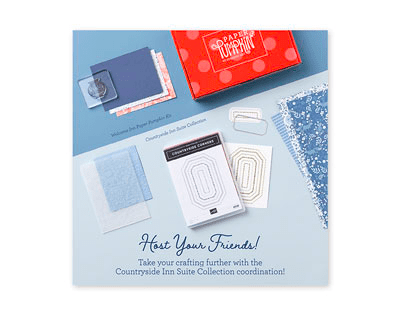
Stampin’ Up! has a monthly subscription for Paper Pumpkin that is also a kit all in one. The first order includes an acrylic block which can be used for all Paper Pumpkin kits after that. This particular kit must be ordered by June 10. Click on the photo above to go straight to my Paper Pumpkin area to subscribe :O) Click here to purchase Paper Pumpkin.

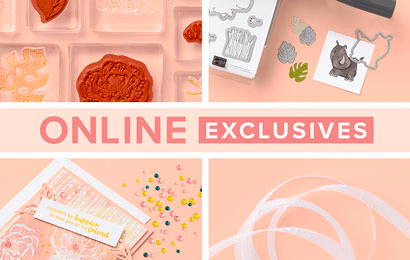
Online Exclusives are products not available in a catalog. This allows Stampin’ Up! to update, add to seasonally or when needed, products on demand. Click on the logo to go straight to my store to order. Click here to order ONLINE EXCLUSIVES.
Thanks for stopping by. May you have a beautiful day!