SU! Sep. Team Projects

Hi Everyone – it’s Saturday! It’s amazing what cool weather can do…this is that in-between season, before the leaves turn and fall – cool temps, absolutely perfect for sleeping, not quite cool enough for a fire in the fireplace though. We live in a ‘shore community’ and have lots of folks visit due to the many beaches. By now though, the beaches are OURS again….😁

Today I want to share a couple of team projects we created virtually ‘together’ last Sunday. We had been sent pictures and dimensions and instructions via email, but then created them via ZOOM. What a great tool ZOOM has become! Anyhoo – these are fun projects and primarily use the Celebration Tidings Bundle. The stamp set has stamps for Halloween, Thanksgiving, Christmas AND Valentines!  Here are three of the projects…

Celebration Tidings Bundle and Poinsettia Petals


Isn’t this beautiful? Yep – the bag is empty – I had no candy to fill it, but the Celebrations Labels Dies create the ‘fold-over’ and background for the Poinsettia Dies. Plaid Tidings 6×6 DSP was used for the ‘label’, Shaded Spruce for the leaves, a bit of Brushed Metallic for the berries, Cherry Cobbler for the poinsettia and the gorgeous Beaded Pearls to accent the center of the poinsettia. . The cello bag pictured here is a retired commodity (unfortunately)n but SU! has Mosaic Gusseted Cello Bags that are very versatile.


celebrations Tidings Bundle
Project #2


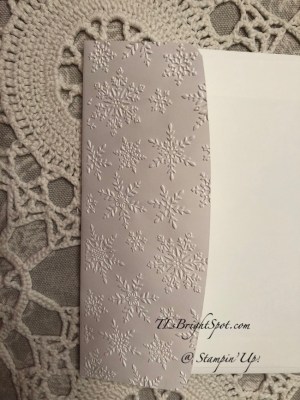
Project #2 is a Christmas card… Celebration Tidings Bundle, Stitched Rectangles Dies and Winter Snow 
Embossing Folder were the primary SU! items used. Another pattern from Plaid Tidings 6×6 DSP was a major focus and I love how the Celebration Dies were used for a fold-over flap for a surprise addition. It was my personal addition of the Linen Thread bow and Red Rhinestone Basic Jewels for the card front. Let me share inside the flap and the card inside as well.


Celebration Tidings Bundle, inside flap

It was my decision to add the Plaid Tidings 6×6 DSP to the top inside of the die cut. And here’s my reasoning… When using the Blends to color, the stamping element, their is some bleeding through and I didn’t like the way that looked. I simply used the smallest die to cut a piece of DSP to cover the bleeding through. It makes it look more complete and professional to me. Now for the inside…

Celebration Tidings C’mas card inside
Project #2


I chose to do no coloring for the inside – I liked the simplicity, and no additional sentiment needed – lots of room for sharing a friendly update!


Project #3 is a fall card, again using the Plaid Tidings 6×6 DSP and the Celebration Tidings Bundle.

Celebration Tidings Bundle, Fall
Project #3

Celebration Tidings Bundle, Fall
Project #3


Another gorgeous project! Plaid Tidings 6×6 DSP takes center stage again, but the stamped Celebration Die holds its own for sure. Colors here are Cinnamon Cider, Blackberry Bliss, Crumb Cake and Very Vanilla card stocks. Blends used for coloring are Pumpkin Pie, Shaded Spruce. Markers used are Early Espresso and Bumblebee.

Thanks for letting me share our team projects! They are beautiful and it’s fun to gather, even if virtually, to encourage and learn from one another. Want to be able to do this? Join my team!

SU! has a promotion going on for new recruits that is a win-win for everyone… for $99 you will get a starter kit worth of products valued at $125 – plus two card sets with instructions & an additional stamp set & Rhinestones. What’s not to like about that? Join my team- and yes, do it NOW so you get all the benefits of this awesome deal. More details below.

.

  • In addition to the regular starter kit (for $99 USD/$135 CAD, new recruits choose $125 USD/$165 CAD-worth of products) new recruit will also receive enough card stock pieces to make 16 cards, a pack of Rhinestone Basic Jewels, the So Much Love stamp set, and the Queen Anne’s Lace stamp set—all for their first event.
  • 8 packs of precut card stock of the coastal cabana pack will be provided, and 8 packs of precut card stock of the Granny Apple Green pack, for a total of 16 cards (packs include envelopes). The new recruit can choose what samples to replicate and how to distribute the packs to their customers.
  • Important note: Ink, adhesive, cutting tool, and clear block for stamping must be purchased separately. However, these products may be included as part of the Starter Kit product selection.
  • Thanks for stopping by.
  • May you have a beautiful day.
  • Make someone happy by sending them a handmade card filled with love.


SU! Beautiful Autumn Bundle

It’s Friday already – where did this week go? How was it – did you have a good week? We had lots of meetings this week, mostly virtual – and that’s OK. Being able to accomplish the goals is what matters. Ok – idle chatter… let’s get on with it shall we?

Today’s card is another fall one – a masculine birthday card. And it’s the DSP that really takes center stage, although… the Autumn Punch pack from the Beautiful Autumn bundle shows itself pretty well too. This is a CASE of a card I saw by another demo: Dawn Olchefske. Thanks for the inspiration!

Beautiful Autumn Bundle
#1

Let’s take a peek at how we made this card.

  • cut a rectangle with Stitched Rectangle Dies from  a 2 x 4 piece of Pumpkin Pie cs. SAVE the outside trim!
  • Using the wonderful Autumn Punch Pack, punch the leaves and acorn. And quick tip… align the right side of the punch with the paper and punch, then move to the left side and align the left sign and punch, then punch the center. And if it helps even more, lightly draw a center line that can be erased after punching.
  • Slip a DSP scrap behind it and adhere with liquid glue. There are so many possibilities in this Gilded Autumn Specialty DSP pack, but I definitely wanted masculine and this check fit that perfectly.
  • Mat on a layer of Early Espresso cs with dimensionals. But wait – some texture… I played around with several things, paper, various ribbons, even other DSP, but settled on this from the Forever Greenery Trim Combo Pack. Layer and adhere with Stampin Seal then place on the Early Espresso cs.
  • Adhere another panel of Gilded Autumn DSP to the Early Espresso card base with liquid glue. (What I would do differently here… adhere DSP to Very Vanilla OR Pumpkin Pie layer, then to the card stock base.)
  • Stamp the birthday sentiment from the Best Year stamp set with Pumpkin Pie ink on Very Vanilla cs. Die cut using the Ornate Frames Dies.
  • Adhere both the sentiment panel and the Autumn Punch panel to the card using liquid glue.
  • For a bit of ‘glam’ and added texture – add the Artistry Blooms Adhesive-Backed Sequins to the sentiment panel.

For the inside… and I really like how this turned out!

Beautiful Autumn Bundle – inside
#2

  • Adhere the saved ‘trim’ from the Stitched Rectangle onto a panel of Very Vanilla cs, using liquid glue.
  • Stamp the sentiment from the Banner Year stamp set in Early Espresso ink.
  • Adhere the punched out leaves/ acorn (from the card front) with liquid glue.
  • Adhere the Very Vanilla panel to the card base – and voila – the card is complete.

For the envelope..

Beautiful Autumn
Bundle
#3

Beautiful Autumn Bundle
#4

Thanks for stopping by.
May you have a beautiful day.
Make someone happy by sending them a handmade card filled with love.
Card cuts:
  • Early Espresso 4 1/4 x 11 scored at 5 1/2, 1 7/8 x 4
  • Gilded Autumn Specialty DSP 4 1/8 x 5 3/8, 2 1/4 x is 6, scrap
  • Pumpkin Pie 2 x 4
  • Very Vanilla 4 x 5 1/4, scrap 2 1/2 x 1 1/2

SU! Ornamental Envelopes and Celebrations Labels Z-Fold

Helllooooo. It’s Monday, the start of a new week. What’s your plan – who are you reaching out to? My card today is guess what – a CHRISTMAS CARD! Yep – I’m back to making them and a fun fold is always a bit exciting – and creating a Z-Fold is – just – easy. Let’s take a look…

Z-Fold, Celebration Labels w/ Ornamental Envelopes
#2

Z-Fold, Celebration Labels
#1


Fun look, right? I’ve used a few stamp sets on this card to get the sentiments or images I wanted. I love these ornaments and they were so fun to color. But I’m getting ahead of myself… Choose a DSP that will add color to the background but not compete with your main image. Here I chose Snowflake Splendor DSP and adhered it to the card front (that card stock is Pacific Point 4 1/4 x 11 and scored at 5 1/2). With the Celebration Labels Dies, cut one in Whisper White for your stamping and the next size larger for a nice background. You are actually cutting through the card front and the DSP and card stock layers. AND – big tip here, listen carefully – you are cutting from the back side of the card front . The reason for this is to have the plain side behind your main image and to have a decorated side when you open the card. It makes the larger die cut stand out more as well. 

Stamp the ornaments from the Ornamental Envelopes stamp set, only using the four ornaments shown. In other words using sticky notes, tape off that section on the stamp you do not want in your image prior to inking, ink the appropriate area in Tuxedo Black Memento ink – then remove the sticky notes and stamp on the die cut Whisper White. Stamp the sentiment using the Itty Bitty Greetings stamp set in Granny Apple Green. Now color the ornaments – I used: Poppy Parade, Granny Apple Green, Daffodil Delight  and Shaded Spruce Stampin Blends. Put dimensionals on the back and adhere to the solid color side of the larger die cut.

For the Z-Fold: cut a strip from Whisper White 2 1/2 x 10 and score at 4 & 8. Burnish these score lines well so they make a wonderful Z. This creates ‘panels that are 4″, 4″ and 1 1/2″. The smallest panel is the end that will attach to the Celebration Dies and the opposite end will adhere to the inside of the card. With the 4″ end and the score line against the score line of the card, adhere the two together with liquid glue, centering it from top to bottom.  Look at this photo again for reference… Now it is time to adhere the die cuts for the front. With the card closed and the 1 1/2 strip facing you, place the die cut panel right into it’s place and adhere with liquid glue. Voila – the Z-Fold is created! Now you are ready to create the inside.

Z-Fold, Celebration Labels
#1For the inside, cut  2 panels of Seaside Spray cs 2 3/8 x 3 7/8; then cut two panels of Whisper White cs 2 1/4 x 3 3/4. Stamp your Whisper White panels. I used Yuletide Pasture stamp set ‘cuz these animals remind me of those in the stable with baby Jesus. 🙂 I stamped them in Soft Suede ink and then used the smallest of the Water Painters to ‘bleed’ the color. The collar of the sheep was colored with Poppy Parade, the bells with Daffodil Delight and the leaves with Granny Apple Green – all Stampin’ Blends. The sentiment on the sheep panel was from the Itty Bitty Greetings stamp set and stamped in Granny Apple Green ink. The bull  got fun ornaments hung from his horns using the Little Treats stamp set and colored with Poppy Parade, Granny Apple Green and the Daffodil Delight Stampin Blends. 

Now these Whisper White panels are colored, adhere them to the Seaside Spray panels with liquid glue, then adhere to the inside of the card on the strips. This picture will help you. I apologize it’s in the wrong direction! Should have fixed that… 😦

Z-Fold inside card
#3

Now flip the card over and do something for the back – – I cut a panel of Whisper White 4 x 5 1/4, stamped the sentiment from the Little Treats stamp set in Granny Apple Green ink and adhered to the card with liquid glue. And your card is complete!!! Such fun. Love doing this.

Z-Fold, back
#5

Z-Fold
#4


Thanks for stopping by today.

May you have a beautiful day.

Make someone happy by sending them a handmade card filled with love.


SU! Tag Buffet Plus

Hi Everyone… did I ‘get’ you with that title? Funny… what it means is Tag Buffet stamp set plus Stitched Nested Labels Dies plus Dainty Diamonds 3D embossing folder.  And yes, it’s a Christmas card. I counted my cards the other day and I don’t have nearly enough. I wonder what Christmas will be like this year – with the pandemic et all? But I can’t go there yet, cuz my head is not able to wrap around all the ‘what ifs’ and it certainly won’t help me to fret about it.

We had a cord of wood delivered yesterday (that’s a stack 4’x 4′ x 8′, I think) and hubby and I carted every piece of it around to the back yard and stacked it!!! Ta da!!! Give us points folks – that’s a lot of wood to haul & stack. In fact it’s 28 cart loads – not wheelbarrow loads, cart loads. Garden carts have two wheels and are much more stable than wheelbarrows and they are larger that wheelbarrows. We would haul five loads, stacking each one as we took it ’round, then rest a bit. We did 15 before lunch and the rest after. Thank goodness it was a gorgeous day – only about 72 and very low humidity. I’ll include a photo at the end – just so you can see we did it :O)

The card…

Tag Buffet Plus
#!

This is such a cute stamp set, I especially love the Christmas images (stocking and this gorgeous ornament). And here’s what I did …

Stamp the ornament from the Tag Buffet stamp set with Tuxedo Black Memento ink and color it with the Cherry Cobbler Stampin Blends, then fussy cut. Oh, and I colored the hangy thingy with Bronze Stampin Blends and covered that with Wink of Stella.While I was at it, I stamped the sentiment (yep, it’s from the Tag Buffet stamp set!) onto Whisper White cs with the Tuxedo Black Memento ink and fussy cut that as well.

I die cut a Stitched Nested Label from Whisper White cs and a larger one from Tis the Season 6×6 DSP. By the way – my Magnetic Platform for the new SU! Cut and Emboss machine arrived the day before so I used that and oh my gosh – incredible! The dies didn’t move one bit!!!

I took another panel of Whisper White cs and ran it through the Dainty Diamonds 3D Embossing Folder.That was. adhered directly to a Thick Whisper White card base. I then adhered the DSP stitched die cut and the Whisper White stitched die cut, again with liquid glue. For the ornament, I first punched a tiny hole in the hanger thingy and slipped a length of Gold metallic trim from the Forever Greenery Trim Combo Pack and glued it in place with a dot of liquid glue. The ornament then got dimensionals and was placed atop the Whisper White stitched die cut. I put dimensionals on the Merry Christmas sentiment and attached it to the bottom of the card. For a little bling I added the stunning Wonderful Gems.

Tag Buffet Plus
#2

For the inside I adhered a panel of Cherry Cobbler to the card base. I then took a panel of Whisper White and stamped the sentiment from the Tag Buffet stamp set inCherry Cobbler ink. Then I stamped the ‘needles’ from Just Jade ink and placed another Wonderful Gem. This panel was adhered to the Cherry Cobbler with liquid glue and the card was complete.

Tag Buffet
#3

For the envelope I stamped a leaf ‘spray’ from the Tag Buffet stamp set in Just Jade ink. For the envelope flap I took several strips of Cherry Cobbler, Whisper White, Tis the Season 6×6 DSP and another Whisper White and adhered them then trimmed to fit. Fait accompli – card is ready!

Tag Buffet Plus
#4

Thanks for stopping by.

May you have a beautiful day.

Make someone happy by sending them a handmade card filled with love.

Card Cuts for today’s project:
  • Thick Whisper White 4 1/4 x 11
  • Whisper White 4 x 5 1/4 (embossed); scraps for die cut and fussy cut sentiment, 3 5/8 x 4 7/8 (inside panel) + strip scraps
  • Cherry Cobbler 3 7/8 x 5 1/8 + scrap strip for envelope flap
  • Tis the Season 6×6 DSP approximately 2 1/4 x 4 for die cut + scrap strip for envelope flap

SU! Boho Indigo #2 on Notecard

Hi Everyone! It is b-e-a-u-t-i-f-u-l here in NJ, USA… Cool temps, low humidity – yes – I could accept this for a while 😁… Just perfect!

My card for today is another Boho Indigo on a Notecard. I had stamped three vases in Memento Black ink some time ago and they have been sitting on my workspace waiting patiently to be used. I swear a little gremlin kept pushing them forward saying “use me, use me”. Must be my imagination 🙂

Card…

Boho Indigo 2

What we have is three colors (a couple of shades of green but that’s ok): a Petal Pink from the Peony Garden DSP, solid Petal Pink cs , Whisper White cs (Postage Stamp Punch, sentiment banners and of course the Notecard, and Pear Pizzazz (+ Old Olive 1/4″ Ribbon from the Ornate Garden Ribbon Combo Pack).

Stamp the vase from the Boho Indigo stamp set in Memento Black ink. Add dimesnionals to it and adhere to a Whisper White piece that has been punched using the Postage Stamp Punch. (Love this punch – such a sweet border it creates…) Die cut the leaves (twice) from Pear Pizzazz cs using the Boho Indigo coordinating dies. Trim the extended stems and adhere with liquid glue to the Whisper White Postage Stamp Punch. Adhere this vase ‘decor’ to a panel of the Petal Pink from the Peony Garden DSP with liquid glue, then to a solid piece of Petal Pink cs. Add a 1/4 length of Pear Pizzazz cs to the Notecard front, then add the Petal Pink completed panel with dimensionals.Add the folded folded 1/4″ Old Olive Ribbon with a glue dot I wanted this to be a thank you card… so I pulled out Itty Bitty Greetings stamp set and stamped the sentiment on a 1/4″ Whisper White strip and cut it apart adding a banner end to the ‘thanks’ word. I adhered these with liquid glue.

For the envelope I adhered the same Peony Garden DSP to the envelope flap then stamped the ‘fleur’ across the bottom with Pear Pizzazz ink.

Thanks for stopping by.

May you have a beautiful day.

Make someone happy by sending them a handmade card filled with love.

Card Cuts for this card…

  • Petal Pink 2 3/8 x 4 3/8
  • Peony Garden DSP 2 x 4
  • Whisper White for the Postage Stamp Punch – approximately 1 3/4 x 2 1/2 + 1/4″ strip for sentiment approximately 2″ in length

SU! Boho Indigo & Notecards

Hi everyone… how are you this holiday weekend? Cannot believe it is Labor Day already… THANK YOU VETERANS & FAMILIES FOR YOUR DEDICATION TO THIS AMAZING COUNTRY. YOU ARE VALUABLE AND INCREDIBLY BRAVE. From my heart to yours – thank you for your service.

My card today uses the Boho Indigo stamp set and coordinating dies and is added to a Notecard. Love this size…

Boho Indigo on a Notecard

I started by stamping the largest vase stamp from the Boho Indigo stamp set on a Whisper White cs with Memento Black ink and die cutting it with the  coordinating dies. I then stamped the leaf grouping using sponge daubers and Garden Green ink and Pear Pizzazz ink. In nature not all leaves are exactly uniform in color, so why should these be – right? Since there is not a die for this stamp, I fussy cut it. I used the Postage Stamp Punch and Whisper White to create a background for the vase, adhering the vase with dimensionals. I used a Petal Pink from the Peony Garden DSP and adhered the Vase/ Postage stamp Punched piece with liquid glue. I put dimensionals on the back of the leaf bunch and added it, making it look as though the leaves were in the vase. This Peony Garden panel was adhered to Basic Black cs with liquid glue. I added a length of folded in half piece of Old Olive 1/4″ Ribbon to the back with Stampin Seal and this entire panel was adhered to the notecard with dimensionals. I added some Rhinestone Basic Jewels and the card front was done.

Boho Indigo on a Notecard

On the inside I stamped this cute leaf stamp along three sides with Garden Green ink then stamped the birthday greeting from Boho Indigo stamp set in Pear Pizzazz.

Boho Indigo card inside

For the envelope I added the same Petal pink from the Peony Garden DSP to the envelope flap and the sweet leaf stamp to the front and the card was complete. Fun! and different…

Boho Indigo on a Notecard

Thanks for stopping by.

May you have a beautiful day.

Make someone happy by sending them a handmade card filled with love.

SU! Wonder of the Season Memories and More Cards/ Envelopes

It’s a new day – AND a new week… let’s make them awesome… make a phone call you have intended to do for a long time but haven’t ; send a card to someone whom you think needs a ‘pick me up’; do a good deed without needing/ wanting recognition.Those are just some ‘off the cuff’ suggestions – you can probably come up with some of your own as well.

Todays cards were made using the Wonders of the Season Memories and More Card Pack + the coordinating Cards & Envelopes. There are two sizes cards in this pack: approx. 3 x 4 & 4 x 6. Also in the pack are several peel & stick stickers/ numbers that can be used for embellishing. More info can be found in the Aug-Dec Mini Catalog on pg 31.

For my first card I chose this gorgeous Just Jade 3 x 4 panel and one of the stickers with the word ‘Joy’. I peeled it off carefully and put it directly onto the panel, trying to center it as best I could. I then adhered it to a piece of Gray Granite cs with liquid glue. I pulled out my Pearls Basic Jewels and put several all over the panel. I adhered dimensionals to the back and adhered this to Whisper White, then another piece of Gray Granite. This toon got dimesnionals and was placed onto the Just Jade card base. And voila – the card front was complete.

Wonder of the Season Memories & More Card
#1

For the inside I adhered a panel of Whisper White then added one of the stickers that coordinates with the leaf pattern on the front. Done!

Inside card #1

Card #2 – this card uses one of the larger panels… I love the feathers and the gold. I adhered this green panel to a Brushed Metallic (gold), then directly onto the Wonder of the Season Memories & More card base. I die cut several feathers from the Brushed Metallic (gold) cs, cuz I didn’t know how many I wanted to use :O) The feather comes from the Nature’s Thoughts Dies. I then took a scrap of Whisper White and cut this beautiful banner using the Snow Time Dies. Notice how the banner has this wonderful raised edge all around it? It’s beautiful!! From another piece of Whisper White I die cut the word Peace, using two elements of the word from the Joy Dies. I adhered these together using liquid glue then onto the banner, also with liquid glue. The banner got dimensionals and was mounted in the center of the card. The single feather was added with liquid glue. DONE!

Wonder of the Season Memories & More Card
#2

Card #3 – I began by cutting the green panel from the card pack apart, saving the trims for another use later. The center panel was adhered to a strip of the Brushed Metallic (gold) cs. . I added several Wonderful Gems for a bit of glitz. I cut a panel of the Plaid Tidings 6×6 DSP and adhered it to one of the Wonder of the Season Memories & More cards. The green panel got dimensionals and went right in the center of the card. Done again!

Wonder of the Season memories & More Cards
#3

Just like that, three Christmas cards ready for my stash. Each is so different and well, wonderful, in it’s own right. Card cuts are listed at the bottom of this post.

Wonders of the Season Memories & More Cards
#1

Wonders of the Season Memories & More Cards
#3


Wonder of the Season Memories & More Card
#2

Thanks for stopping by.

May you have a beautiful day.

Make someone happy by sending them a handmade card made with love.

Remember to cash in those Bonus Coupons from purchases made last month!

20200804_AD_en_US Annual Catalog PDF

August_89_2020 Mini Catalog PDF

Card Cuts:

  • Card #1: pattern – front: 3 x 4, Gray Granite 3 1/4 x 4 1/4, Whisper White 3 7/8 x 4 7/8, Gray granite 4 x 5 1/8; inside Whisper White 4 x 5 1/4
  • Card #2: panel + Brushed Metallic (gold)  4 1/8 x 6 1/8; feathers cut from center of Brushed Metallic (gold) prior to adhering to card panel
  • Card #3: cut panel 1 1/2 x 6 + Brushed Metallic (gold) 1 5/8 x 6;

SU! Hooray to You

Hi Everyone! How was your Saturday? Ours was FABULOUS… our family got together!!! No, we didn’t touch (not even hug our Grands 😞)…. we were outside… and we had lots of laughs and giggles… it was great fun.  Sigh – I am truly blessed… thank you God, for my family.

OK – today’s card… I was kind of on a roll making birthday cards and pulled out the Hooray To You stamp set. I have to say, this was inspired by an incredible Demonstrator, Mary Deatherage. I don’t remember her card very well, but I do remember she popped up a portion of the balloon. That’s all I remember about it though. So, here’s my ‘take’ for this card.

Hooray To You


Very girlie, girlie, isn’t it? There’s a bit too much white space for my liking, but the Magenta Madness is bright and cheerful and happy looking. And… I love all the little bitty pearls :O)

Hooray To You

I like using my Stamparatus for keeping things straight – and this is a big stamp, so that’s what I used – with Magenta Madness ink on Whisper White cs.  And I stamped two of them, then cut down one of them, went over several of the little flowers with Wink of Stella for some glitz, then added Pearls Basic Jewels. The strip got dimesnionals and was placed over the larger balloon, matching the edges and flowers. I added Wink of Stella to several of the flowers beyond the strip then another Pearl Basic Jewel in the center of the bow. This panel was adhered to  Magenta Madness cs with liquid glue. I stamped the ‘TO YOU’ sentiment from the Hooray To You stamp set and punched it out with the Classic Label Punch, put dimesnionals on the back and added it just under the larger strip. Then I trimmed the banner at the one end. Almost done… The Magenta Madness got dimensionals and attached to Thick Whisper White card base.

So simple and very girlie… what do you think? I’ll be honest, I haven’t completed the inside yet. I did adhere another panel of Magenta Madness cs to the inside, but I’m not sure what I want to do for the inside yet. For now, that’s it…

Hooray To You

Thanks for stopping by.

May you have a beautiful day.

Make someone happy by sending them a handmade called created with love.

Card Cuts for this project…

  • Whisper White 3 3/4 x 5, 3 3/4 x 1 3/4 + 3 3/4 x 5 for the inside
  • Magenta Madness 3 7/8 x 5 1/8 + 4 x 5 1/4 for the inside
  • Thick Whisper White 4 1/4 x 11 scored at 5 1/2

SU! The Right Triangle

Hello everyone – how are you doing? It’s back to heat and humidity today – and here for two whole days I was enjoying very low humidity and wonderfully lightly cool temps. Oh well, such is nature. I’ve been playing with triangles again… this time just The Right Triangles stamp set. Each right triangle has a different pattern in it, so I took several and also played with bright colors. Here it is…

The Right Triangle

The person I made this for loves color and pattern and since this stamp set was out, well, I played. The green is a bit ‘heavy’, maybe in the wrong place, but otherwise I kinda like it. It certainly isn’t my normal card!

Here are the ink colors I used… Highland Heather, Flirty Flamingo, Coastal Cabana, Mango Melody, Granny Apple Green, and Melon Mambo.. The scripty sentiment is from the Posted For You stamp set and the block ‘TO YOU” is from Hooray To You stamp set. They were stamped on a Whisper White panel – and I used my Stamparatus to make sure everything stayed straight. The Whisper White panel was adhered to Artistry Blooms DSP with liquid glue. Then I took ribbons from The Playing with Patterns Ribbon Combo pack and adhered them to the top of the card with Stampin Seal. I created a bow and adhered that with a glue dot.. This then was adhered to a Highland Heather card base with Stampin Seal.

For the inside I took another panel of the Artistry Blooms DSP and adhered it to the card base with liquid glue. I took another panel of Whisper White and stamped the ‘confetti’ in Highland Heather ink and the sentiment in Melon Mambo. Both are from the Hooray to You stamp set. This was adhered to the inside with liquid glue and the card was complete. As I said, not my usual kind of card but it will be perfect for the person it is intended.

inside of card

Thanks for stopping by.

May you have a beautiful day.

Make someone happy by sending them a handmade card created with love.

The Right Triangle

20200804_AD_en_US. open this for the PDF for the August – December 2020 Mini catalog

2020 AC US open this PDF for the Annual 2020 catalog

Shop with me? Receive a SU! item worth $10 when your order is between $50-$150 and using my current host code – August Host Code 4TEZ7HWY. If your order is more than that, you STILL receive the $10 item from me but SU! has rewards for you as well :o)

Card cuts for todays card:

  • Highland Heather card base 4 1/4 x 11 scored at 5 1/2
  • Artistry Blooms DSP 4 1/4 x 5 1/2 (2)
  • Whisper White cs 3 7/8 x 4 1/2 (front), 3 3/4 x 5 (inside)

SU! Tree Angles/ Stitched Rectangles #2

Hello again – nice to have you visit! We have had a couple of cool days here in NJ and I LIKE IT! There have been some days recently that the humidity and heat have made it difficult to breathe. Of course the sun isn’t up yet, but it’s 64 degrees… my kind of weather. It’s interesting, I attended an ‘in person’ meeting Wed. evening – masks during the meeting, 6-8′ apart, ZOOM going for those unable to attend in person and when we spoke we brought down the mask – all this to say one of the gentleman in the group said – ‘I’m praying for normalcy’. That seems so long ago… I want to be able to hug my grandkids and daughters so badly, but for their sake (and mine) I’m not doing that. And you know, it changes our relationship somehow… I don’t like that, but it does. Maybe that’s why I’m hung up on Christmas cards – hoping that by then they can actually come in the house and I can hug them tight… Guess I’m trying analyze this compulsion of mine right now – hmmm.OK – on with it – today’s card. I wanted to play with the Tree Angle stamps with the coordinating Stitched Rectangles again and here’s what I did. Card cuts are listed at the end of this post.

Tree Angle Card #2

Look at those cute trees! So – confession… I didn’t really KNOW what I was going to do, I simply sat down to play. I wanted to do these trees, didn’t know what I was going to do with them. I stamped the smaller one in Real Red and the larger one in Shaded Spruce then die cut them with the coordinating Stitched Triangles. They needed stars – so I pulled out my Stitched Stars Dies and Balmy Blue Glimmer paper. For the smaller tree, the star is adhered with liquid glue. For the larger tree it’s adhered with a dimensional cut down to fit. I began rifling through DSP and remembered the Feels Like Frost 6×6 Specialty DSP. I cut it down a bit and placed the trees but did not adhere them yet. I decided a sentiment heat embossed in white would look really pretty, so that’s what I did – and it’s from the Tree Angle stamp set. Now that I think about it, it would also be pretty to heat emboss the whole piece with clear embossing powder to make it sparkle. Another time! Now that the sentiment was on, I adhered the larger tree with liquid glue and the smaller one with dimensionals. This was adhered to a panel of Pretty Peacock, then put on dimensionals and added to a Real Red card base.

The inside was super easy… I took one of the dies from the Stitched Rectangles Dies and simply laid it across the bottom of a Whisper White panel and die cut the strip. It created these fun triangles all in a row! I adhered this to another panel of Pretty Peacock cs with liquid glue and then right onto the inside of the Real Red card base. simplicity at it’s best!

Stitched Rectangles, inside

For the envelope, I simply ran the flap through the Winter Snow embossing folder and voila! the card was complete.

Winter Snow embossing folder

Tree Angle/ Stitched Rectangles Dies

One of the aspects of purchasing from SU! is how they coordinate their colors. Shaded Spruce, Pretty Peacock, Balmy Blue – they compliment each other. So if you have hesitation, try a bit and see how it works for you. Come Sep 1 (just two very short weeks away!) – Sep 31, SU! will offer a special deal when you join as a demonstrator. Stay tuned for more information on that and join my team!

Now also is the time to REDEEM THOSE BONUS COUPONS – for they will no longer be available to you in Sep. Shop with me using my current HOST CODE 4TEZ7HWY which is good during the month of August. When you purchase through my online store and your product is $50-$150, you will receive a free SU! item of your choice worth $10. If your purchase is OVER that amount, you will still receive that free item from me, but SU! will offer you Stampin Rewards for products right then during your order. If you have questions about that, please do not hesitate to ASK! tlsbrightspot@gmail.com


Thanks for stopping by.

May you have a beautiful day.

Make someone happy by sending therm a handmade card created with love.

Card cuts for today’s project:

  • Feels Like Frost 6×6 Specialty DSP 4 x 5 1/4
  • Pretty Peacock 4 1/8 x 5 3/8 (front), 4 x 5 1/4 inside
  • Real Red 4 1/4 x 11 scored at 5 1/2
  • Whisper White 3 7/8 x 5 1/8 (inside) + scraps for trees