Stampin’ Up! Lazy Daisy for the Happy Inkin’ Thursday Blog Hop

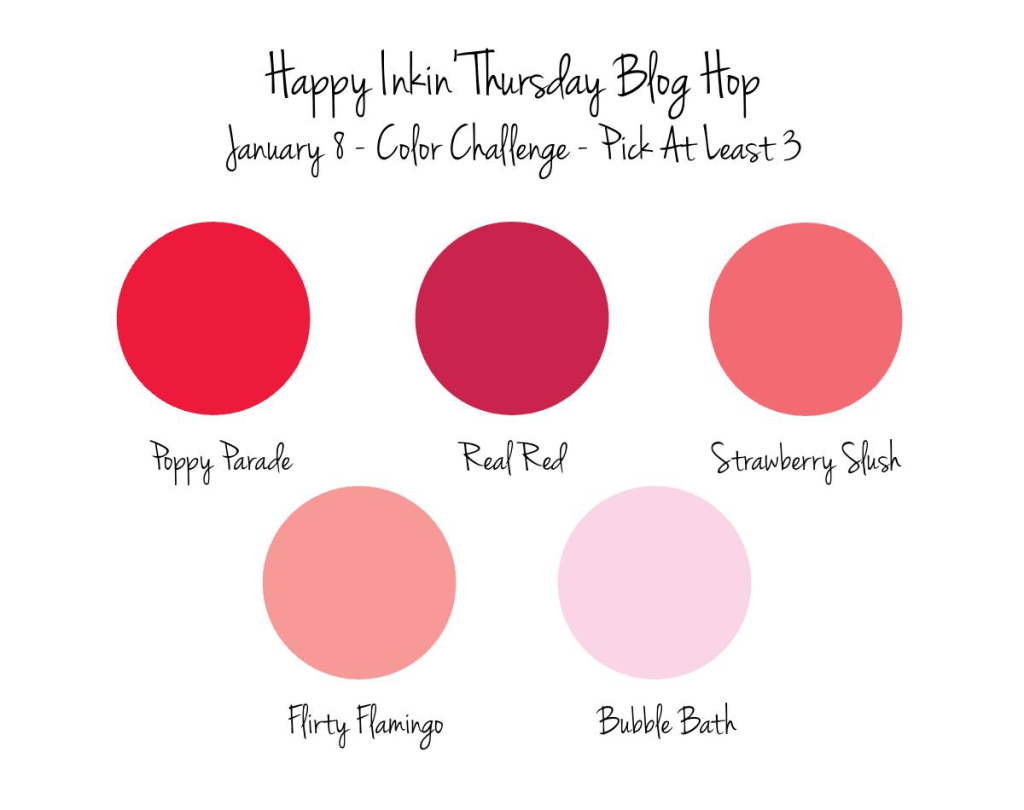
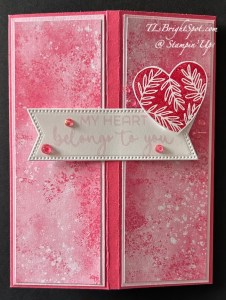
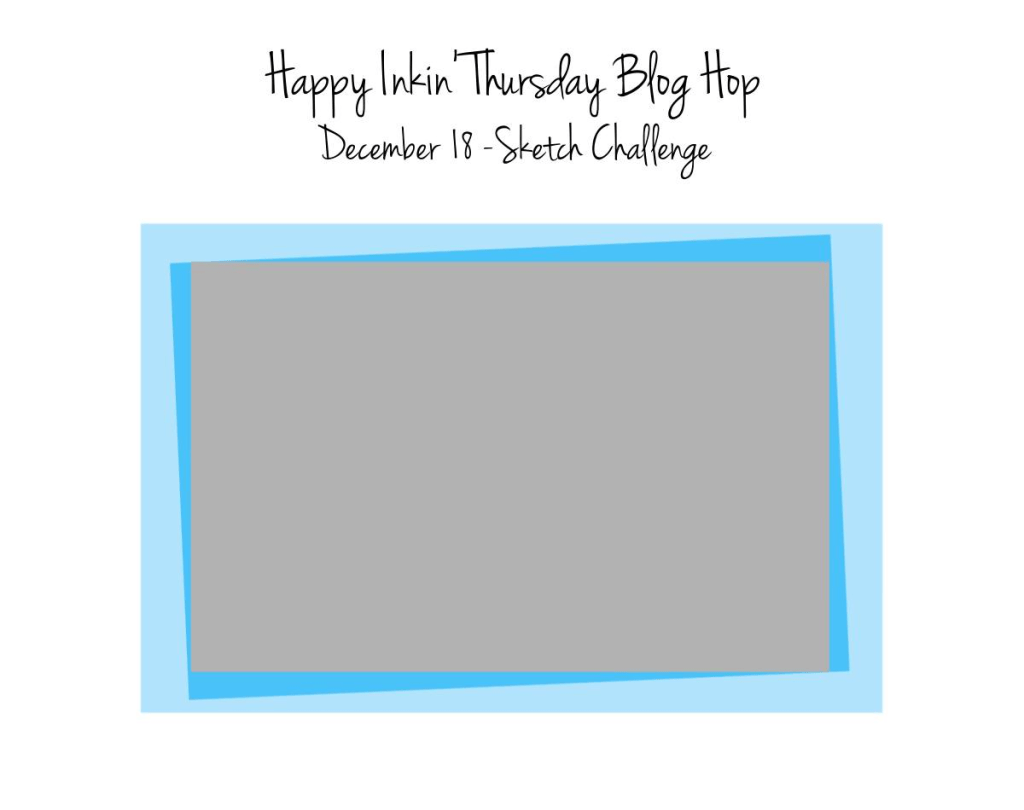
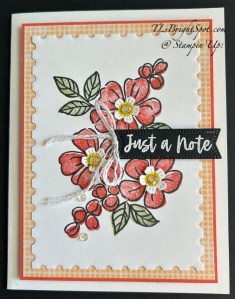
Welcome to Thursday and the fun Happy Inkin’ Thursday Blog hop. We have a sketch challenge today and I’ve turned it sideways, I also think it fits the sketch. .

Stampin' Up! Blog hop group
Stampin' Up! Blog hop sketch
Stampin' Up! Lazy Daisy card front

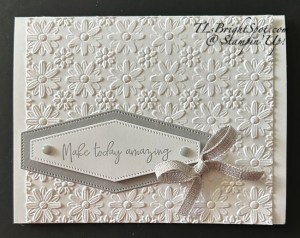
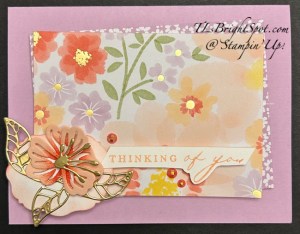
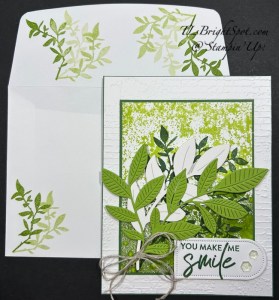
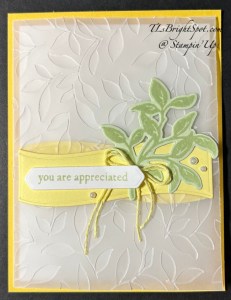
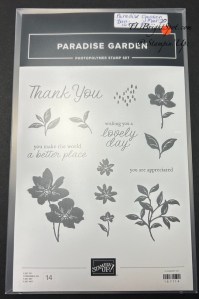
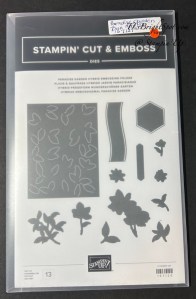
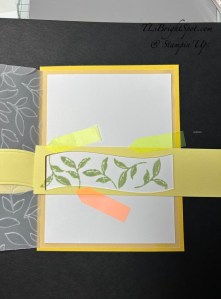
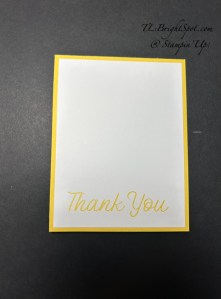
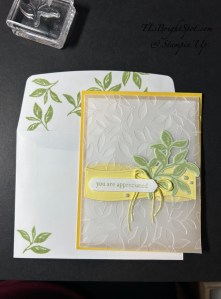
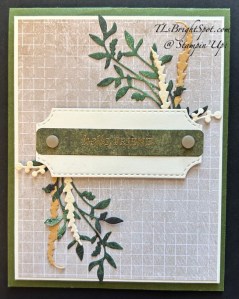
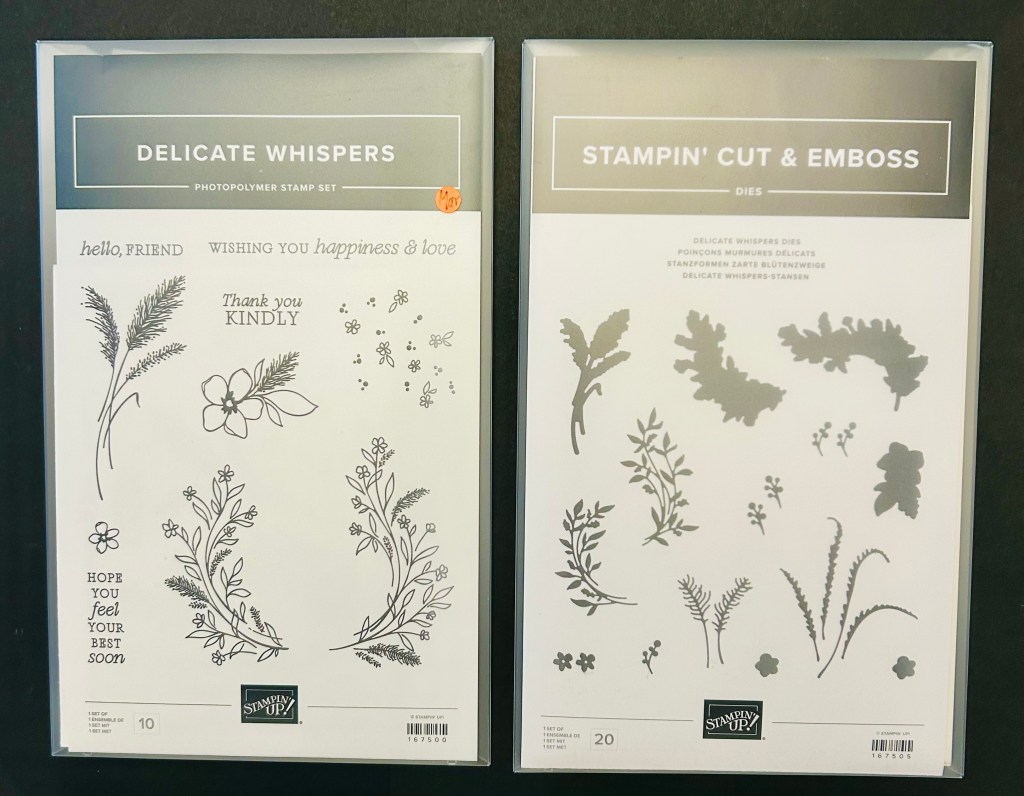
I’ve been playing a lot with this embossing folder. It’s a new one – an ONLINE EXCLUSIVE and I’m loving how beautiful it is. I’ve kept this card really simple to show off the beauty of this embossing folder. The card base is a standard A2 size, 8 1/2 x 5 12 scored at 4 1/4. The embossed layer is 5 x 4 1/4 and is attached to the Thick Basic White base with liquid glue. I used Smoky Slate ink to stamp the sentiment on a Basic White piece- from You Are Beautiful stamp set. I die cut this with Nested Essentials Dies – a carry over set into the May-Aug 2026 catalog. I adhered this with dimensionals to the next larger die cut in Smoky Slate. The two were attached directly to the embossed panel. I wanted a bow & decided this 1/” Variegated Trim would do the trick – & attached it with a glue dot. Final step… two 2025-2027 In Color Flat Pearls.

Stampin' Up! Lazy Daisy card inside

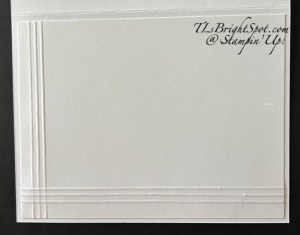
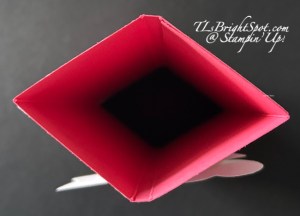
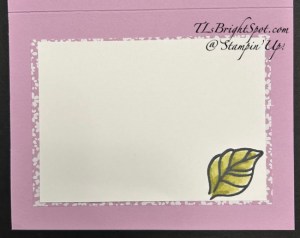
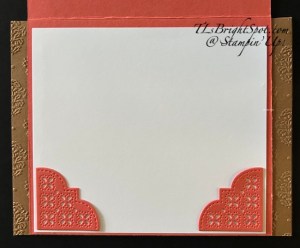
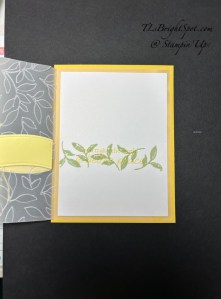
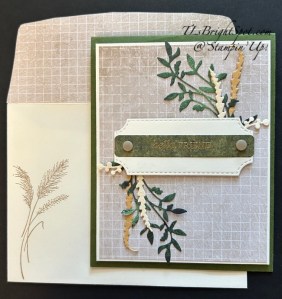
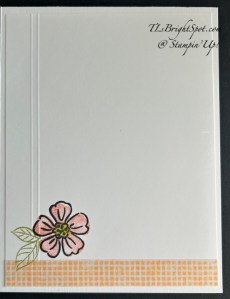
For the inside I decided to do something I haven’t done in a bit – use my scoring tool to create some lines. I turned the Basic White 4 x 5 1/4 panel to the back and scored three lines. I turned the panel 90 degrees and did the same again. Turning this to the right side, the score lines are raised and just what I wanted. This created a simple & elegant border to the left and bottom. This was attached to the inside of the card and is ready!

Stampin' Up! Lazy Daisy card & envelope

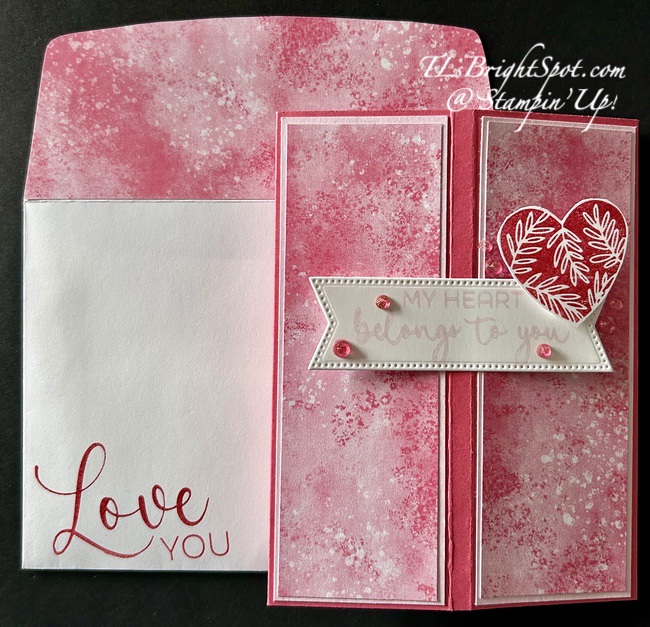
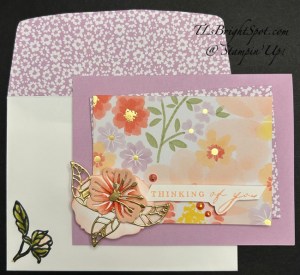
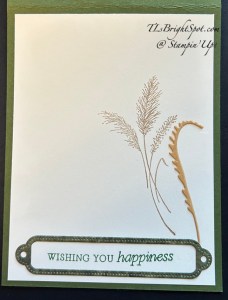
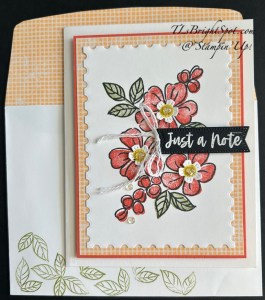
For the envelope… I used another stamp in the You are beautiful stamp set – the large leaf – and Smoky Slate ink to stamp several times on the flap and once on the envelope front. This is such a nice set and I haven’t used it nearly enough!

So here’s my question… do I need the bow? Or, shall I remove it?

To purchase the products to make this card, check the list below & place that order with me. 😀 With every order Stampin’ Up! gives you rewards that you can use with your next order. When your purchase is $50 & up, you get bonus points from me that when earned xxx number of points you can order something free from me + receive the monthly tutorial as well. Check out my Daisy Patch Rewards for more info.

My box of new goodies is to arrive tomorrow – along with my order of catalogs to send to my customers. I hope to share

Be sure to make the rounds on the hop today. I know you’ll see lots in inspirational stuff. Click the next button or click on a name. And thanks for stopping by!

Stampin' Up! next button for hop

Amy Koenders

Mary Deatherage

Karen Ksenzakovic

Tara Carpenter

Terry Lynn Bright

Nicole Bloxom

Thanks for stopping by. May you have a beautiful day. Make someone happy by sending them a handmade card filled with ❤️

Product List

Stampin’ Up! Nature’s Symphony for the Happy Inkin’ Thursday blog Hop

Good morning & happy Thursday! We have a fun them challenge this week as part of our hop. i’ve created a spring-like card with lots of layers & texture & I hope you’ll like it.

Stampin' Up! Blog Hop

Stampin' Up! Nature's Symphony card front

I began by creating the background for the stamped & die cut leaves on a piece of Basic White card stock. Using size E acrylic block I added ink colors of Granny Apple Green and Lemon Lime Twist by simply stamping the ink pad on a portion of the block. I spritzed this with water and stamped it directly to the card stock. I left this on the card stock for a bit to get it to soak in. I pulled out the large leaf stamp from Nature’s Symphony and inked it with Garden Green and stamped it on the inked card stock. I cut this down to size (3 1/4 x 4 1/4) and added it to a Garden Green panel 3 3/8 x 4 3/8. The next step was to add this beautiful laser cut leaf from the Covered in Flowers Accents (Jan. ONLINE EXCLUSIVE) with dimensionals. I die cut the stunning leaves from Granny Apple Green and attached it with both liquid glue & dimensionals. I added a double loop Linen Thread bow with a glue dot. This was attached to a Basic White panel run through the Exposed Brick 3D embossing folder (4 3/16 x 5 7/16) and then to a Garden Green card base 4 1/4 x 11 scored at 4 1/4. The sentiment is stamped in Garden Green ink on a Basic White scrap (also from Nature’s Symphony stamp set) & die cut with the smallest Everyday Arches Dies. This was added with dimensionals. Final step… three Shades of Green Hexagons were added.

Stampin' Up! Nature's Symphony card inside

For the inside… on a 4 x 5 1/4 panel of Basic White, I stamped the small leaf image from Nature’s Symphony stamp set in Garden Green three times – each without re-inking. This gives a wonderful depth to the image. This piece was added to the inside of the card.

Stampin' Up! Nature's Symphony card & envelope

For the envelope… I repeated the process of stamping three times on the envelope front – first time full strength then two more times without re-inking. I repeated this process on the flap. LOVE how this turned out – and hope you do as well.

Now… on with the hop! Click the next button to take you to Nicole or click on a name to take you elsewhere – but be sure to visit all those participating in today’s hop – such great creations!

Want to purchase the products to make this card? See below the list of names for how to do that 😀

Stampin' Up! Blog Hop button

Amy Koenders

Mary Deatherage

Karen Ksenzakovic

Tara Carpenter

Terry Lynn Bright

Nicole Bloxom

Product List

Stampin’ Up! Beautiful Gallery for the Happy Inkin’ Thursday Blog Hop

Welcome, welcome to the Happy Inkin’ Thursday Blog Hop! We have a sketch challenge today & I’m using the Beautiful Gallery 6×6 DSP to show off. This one does not have a scene, but it does have this beautiful pattern of light Calypso Coral & Pecan Pie. I’ve paired this with Beautifully Celebrated Dies from the Jan-Apr 2026 Mini Catalog. This bundle of stamps & dies is very versatile! I’ve also brought in the stamp set Prayers & Promises from the same Jan-Apr – 2026 Mini Catalog.

Stampin' Up! Happy Inkin' Thursday Blog Hop
Stampin' Up! Beautiful Gallery 6x6 DSP card front

In looking closely to the card, I hope you see the Damask Designs 3D embossing behind the Beautiful Gallery 6×6 DSP. Those wonderfully scalloped ovals are from the Beautifully Celebrated Dies. I die cut these from Pecan Pie card stock and Basic White. The stamping was done with Pecan Pie ink prior to die cutting. The embellishments are Pearls of Beauty in Calypso Coral. And the ribbon – 3/8″ Gold & White ribbon from the Jan-Apr 2026 Mini Catalog. 😀

Stampin' Up! hop sketch challenge

Directions:

  • The card base is 4 1/4 x 5 1/2 Pecan Pie with a Layer of the same color & same size, embossed with damask Designs EF & attached to the card base.
  • The Calypso Coral portion of the card is 8 1/2 x 4 3/4 scored at 4 1/4 on the long side & attached to the card front.
  • Layer a panel of Beautiful Gallery 6×6 DSP (from the Annual Catalog!) 4 1/4 x 4 5/8 to the Calypso Coral
  • Stamp the sentiment in Pecan Pie ink on Basic White 2 x 2 1/2 & die cut using the Beautifully Celebrated Dies. Add with dimesnionals to a Pecan Pie piece die cut with the Beautifully Celebrated Dies
  • Loop a length of the 3/8″ Gold & White ribbon and attach to the back of the Pecan Pie die cut, add these to the card front with dimensionals.
  • Final touch… two Pearls of Beauty embellishments in calypso Coral
Stampin' Up! Beautiful Galley card inside... Beautifully Celebrated Dies

For the inside of the card… on the panel of Basic White I added die cuts of these two corner pieces, die cut from Calypso Coral using the Beautifully Celebrated Dies. They add such a fun texture & ‘eye candy’ to the inside of the card, nothing else is needed.

Now – time to visit others participating in today’s blog hop. See the list below & click on the next button to see what Nicole has created. Enjoy the hop!

Stampin' Up! next button

Amy Koenders

Mary Deatherage

Karen Ksenzakovic

Tara Carpenter

Terry Lynn Bright

Nicole Bloxom

Thanks for stopping by. May you have a beautiful day. Make someone happy by sending them a handmade card filled with ❤️

Product List

Stampin” Up! Celebrate Spring for Amy’s Inkin’ Krew Blog Hop Group

We have a fun challenge today for our blog hop group… Celebrate Spring! What does that mean to you? For me it means early bulbs are popping through the remaining grass & leaves – we have sweet, sweet snowdrops coming up! What else does it mean – new birth? Baby Chicks? Baby rabbits? And searching through the woods for morel mushrooms – I did this with my Mom. They were oh so good. Spring is – it’s coming just around the corner.

Stampin' Up! Amy'sa Inkin' Krew Blog Hop
Stampin' Up! Cute As A Bug card front

This Designer Series Paper, Cute As A Bug, is just so sweet – bugs & mushrooms and perfect for spring. I couldn’t resist working with it. So I trimmed it into these rectangles and it makes a nice scene. I used the coordinating stamp & die set (the Sweet Bugs Bundle) to die cut the flowers and the small mushroom group. just above the sentiment.

The card base is Soft Sea Foam and I layered another panel of the same color to the card front after embossing it with the Birchwood 3D embossing folder (OOPS! This item is retired!). The layers under the DSP are both Two-Tone: Soft Sea Foam & Old Olive. The ink used for the sentiment is Old Olive ink. The flowers & the mushroom were added with dimensionals. And the sweet ladybug is from the Ladybug Garden Epoxy Shapes.

  • The card base is 4 1/4 x 11 scored at 5 1/2.
  • The embossed layer is 4 1/4 x 5 1/2 added directly to the card front.
  • Cut the DSP 2 3/4 x 4, then trim to 1 3/4 x 1 1/2, leaving a strip 1 3/4 x 2 1/2; 1 x 2 1/2, leaving a strip 1 x 1 1/2.
  • Add these to a layer 3 x 4 1/4 as shown, keeping the images intact, and another 3 1/8 x 4 3/8. Put dimensionals on the back and add to card front
  • Add die cuts & sentiment – all from Cute As A Bug bundle
Stampin' Up! Sweet Bugs card inside

For the inside… I stamped the word ‘friend’ from the Sweet As A Bug stamp set, taping off the Hello and inking with Old Olive ink. Across the bottom are these adorable flowers, also stamped in Old Olive ink, repeatedly across. I used Daffodil Delight Marker to create the center color then used Wink of Stella to pull that color into the flower petals. This Basic White panel was added to the inside of the card and voila! Ready to send to someone to cheer them.

Want to make this card? Check the information below to order & to learn more. And now… on with the hop!

Stampin' Up! Blog Hop button
  1. Karen Ksenzakovic
  2. Ann Louise Fodgaard
  3. Mary Deatherage
  4. Karen Finkle
  5. Tara Carpenter
  6. Charlene Tackvic
  7. Terry Lynn Bright
  8. Nicole Bloxom
  9. Amy Koenders

Thanks for stopping by. May you have a beautiful day. Make someone happy by sending them a handmade card filled with ❤️

Product List

Stampin’ Up! Paradise Garden for the Happy Inkin’ Thursday Blog Hop Group

Welcome to Thursday’s hop! We have a fun sketch challenge for you today and I think you’ll like what you see from all those participating. Thanks for dropping in, whether you came from fabulous Tara or someone else, I’m glad you’re here. We’ve had a bit of snow this week & this card definitely says SPRING! Let’s take a peek…

Stampin' Up! Happy Inkin's Thursday Blog Hop logo
Stampin' Up! blog hop sketch challenge

Stasmpin' Up! Paradise Garden & Vellum

I’ve used Vellum again and the Paradise Garden Hybrid Embossing folder for the card front, The Vellum is 5 1/4 x 8 1/4 scored at 4 1/8 and only the front is embossed. This bundle (Paradise Garden Bundle) will be available Mar 3 as part of the ONLINE EXCLUSIVES.

Stampin' Up! Paradise Garden stamp set
Stampin' Up! Paradise Garden Dies

One of the dies is this curvy piece that I’ve used for my large panel, cut from Lemon Lolly card stock. The leaf is stamped & die cut with parts of the Paradise Garden set.I used Soft Sea Foam ink on a Soft Sea Foam card stock. I used Iridescent Pearls in two sizes as embellishments, also the Baker’s Twine Three Color Pack from the Annual Catalog – in Lemon Lolly of course to create the double bow.

Stampin' Up! Paradise Garden inside.1
Stampin' Up! Paradise Garden inside.2

On the inside of the front Vellum embossed panel is another of the strips die cut from Lemon Lolly and attached. It doesn’t exactly match, due to the curves, but I like the way it looks & it covers the adhesive. Facing on the inside… and in the same area as the Lemon Lolly panel facing it, is stamped a leaf image in Soft Sea Foam using the Paradise Garden stamp set. The sentiment is stamped in Daffodil Delight and uses Paradise Garden stamp set. I used a template from the curvy die cut to know exactly where to stamp 😁 This Basic White panel is added to the the Vellum, then the Vellum is attached to a Daffodil Delight piece 4 1/4 x 5 1/2.

Stampin' Up! Paradise Garden back of card

For the back of the card … another panel of Basic White stamped with the sentiment in Daffodil Delight using the Paradise Garden stamp set.

Stampin' Up! Paradise Garden card & envelope

For the envelope I sued another leaf from the Paradise Garden stamp set & Soft Sea Foam ink to stamp both the front of the card & the flap.

Stampin' Up! Blog Hop button

Amy Koenders

Mary Deatherage

Karen Ksenzakovic

Tara Carpenter

Terry Lynn Bright

Nicole Bloxom

As a demonstrator, there are so MANY benefits: being able to preorder new products before they are available to the ‘open market’, having a supportive creative community that encourages & helps in various ways, being able to attend creative events via ZOOM or in person (CONVENTIONS!), 20% discount on all products after joining, monthly tutorials and lots, lots more.

Want to thinking about JOINING MY TEAM? Check out how to do that HERE. What more could you ask for? well, let me just say… JOIN MY TEAM & get this awesome new Positioner Tool designed by our Stampin’ Up! TEAM!

Here are the details about the JOINING PROMOTION…New team members who purchase their Starter Kit February 3–March 2 will also receive our new Stampin’ Positioner*.

New demonstrators who submit their Independent Demonstrator Agreement (IDA) before February 3 or after March 2 will not be eligible for this offer.

Joining deadline:  March 2, 2026, at 11:59 p.m. (MT)

Stampin' Up! Joining Promotion
Stampin' Up! FREE Positioner for Joining

When you shop with me, there are some fun benefits… I like to thank my customers.. When you spend $50 or more (before tax & shipping) you will also receive a copy of my monthly tutorial – and guess what – it’s Sweet Bugs for February! AND… keep track of your purchases using my Daisy Patch Rewards and get even more benefits! Visit my REWARDS Page for more info.

Stampin' Up! Redeem Bonus Days Coupons

Redemption Period: February 3–28, 2026There is no limit to the number of coupon codes you can redeem on an order during the redemption period. If you’re redeeming multiple codes, you must put a space between each code.

You may only redeem coupon codes one time. You cannot redeem them after February 28.

You can redeem Bonus Days coupon codes for month-to-month Paper Pumpkin subscriptions and new prepaid subscriptions.

Some restrictions apply. Coupons can’t be redeemed towards Starter Kits and you cannot use them on exchanges.

Redemption period ends:  February 28, 2026, at 11:59 p.m. (MT)

SHOP WITH ME HERE!

Thanks for stopping by. May you have a beautiful day. Make someone happy by sending them a handmade card made with ❤️

Product List

Stampin’ Up! Sneak Peek of Delicate Whispers from March Online Exclusives

Welcome to our Happy Inkin’ Thursday Blog Hop! We have a sketch challenge today & i’ve chosen to wirk with a new soon to be released March ONLINE EXCLUSIVE called Delicate Whispers. I’m using both the stamp set & the dies plus a couple of other fun products. Here’s my card…

Stampin' Up! Delicate Wishes Bundle, card front

Do you notice all those beautiful and delicate die cuts of leaves & fronds? They are from the Delicate Wishes Dies which are part of the Delicate Whispers Suite Collection to be released March 3.

Stampin' Up! Delicate Whispers Bundle, March ONLINE EXCLUSIVE

I began by die cutting all the pieces I wanted to use from the Delicate Whispers Dies using Nature Walk 12 x 12 DSP & the coordinating Natural Hues 12 x 12 from the January-April 2026 Mini Catalog pages 38-41. The Very Vanilla panel is the smallest of the Branching Out Dies, and cut down even more narrow for my purposes. The embossed panel is die cut from Nature Walk DSP using the Fragrant Layers Dies, a January ONLINE EXCLUSIVE. I embossed this piece using the Delicate Whispers stamp set, VersaMark ink and WOW! Gold Embossing powder & heat set it.

Layers:

  • Mossy Meadow card base 4 1/4 x 11 scored at 5 1/2
  • Very Vanilla 4 x 5 1/8 with Nature Walk DSP cut 3 7/8 x 5 and attached to i, then added to card base with dimensionals

I added the die cuts to the card front with liquid adhesive then attached the Very Vanilla die cut with dimensionals. The embossed banner was attached with Stampin’ Seal. Two Natural Matte Dots were added to the banner (part of the Delicate Dreams Suite Collection)

For the inside…

Stampin' Up! Delicate Wishes bundle, inside card

On the 4 x 5 1/4 Very Vanilla panel I added another of the die cuts from the Delicate Whispers Dies cut from Natural Hues 12×12. I stamped the sentiment from Delicate Wishes stamp set in Garden Green ink, added the rest of the Die cut banner from the Fragrant Layers Dies. The final step was stamping the beautiful frond from Delicate Whispers stamp set in Crumb Cake ink.

For the envelope…

Stampin' Up! Delicate Wishes card & envelope

I stamped the same delicate frond as on the inside of the card on the envelope front and added more of the Nature Walk 12×12 DSP to the flap – & one & done! This card fits so many possibilities: masculine, birthday, just a note, friendly hello – the list goes on. I hope when these items are available you will give them a ‘go’.

Now… time to visit others on the hop. Click the next button to take you to Nicole or click on a name, but don’t miss anyone. To purchase from me, see more information below.

Stampin' Up! Blog Hop button

Amy Koenders

Mary Deatherage

Karen Ksenzakovic

Tara Carpenter

Terry Lynn Bright

Nicole Bloxom

Shopping with me could not be easier. Click this link to visit my shop.., note the ONLINE EXCLUSIVE, the new kits available, the Jan-Apr 2026 Mini Catalog and of course the 2025-2026 Annual Catalog.

From January, 6 to Febraury 2, Stampin’ Up! is offering BONUS DAYS. Because do you know what’s a great deal? Getting rewarded for all the crafting supplies you’re already going to buy! When you shop between January 6 and February 2 and spend $50 USD | $60 CAD, you will earn a $5 USD | $6 CAD coupon! Make sure you save all your coupons because you can redeem them (and we mean ALL of them) between February 3 and 28. During the earning period, a shopping-cart notification will appear when an order qualifies for a Bonus Days coupon—an online store feature on both the demonstrator and customer websites.

Stampin' Up! Bonus Days

PRODUCT OF THE MONTH – only $5 with a $75 order (before shipping & taxes)

Stampin' Up! January POM

167972

FABULOUS SAYINGS PHOTOPOLYMER STAMP SET (ENGLISH)

$5.00

The Fabulous Sayings Stamp Set is the exclusive Product of the Month for January 2026! Only available until stocks run out—don’t wait to get yours! This is a Two-Step Stampin’ set; it allows you to layer two or more images to create one final image with extra texture and dimension in the colors you want.

When shopping with me -.With a $50 order or more, receive my MONTHLY TUTORIAL – For January, that tutorial is all about the Lovely Arrangements bundle and Lovely Blossoms DSP – all part of the January ONLINE EXCLUSIVE Lovely Blossoms Suite Collection.

Stampin' Up! January ONLINE Class

Thanks for stopping by. May you have a beautiful day. Make someone happy by sending them a handmade card made with ❤️

Stampin’ Up! Fragrant Layers for the Happy Inkin’ Thursday Blog Hop

Hello Thursday – and welcome to our fabulous blog hop group! We have a sketch challenge today – flowers – and I’m pleased to share what I created for this hop. It uses the Fragrant Layers bundle that is an ONLINE EXCLUSIVE, meaning not pictured in any of the Stampin’ Up! Catalogs.

Stampin' Up! Happy Inkin' Thursday Blog Hop
Stampin' Up! Blog Hop challenge

Stampin' Up! Fragrant Layers card front

This card is just so bright & fresh looking to me. And I love all the texture. So… how to make this

  • The card base is Thick Basic White 8 1/2 x 5 1/2 & scored at 4 1/4
  • Using the second largest of the Perennial Postage dies, die cut a Basic White piece & stamp it with the large floral in Fragrant Layers stamp set with Memento Black ink.
  • Using the coordinating stamps in the Fragrant Layers stamp set, add color to the leaves: Old Olive, and color to the flowers: Calypso Coral.
  • Die cut more of the tiny flowers from Basic White, color the centers with Darling Duckling and add to the large flowers with liquid glue.
  • Add this panel to Lovely & Beautiful SDSP ( 3 5/8 x 4 7/8) that was attached to a Calypso panel 3 3/4 x 5. Put dimensionals on the back & add to the card front.
  • On a Basic Black strip, run the embossing buddy across the paper to remove any static and stamp the sentiment in VersaMark ink, sprinkle it with WOW! White Embossing powder & heat set.
  • Die cut this piece with the die in the Fragrant Layers dies, put dimensionals on the back and add to the card front.
  • Add embellishments to the flowers & on the card (5 in all) Iridescent Floral Gems
  • Add a bow with the white twine pulled apart and attach with a glue dot.
Stampin' Up! Fragrant Layers inside card

For the inside…

  • Add a 1/2 x 4″ strip of the Lovely & Beautiful SDSP to the bottom of the card
  • Stamp the flower in Memento ink (from Fragrant Flowers stamp set) & color with Calypso Coral ink
  • Stamp the leaf in Old Olive ink
  • I then put the Basic White panel on my scoring board and scored twice on the left – for more texture.
Stampin' Up! Fragrant Layers card & envelope

I used the same leaf stamp as on the inside of the card to stamp several leaves across the bottom of the envelope in Old Olive ink. I then added another strip of the Lovely & Beautiful SDSP to the flap & finis! I love the freshness of the completed card.

You can find information below in how to shop with me and other new & exciting Stampin’ Up! information. To see what others have created, be sure to follow along by clicking the ‘next’ button below to take you to Nicole.

Stampin' Up! Blog Hop group button

Amy Koenders

Mary Deatherage

Karen Ksenzakovic

Tara Carpenter

Terry Lynn Bright

Nicole Bloxom

Shopping with me could not be easier. Click this link to visit my shop.., note the ONLINE EXCLUSIVE, the new kits available, the Jan-Apr 2026 Mini Catalog and of course the 2025-2026 Annual Catalog.

From January, 6 to Febraury 2, Stampin’ Up! is offering BONUS DAYS. Because do you know what’s a great deal? Getting rewarded for all the crafting supplies you’re already going to buy! When you shop between January 6 and February 2 and spend $50 USD | $60 CAD, you will earn a $5 USD | $6 CAD coupon! Make sure you save all your coupons because you can redeem them (and we mean ALL of them) between February 3 and 28. During the earning period, a shopping-cart notification will appear when an order qualifies for a Bonus Days coupon—an online store feature on both the demonstrator and customer websites.

PRODUCT OF THE MONTH – only $5 with a $75 order (before shipping & taxes)

Stampin' Up! January Product of the Month

167972

FABULOUS SAYINGS PHOTOPOLYMER STAMP SET (ENGLISH)

$5.00

The Fabulous Sayings Stamp Set is the exclusive Product of the Month for January 2026! Only available until stocks run out—don’t wait to get yours! This is a Two-Step Stampin’ set; it allows you to layer two or more images to create one final image with extra texture and dimension in the colors you want.

When shopping with me -.With a $50 order or more, receive my MONTHLY TUTORIAL – For January, that tutorial is all about the Lovely Arrangements bundle and Lovely Blossoms DSP – all part of the January ONLINE EXCLUSIVE Lovely Blossoms Suite Collection.

Thanks for stopping by. May you have a beautiful day. Make someone happy by sending them a handmade card made with ❤️

Product List

Stampin’ Up! Brushed with Beauty for the Happy Inkin’ Thursday Blog Hop

Welcome to the weekly Happy Inkin’ Thursday Blog Hop. We have a sketch challenge today and if you have come from Tara or just hopped right in here – glad you stopped by! You will get some fun ideas today so let’s begin…

Stampin' Up! Brushed with Beauty for sketch challenge

I began with Very Vanilla A2 size card. The floral pattern of the Brushed with Beauty is 2 x 4 and I adhered a thin strip (!/2 x 4) of another pattern from this package of DSP to the left side of the floral piece and adhered it to the card base – a 1/4″ edge on three sides. I then cut a piece of Crumb Cake 1 1/4 x 5 1/2 and stamped it with this fun pattern using the Beautifully Celebrated stamp set and Crumb Cake ink. I then adhered a strip of Mossy Meadow 1/2 x 5 1/2 to create the same edge as the upper panel & adhered it in place. I die cut the leaf from Mossy Meadow and set it aside while I made the sCake ink on a Very Vanilla strip 1/2 x 3 3/4. The leaf was added to the back of the stripn with liquid glue, then the strip added to the card front with dimensionals. As a final touch – three Pressed Flower Motifs were attached to bring it all together. These embellishments are an ONLINE EXCLUSIVE item from the Beautiful Gallery Suite.

Stampin' Up! Brushed with Beauty card inside

For the inside… Crumb Cake ink and items in the Beautifully Celebrated stamp set were stamped on the Very Vanilla insert (4 x 5 1/4)

Stampin' Up! Brushed with Beauty card & envelope

For the envelope… more of the Brushed with. Beauty DSP was attached to the flap & trimmed to fit. On the envelope front, the same leaf as on the inside of the card was stamped on the front – also in Crumb Cake ink. And there you have it – finis!

Now… time to see what others have created for today’s hop. Remember to check below on how to order from me, get those Bonus Days coupons, see the Product of the month and MORE! Make sure you visit Nicole – next on the list!

Stampin' Up! Blog hop button

Amy Koenders

Mary Deatherage

Karen Ksenzakovic

Tara Carpenter

Terry Lynn Bright

Nicole Bloxom

First – BONUS DAYS…BONUS DAYS BONUS DAYS! Because do you know what’s a great deal? Getting rewarded for all the crafting supplies you’re already going to buy! When you shop between January 6 and February 2 and spend $50 USD | $60 CAD, you will earn a $5 USD | $6 CAD coupon! Make sure you save all your coupons because you can redeem them (and we mean ALL of them) between February 3 and 28. During the earning period, a shopping-cart notification will appear when an order qualifies for a Bonus Days coupon—an online store feature on both the demonstrator and customer websites.

Stampin' Up! Bonus Days

PRODUCT OF THE MONTH – only $5 with a $75 order (before shipping & taxes)

167972

FABULOUS SAYINGS PHOTOPOLYMER STAMP SET (ENGLISH)

$5.00

The Fabulous Sayings Stamp Set is the exclusive Product of the Month for January 2026! Only available until stocks run out—don’t wait to get yours!

This is a Two-Step Stampin’ set; it allows you to layer two or more images to create one final image with extra texture and dimension in the colors you want.

Jan-Apr 2026 Mini Catalog – click the image below to view the catalog

Stampin' Up! Jan-Apr 2026 Mini Catalogue

ONLINE EXCLUSIVES Several new stamp sets, dies, Designer Series Papers, embellishments and ribbons are available online that are not in any SU! Catalog. SHOP WITH ME HERE

KITS COLLECTION

Stampin’ Up released 3 new kits this month. 
  • Adopt A Pet Kit DETAILS 
    – Makes 4 projects: 1 each of 4 designs 
    – Largest box size: 4-3/8″ x 3-1/2″ x 4-1/2″
    – Colors: Basic Gray, Cajun Craze, Coastal Cabana, Crushed Curry, Secret Sea, Strawberry Slush
    – Sentiments printed in English, French, and German
  • Butterfly Garden Kit DETAILS
    – Makes 9 cards: 3 each of 3 designs
    – Folded card size: 5-1/2″ x 4-1/4″ (14 x 10.8 cm)
    – Colors: Crushed Curry, Flirty Flamingo, Garden Green, Misty Moonlight, Pretty Peacock, Timid Tiger
    – Also available in French
  • Lots To Love Kit Details
  • – Makes 9 cards: 3 each of 3 designs
    – Folded card size: 5-1/2″ x 4-1/4″ (14 x 10.8 cm)
    – Colors: Basic Beige, Darling Duckling, Fresh Freesia, Pretty Peacock, Strawberry Slush, Timid Tiger
    – Sentiments printed in English, French, and German

When shopping with me -.With a $50 order or more, receive my MONTHLY TUTORIAL – For January, that tutorial is all about the Lovely Arrangements bundle and Lovely Blossoms DSP – all part of the January ONLINE EXCLUSIVE Lovely Blossoms Suite Collection.

Thanks for stopping by. May you have a beautiful day. Make someone happy by sending them a handmade card made with ❤️

Stampin’ Up! Diamond Fun Fold for the Happy Inkin’ Thursday Blog Hop

Welcome to our 2nd hop of 2026! If you came from the fabulous Tara or just popped right in here, we’re glad you stopped in. We have a fun color challenge today and I have chosen Strawberry Slush, Bubble Bath & Real Red for my colors with a new fun fold. Let’s take a look.

Stampin' Up! Diamond Fun Fold

Fun Folds can sometimes be difficult or time consuming – this one is not. It begins with a card base 5 1/2 x 10 1/2 scored on the long side @ 2, 4, 4 1/4, 6 1.4, 8 1/4 & 8 1/2 (Strawberry Slush card stock). In the last 2″ section, add adhesive and adhere to the first section, securing just to the score line. This will now be the back of the card. Add your contrasting layer(Bubble Bath) to each panel (4 panels 1 7/8 x 5 3/8). Add your Designer Series Paper (2025-2027 In Color 6×6 DSP) to three panels & Basic White to the last panel – which is the back. (3 panels of DSP 1 3/4 x 5 1/4 & 1 panel of Basic White same size.) Add sentiments and stamping to the Basic White panel. Decorate front with a sentiment (Hearts of Elegance stamp set) stamping in Bubble Bath and die cutting with the Stitched Shapes Dies. Stamp the heart in Real Red, fussy cut and adhere it with a single dimensionals to the die cut sentiment. Add the sentiment with liquid adhesive to the double scored section on the front. Add lots of embellishments for glam… Strawberry Slush and Pretty In Pink Gems (from the ONLINE EXCLUSIVES.) Here’s how it looks from the top down and a photo of the completed back.

Stampin' Up! Diamond Fun Fold from the top
diamond Fun Fold back of cardStampin' Up!

This card folds flat to go into a regular A2 envelope :O) Speaking of the envelope, stamp the sentiment on the front using Real Red ink and the Hearts of Elegance stamp set. Add the same 2025-2027 In Color 6×6 DSP to the flap (Strawberry Slush) – and finis! This is such a quick & easy fun fold and yet it is new and different.

Stampin' Up! Diamond Fun Fold card & envelope

For more information about ordering these products and other Stampin’ Up! items from me, see below. The next person in line is Nicole – be sure to see what fun item she has created with this color scheme. Click the ‘next’ button or click on a name – just be sure to see what each has created!

Stampin' Up! Blog Hop

Amy Koenders

Mary Deatherage

Karen Ksenzakovic

Tara Carpenter

Terry Lynn Brightyou are here!

Nicole Bloxom

SHOP WITH ME HERE – whether it be for ONLINE EXCLUSIVES, the Jan-Apr Mini Catalog, the Annual Catalog or discontinued products. During this time frame of Jan 6-12, 2026, I am offering DOUBLE DAISY PATCH REWARDS as a customer Thank You! In other words, for every $25 order (before shipping & taxes), you will receive double the rewards. :O) In addition, when your order is $50 & above, you will also receive the monthly tutorial with lots of fabulous ideas. For January, that tutorial is all about the Lovely Arrangements bundle and Lovely Blossoms DSP – all part of the January ONLINE EXCLUSIVE Lovely Blossoms Suite Collection.

For information re: all the new kits, ONLINE EXCLUSIVES, BONUS DAYS AND MORE, VIEW THIS POST. To see the new catalog, click the image below.

Thanks for stopping by. May you have a beautiful day. Make someone happy by sending them a card full of handmade ❤️

Stampin’ Up! Happy Inkin’ Thursday Blog Hop

Welcome to the week before Christmas – and this fun blog hop with the Happy Inkin’ Thursday Blog Hop! We have a sketch challenge today… I’ve chosen to use the Simply Beautiful bundle & other products in the Lovely & Beautiful Suite in the Jan-Apr 2026 Mini Catalog.

Stampin' Up! Simply Beautiful Bundle card front

I began with a Fresh Freesia card base and added two layers of the Lovely & Beautiful Special DSP, off-setting them for the challenge and attached them with dimensionals. I then pulled out Petal Pink to die cut the two flower pieces and Gold Foil for the stems & leaves. I used a sponge dauber & Calypso Coral ink to add dimension to the flower centers. Using the Beautifully Celebrated Dies, I also die cut the sweet label under the flower from Basic White and used the same sponge dauber to sponge the edges. I stamped the sentiment in Petal Pink ink and fussy cut along the bottom. This was attached with dimesnionals. Final touch… the awesome Pearlized Faceted Circles. Let me explain the flower layers a bit more… I added the two petal layers with a single cut in half mini dimensional, but it didn’t quite ‘sit’ the way I wanted, so I rolled a glue dot and attached that to one of the petals and it did the trick. The gold foil stamen is added with a glue dot.

Stampin' Up! Simply Beautiful card inside

For the inside… The leaf is stamped with Memento ink – my ink pad is way juicy and the image is quite strong 😦 But I colored the leaf with Stampin’ Blends in Old Olive. I added the Basic White panel to another piece of the Lovely & Beautiful SDSP and attached them to the inside of the card.

Stampin' Up! Simply Beautiful card & envelope

For the envelope… another stamped image in Memento ink Simply Beautiful stamp set & colored with Stampin’ Blends Petal Pink & Old Olive. The flap has the same Fresh Freesia Lovely & Beautiful SDSP trimmed to fit. For information about shopping with me or joining my team, see below.

Now it’s time to follow my hop buddies… click the next button or click on a name – you’re going to want to see what everyone has created. Enjoy the hop!

Amy Koenders

Mary Deatherage

Karen Ksenzakovic

Tara Carpenter

Terry Lynn Brightyou are here!

Nicole Bloxom

When shopping through me & Stampin’ Up! you will earn 10% of your retail amount on all orders of $20 or greater – that’s deal #1! You will also be earning Daisy Patch Rewards from me – one Daisy Patch reward for each $25 of your order through my online store – that’s deal #2! When you have a total of 16 Daisy Patch Rewards – you will be able to select a $40 gift from me – that’s deal #3! 😀 When your order is $50 or greater, you will receive the monthly tutorial – and for December it’s the Pop-Up Petals tutorial – deal #4! See below for more fantastic deals.

167970

TRUE BLUE FLORALS 12″ X 12″ (30.5 X 30.5 CM) DESIGNER SERIES PAPER

$5.00

If you love exclusive products, you’re going to love Product of the Month, a promotion centered around a special product release every month. The Product of the Month items are specially designed to be some of the best items Stampin’ Up! has to offer that aren’t available in any of our catalogs or our Online Exclusives. Every month we’ll release a new item that is only available for purchase once per account. These items will be limited quantity and are likely to sell out quickly—once they’re sold out, they’re gone for good! The True Blue Florals 12″ x 12″ (30.5 x 30.5 cm) Designer Series Paper is the exclusive Product of the Month for December 2025! Only available until supplies run out—don’t wait to get yours! This product can be unlocked for just $5 with a single order over $75 (after discounts and rewards).

Shop withhttps://www.stampinup.com/?demoid=2169800me here

Thanks for stopping by. May you have a beautiful day. Make someone happy by sending them a handmade card filled with ❤️