Unknown's avatar

About TL's Bright Spot

I love to be creative - in the garden, crafting, and in leadership roles. There is something wonderful that happens when we design something new and share it with others. It's fun and makes everyone happy.

SU! Gnome for the Holidays

Hello again – it’s Monday… did you have a good weekend? And your plans for the week? This has become kind of a busy one for me, in comparison to all the seclusion/ quaranteen stuff.- two meetings IN PERSON no less… We wear masks, sit 6-8′ apart, it’s good. So – today’s card… I broke out a new stamp set – Gnome for the Holidays – they are so stinkin’ c-u-t-e! And oh yeah, got my new Cut & Emboss machine, which I love…. Works like a charm; smooth crankin’ both for cutting AND embossing – and I did both for today’s card. OK OK, I hear you – on with it already :O)

Gnome for the Holidays #1

Didn’t I tell you they were cute? I stamped them in Memento Black ink on Whisper White cs then colored them all with Blends:

  • the girl: both Lt and Dk Call Me Clover, Poppy Parade, Dk Highland Heather, So Saffron and dk Crumb Cake
  • for the center gnome: Lt Seaside Spray Lt & Dk Highland Heather, So Saffron, Lt & Dk Smokey Slate and Dk Crumb Cake
  • gnome on right: Lt & dk Call Me Clover, Poppy Parade, Lt & Dk Crumb Cake, Dk Highland Heather, So Saffron
  • I colored each of their noses with just a bit of Lt Petal Pink

I cut them down to size and adhered them with liquid glue to Highland Heather cs that had been die cut with the Stitched So Sweetly Dies. Next I cut a panel of Gorgeous Grape cs & ran it through the Old World Paper 3D embossing folder. I adhered the gnome panels to it with dimensionals. I took a Thick Whisper White card base and ran the front through the Winter Snow embossing folder – loving all this texture from the embossing! I adhered the Gorgeous Grape piece to the card front with liquid glue.

Next I stamped the sentiment (don’t you love this cute font!) from the Gnome for the Holidays stamp set in Garden Green ink on a Whisper White strip. I created a banner at the end and adhered it to a Highland Heather strip that also had a banner. I adhered this with dimensionals to the card front and Voila – card front is complete!

Gnome for the Holidays #2

So fun… now for the inside… Adhere a panel of Gorgeous grape with liquid glue. With a Whisper White panel stamp the sentiment in Garden Green ink (it’s from Gnome for the Holidays stamp set). Then stamp the tree from the Merry Moose stamp set in twice stamped off Garden Green ink. Adherer over the Gorgeous Grape and your card is fait accompl!

Gnome for the Holidays inside

For the envelope I embossed the flap with the Winter Snow embossing folder then stamped the gnome in Memento ink. I colored him with the Blends as noted above. TIP: slip a scrap of card stock into your envelope before coloring so the ink doesn’t bleed through the envelope!

Gnome for the Holidays #4

Fun fun… I’m labeling this a masculine card ‘cuz I think it could be :o) I hope you have enjoyed today’s card. I had such fun coloring and creating. If you would like to join my team – would enjoy working with you. For $99 you can sign up and get $125 worth of products at the same time and some wonderful discounts for products as well. Hobby stamper? Works for me! Let me know if I can help you get started in that direction…

Thanks for stopping by.

May you have a beautiful day.

Make someone happy by sending them a handmade card created with love.

20200804_AD_en_US. open this for the PDF for the August – December 3030 Mini catalog

2020 AC US open this PDF for the Annual 2020 catalog

Shop with me? Receive a SU! item worth $10 when your order is between $50-$150 and using my current host code – August Host Code 4TEZ7HWY. If your order is more than that, you STILL receive the $10 item from me but SU! has rewards for you as well :o)

Card cuts for todays card:

  • Thick Whisper White 4 1/4 x 11 scored at 5 1/2
  • Gorgeous Grape 3 1/8 x 5 1/2 (front), 4 x 5 1/4 (inside)
  • Highland Heather approximately 3 x 5 1/4 + scrap for sentiment strip
  • Whisper White 1 3/8 x 2 3/8 for each gnome + scrap for sentiment + 3 3/4 x 5 for inside panel

SU! Mini Pizza Box and Cards/ Punches

Gleaming Ornaments Punch Pack 3″ card

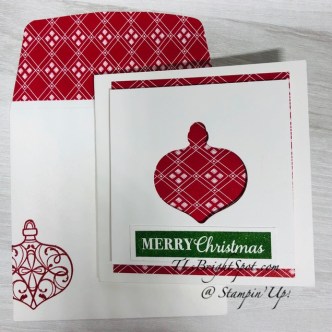
Hi Everyone! One day last week I covered a Mini Pizza Box and didn’t share it as I hadn’t created cards for the inside yet – so yesterday I got busy and did just that. I pulled out some fun carryover punches: Mr Moose (which I adore!), the Pine Tree Punch and Gleaming Ornaments Punch Pack. Because these are small cards (3 x 6 scored at 3), I used only the smaller of the Gleaming Ornaments punches. Let’s take a look…

Aren’t these fun? Let’s start with the box: Mini Pizza Box… Mossy Meadow cs (3 1/4″ square) adhered with liquid glue; Heartwarming Hugs DSP (2 3/4″ square) adhered to Pear Pizzazz cs (3″ square), then put on dimensionals and onto the Mossy Meadow piece. I adhered a Gold Hoops Embellishment  (love these!) with liquid glue then tied a bow with the  3/8″ Real Red Sheer Ribbon then attached a fun Jingle Bell with a gold  cord from the Wonder of the Season Ribbon Combo Pack and attached with a glue dot. I stamped the three trees in Mossy Meadow on a Whisper White scrap and fussy cut them and adhered with dimensionals. The center tree got two layers of dimensionals.

For the three cards I cut Whisper White cs 3 x 6″ and scored at 3″, making them fit nicely in the Mini Pizza Box. I took another piece of Whisper White and punched the tree, moose and ornament.  TIP: I marked a larger piece of the Whisper White 2 1/2 x 7 1/2 so I knew the 2 1/2″ square, marked the centers of each square so I would have the punch centered, punched each one then cut the strip into the 2 1/2″ squares. Perfect centering and easily punched! This Whisper White square was put on dimesnionals and adhered to more of the Hearttwarming Hugs DSP (cut to 2 7/8″) which had been adhered to the 3 x 6 pieces.

For the sentiments:

  • Ornament card… stamped in  Garden Green using the Christmas Gleaming stamp set on a Whisper White scrap and fussy cut then adhered with liquid glue.
  • Tree card… stamped in Real Red from the Gnome for the Holidays stamp set on a Whisper White strip and adhered with liquid glue.
  • Moose card… stamped in Crumb Cake from the Merry Moose stamp set

Envelopes: each of the envelope flaps got coordinating DSP from the Heartwarming Hugs DSP then stamped on the front with coordinating stamp sets:

  • Christmas Gleaming stamp set  – ornament stamped in Real Red
  • Merry moose stamp set – moose stamped in Crumb Cake
  • Perfectly Plaid stamp set – tree stamped in Garden Green

Voila! This is such a cute set of gift cards. I can’t wait until it’s closer to the appropriate time to gift it :O)

All items may be found in the Aug – Dec 2020 Mini Catalog – see the PDF if you do not have a new cattie. Then let me know if you do not have a demonstrator how I may help you get that order placed so you, too, can have such fun creating! Here’s the PDF: August_89_2020

When you shop with me… get a free SU! item worth $10 when your purchase is $50- $150 and use my HOST CODE… during the month of August… 4TEZ7HWY. If your purchase is over $150 you’ll still get a free gift from me but don’t use the host code as SU! will offer you some sweet options for free product!

Thanks for stopping by.

May you have a beautiful day.

Make someone happy by sending them a handmade card.

SU! Autumn Greetings Bundle

The other day I participated in a blog hop and the theme was Fall Frenzy – cute name for our theme! I was ‘on a roll’ and made another fall-themed card – here ’tis…

Autumn Greetings Bundle

It is made using the Autumn Greetings stamp set with coordinating dies, Autumn Essential Dies. Aren’t these wheat stalks perfect? And the pumpkins…. Here’s the deets:

Begin with Thick Very Vanilla for your card base; add a layer of Cajun Craze cs with liquid glue. Die cut several wheat fronds with the Autumn Essential Dies out of Crumb Cake cs and sponge dauber them with either Crumb Cake or Cajun Craze inks. Die cut the pumpkins: for the larger one I used Mango Melody cs for the outline die and Pumpkin Pie cs for the detail die; for the smaller I used Pumpkin Pie cs for the outline and Cajun Craze cs for the detail. Once I glued the detail die cut to the outline die cuts with liquid glue, I used a sponge dauber and sponged them with Crumb Cake ink to give them that aged look, as if they have just come from the pumpkin patch. 🙂  I also die cut a circle from Cajun Craze and another from Early Espresso. The Early Espresso piece I ran through the Forever Greenery embossing folder for some added texture.

Autumn Greetings Bundle

Now to begin the layering… Adhere a strip of Gilded Autumn Specialty DSP to a strip of Cajun Craze and adhere to regular Very Vanilla panel with liquid glue. Adhere the circles with liquid glue to this strip.  Stamp the sentiment from the Autumn Greetings stamp set in Cajun Craze ink. Don’t you love this font? So fresh! Adhere the wheat fronds with liquid glue. I then took a short length of Braided Linen Thread and gently stretched it, pulling the threads almost apart. I attached this with a dab of liquid glue and placed the larger pumpkin over it that had dimensionals on the back. The smaller pumpkin also got dimesnionals. For the final touch I added several fun Artistry Blooms Adhesive- Backed Sequins.

Fun, fun… love all the texture and layers. And this can so easily be a masculine card if you need it to be. I often find it difficult to create a masculine card and I think this one fits that masculine category.

Autumn Greetings Bundle

Thanks for stopping by.

May you have a beautiful day.

Make someone happy by sending them a handmade card.

Card cuts for today’s card…

  • Thick Very Vanilla 4 1/4 x 11 scored at 5 1/2
  • Regular Very Vanilla 4 x 5 1/4
  • Cajun Craze 4 1/8 x 5 3/8; 1 3/4 x 4; 2 3/8 circle
  • Early Espresso 2 12/4 circle
  • DSP 1 1/2 x 4

SU! Celebrate Sunflowers Duo

Hi folks! Today I’m sharing a card and ‘tot’ with you using the Celebrate Sunflowers Bundle – which means using the Sunflower Dies AND the stamp set. I can’t stand it, these are so pretty…

All Dressed Up tote

Celebrate Sunflowers card


So much fun to create! And the dies and stamp set make it so easy… For the tote: Begin by Die cutting the tote using the All Dressed Up Dies. This is die cut from Flirty Flamingo. Remember you have to die cut two and put them together. Then die cut the straps and do two of those as well. I sponged the edges of the tote in Flirty Flamingo to give it some depth. It doesn’t really show in the picture, but it does make a difference. Once the tote is put together, set it aside and create the sunflower: stamp the sunflower in Flirty Flamingo ink on Whisper White cs and die cut with the outline die. Die cut the full sunflower in Petal Pink and using a sponge dauber, ‘color’ with Flirty Flamingo. I also used my Wink of Stella and covered the petals only.  Color the center area with Stampin’ Blends using both light and dark Crumb Cake. Die cut the tiny center out of Crumb Cake cs and sponge the edges of this with Crumb Cake and adhere with dimensionals. Add three Gold Glitter Enamel Dots. Adhere the finely detailed Sunflower die cut to the outline die cut, lining up the edges so they match or not. (It gives it a different look if it isn’t lined up and I like it both ways. This one is lined up.) I used liquid glue and just adhered the larger center area leaving the petals loose/ free. Die cut the leaves in Just Jade – you can see I did several. Adhere the leaves to the back of the Sunflower die cut, then adhere to the front of the tote with liquid glue. Tie a length of the 5/8″ Polka Dot Tulle ribbon in a knot to one one of the straps. Then I tied a bow out of the 1/2″ Whisper White Faux Linen Ribbon and adhered with a glue dot. Love this – so feminine and so cute!

The card… Die cut a panel of the Flowers for Every Season 6×6 DSP using the die from the Ornate Layers Dies. This creates a beautiful feminine background for this sunflower. This was adhered to a Thick Whisper White card base (4 1/4 x 11). Another piece of the DSP was cut using the Stitched Rectangles Dies to create another layer and fun background. Next I stamped the sunflower in Memento black in on panel of Whisper White cs and die cut using the Stitched Squares dies. Color with both the light and dark Flirty Flamingo Blends.Notice it is lightly colored with lots of white showing. This gives it wonderful depth and really makes it more realistic. And I actually stamped two sunflowers and after coloring cut into one of them and added it to the Square one using dimensionals. I die cut the detailed sunflower from Flirty Flamingo and used the outline die cut to create a vellum background. I adhered the detailed die cut to the vellum, retaining a few of the petal insets and adhered those with liquid glue. The sunflower was adhered to the card front with liquid glue then the square one with dimensionals. I stamped the sentiment from the Celebrate Sunflowers stamp set in Memento black ink, cut it apart and adhered it with dimensionals. Love this look!

Celebrate Sunflowers closeup

For the inside I stamped several leaves in Just Jade ink on a Whisper White panel (4 x 5 1/4) and adhered that to Just Jade (4 1/8 x 5 3/8) and then into the card base. While the stamp was out I stamped the envelope front and flap continuing in the Just Jade ink.

Celebrate Sunflowers card inside

Celebrate Sunflowers card envelope

Are these two items fun? I’m giving them together to a special friend. :o)

Want to make these? I can help you do that… join my team or order from me. Remember when byou order from me and your purchase is between $50-$150 and you use my current host code (4TEZ7HWY – good throughout August!) I will send a SU! item of your choice worth $10.

Thanks for stopping by.

May you have a beautiful day.

Make someone happy by sending them a handmade card made with love.


SU! Fall Frenzy Amy’s Inkin Krew Blog Hop – Aug ’20

Here we are for the “Fall Frenzy” of the awesome Amy’s Inkin’ Krew Blog Hop… wait till you see the wonderful creations everyone has posted

Stitched Leaves Dies

We begin with Shimmer White card stock and do a watercolor wash with Soft Sea Foam using the new Water Painters. Set it aside to dry and do the die cuts: Crumb Cake for the largest leaf in the Stitched Leaves Dies, Soft Suede for the medium leaf from the StitchedLeaves Dies and Soft Sea Foam for the third and smallest leaf – this time from the Gathered Leaves Dies. The berries are die cut both from Whisper White and Shimmer White card stock using the Poinsettia Dies. I used my bone folder and the Stampin’ Pierce mat to follow along the main veins on each of the leaves to encourage ‘curling’ or ‘creasing’ to give them dimension.

Now that the wash is dry, let’s begin the layering… the two larger leaves go on first… I used glue dot in the center to hold them together then rolled glue dots to put one on a fold of the two side leaves. This holds them in place so they don’t flop. I added the smallest leaf also with a glue dot, then added the berry die cuts with liquid glue. When necessary I shorted stems to make them fit nicely. I stamped the sentiment from the Love of Leaves stamp set. Finally I added several; Elegant Faceted Gems to give the card a bit of sparkle. This panel was adhered to a Soft Sea Foam then dimesnionals added to the back. This was adhered to the Shimmery White card base.

Stitched Leaves Dies #2

For the inside I stamped the leaves in Soft Suede from the Forever Fern stamp set on a Whisper White panel. The sentiment comes from the Love of Leaves stamp set and is also in Soft Suede. This was adhered to another piece Soft Sea Foam then mounted to the card base. Voila! card is complete and gorgeous. I love the soft colors and the layering.

Stitched Leaves card (inside panel)

The stamps and dies for today’s card are mostly from the new Aug-Dec 2020 Mini Catalog, pages 49-50. Gathering Leaves is a returning stamp set and may be found in the Annual catalog. Need help locating these? Here is a link to the Mini Catalog:  20200804_AD_en_US


Card Cuts for today’s card:

  • Shimmery White 3 3/4 x 5 (front panel) 8 1/2 x 5 1/2 cored at 4 1/4 + scraps for berries
  • Soft Sea Foam 3 7/8 x 5 1/8 (front) 4 1/8 x 5 3/8 (inside)
  • Whisper White 4 x 5 1/4 (inside)
  • Scraps of Crumb Cake, Soft Suede and Soft Sea Foam for leaves

Thanks for stopping by.

May you have a beautiful day.

Make someone happy by sending them a handmade card.

Now follow along the hop by using the buttons or use the links listed below.


  1. Ksenzakovic – https://wp.me/paaNf4-2LD
  2. Terry Lynn Bright – https://wp.me/p8fxPh-JY
  3. Mary Deatherage – https://wp.me/p5snyt-ecO
  4. Leslie Larkin – https://leslielarkin.com/love-of-leaves-bundle/
  5. Akiko Sudano – https://wp.me/paOv8E-1y8
  6. Julie Johnston – https://wp.me/p8SzmQ-2lB
  7. Jaimie Babarczy – https://wp.me/p79UhD-47T
  8. Sue Prather – https://wp.me/p5yitZ-254
  9. Donna Leonard – http://stampdabbles.com/?p=2586
  10. Nicole Bloxom – https://bloxiegirl.blogspot.com/2020/08/stampin-up-fall-frenzy-blog-hop-with.html
  11. Amy Koenders – https://wp.me/p2SFwf-kqs

SU! Warm Hugs Bundle

It’s Monday – and a glorious day! I’m thankful for so much… and one of those I have the opportunity to play with some amazing SU! products. What I did prior to SU! was just muddle around in mediocre stuff. Once I found SU!, there was no turning back. All products are made well; products coordinate. I can’t say enough. So if you are ‘on the fence’, jump in. I’ll help you navigate and create – we could make a great team. Contact me at tlsbrightspot@gmail.com and let’s talk about how to make this happen.

For today’s card I pulled out a stamp set I haven’t used before – yep – from the amazing Aug-Dec 2020 Mini Catalog. It’s called the Warm Hugs Bundle and is actually part of a suite of products that can be found on pages 8-11. I used many of the products from the suite but incorporated some other items as well.

Warm Hugs Bundle #1

I started with a Crumb Cake card base. Then took a panel of Mossy Meadow cs and ran it through the Wrapped in Texture embossing folder twice. This embossing folder is narrow, and probably is not meant to emboss a card front, but I did and think it turned out really well. I took a strip of Heartwarming Hugs DSP cut a banner at the bottom and adhered it with liquid glue to the card front. I took another very narrow strip of this same DSP, cut a side angle at the bottom and slipped it under the right of the banner. Next I took the Mossy Meadow Diagonal Stripe ribbon and wrapped it back and forth on the card front, adhering in various places with Stampin Seal. The sentiment was extra fun and easy to create using the Warm Wraps Dies and the Warm Hugs stamp set. Don’t you love this hexagonal look?

Stamp the sentiment in Real Red ink on a Whisper White scrap. The sentiment comes from the Wrapped in Christmas stamp set which is part of the Heartwarming Hugs Suite of products. Stamp the hexagonal decoration around it in Mossy Meadow ink and die cut with the Warm Wraps Dies. Put dimensionals on it and adhere to a circle cut from Pear Pizzazz cs. That circle also is in this die set. The Pear Pizzazz also got dimensionals and was adhered over the Diagonal Stripe Ribbon.  Since the card front is complete, let’s move to the inside.

Warm Hugs #2

So, so simple but I love how the inside coordinates with the outside… another strip of DSP adhered to Whisper White panel. This was adhered to Mossy Meadow and attached to the Crumb Cake card base. And voila, your card is complete!

Warm Hugs Bundle #3

For the envelope I stamped a fun little cup in Mossy Meadow, then the steam rising from the cup in Crumb cake. The envelope flap got the same Heartwarming Hugs DSP as the card front. Fait accompli! While this card is done in Holiday-type colors, it could so easily be used as a card of encouragement or a birthday card, and it’s a bit masculine too.

Warm Hugs Bundle #4

Here’s a link to the cattie to help you find everything.

20200804_AD_en_US

Thanks for stopping by.

May you have a beautiful day.

Make someone happy by sending them a handmade card filled with love.

Card cuts for today’s card:

  • Crumb cake card base 4 1/4 x 11, scored at 5 1/2
  • Mossy Meadow 4 x 5 1/4 (2)
  • Heartwarming Hugs DSP – 2 1/2 x 5, 3/8 x about 5 (front), 3/8 x 5 (inside) and 2 1/4 x 6 (envelope flap)
  • Whisper White 3 3/4 x 5 (inside) + scrap for front sentiment
  • Pear Pizzazz for front circle

SU! Yuletide Pasture Slimline Card

Oh what fun …I loved making this card… it’s..um.. different. Who would have thought I would like this stamp set so much. (Yuletide Pasture).. but once I started, well, it struck my fancy 🙂 I’ll be honest, I don’t know what this beast is called – maybe an ox? But it has this undisturbed look, with ornaments from its horns. I mean, what NOT to like! So here we go…

The card base is Crumb Cake and it’s a slimline card, so l-o-n-g. And this hairy ox is stamped in Soft Suede, just lying there, with ornaments on its horn on a Whisper White piece. I then took the fine tip water painter and brushed it across the ‘hair’ of the animal to give it some color, but not too much. I did the same to the antlers. Then I colored the ornaments with various shades of blue Blends and added a stripe of Just Jade on each one. The Blends used.. Night of Navy, Seaside Spray and Misty Moonlight. The beast looked incomplete so I added a bow using Flowers For Every Season Ribbon Combo Pack, specifically the Misty Moonlight/ Silver Bakers Twine. I completed the bells by adding the sparkle of Wink of Stella.I put dimensionals on the back and set it aside.

For the layering on the card front… Pacific Point and the lovely Snowflake Splendor DSP. The banners are again Pacific Point and Crumb Cake with the sentiment stamped in Soft Suede. I used the Banner Pick A Punch for the ends. 2020-2022 In Color Enamel Dots completed the look for the banner. Once these were placed where I wanted them, I added the ox panel with dimesnionals.

Yuletide Pasture #1

The inside is another adorable beast stamped in Soft Suede on the Whisper White panel , then the fine- tip water painter was used to add color and depth. The neckband/ bells uses Blends in… Poppy Parade, Call Me Clover and Mango Melody. I stamped the sentiment in Soft Suede as well.The Whisper White panel was adhered to Pacific Point with liquid glue and that in turn added to the Crumb Cake Card base, again with liquid glue. Voila – fait accompli’. I love this simple card and hope you do as well.

Yuletide Pasture #2

This wonderfully fun stamp set can be found in the Aug-Dec 2020 Min Catalog on pg 28. Here’s a link to the cattie to help you find everything.

20200804_AD_en_US

Be sure to redeem those coupons from purchases made last month!

Yuletide Pasture #3

Thanks for stopping by

May you have a beautiful day

Make someone happy by sending them a handmade card :O)

Card cuts….

  • Crumb Cake card base 7 x 8 1/2 scored at 3 1/2, 1 x 5 (banner)
  • Pacific Point 3 1/4 x 8 (front), 3 1/4 x 8 1/8 (inside), 3/4 x about 5 1/4 (banner)
  • Whisper White 2 7/8 x 3 3/8 (front), 3 x 8 (inside)

SU! Ornamental Envelopes

Hi Folks! In yesterday’s post I shared two cards but gave instructions for only one… so today you get full disclosure on Card #2   <:O). Funny me, right? So here’s the card again..,.

Ornamental Envelopes Card #2 a

One of the things about this particular stamp and die set is the variety, how very different we can create from one bundle. To create this wreath I stamped with Granny Apple Green on a Whisper White panel. TIP: To be certain I stayed in a circle, I had used a 2 1/4″ circle punch to pop out a circle. I laid that on the Whisper White panel and stamped around the edge of it …. perfect for creating this wreath!  On  a Whisper White scrap I stamped several of the triple flowers in both Crumb Cake and Real Read inks and die cut them with the dies from the coordinating Envelopes dies. I placed them around the wreath where I wanted and adhered some with liquid glue and some with dimensionals. To add some sparkle I added the lovely Champagne Rhinestone Basic Jewels to many of the floral centers. then added three gold bows using the Forever Greenery Trim Combo Pack, attaching them with liquid glue. I took another length of the gold trim and wrapped it around the wreath, encircling some of the flowers, using liquid glue under the raised flowers to adhere.


I then took a strip of the beautiful Heartwarming Hugs DSP and adhered it to the lower portion with liquid glue. Over this is a die cut in Granny Apple Green from the Painted Labels dies. This I adhered with liquid glue.  I stamped the sentiment from the Ornamental Envelopes stamp set in Granny Apple Green on a Whisper White scrap and die cut it with the Ornate Frames Dies. This was put on dimensionals and voila! the card front just needs the layering panels: adhere to Granny Apple Green with liquid glue; then this panel is put on dimensionals and goes on the Crumb Cake card base. OH! Almost forgot a VERY IMPORTANT Step…..use the Tasteful Textile embossing folder to emboss the front of the card, spritzing it lightly with water to get a good emboss.

For the inside, I stamped the sentiment in Real Red ink on the Whisper White panel then adhered a couple of the leftover die cut flowers. The panel was adhered to Granny Apple Green cs, then to the inside Crumb Cake card base. Card is complete!

Ornamental Envelopes Card #2 b

For the envelope I took a piece of the Heartwarming Hugs DSP and adhered it to the envelope flap, then die cut it with one of the wonderful edges curved perfectly for envelopes – hence Envelopes Dies!!! This gives that final elegant appearance and completes your card.

Ornamental Envelopes Card #2 c

This is such a neat bundle – the Ornamental Envelopes. 10% off when purchasing the stamp set and dies as a bundle. See pg 40 in the Aug – Dec 2020 Mini catalog by clicking the link…

20200804_AD_en_US

Thanks for stopping by

May you have a beautiful day

Make someone happy by sending them a handmade card :O)

Card cuts for today’s card:

  • Whisper White 3 3/4 x 5 (front), 4 x 5 1/4 (inside) + scrap for sentiment
  • Granny Apple Green 3 7/8 x 5 1/8 (front), 4 1/8 x 5 3/8 (inside)
  • Crumb Cake 8 1/2 x 5 1/2 scored at 4 1/4


SU! Ornamental Envelopes

Hi Everyone – have you visited the UPDATED SU! site yet? Oh my goodness – it’s wonderfully exciting…the techs have worked miracles! AND the new Aug-Dec 2020 Mini Catalog is now live… see that right here…08.01.20_HAPPENING_NOW_AD_CATALOG_GOLIVE_ENG

OK, I have two cards for you today, both using the Ornamental Envelopes stamp set with coordinating dies.

Ornamental Envelopes #1 a

Ornamental Envelopes Card #2 a


I really appreciate how different and yet how similar these two cards are… similar due to colors mostly, and different as different elements were used from the stamp set.

Card #1:

  • stamp the ornaments using Versamark ink on Whisper White panel, sprinkle with silver embossing powder then heat emboss to set.
  • Once embossing has cooled sufficiently, color with Stampin’ Blends: Light Misty Moonlight, Lt Highland Heather, Lt Granny Apple Green, and Lt Melon Mambo
  • Add a pearl to the one ornament and color with the Lt Misty Moonlight Blends
  • Adhere this panel to Pear Pizzazz with liquid glue
  • Adhere both of these to Silver Foil sheets with dimensionals
  • Place but DO NOT ADHERE on the Pear Pizzazz card base.
  • Using your Stamparatus, place the ‘Merry” sentiment and the ornament in the appropriate position, remove the ornament panel and stamp with Versamark ink. sprinkle with silver embossing powder and heat set. Again, once cooled, color the ornament with Lt Misty Moonlight and Lt Melon Mambo Blends
  • Adhere the ornament panel and your card front is complete :O)

For the inside:

  • Stamp the sentiment on a Whisper White panel with Melon Mambo ink. The sentiment comes from Festive Corners stamp set (an awesome versatile stamp set I might add!)
  • Because I colored the single ornament on the card front with Blends, the colors bled through – what to do? Cover the offending panel with DSP – this comes from Heartwarming Hugs DSP and coordinates perfectly!

    Ornamental Envelopes – card inside using Festive Corners

    The envelope got the same DSP on the flap and then using a die from the coordinating dies, create this incredibly beautiful edge. Can you see that cuteness?

    Ornamental Envelopes with Envelope Dies

    The card is complete… yay!

    Card cuts for Card #1

  • Whisper White: 2 1/2 x 4 1/2, 4 x 5 1/4
  • Pear Pizzazz 2 3/4 x 4 3/4, 8 1/2 x 5 1/2 scored at 4 1/4
  • Silver Foil sheet 3 x 5
  • Heartwarming Hugs DSP 4x 5 1/4 + 2 1/4 x 6 for envelope flap

Thanks for stopping by

May you have a beautiful day

Create something wonderful and send it to a friend.

OH PS… I’ll share directions for Card #2 tomorrow :O) 😏

SU! Online Store Update!!!!

Stampin’ Up! is updating the look and function of the online store!  Yay!!  The store will be updated beginning tomorrow, August 4 with a new look and feel to help you better navigate it while you shop!  Here is what you need to know so that you’re all set to shop on August 4!

The new online store will go live at 7:00 AM (MT) on 4 August.  Be aware that the online store will be offline temporarily from midnight until around 7:00 AM MT on August 4 as they transition to the new store.  It should be back up and running no later than 7:00 AM MT for ordering from the new August-December 2020 Mini Catalog!

A few things to know:

  1. Your account information and passwords will still work with the new site.
    • Be sure that you know your current login information so that you can log in right away on Tuesday!
    • If you don’t know your login information by heart (or if you do like I do and have it saved to your browser so that you don’t have to remember it every time):
      • Log into your account today and then click on “my account” and then “email/passwords” and either record the information that is shown or, if it’s not shown, update your password and then write it down.
  2. While old bookmarks and links will forward you to the new store, your browser will see it as a “new” site. If you rely on your browser to remember your login information, the first time that you log in, it will not associate the new site with that saved information.
  3. Be sure that you see my name at the top on the right when you are shopping with me to earn my rewards and benefits for ordering!

If you have trouble logging in on Tuesday:

  1. Once the new store is up and running on Tuesday, if you have trouble logging in, you can click the “Forgot Password” link on the new online store’s sign-in page and follow the steps to reset your password. The password reset email will come from noreply@info.stampinup.com. Adding this email address to the contacts list in your email program and/or searching for your email program’s spam settings can help you ensure that you receive the email.
  2. Should you run into any problems, there is a link in the password reset window to a page with additional information.
  3. If you have trouble accessing your account, Stampin’ Up! can also help you reset your password.  Just call them at 1-800-STAMPUP and they’ll be happy to help!  Unfortunately, I’m not able to assist with password changes as it’s a security issue for you. But Stampin’ Up! can definitely help you!

Hopefully this will be a seamless transition for you on August 4!  I’m looking forward to seeing the new site design too!