Hi Everyone… did you miss me yesterday? I made a card and it got snatched up by another member of the household and SENT! No photos to show for it… but it got out in record time so I’ll have to make something similar another day. For today, I’m using the best ever BOHO INDIGO PRODUCT MEDLEY. Love, love, love – just sayin’. I’m not usually ‘into’ the medleys, but this one is fantabulous!!!
Boho Indigo Product Medley
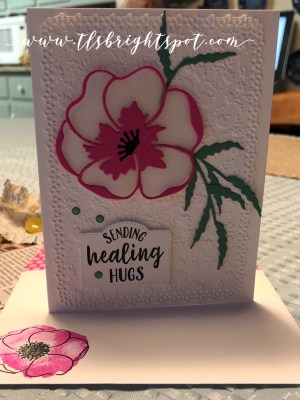
#1
Classy, right? Blue/ Very Vanilla sparkle on their own, then adding the Magenta Madness for a couple of flowers and POP. In addition to the Boho Indigo Product Medley, additional products were Stitched Rectangles Dies, Linen Thread, Misty Moonlight ink/ cs, Magenta Madness ink, Pear Pizzazz ink, Very Vanilla cs and Crumb Cake cs for the card base. I could probably stop right there and you could figure out the rest… 😏 … but I’ll give a few more details ‘cuz someone just may want them.

Boho Indigo Product Medley
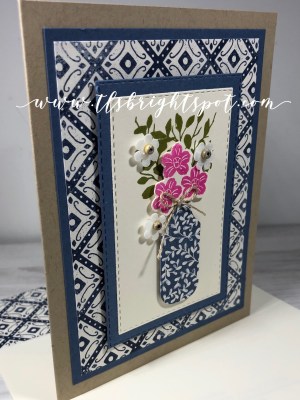
#2
- Boho Indigo Product Medley
- Crumb Cake card base 8 1/2 x 5 1/2, scored at 4 1/4.
- Misty Moonlight cs 3 3/4 x 5 (front), about 3 x 4 (front layer die cut with Stitched Rectangles Dies), 4 x 5 1/4 (inside) + 1/2 x 5 for inside
- Very Vanilla cs about 2 1/2 x 3 1/2 (front layer die cut with Stitched Rectangles Dies), 3 3/4 x 5 (inside panel) + scrap for flowers (stamped in Magenta Madness and die cut with Boho Indigo Dies then adhered with dimensionals)
- Boho Indigo DSP 3 1/2 x 4 3/4 + scrap for vase (die cut with Boho Indigo Dies and adhered with dimensionals) and 3/8 x 5 scrap for inside
- Paper Flowers from the Boho Indigo Product Medley (3) adhered with mini dimensionals
- Leaves on card front stamped in Pear Pizzazz (should probably have been stamped off first!)
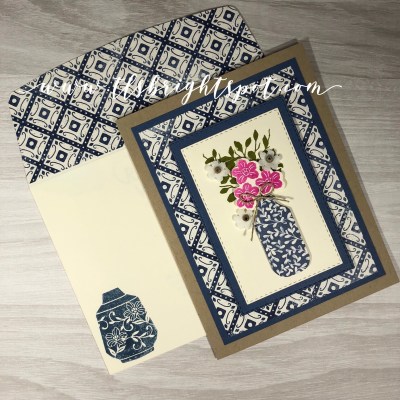
- Envelope… Boho Indigo DSP 2 1/4 x 6 for envelope flap
- Stamp vase from the Boho Indigo stamp set in stamped off once Misty Moonlight
Boho Indigo Product Medley
Stitched Rectangles Dies
#3
If you have a catalog you can reference this set on pg 9 of the 2020-2021 Annual Catalog. If you do not have a demonstrator nor a catalog, reach out to me. I would be happy to be your demonstrator and send a ‘cattie’ ASAP. Here’s a PDF version until then. 2020 AC US
SU! has some really super deals going on right now if you join as a Demonstrator (even a hobby demo is OK by me!) AND you get a FREE BUNDLE from SU! just for joining. Of course you get something special from me as well :O) Here’s a flyer. for more info.. 06.03.20_FLYER_RECRUITING_PROMO_NA
Thanks for stopping by.
May you have a beautiful day.
Make someone happy by sending them a handmade card.