Stampin’ Up! Ornate Garden Suite Masculine Card

I used the Stampin’ Up! Ornate Thanks stamp set and Ornate Layers dies from the upcoming 2020-2021 Annual Catalogue to create my masculine thank you card today. It was quick and it was easy!

  • Starting with Old Olive 8 1/2″ x 5 1/2″ card stock, score @ 4 1/4″
  • Cut a piece of Pear Pizzazz 4 ” x 5 1/4″. I appreciate how these two greens work together.
  • Cut a piece Ornate Garden Specialty DSP with the largest die in the Stitched Rectangle dies. Using liquid glue, adhere this to the Pear Pizzazz.
  • Cut a piece of Gold Foil from the Ornate Layers dies. Put dimensionals on the back and attach to the Pear Pizzazz and Ornate Garden SDSP.
  • Cut a strip of Basic Black 1/2″ x 5″. Adhere using snail to the center of the Gold Foil.
  • Cut a piece of Pear Pizzazz about 1 1/2″ x 4 1/2″. Run your embossing buddy across this to remove all static. Stamp the front sentiment with Versamark ink and sprinkle with Black embossing powder and heat set. Once cooled, cut this out with another of the Ornate Layers dies. Color six Rhinestone Basic jewels with Black Stampin’ Up! blends and adhere as shone. Adhere dimensionals to the back of this piece and attach, centering it, over the black strip.
  • Almost done with the front… Add dimensionals to the large Pear Pizzazz and attach, centering, to the Old Olive card base. This card now has three layers on dimensionals and shows such depth and beauty. I love it!

The inside…

  • Cut a piece of Pear Pizzazz 4′ x 5 1/4″ and adhere to the card base with liquid glue.
  • Cut a piece of Whisper White 3 3/4″ x 5″. Stamp the sentiment from the Ornate Thanks stamp set using Tuxedo Black Memento ink. Adhere a strip of the Ornate Garden SDSP 1/2″ x 5″ toward the bottom as shown. Adhere the Whisper White to the Pear Pizzazz already attached to the inside of the card and voila!

The envelope flap… adhere a piece of the Ornate Garden SDSP, cut to fit. Your card is ready to share, send, give.

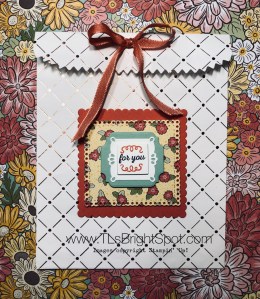
Thanks for stopping by today. I hope you like this masculine card. I think it looks really elegant. And.. it will fit inside the gift bag from yesterday’s post. Lucky man!!!

Remember the Ornate Garden Suite will become available to customers Apr 1 – May 31. Items will be in the Annual catalogue, but probably not listed as a suite – so definitely a deal as a suite of products.  When you shop with me please use my HOST CODE XYW2SYNV to receive a free gift from me!

May you have a beautiful day. Make someone happy by sending them a handmade card.

Stampin’ Up! Ornate Garden SuiteTreat Bag or Card Holder

Hello again… We have had some beeeeauuutiful weather here lately – jonquils and some daffodils are up and blooming; and the hellebores are stunning. The only thing is, I’ve been feeling really punky and haven’t been able to get out and do my garden thing. I’m better mind you, just not up to snuff yet.

Today’s post is more of the products from the Ornate Garden Suite. I had used one of the dies to cut one of the gorgeous papers and needed to cut it down. Well – I didn’t line it up properly and goofed but I couldn’t bring myself to throw that piece out, so I tried again and it worked the way I intended. That stitched (almost) square with the cute scallop using the Ornate Garden Specialty DSP is the result. Take a look see.

Isn’t this fun? Here are the deets:

  • Copper Dotted Treat bag, fold over the top and punch two holes.
  • Cut out a square using the Layering Squares dies, scalloped of course – Terracotta Tile cs and adhere using snail.
  • The next layer is that stunning paper  (Ornate Garden Specialty DSP) using the Ornate Layers dies and cutting it down to almost a square. It isn’t perfect, but I liked that I made it work. Adhere this layer with dimensionals.
  • The next two layers: Mint Macaron cut using the Ornate Frames dies and Whisper White cut using another framelit from that set.
  • The top layer uses the smallest of the Layering Squares dies. It has been stamped with a sentiment from Itty Bitty Greetings stamp set.
  • The ribbon is from the Ornate Garden Ribbon Combo Pack and uses the Terracotta Tile from the set.

My plan is to make a card to put in this bag, and of course it would need to be in a larger size envelope due to the size of the treat bag. Perhaps you’ll see that card tomorrow. Good plan, right? Remember… this Ornate Garden Suite will become available to customers beginning Apr 1 – May 31and will be listed in the new Annual ’20-’21 Catalogue, but probably not available as a suite of products.

When you want to learn more about this suite and how to order, please contact me. If we do not connect via my blog, please send a note to my email at tlsbrightspot@gmail.com. Thanks for stopping by today. Remember… make someone happy by sending them a handmade card!

Stampin’ UP! Ornate Garden Suite

Eeeek! My order for the Ornate Garden Suite arrived, so yesterday I took some time to play. I only had time to create two items and I’m really excited about them. Take a peek. (OOPS … I’ll share the other items in tomorrows post.)

The card was super simple and oh my goodness, the Ornate Floral 3D embossing folder is just wonderful – little tiny flowers all over. That is going to become a favorite I’m sure. And the Ornate Layers dies – eeek! Stunning results!

Details:

  • Run the ….. lightly spritz a 4″ x 5 1/4″ piece of So Saffron cs  then run it through the Ornate Floral 3D embossing folder. The spritzing allows the papers’ fibers to bend to create deeper impressions instead of cracking and breaking and not as clear definition. Does that make sense?
  • Using about a 22″ piece of the Ornate Garden Ribbon Combo pack (I used the Old Olive ribbon in the package), wrap it around the embossed piece and tie a bow. Make certain it is centered on the paper. Use glue dots to keep in place. Adhere the embossed cs with liquid glue directly to the Whisper White thick 4 1/4″ x 11″ base.
  • Using the Ornate Layers dies cut a piece of Terracotta Tile. Cut a piece of Whisper White cs, stamp the front sentiment from the Ornate Thanks stamp set and adhere with liquid glue to the Terracotta Tile die cut. Adhere two little Gilded Gems from this wonderful suite of products. Put dimensionals on the back  of the die cut and place it centered over the ribbon. The front it complete!

The inside…

  • Cut another piece of So Saffron cs 4″ x 5 1/4″, run it through your diecut machine using another of the Ornate Layers dies. Is that gorgeous or what! This could so easily be a card front, or better yet, used to cut down the embossed piece.  Yes, yes! I must try that. On with the directions… Stamp the sentiment in Tuxedo Black Memento ink from the Ornate Thanks stamp set. Adhere to the inside of the Whisper White thick cs.
  • Those little die cut pieces are from another of the die cuts in this set that I saved, cuz I liked them. 🙂 I’ll share that die another day.

Be sure to decorate your envelope. I stamped the adorable little flower in Tuxedo Black Memento ink then used Stamp’ UP! blends to color it. Just remember, when using the blends on an envelope to slip a piece of scrap paper inside so the blends don’t bleed through the envelope. Ask me how I know that!!! And I adhered a piece from the Ornate Garden Specialty DSP to the flap. These papers are stunning folks! I can’t wait to share more of them with you.

Thanks for stopping by. Please remember to used my HOST CODE 2TMMA9HX when ordering $50 + in products. This gives you the opportunity to receive a free product of your choice from me – not to exceed $10.

May you have a beautiful day! Make someone happy by sending them a handmade card.


Timeless Tulips

Hello! The birds are singing wildly this morning. Isn’t it amazing how bulbs popping out of the ground can get us all enthused? It happens to me for sure. So today’s card is a hint of Spring – Pool Party is the lead color with just a hint of Petal Pink and Soft Seafoam. Here it is…

  • Card base is 4 1/4″ x 11″, scored at 5 1/2″ – Pool Party
  • Layer 4″ x 4 1/4″ Pool Party dry embossed with the beautiful Parisian Flourish 3D embossing folder. Adhere with liquid glue directly to the card base
  • Layer #2: 3 1/4″ x 4 1/4″ Pool Party. Cut 3″ x 4″  Parisian Blossoms Specialty DSP and adhere with liquid glue to the smaller Pool Party. Put dimesnionals on the back and adhere to the card base by centering it on the card.
  • Layer #3: Using the Stitched So Sweetly dies and second from largest scalloped edge, cut a piece of Whisper White. Stamp the sentiment in Tuxedo Black Memento ink, the stamp the smaller tulip in Petal Pink, followed by the stem and leaves in Soft Seafoam.
  • Adhere pearls from Share What You Love OR color pearls using Stampin Blends markers.

Love the simplicity of this primarily monochromatic look. The sentiment chose lends itself to being used as a birthday, sympathy, congratulations or just a note card.

Thanks for stopping by. I hope you enjoyed the card today. This kind of card lifts my spirits and I hope it does the recipient as well.

When you’re ordering from me, Please use my current HOST CODE 2TMMA9HX if your order is between $50- $150 and I’ll send you a product of your choice not to exceed $10. If your purchase is over $150, don’t use a host code – accept the freebies offered by Stampin’ UP! and I’ll still send you a product of your choice not to exceed $10. One fvrfee item per month per customer, thank you.

May you enjoy your day. Make someone happy by sending them a handmade card!

Sneak Peek – Breathtaking Bouquet – 2020 Mini Catalogue

Todays card is from the new 2020 Mini Catalogue that opens for ordering Jan – Jun. The stamp set is called Breathtaking Bouquet Background Stamp Set. I used it in my Stamparatus with Versamark and then embossed with white embossing powder on Seaside Spray. I really like the softness of this color! The really fun part happened next as I began coloring the image with various Stampin’ Up! Blends. It takes a bit of time but somehow it’s soothing to me. Here are the Blends I have used for the flowers: Light and Dark So Saffron, Light and Dark Purple Posy (love this color too!), Light and Dark Flirty Flamingo, Light and Dark Pumpkin Pie,Light and Dark Blackberry Bliss. For the leaves I used Light and Dark Granny Apple Green plus Light and Dark Old Olive. The ribbons used to simply wrap the card were Whisper White Flax ribbon and the Seaside Spray 1/4″ Metallic ribbon from the Holiday catalogue. For the inside I used the Beautiful Bouquet Stamp set for the sentiment (using Purple Posy Stampin’ Blends) and the dragonflies from the Friend Like You stamp set using Seaside Spray ink pad.

Here are the deets for the card:
* 5 1/2″ x 8 1/2″ Seaside Spray CS, scored at 4 1/4″
* Seaside Spray Layer 4 x 5 1/4″ (front)
* Whisper White 4 X 5 1/4″ (inside)

Please notice the envelope – stamped in dragonflies as though they are circling the card!

TIP:
Cut your card stock for the stamping Breathtaking Bouquet, larger than 4 x 5 1/4 as the stamp set is large and you want it to stamp all the way to the edge. After stamping and embossing, pare down to appropriate size :o)

Here’s the card!

And the inside with the envelope.

Hope you enjoyed this sneak peek of a very pretty stamp.

Thank You Card for a Man

Today’s card was made with someone special in mind. A gentleman on staff at our church has taken another position elsewhere and is moving. While we have not had a lot of interaction, it’s still an appropriate time to say thank you for serving our congregation. I’ve used a retired embossing folder but there are some others that would work very well with this design setup. Here’s the card:

I used Blackberry Bliss Cardstock, 4 1/4″ x 11″, scored at 5 1/2″. The next layer is 3 3/4″ x 5 1/2″ and dry embossed. The tile tief might be a nice embossing folder to use – definitely creating a different texture. I used a 1″ strip of Old Olive and cut it on the diagonal, matching the sideways embossed pattern, adhering it just a bit lower than halfway. On top of that is a strip of textured burlap ribbon, adhered with tear ‘n tape. Another piece of Old Olive cut with the scalloped oval die has been put on dimensionals. Abstract Impressions stamp set was used for the Thank You sentiment, using Blackberry Bliss ink. Dandelion Wishes stamp set was used to create the floating away flowers using Smokey Slate ink.

Here’s the inside:

Again using Smokey Slate ink, I stamped the the dandelion then positioned the sentiment where I wanted it. That is stamped in Old Olive ink.

This is a rather elegant looking card and seems perfect for a man. Hope you like it!

Cute packaging using retired DSP

Hi All – happy August! Today is a fun project using retired Designer Series Paper (or in the Stampin Up! World DSP) Of course, any paper can be used, but this is a fun way to make use of that retired product. I’ve used 6 x 6 cardstock and cut that down to size. Here is a picture of the finished product – five  of them anyway – and so easy to do.

Here are the dimensions:

5″ wide scored at 1 1/8″, 2 1/4″, 3 3/8″ and 4 1/2″

4 3/4″ tall scored at 1″ at bottom. Burnish all score lines.


Look at the next picture to see how that was trimmed. Notice also the tear ‘n tape and where it is positioned. The first is the front side, the second is the inside of the package.


What’s fun then is to decorate! I used primarily the 1 3/8″ scalloped punch for the larger circle, and went from there, looking in my scrap bin for whatever I could find. On one of them are two sets of leaves from the leaf punch: one. In vellum, the other in Shaded Spruce to coordinate with the DSP. The spruce leaf is scored along each leaf and slightly curled to make it more three dimensional. The butterfly is reinforced on a piece of cardstock – cut from another retired DSP. The little dots are glitter dots – don’t you just love them? They bring the decoration to life. The sentiment is from Itty Bitty Greetings.

After puttting it together, I’ve pinched the top and punched a hole in which to thread the ribbon.

Questions? Feel free to ask! Let me know if I can help you create something fun. If you would like to place an order, please use my HOST CODE: 6YVUK6A9, which is good Aug 6-20, 2019. If you order is OVER $150, do not use the HOST CODE.

Thanks for stopping by today.