Hi Everyone… did I ‘get’ you with that title? Funny… what it means is Tag Buffet stamp set plus Stitched Nested Labels Dies plus Dainty Diamonds 3D embossing folder. And yes, it’s a Christmas card. I counted my cards the other day and I don’t have nearly enough. I wonder what Christmas will be like this year – with the pandemic et all? But I can’t go there yet, cuz my head is not able to wrap around all the ‘what ifs’ and it certainly won’t help me to fret about it.
We had a cord of wood delivered yesterday (that’s a stack 4’x 4′ x 8′, I think) and hubby and I carted every piece of it around to the back yard and stacked it!!! Ta da!!! Give us points folks – that’s a lot of wood to haul & stack. In fact it’s 28 cart loads – not wheelbarrow loads, cart loads. Garden carts have two wheels and are much more stable than wheelbarrows and they are larger that wheelbarrows. We would haul five loads, stacking each one as we took it ’round, then rest a bit. We did 15 before lunch and the rest after. Thank goodness it was a gorgeous day – only about 72 and very low humidity. I’ll include a photo at the end – just so you can see we did it :O)
The card…

Tag Buffet Plus
#!
This is such a cute stamp set, I especially love the Christmas images (stocking and this gorgeous ornament). And here’s what I did …
Stamp the ornament from the Tag Buffet stamp set with Tuxedo Black Memento ink and color it with the Cherry Cobbler Stampin Blends, then fussy cut. Oh, and I colored the hangy thingy with Bronze Stampin Blends and covered that with Wink of Stella.While I was at it, I stamped the sentiment (yep, it’s from the Tag Buffet stamp set!) onto Whisper White cs with the Tuxedo Black Memento ink and fussy cut that as well.
I die cut a Stitched Nested Label from Whisper White cs and a larger one from Tis the Season 6×6 DSP. By the way – my Magnetic Platform for the new SU! Cut and Emboss machine arrived the day before so I used that and oh my gosh – incredible! The dies didn’t move one bit!!!
I took another panel of Whisper White cs and ran it through the Dainty Diamonds 3D Embossing Folder.That was. adhered directly to a Thick Whisper White card base. I then adhered the DSP stitched die cut and the Whisper White stitched die cut, again with liquid glue. For the ornament, I first punched a tiny hole in the hanger thingy and slipped a length of Gold metallic trim from the Forever Greenery Trim Combo Pack and glued it in place with a dot of liquid glue. The ornament then got dimensionals and was placed atop the Whisper White stitched die cut. I put dimensionals on the Merry Christmas sentiment and attached it to the bottom of the card. For a little bling I added the stunning Wonderful Gems.

Tag Buffet Plus
#2
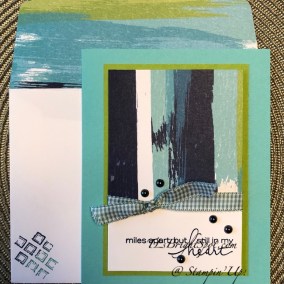
For the inside I adhered a panel of Cherry Cobbler to the card base. I then took a panel of Whisper White and stamped the sentiment from the Tag Buffet stamp set inCherry Cobbler ink. Then I stamped the ‘needles’ from Just Jade ink and placed another Wonderful Gem. This panel was adhered to the Cherry Cobbler with liquid glue and the card was complete.

Tag Buffet
#3
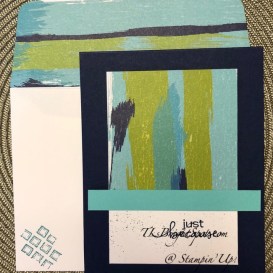
For the envelope I stamped a leaf ‘spray’ from the Tag Buffet stamp set in Just Jade ink. For the envelope flap I took several strips of Cherry Cobbler, Whisper White, Tis the Season 6×6 DSP and another Whisper White and adhered them then trimmed to fit. Fait accompli – card is ready!

Tag Buffet Plus
#4
Thanks for stopping by.
May you have a beautiful day.
Make someone happy by sending them a handmade card filled with love.
- Thick Whisper White 4 1/4 x 11
- Whisper White 4 x 5 1/4 (embossed); scraps for die cut and fussy cut sentiment, 3 5/8 x 4 7/8 (inside panel) + strip scraps
- Cherry Cobbler 3 7/8 x 5 1/8 + scrap strip for envelope flap
- Tis the Season 6×6 DSP approximately 2 1/4 x 4 for die cut + scrap strip for envelope flap