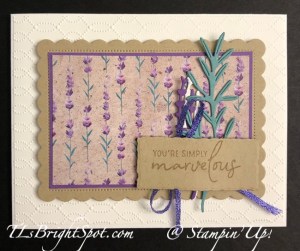
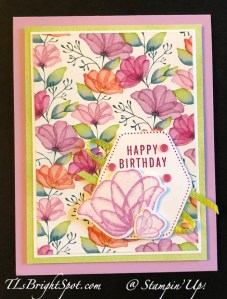
Good Monday morning! I have a pretty card for you today using many of the products in the Perennial Lavender Suite and a few others as well.
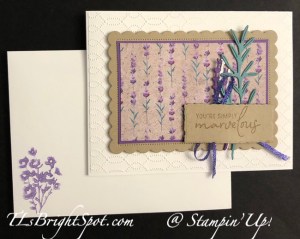
I love the softness & femininity of this card. Perennial Lavender DSP is the focal point, along with dies used from Painted Lavender Dies die cut with card stock from: Lost Lagoon, Gorgeous Grape and Pretty Peacock. Scallop Contour Dies in Basic White form the scalloped left edge and the sentiment banner. The sentiment is from Perennial Postage stamp set. stamped in Gorgeous Grape ink. The embellishments are Purple Fine Shimmer Gems as part of the suite of products. I also added a double Linen Thread bow attached with a glue dot.
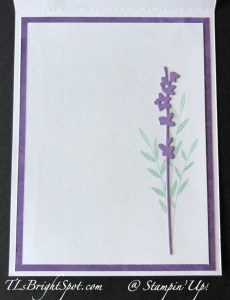
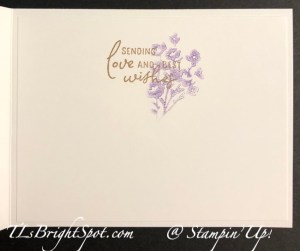
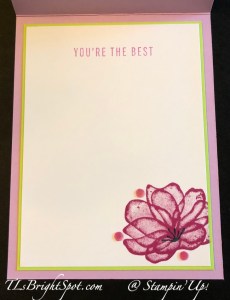
For the inside of the card I used another panel of the Perennial Lavender DSP for the background of the Basic White panel. I stamped the leaf image in Pool Party ink using the Painted Lavender stamp set. Because the Painted Lavender Dies die cut two of these flowers (the Gorgeous Grape) I adhered it with liquid glue.
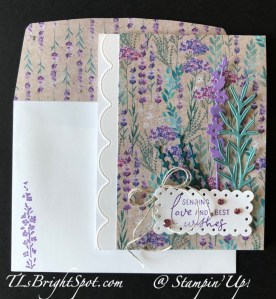
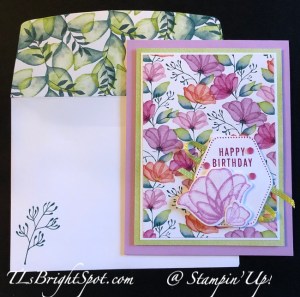
For the envelope, another panel of Perennial Lavender DSP for the flap and a very sweet flower stamp in Gorgeous Grape from the Painted Lavender stamp set. I love that I can use this card for many occasions: birthday, thinking of you, get well, just a note – you name it. Versatility is the key!
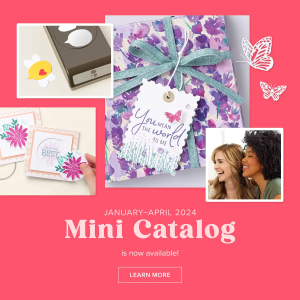
Need these products? They may be found in the Jan-Apr 2024 Mini Catalog on pages 22-25. If you wish to shop with me and don’t have a demonstrator, please connect with me and I’ll get a catalog to you lickety-split. You can also view the catalog online by clicking the image below.

For every $50 you spend (prior to shipping and handling) you can receive FREE product from the Sale-a-Bration catalog. Click here to see those products.

Sale-A-Bration is one of our biggest promotions of the year! It’s packed with perks, overflowing with opportunities for customers, and filled with fun for everyone.
For every $50 of purchase, there are opportunities for FREE ITEMS from the Sale-a-bration Catalog. Enjoy the demonstrator perk of having early access to product by redeeming exclusive Sale-A-Bration products for FREE when you reach $50 USD | $60 CAD or $100 USD | $120 CAD spend levels.
While you’re at it, consider checking out the Stampin’ Up! Clearance Rack, the Kits Collection, Paper Pumpkin – and oh yes, consider JOINING MY TEAM to get regular discounts on every order.
Nothing brings people together quite like creativity. As an independent demonstrator, you can share what you love and expand your circle of friends to build a close-knit, collaborative community of crafters. You’ll meet, connect, learn from, and create with other demonstrators from all around the world through virtual events, in-person conventions, support groups, and social media. And don’t forget the importance of hosting your own crafting parties! You can host events with your favorite people and show off your favorite Stampin’ Up! projects. Let’s discover the joy of being a demonstrator together!
JOIN NOW
Become a Stampin’ Up! demonstrator and for just $99, you’ll get your own customized Starter Kit with $125 worth of products. And we’ll include all the business supplies you need to help you get started, plus free shipping. Don’t wait! Talk to me today to begin your creative journey! You may do that here!

Join my Stampin’ Up! team as a demonstrator using one of the options below…
Option #1:
- Pay $99 USD for your Starter Kit
- Choose $125 worth of products of your choice in your Starter Kit
- PLUS receive the Stampin’ Glass Mat Studio for FREE (a $60 value) (Item #163987) I AM LOVING MINE!!!

Option #2:
- Pay $99 USD for your Starter Kit
- Choose $125 worth of products of your choice in your Starter Kit
- PLUS receive an additional $30 worth of products of your choice in your Starter Kit
- That’s a total of $155 worth of products for just $99! This is such a great deal!

Of course, there are other great benefits to becoming a Stampin’ Up! Demonstrator, such as free shipping on your Starter Kit, a 20%+ discount on demonstrator orders, early access to new catalogs and promotion information, early ordering of new products, attend conventions and workshops, being part of a team of creativity, no pressure to sell products and my full support as a valued team member!
I would love to talk to you about joining my team and what that means for you. Please connect with me if you have questions: tlsbrightspot@gmail.com There’s no better time to joining as a demonstrator than during Sale-a-Bration
If you’ve made up your mind and are ready to do join my team, you may do that here.
When ordering from me please use my NEW HOST CODE TJRE9W6M so that I receive proper notification and YOU GET THE Benefits of a FREE SU! item valued up to $10 :O) AND the Monthly Card Tutorial. (I like to treat my customers!) If your order is over $150, please don’t use the host code as SU! has benefits. I’ll still be notified and you can receive that FREE ITEM!
Note: Make sure that you can see my name on the final checkout page listed as your Demonstrator when you order so that you know that you’re ordering with me and you’ll get my rewards! PLUS… the monthly Online Tutorial when your order is over $50.
Thanks for stopping by. May you have a beautiful day –
and Happy Shopping!