SU! Lots of Leaves Bundle

Hello again! The weather here in NJ is beginning to turn cool – and that means leavers are gonna fall…. and we have LOTS of trees on our property… which means raking, raking, raking. Before this sounds as though I’m in the complaint department – let’s look at today’s card – it’s an elegant fall card and it features the fabulous Love of Leaves bundle. Why a bundle? When purchasing a coordinating die set with a stamp set it’s 10% LESS when bought together – a great deal.

Love of Leaves Bundle #1

I started by choosing my paper – Gilded Autumn Specialty DSP. This guided me to Very Vanilla for a coordinating card stock (versus Whisper White). Thick Very Vanilla for the card base, Brushed Metallic 12 x 12 card stock to coordinate with the gold in the Gilded Autumn Specialty DSP and Very Vanilla – that’s it for papers. I wanted the Brushed Metallic paper to create a bit of shadow for my leaf, so I die cut this gorgeous leaf from the center of the panel I had cut. This ‘hole’ is covered by both the Very Vanilla card base and the Specialty DSP on top – so no one knows (but you and me!). Here’s a picture of how it looks from the back side.

Love of Leaves – die cut from Brushed metallic
#2

I die cut a rectangle using the Stitched Rectangle Dies and the 3rd smallest die from Very Vanilla cs and also die cut this gorgeous leaf from Very Vanilla at the same time. One of the special things about this bundle is how the leaves have an embossing portion that creates these wonderful impressions. OK… adhere the Very Vanilla leaf to the Brushed Metallic leaf using Stampin Seal. Adhere the leaf to the stitched rectangle with dimensionals. Then adhere this to the center of the Gilded Autumn Specialty DSP with liquid glue, and this to the Brushed Metallic and then onto the card base. Now all it needs is a double length of Linen Thread tied into a bow and attached with a glue dot.

Love of Leaves
Bundle
#3

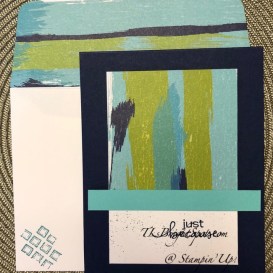
For the inside, because this particular sheet of Specialty DSP coordinates with Mint Macaron, I added a panel as a layer to the card base. The Very Vanilla got special treatment along the left edge with one of the embossing dies in this die set. Then I stamped the sentiment in Mint Macaron ink. Adhere this panel to the mint Macaron and the card is complete.

Love of Leaves inside
#4

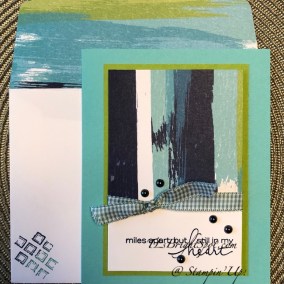
For the envelope I used a strip of the Gilded Autumn Specialty DSP to adhere to the envelope flap. For the card front I ’embossed’ a portion of one of the leaves from the die set. Elegant!

Love of Leaves Bundle #5

Love of Leaves
Bundle
#3


Such a beautiful card and so EASY to do with this gorgeous bundle. One of the items that makes this card so simple to do is the new Metallic Plate that can be used with the new Cut & Emboss machine. Because the plate is metallic all over, once the die is placed on it, it doesn’t move!!! No need to hold it down with a sticky note or anything. It’s the best ever. So I’m going to show it on the product list, along with the die cutting machine, cuz these are ‘must haves’. Remember, when you shop with me and your order is over $50, you will receive a SU! item of your choice worth $10.

<div><div><div id=”e4d5dfeb-95e0-4bbc-b8ae-92cf0315bdc6″>https://mystampinblog.com/Showcase/Details/c327d7aa-f094-45d9-b991-5005e4dc67f6?layout=Tiled&showSku=True&showPrice=True&showSalePrice=True&showAddToCart=False&showAddAllToCart=True&showDownload=True&transparent=True&bordered=True&hFontHeight=14&rFontHeight=13&imageHeight=120&middleContent=False</div>https://mystampinblog.com/Script/ShowcaseDetailsScript</div></div>

SU! Tag Buffet #3

Today’s card is another using the wonderful Tag Buffet stamp set and using the stocking stamp. It’s so cute, that little stocking! Here’s the card…

Tag Buffet stamp set
#1

These are the stamp sets I used for this card:

  • Tag Buffet stamp set for the stocking
  • Dove of Hope stamp set for the for the sentiment on front.
  • Cherish the Season Stamp set for the pine branches and the inside sentiment

I also used:

  • Winter Snow Embossing Folder with Whisper White Craft ink
  • Adhesive-So Sweetly Dies – the 3rd smallest, the largest and next to largest
  • Ornate Layers Dies for the inside
  • Wonder of the Season Combo Pack Ribbon – the Gold cord
  • Just Jade Stampin Blends for coloring the stocking, fussy cut and placed on dimensionals
  • Pick a Punch for the sentiment tag

Papers:

  • Just Jade cs 3 3/4 x 5 for the front panel run through the Snowflake embossing folder and 4 x 5 1/4 for the inside (this panel should have been a bit larger 4 x 5 3/8
  • Tis the Season 6×6 DSP approx.4 x 2 1/2 + 2 1/4 x 6 for the envelope flap
  • Whisper White approx. 3 x 4 1/4 and die cut the background for the stocking out of the center 🙂  and approx .4 1/4 x 5 1/4 for the inside die cut

All the layers are adhered with liquid glue except the stocking, which is on dimensionals. Here are more pictures…

Tag Buffet
#2

Tag Buffet, inside
#3


And here’s a final picture…

Tag Buffet
#5

This was a bit of a new format for this card, lots of layering and fairly simple, so wasn’t sure tons of directions were necessary.

Thanks for stopping by.

May you have a beautiful day.

Make someone happy by sending them a handmade card filled with love.

Below is a list of the supplies that will take you directly to my online store 😁 Enjoy shopping and creating… When you shop with me, you will receive a SU! item of choice worth $10 when your purchase is over $50. All you have to do is let me know what that is after placing your order (and yes, I WILL reach out to you when your order is placed!)

.<div><div><div id=”635c1263-e56c-4412-8ab8-2603588a2b2c”>https://mystampinblog.com/Showcase/Details/fff0eab3-4155-414f-bdb2-4ee4cf5992db?layout=Tiled&showSku=True&showPrice=True&showSalePrice=True&showAddToCart=False&showAddAllToCart=True&showDownload=True&transparent=True&bordered=True&hFontHeight=14&rFontHeight=13&imageHeight=120&middleContent=False</div>https://mystampinblog.com/Script/ShowcaseDetailsScript</div></div>


And now is the perfect time to join my team as well… SU! has this awesome deal going on until Sep 30… take a peek…

  • SU! has a promotion going on for new recruits that is a win-win for everyone… for $99 you will get a starter kit worth of products valued at $125 – plus two card sets with instructions & an additional stamp set & Rhinestones. What’s not to like about that? Join my team- and yes, do it NOW so you get all the benefits of this awesome deal. More details below.

.

  • In addition to the regular starter kit (for $99 USD/$135 CAD, new recruits choose $125 USD/$165 CAD-worth of products) new recruit will also receive enough card stock pieces to make 16 cards, a pack of Rhinestone Basic Jewels, the So Much Love stamp set, and the Queen Anne’s Lace stamp set—all for their first event.
  • 8 packs of precut card stock of the coastal cabana pack will be provided, and 8 packs of precut card stock of the Granny Apple Green pack, for a total of 16 cards (packs include envelopes). The new recruit can choose what samples to replicate and how to distribute the packs to their customers.
  • Important note: Ink, adhesive, cutting tool, and clear block for stamping must be purchased separately. However, these products may be included as part of the Starter Kit product selection.


SU! Lovely You w/ Artistry Blooms DSP

Hello again! It’s raining here today and I have a meeting OUTSIDE tomorrow for 18 folks! Please pray it stops raining so I can get yard furniture dried and moved for physically distancing… This group hasn’t been together since March and we desperately need to see one another. We lost the president of our group recently (yes, to Covid-19) and we are anxious to share with one another that loss of a special woman. She was giving and caring, a gentle spirit, gracious, and laughter came easily to her. She will be greatly missed… I’ve gotten off track – pray for the rain to stop so we can gather together.

Today’s creation is… four creations – each the same and yet, well, not.

Artistry Blooms DSP w/ Lovely You
Card #1

Artistry Blooms DSP w/ Lovely You
Card #2


Artistry Blooms w/ Lovely You
card #3

Artistry Blooms DSP w/ Lovely You
Card #4


Card #1 is the base card – no dimensionals, no extras, just papers adhered to the card base and a sentiment – a perfect beginner card.DSP is adhered to the Whisper White panel, a strip added to cover the seam and stamped. Perfect for a beginner! The card base is Bermuda Bay; the strip is Night of Navy; sentiment stamped in Bermuda Bay.

Card #2 is only slightly different… DSP is adhered to a Whisper White panel, an strip isn added to cover the seam, then stamped. Now two additions: 1-splatter the sentiment section using the Night of Navy Marker and the lid and tap the longer tip end to create the light splatters. 2- put this panel on dimensionals. This is a step up due to the Marker and the dimensionals, but still a good beginner project. The card base is Night of Navy and the strip is Coastal Cabana; sentiment is stamped in Night of Navy.

Card #3 is another step up by adding ribbon (Just Jade 3/8″ Gingham Ribbon from the Flowers for Every Season Ribbon Combo Pack) and these wonderful Iridescent Pearls, dimensionals behind the main panel AND an additional layer of card stock. The card base is Coastal Cabana, the layering panel is Granny Apple Green; the sentiment is stamped in Night of Navy.

Card #4 is similar to #3 BUT – the layering panel is the one on dimensionals. This then is the DSP adhered to the Whisper White panel, ribbon added to cover the seam (Boho Indigo Product Medley – Night of Navy 1/2″ Frayed Grosgrain Ribbon) and Artistry Blooms Adhesive-Backed Sequins in Coastal Cabana). The card base is Granny Apple Green and the layering panel is Coastal Cabana; the sentiment is stamped in Coastal Cabana.

The DSP is… Artistry Blooms – 3 x 3 adhered to Whisper White panel 3 x 4 1/2; lkayering panels are 3 1/4 x 4 3/4.

The envelopes all have the Artistry Blooms DSP on the envelope flap 2 1/4 x 6, adhered with liquid glue and trimmed to fit. For the front I pulled another stamp set as it has this rather modern stamp in it, Tasteful Touches stamp set. I used a sponge dauber, one for each color of ink, and dabbed the color on the stamp, varying it each time I stamped it. I did not clean the stamp in between. Inks used were Night of Navy and Coastal Cabana.

Thanks for stopping by.

May you have a beautiful day.

Make someone happy by sending them a handmade card filled with love.


I’m trying out a new program. Below is a way to click the items used for todays project and it will take you right to my online store so you can purchase right away. Hope this works!!! AND I hope it helps you, the customer really SEE the products used. Thanks for shopping with me…

<div><div><div id=”3fdd91af-91fe-441c-8fa5-c5f6aeaa4acc”>https://mystampinblog.com/Showcase/Details/5981b84f-d507-41c1-846f-940400e5899e?layout=Tiled&showSku=True&showPrice=True&showSalePrice=True&showAddToCart=False&showAddAllToCart=True&showDownload=True&transparent=True&bordered=True&hFontHeight=14&rFontHeight=13&imageHeight=120&middleContent=False</div>https://mystampinblog.com/Script/ShowcaseDetailsScript</div></div>


  • SU! has a promotion going on for new recruits that is a win-win for everyone… for $99 you will get a starter kit worth of products valued at $125 – plus two card sets with instructions & an additional stamp set & Rhinestones. What’s not to like about that? Join my team- and yes, do it NOW so you get all the benefits of this awesome deal. More details below.

.

  • In addition to the regular starter kit (for $99 USD/$135 CAD, new recruits choose $125 USD/$165 CAD-worth of products) new recruit will also receive enough card stock pieces to make 16 cards, a pack of Rhinestone Basic Jewels, the So Much Love stamp set, and the Queen Anne’s Lace stamp set—all for their first event.
  • 8 packs of precut card stock of the coastal cabana pack will be provided, and 8 packs of precut card stock of the Granny Apple Green pack, for a total of 16 cards (packs include envelopes). The new recruit can choose what samples to replicate and how to distribute the packs to their customers.
  • Important note: Ink, adhesive, cutting tool, and clear block for stamping must be purchased separately. However, these products may be included as part of the Starter Kit product selection.

SU! Boho Indigo #2 on Notecard

Hi Everyone! It is b-e-a-u-t-i-f-u-l here in NJ, USA… Cool temps, low humidity – yes – I could accept this for a while 😁… Just perfect!

My card for today is another Boho Indigo on a Notecard. I had stamped three vases in Memento Black ink some time ago and they have been sitting on my workspace waiting patiently to be used. I swear a little gremlin kept pushing them forward saying “use me, use me”. Must be my imagination 🙂

Card…

Boho Indigo 2

What we have is three colors (a couple of shades of green but that’s ok): a Petal Pink from the Peony Garden DSP, solid Petal Pink cs , Whisper White cs (Postage Stamp Punch, sentiment banners and of course the Notecard, and Pear Pizzazz (+ Old Olive 1/4″ Ribbon from the Ornate Garden Ribbon Combo Pack).

Stamp the vase from the Boho Indigo stamp set in Memento Black ink. Add dimesnionals to it and adhere to a Whisper White piece that has been punched using the Postage Stamp Punch. (Love this punch – such a sweet border it creates…) Die cut the leaves (twice) from Pear Pizzazz cs using the Boho Indigo coordinating dies. Trim the extended stems and adhere with liquid glue to the Whisper White Postage Stamp Punch. Adhere this vase ‘decor’ to a panel of the Petal Pink from the Peony Garden DSP with liquid glue, then to a solid piece of Petal Pink cs. Add a 1/4 length of Pear Pizzazz cs to the Notecard front, then add the Petal Pink completed panel with dimensionals.Add the folded folded 1/4″ Old Olive Ribbon with a glue dot I wanted this to be a thank you card… so I pulled out Itty Bitty Greetings stamp set and stamped the sentiment on a 1/4″ Whisper White strip and cut it apart adding a banner end to the ‘thanks’ word. I adhered these with liquid glue.

For the envelope I adhered the same Peony Garden DSP to the envelope flap then stamped the ‘fleur’ across the bottom with Pear Pizzazz ink.

Thanks for stopping by.

May you have a beautiful day.

Make someone happy by sending them a handmade card filled with love.

Card Cuts for this card…

  • Petal Pink 2 3/8 x 4 3/8
  • Peony Garden DSP 2 x 4
  • Whisper White for the Postage Stamp Punch – approximately 1 3/4 x 2 1/2 + 1/4″ strip for sentiment approximately 2″ in length

SU! Boho Indigo & Notecards

Hi everyone… how are you this holiday weekend? Cannot believe it is Labor Day already… THANK YOU VETERANS & FAMILIES FOR YOUR DEDICATION TO THIS AMAZING COUNTRY. YOU ARE VALUABLE AND INCREDIBLY BRAVE. From my heart to yours – thank you for your service.

My card today uses the Boho Indigo stamp set and coordinating dies and is added to a Notecard. Love this size…

Boho Indigo on a Notecard

I started by stamping the largest vase stamp from the Boho Indigo stamp set on a Whisper White cs with Memento Black ink and die cutting it with the  coordinating dies. I then stamped the leaf grouping using sponge daubers and Garden Green ink and Pear Pizzazz ink. In nature not all leaves are exactly uniform in color, so why should these be – right? Since there is not a die for this stamp, I fussy cut it. I used the Postage Stamp Punch and Whisper White to create a background for the vase, adhering the vase with dimensionals. I used a Petal Pink from the Peony Garden DSP and adhered the Vase/ Postage stamp Punched piece with liquid glue. I put dimensionals on the back of the leaf bunch and added it, making it look as though the leaves were in the vase. This Peony Garden panel was adhered to Basic Black cs with liquid glue. I added a length of folded in half piece of Old Olive 1/4″ Ribbon to the back with Stampin Seal and this entire panel was adhered to the notecard with dimensionals. I added some Rhinestone Basic Jewels and the card front was done.

Boho Indigo on a Notecard

On the inside I stamped this cute leaf stamp along three sides with Garden Green ink then stamped the birthday greeting from Boho Indigo stamp set in Pear Pizzazz.

Boho Indigo card inside

For the envelope I added the same Petal pink from the Peony Garden DSP to the envelope flap and the sweet leaf stamp to the front and the card was complete. Fun! and different…

Boho Indigo on a Notecard

Thanks for stopping by.

May you have a beautiful day.

Make someone happy by sending them a handmade card filled with love.

SU! In Good Taste DSP – Masculine Card

Hi Everyone – it’s… Thursday – almost Labor Day weekend… can you believe it? I cannot. As long and slow as this pandemic has been, time did not slow in any way… And guess what? The Kentucky Derby is also this weekend. I enjoy horse racing and this one in particular, for some reason and plan on watching it.

The card today was made for two specific reason… 1) last week I did a Christmas Card with this same layout and mentioned in my post how easy it would be to ‘transition’ to a masculine (or other sort) of card; reason #2 my friends hubby just had shoulder replacement and it seemed perfect for that.

In Good Taste

What I did… cut three strips of coordinating In Good Taste DSP. Layer on an Early Espresso panel with liquid glue, then onto the Gray Granite card base, also with liquid glue. Cut a length of  Vanilla 1/2″ ribbon from the Forever Greenery Trim Combo Pack. Adhere with just a bit of Stampin Seal. Over this goes a banner on dimensionals. Banner: Early Espresso cs cut with the Ornate Frames Dies (gosh these are versatile!!). Stamp the sentiment in Early Espresso ink on Very Vanilla scrap and die cut with another of the Ornate Frames Dies. Adhere to the Early Espresso banner with liquid glue; add dimensionals and place over the ribbon. Bingo – your card front is done!

For the inside.. on a panel of Very Vanilla, stamp the leaf/ fall floral bouquet in stamped off once Crumb Cake ink. Over the top of this stamp the sentiment from Healing Hugs stamp set in Early Espresso ink. Adhere the completed Very Vanilla panel to Early Espresso cs with liquid glue then add to the card base the same way. yes – card completed…

In Good Taste – Masculine
inside

In the last photo I’m hoping you can see that I dry embossed the envelope flap after adhering Early Espresso cs to the flap. I used the Tastful Textile 3D embossing folder. The front of the card got another of those floral/ leaf bouquets. And this card is ready to send! Actually – it went out in yesterday’s mail 😊

In Good Taste – Masculine

OK – what else – of course you want card cuts. They will be found at the bottom of this post.

Other news – NEW HOST CODE… Z3WFFJTH  – so shop with me 🙂


Here’s a picture of how this new machine looks open, in use and closed. There is also a picture of the Mini Stampin’ Cut and Emboss Machine, but it is not yet available for purchase – not even for demonstrators.


Starting 1 September the Magnetic Cutting Plate becomes available to customers AND demonstrators. It is not required for use with the new machine but is great to incorporate into the die-cutting experience. It is a thin, fully magnetic sheet with a self-healing cutting surface and holds dies securely in place, even nested dies. This slim, portable sheet replaces a Cutting Plate in your sandwich. That order number is…149656 – so SHOP WITH ME…

Join My Team…

Starter Kit Promotion 1-30 September

  • In addition to the regular starter kit (for $99 USD/$135 CAD, new recruits choose $125 USD/$165 CAD-worth of products) new recruit will also receive enough card stock pieces to make 16 cards, a pack of Rhinestone Basic Jewels, the So Much Love stamp set, and the Queen Anne’s Lace stamp set—all for their first event.
  • 8 packs of precut card stock of the coastal cabana pack will be provided, and 8 packs of precut card stock of the Granny Apple Green pack, for a total of 16 cards (packs include envelopes). The new recruit can choose what samples to replicate and how to distribute the packs to their customers.
  • Important note: Ink, adhesive, cutting tool, and clear block for stamping must be purchased separately. However, these products may be included as part of the Starter Kit product selection.

Card cuts for Today’s project:

  • In Good Taste DSP 1 1/4 x 5 1/2 (cut 3 coordinating panels
  • Early Espresso cs 4 1/8 x 5 3/8 (cut 2) + scrap for banner
  • Very Vanilla cs 4 x 5 1/4 (inside) + scrap for banner
  • Gray Granite card base 4 1/4 x 11 scored at 5 1/2

SU! Snow Wonder Stamp Set/ Dies

Tuesday, this musty be Wonderful Wednesday 😁… hee hee hee. And… time for another Christmas card! I know, I need to make some cards using items from the 2020 Annual Catalog, but Christmas, well, I can’t seem to get enough. This is such an EASY card, you could make several using papers from any of the Designer Series Papers and make it fall themed or a thank you or a birthday or even a sympathy card, make it masculine or super feminine. Here goes…

Snow Wonder stamp set/ Snow Time Dies

Snow Wonder Stamp Set/ Snow Time Dies


Can you see how you could remake this card? Another post 🙂 The Designer Paper used here is called Heartwarming Hugs DSP. One of the greatest parts of SU! (and I know I have said this before, but..) is how they coordinate. The pack of DSP can so easily be interchanged without thinking too hard. Three strips were cut and adhered to a panel of Whisper White cs and that was adhered to the Pear Pizzazz card base – all with liquid glue. I stamped the sentiment from Snow Wonder stamp set on a Whisper White scrap with Pear Pizzazz ink then I die cut two banners using the Snow Time Dies, one in Pear Pizzazz and the stamped one in Whisper White. The sentiment banner got dimensionals and placed on top of the Pear Pizzazz banner. I took a length of the Double Stitched Satin Ribbon, 3/8″ Real Red, and looped it, adhering together with glue dots. Once I had it in place on the card front, I cut another length and put it crosswise. The banner went over this with dimesnionals on the back. I felt the front needed something more and used the All The Trimmings Embellishments, Real Red and popped them on the banner. Since they are self adhesive, easy peasy.

Snow Wonder stamp set/ Snow Time Dies

For the inside I took two snowflake embossing dies from the Snow Time Dies and ran them through the die cut machine. I took a sponge dauber and very lightly rubbed over them to show them off a bit more. I’m not sure the picture shows it very well. If you enlarge the photo, you can see the snowflakes. :l

Snow Time Dies – embossed

For the envelope, I used several scraps from the Heartwarming Hugs DSP and adhered them to the envelope flap. And voila! Quick, easy, fun!

Snow Wonder stamp set/ Snow Time Dies

Business…. during the month of September, SU! is going to have a ‘joining’ special – do hope you will join my team and become a creative junkie with me. Let me know if I can help you make that decision – if you have questions, etc.


Box of Sunshine shareable image


This is also the time to be cashing in those BONUS rewards earned during the month of August. Do not let those go to waste! If not used in August they will be lost forever.

Thanks for stopping by.

May you have a beautiful day.

Make someone happy by sending them a handmade card created with love.

Card cuts:

  • Heartwarming Hugs DSP 1 1/4 x 5 1/4 (cut 3)
  • Whisper White 4 1/8 x 5 3/8 (cut 2) + scrap for banner
  • Pear Pizzazz 4 1/4 x 11 scored at 5 1/2 + scrap for banner

SU! StitchedfStars

Hi there! It’s Terrific Tuesday – why not? We can make our day terrific, or not, and this is what I choose – terrific. Let’s go for it…

Today’s card is made with a die set that came out last year called Stitched Stars Dies. For the inside I used a stamp set from the new Aug-Dec 2020 Mini Catalog called Snow Wonder. They worked beautifully together.

Stitched Stars Dies

This is very 3 D as the large star has three dimensionals in its middle. Tis The Season 6×6 DSP  is the centerpiece for this card. I love the contrast of another panel of the same DSP in the background. So let’s talk particulars… Die cut the 6 stars – I happened to use the same paper for all the stars and die cut them all at the same time. Then I took the largest star and scored it…from the center, score to all five points then score again from the center to each of the inner points of the star. Fold along the pointy score lines just with your hands and press firmly. Then fold in the opposite direction (valley) each of side score lines. it creates mountain/ valley creases. Before adhering, let’s prepare the card front panels.

Cut a panel of the Tis The Season 6×6 DSP that coordinates/ contrasts with the die cut stars. Behind this is a panel of coordinating cs – Cherry Cobbler. Both have been adhered to the card front with liquid glue. Now you are ready to place the stars. (Card cuts may be found at the end of this post.)

Put dimesnionals in the center of the star – I stacked three – and place on the front of the card panel. Place the other stars where you desire. I cut mini dimensionals in half to put on three of the other stars, stacking two of them together just with liquid glue. Only the smallest star was adhered to the card front with liquid glue. The three stars on dimesnionals also got a Real Red gem from Wonderful Gems pack. I felt the large star needed something so searched my embellishments and found – drum roll here – Star Designer Elements – and placed one in the large star center. Voila – card front is complete!

For the inside, I adhered a panel of Cherry Cobbler cs to the Thick Whisper White card base with liquid glue. With regular Whisper White, I stamped the sentiment in the center with Cherry Cobbler ink and the Snow Wonder stamp Set. I then stamped the trees, stamping off twice, over the sentiment with Garden Green ink. It’s important to stamp off at least twice so this delicate sentiment shows through the trees. Adhere to the inside of the card. Done, done.

Snow Wonder stamp set for inside of card

For the envelope I used a coordinating red panel of Tis The Season 6×6 DSP for the envelope flap.

Stitched Stars Dies

So what do you think? So simply done but a very effective standout card. I do hope you will try this and share your results with me.

Business…. during the month of September, SU! is going to have a ‘joining’ special – do hope you will join my team and become a creative junkie with me. Let me know if I can help you make that decision – if you have questions, etc.


Box of Sunshine shareable image


This is also the time to be cashing in those BONUS rewards earned during the month of August. Do not let those go to waste! If not used in August they will be lost forever.

Thanks for stopping by.

May you have a beautiful day.

Make someone happy by sending them a handmade card made with love.

Remember to cash in those Bonus Coupons from purchases made last month!

20200804_AD_en_US Annual Catalog PDF

August_89_2020 Mini Catalog PDF

Card Cuts:

  • Thick Whisper White card base 8 1/2 x 5 1/2 scored at 4 1/4
  • Cherry Cobbler cs 3 1/2 x 4 1/4 (front), 4 x 5 1/4 (inside)
  • Tis the Season 6×6 DSP 3 3/4 x 5 (front), 4 1/2 square (die cutting stars), 2 1/4 x 6 (flap)
  • Whisper White 3 3/4 x 5 (inside)


SU! Wonder of the Season Memories and More Cards/ Envelopes

It’s a new day – AND a new week… let’s make them awesome… make a phone call you have intended to do for a long time but haven’t ; send a card to someone whom you think needs a ‘pick me up’; do a good deed without needing/ wanting recognition.Those are just some ‘off the cuff’ suggestions – you can probably come up with some of your own as well.

Todays cards were made using the Wonders of the Season Memories and More Card Pack + the coordinating Cards & Envelopes. There are two sizes cards in this pack: approx. 3 x 4 & 4 x 6. Also in the pack are several peel & stick stickers/ numbers that can be used for embellishing. More info can be found in the Aug-Dec Mini Catalog on pg 31.

For my first card I chose this gorgeous Just Jade 3 x 4 panel and one of the stickers with the word ‘Joy’. I peeled it off carefully and put it directly onto the panel, trying to center it as best I could. I then adhered it to a piece of Gray Granite cs with liquid glue. I pulled out my Pearls Basic Jewels and put several all over the panel. I adhered dimensionals to the back and adhered this to Whisper White, then another piece of Gray Granite. This toon got dimesnionals and was placed onto the Just Jade card base. And voila – the card front was complete.

Wonder of the Season Memories & More Card
#1

For the inside I adhered a panel of Whisper White then added one of the stickers that coordinates with the leaf pattern on the front. Done!

Inside card #1

Card #2 – this card uses one of the larger panels… I love the feathers and the gold. I adhered this green panel to a Brushed Metallic (gold), then directly onto the Wonder of the Season Memories & More card base. I die cut several feathers from the Brushed Metallic (gold) cs, cuz I didn’t know how many I wanted to use :O) The feather comes from the Nature’s Thoughts Dies. I then took a scrap of Whisper White and cut this beautiful banner using the Snow Time Dies. Notice how the banner has this wonderful raised edge all around it? It’s beautiful!! From another piece of Whisper White I die cut the word Peace, using two elements of the word from the Joy Dies. I adhered these together using liquid glue then onto the banner, also with liquid glue. The banner got dimensionals and was mounted in the center of the card. The single feather was added with liquid glue. DONE!

Wonder of the Season Memories & More Card
#2

Card #3 – I began by cutting the green panel from the card pack apart, saving the trims for another use later. The center panel was adhered to a strip of the Brushed Metallic (gold) cs. . I added several Wonderful Gems for a bit of glitz. I cut a panel of the Plaid Tidings 6×6 DSP and adhered it to one of the Wonder of the Season Memories & More cards. The green panel got dimensionals and went right in the center of the card. Done again!

Wonder of the Season memories & More Cards
#3

Just like that, three Christmas cards ready for my stash. Each is so different and well, wonderful, in it’s own right. Card cuts are listed at the bottom of this post.

Wonders of the Season Memories & More Cards
#1

Wonders of the Season Memories & More Cards
#3


Wonder of the Season Memories & More Card
#2

Thanks for stopping by.

May you have a beautiful day.

Make someone happy by sending them a handmade card made with love.

Remember to cash in those Bonus Coupons from purchases made last month!

20200804_AD_en_US Annual Catalog PDF

August_89_2020 Mini Catalog PDF

Card Cuts:

  • Card #1: pattern – front: 3 x 4, Gray Granite 3 1/4 x 4 1/4, Whisper White 3 7/8 x 4 7/8, Gray granite 4 x 5 1/8; inside Whisper White 4 x 5 1/4
  • Card #2: panel + Brushed Metallic (gold)  4 1/8 x 6 1/8; feathers cut from center of Brushed Metallic (gold) prior to adhering to card panel
  • Card #3: cut panel 1 1/2 x 6 + Brushed Metallic (gold) 1 5/8 x 6;

SU! Hooray to You

Hi Everyone! How was your Saturday? Ours was FABULOUS… our family got together!!! No, we didn’t touch (not even hug our Grands 😞)…. we were outside… and we had lots of laughs and giggles… it was great fun.  Sigh – I am truly blessed… thank you God, for my family.

OK – today’s card… I was kind of on a roll making birthday cards and pulled out the Hooray To You stamp set. I have to say, this was inspired by an incredible Demonstrator, Mary Deatherage. I don’t remember her card very well, but I do remember she popped up a portion of the balloon. That’s all I remember about it though. So, here’s my ‘take’ for this card.

Hooray To You


Very girlie, girlie, isn’t it? There’s a bit too much white space for my liking, but the Magenta Madness is bright and cheerful and happy looking. And… I love all the little bitty pearls :O)

Hooray To You

I like using my Stamparatus for keeping things straight – and this is a big stamp, so that’s what I used – with Magenta Madness ink on Whisper White cs.  And I stamped two of them, then cut down one of them, went over several of the little flowers with Wink of Stella for some glitz, then added Pearls Basic Jewels. The strip got dimesnionals and was placed over the larger balloon, matching the edges and flowers. I added Wink of Stella to several of the flowers beyond the strip then another Pearl Basic Jewel in the center of the bow. This panel was adhered to  Magenta Madness cs with liquid glue. I stamped the ‘TO YOU’ sentiment from the Hooray To You stamp set and punched it out with the Classic Label Punch, put dimesnionals on the back and added it just under the larger strip. Then I trimmed the banner at the one end. Almost done… The Magenta Madness got dimensionals and attached to Thick Whisper White card base.

So simple and very girlie… what do you think? I’ll be honest, I haven’t completed the inside yet. I did adhere another panel of Magenta Madness cs to the inside, but I’m not sure what I want to do for the inside yet. For now, that’s it…

Hooray To You

Thanks for stopping by.

May you have a beautiful day.

Make someone happy by sending them a handmade called created with love.

Card Cuts for this project…

  • Whisper White 3 3/4 x 5, 3 3/4 x 1 3/4 + 3 3/4 x 5 for the inside
  • Magenta Madness 3 7/8 x 5 1/8 + 4 x 5 1/4 for the inside
  • Thick Whisper White 4 1/4 x 11 scored at 5 1/2