15% off inks, including pads, refills, markers, and Blends. Bundles are not included.
20% off papers, including cardstock, specialty paper, and Designer Series Paper.
Shop online to see the full selection of discounted products available. This is a limited time offer.
Discounts are automatically applied when sale items are added to any order, including Starter Kits.
Please keep in mind that due to the high volume of orders, the distribution center may fall behind our typical shipping timeframes. We will do everything we can to return to our regular service levels as quickly as possible.
Please note: Some items may sell out due to high demand. The discount will automatically be applied to qualifying items that are in stock. Per our updated policy, backorders are not available.
Do you have your eye on something special??? 20% off various card stocks, specialty papers, Designer Series Papers – such a good deal! Make your list and then check back. Remember to use my current
HOST CODE HSJD7BR6
when placing your order and make sure when checking out that you’re shopping with me. :O)
If your total is $50 prior to shipping & taxes, you’ll get a FREE GIFT FROM ME. Make that list and shop with me November 14-16 for some terrific Stampin’ Up! deals. The free gift is your choice of any item valued up to $10.00 in the 2023-2024 Annual Catalog! For orders placed after September 1, which this certainly is… you can pick a $10 item from either the Annual Catalog or the September-December 2023 Mini Catalog! AND… orders placed through me that are $50 & up also receive my monthly tutorial. How awesome is that!
Stampin’ Up! has some really fun ONLINE EXCLUSIVES (some available as of Nov 7) so click here to see those products
It’s hop time… every Thursday our group does a fabulous hop creating cards, note cards, boxes, special items, to meet the challenge of the week. This week is a sketch challenge and I find these the easiest to do for some reason.
What do you think? Does my card match the challenge? I think so! What did I do, how did I make this, what supplies did I use?
I cut three panels of Joy of Christmas 12×12 DSP to cover the entire card front & adhered them to the Real Red card base.
With my embossing buddy, I cleared the top panel and stamped the sentiment (Christmas Classics stamp set) with VersaMark ink, sprinkled it with Gold Embossing Powder & heat set it.
I stamped the large image(Joy of Noel stamp set)in Memento Black ink and colored it with several Stampin’ Blends
Old Olive, Shaded Spruce, Dark Real Red, Dark Cherry Cobbler
Die cut image with coordinating die (Joy of Noel Dies)
Die cut pine boughs (Joy of Noel Dies) from Old Olive card stock
Add Large Check Ribbon to card front with Stampin’ Seal
Add pine boughs with Stampin’ Seal
Add large colored image with dimensionals
Add three Loose Holly Gems & Sequins near sentiment – done!
For the inside, I stamped this delightful holly stamp from Christmas Classics stamp set in Memento ink, then the berries from the same stamp set in Real Red ink: To color the holly I used Stampin’ Blends Shaded Spruce. All this on a Basic White panel and then adhered to the inside of the card.
For the envelope, more of the Joy of Christmas DSP on the flap, adhered & trimmed to fit. On the front, the very same holly and berries stamped in Memento ink using the Christmas Classics stamp set. These were colored with Stampin’ Blends for the holly and the berries stamped in Real Red ink.
Choosing the background papers was the most difficult for me :O], but I like the finished product, although a bit darker than I would like. Anyhoo… on with the hop! Use the next button to take you to Carol or clkick on a name to visit another;s blog. Whatever you do, don’t miss a single one – they will be fabulous!
Want to purchase the products to make this card? Supplies can be ordered using this link to my online store. You will find ONLINE EXCLUSIVES, Clearance Rack, Sep-Dec Mini Catalog, the Annual Catalog, kits, Paper Pumpkin – you name it. Shop at your convenience :O)
When ordering from me please use my NEW HOST CODEHSJD7BR6 so that I receive proper notification and YOU GET THE Benefits of a FREE SU! item valued up to $10 :O) AND the Monthly Card Tutorial. (I like to treat my customers!) If your order is over $150, please don’t use the host code as SU! has benefits. I’ll still be notified and you can receive that FREE ITEM!
Note: Make sure that you can see my name on the final checkout page listed as your Demonstrator when you order so that you know that you’re ordering with me and you’ll get my rewards! PLUS… the monthly Online Tutorial when your order is over $50. The November Tutorial features the beautiful Winter Meadow suite of products which can found in the Jul-Dec 2023 Mini Catalog on pages 36-38!
NEW KIT (THE BEST DESTINATION KIT) ADDED AS OF NOVEMBER 1!
163186
THE BEST DESTINATION KIT
$20.00 USD | $28.00 CAD
Available starting 1 November 1.
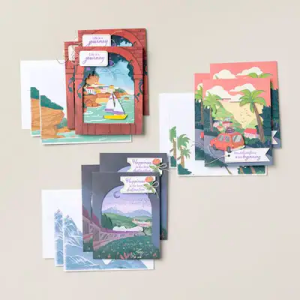
This kit lets you make nine tri-fold cards with a colorful, nostalgic, travel vibe.
Enough supplies to create 9 cards—3 each of 3 designs
9 coordinating envelopes
Best Destination Photopolymer Stamp Set
One Gorgeous Grape Ink Spot
Printed card bases, printed die cuts, adhesive, embellishments, and a clear block
Finished card size: 5-1/2″ x 4-1/4″ (14 x 10.8 cm)
Good morning! I have some small gift cards for you today. I was inspired by a. post by Artisan Design Team member Tammy White who made 3 x 3 cards. I happen to like something a bit larger in order to write my message, whatever that is. And, I like it in an envelope. Stampin’ Up! has envelopes for 3″ size creations and they really are quite perfect for a 6 x 3 gift card.
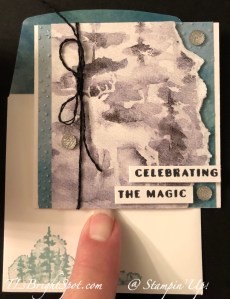
Aren’t these fun? The card stock base is Thick Basic White cut 6 x 3 and scored @ 3. Each uses a panel of Winter Meadow DSP, some torn and one attached on an angle. I like this particular panel of DSP – shades of Pebbled Path & Smoky Slate, trees and deer. It’s comforting and not bold and can be used for a masculine gift as well. Supplies to make these were not a lot, but the list may seem long – I just don’t do two exactly alike and there’s the rub!
For the gift card on the far left: I ran the bottom Winter Meadow DSP through the Snowflake Sky 3D embossing folder and die cut the pine bough from Shaded Spruce card stock using the Joy of Noel Dies. Embellishments the Adhesive-Backed Glitter Sequins. I also used the remaining glitter from the October Paper Pumpkin on the pine bough. It doesn’t show in this photo, but in real life it does! The stamp on the envelope front is from the Magical Meadow stamp set and stamped in Lost Lagoon ink.
The gift card next to it has a piece of the Snowflake Magic SDSP as the bottom layer. The two die cut pieces are from Shimmer Paper and Snowflake Magic SDSP die cut with Magical Meadow Dies. They are held in place with a glue dot and a Metallic Ribbon In Tahitian Tide was added over top. Three Adhesive-Backed Glitter Sequins were added for a bit of bling.
In the next photo, the gift card on the left the Winter Meadow DSP is added at an angle and on dimensionals. The die cuts use the Magical Meadow Dies, Shimmer Paper and Snowflake Magic SDSP. You can see one of the die cuts was trimmed and peeking out from the left side under the DSP. Over top is a double bow tied with separated black twine from the Baker’s Twine Essentials Pack. The envelope front was stamped in Pebbled Path ink using the same stamp from Magical Meadow stamp set.
The last card is probably my favorite: it has the Snowflake Sky 3D EF embossed panel of Winter Meadow DSP on the card with the layer of the trees/ deer from Winter Meadow DSP on dimensionals. Before attaching the top layer, I wrapped separated black twine around one end and tied a bow, securing it with a glue dot. The twine is from the Baker’s Twine Essentials Pack. On this card I added three gems from the Faceted Gems Trio Pack. I also stamped a portion of the sentiment in Memento ink using the Stars At Night stamp set, then stamped the rest of the sentiment on the inside of the gift card on the adhered torn DSP. The envelope front got the same tree stamp from Magical Meadow stamp set in Lost Lagoon ink.
Want to purchase the supplies for this card? Supplies can be ordered using this link to my online store. You will find ONLINE EXCLUSIVES, Clearance Rack, Sep-Dec Mini Catalog, the Annual Catalog, kits, Paper Pumpkin – you name it. Shop at your convenience :O)
When ordering from me please use my NEW HOST CODEHSJD7BR6 so that I receive proper notification and YOU GET THE Benefits of a FREE SU! item valued up to $10 :O) AND the Monthly Card Tutorial. (I like to treat my customers!) If your order is over $150, please don’t use the host code as SU! has benefits. I’ll still be notified and you can receive that FREE ITEM!
Note: Make sure that you can see my name on the final checkout page listed as your Demonstrator when you order so that you know that you’re ordering with me and you’ll get my rewards! PLUS… the monthly Online Tutorial when your order is over $50. The November Tutorial features the beautiful Winter Meadow suite of products which can found in the Jul-Dec 2023 Mini Catalog on pages 36-38!
NEW KIT (THE BEST DESTINATION KIT) ADDED AS OF NOVEMBER 1!
163186
THE BEST DESTINATION KIT
$20.00 USD | $28.00 CAD
Available starting 1 November 1
This kit lets you make nine tri-fold cards with a colorful, nostalgic, travel vibe.
Enough supplies to create 9 cards—3 each of 3 designs
9 coordinating envelopes
Best Destination Photopolymer Stamp Set
One Gorgeous Grape Ink Spot
Printed card bases, printed die cuts, adhesive, embellishments, and a clear block
Finished card size: 5-1/2″ x 4-1/4″ (14 x 10.8 cm)
Good morning, good morning! It’s hubby’s & my anniversary today :O) … My card for today uses the amazing Wishes All Around bundle and I’ve chosen to use the snowflake wreath and a similar layout to yesterday’s card, but simpler.
The Winter Meadow 12×12 DSP seemed a perfect backdrop, and I adhered a strip to a Thick Basic White card base. I cut a piece of the Silver & Gold Adhesive-Backed Glimmer Paper (in silver of course) and ran it through the die cutting machine with the snowflakes die from Wishes All Around Dies. This paper is so neat! Just remove the backing and adhere :O) And I did… to a piece of Basic White. At this point I should have stamped the sentiment in the middle. But no, I didn’t do that :O( I die cut more snowflakes and this time from a piece of the same pattern of Winter Meadow 12×12 DSP. I adhered these on top of the other snowflakes, every other one, on black mini dimensionals. That way they don’t show so much. On top of those snowflakes I added these gorgeous Iridescent Pearl Basic Jewels. This square was added to another slightly larger square with dimensionals, then adhered in place with liquid glue to the card base. I used the second smallest die in the Deckled Circles Dies to die cut a circle from Basic White, stamped it in Misty Moonlight ink with the Wishes All Around sentiment. I adhered it in the center of the snowflake wreath ~ and the card front was done.
For the inside, on another piece of Basic White I adhered more snowflakes die cut with the Wishes All Around Dies: two from the Silver & Gold Adhesive-Backed Glimmer paper and another from Winter Meadow 12×12 DSP. I added a small Iridescent Pearl Basic Jewel to this last snowflake. I opted NOT TO add a sentiment at this point as this could be a very general card. If i need to add a sentiment before sending, I can.
For the Basic White envelope, I stamped this fun three-snowflake stamp in Misty Moonlight ink, also from then Wishes All Around stamp set. I stamped it several times on the envelope front and a couple of times on the flap, re-inking the stamp each time.
I’ll add a link here so you can view yesterday’s card using the same Wishes All Around Bundle and a similar layout. It’s just fun to compare.
Want to purchase the supplies for this card? Supplies can be ordered using this link to my online store. You will find ONLINE EXCLUSIVES, Clearance Rack, Sep-Dec Mini Catalog, the Annual Catalog, kits, Paper Pumpkin – you name it. Shop at your convenience :O)
When ordering from me please use my NEW HOST CODEHSJD7BR6 so that I receive proper notification and YOU GET THE Benefits of a FREE SU! item valued up to $10 :O) AND the Monthly Card Tutorial. (I like to treat my customers!) If your order is over $150, please don’t use the host code as SU! has benefits. I’ll still be notified and you can receive that FREE ITEM!
Note: Make sure that you can see my name on the final checkout page listed as your Demonstrator when you order so that you know that you’re ordering with me and you’ll get my rewards! PLUS… the monthly Online Tutorial when your order is over $50. The November Tutorial features the beautiful Winter Meadow suite of products which can found in the Jul-Dec 2023 Mini Catalog on pages 36-38!
NEW KIT (THE BEST DESTINATION KIT) ADDED AS OF NOVEMBER 1!
163186
THE BEST DESTINATION KIT
$20.00 USD | $28.00 CAD
Available starting 1 November
This kit lets you make nine tri-fold cards with a colorful, nostalgic, travel vibe.
Enough supplies to create 9 cards—3 each of 3 designs
9 coordinating envelopes
Best Destination Photopolymer Stamp Set
One Gorgeous Grape Ink Spot
Printed card bases, printed die cuts, adhesive, embellishments, and a clear block
Finished card size: 5-1/2″ x 4-1/4″ (14 x 10.8 cm)
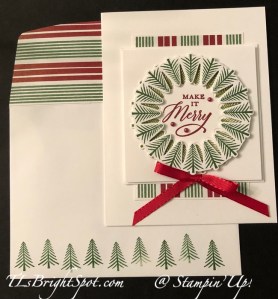
Hello folks! It’s getting closer… Christmas that is… and already I’m getting anxious. I keep making Christmas Cards but wondering if I’m making any headway… Oh well. I’m enjoying the process and that’s part of it. Today’s card is a lot of white, which I don’t usually do. The basic colors are Garden Green, Old Olive & Cherry Cobbler. The stamp & die bundle is wonderful: trees in a wreath form, snowflakes in a wreath form, and ‘green’ in a wreath form. My original idea was to showcase all three on cards with the very same layout. Unfortunately I got sidetracked to the outside chores and only the trees in a wreath form are showing today.
This card is welcoming, friendly and bright – and oh yes, layered! The DSP in the background is A Walk in the Forest 12×12 DSP. The colors on this particular panel are Garden Green & Cherry Cobbler and are layered on a piece of Basic White just slightly larger. The next two layers are squares: 3 5/8 x 3 5/8 and 3 38 x 3 3/8 with the smaller one on dimensionals. The wreath is a double wreath: first stamped in Old Olive which you can barely see, and the top one in Garden Green ink. Each was die cut with Wishes All Around dies. I stamped the sentiment with Cherry Cobbler ink on the inner portion of the Old Olive trees die cut and adhered the wreath & inner portion with liquid glue to the square. The Garden Green tree wreath is attached with mini dimensionals on every other tree. I added three Festive Pearls in red to the sentiment. The bow is from the Real Red and Burlap Ribbon Combo Pack and is attached with a glue dot.
For the inside I added a strip of the A Walk in the Forest DSP on the Basic White insert. I then stamped the trees in Garden Green ink from the Wishes All Around stamp set, then also stamped the sentiment in Cherry Cobbler ink. This is from the same stamp set – Wishes All Around.
The basic White envelope got some special treatment: more of the stripe paper from A Walk in the Forest 12×12 DSP on the flap and staggered trees stamped all along the bottom of the envelope in Garden Green ink using the Wishes All Around stamp set. I love how friendly this card looks!
Want to purchase the supplies for this card? Supplies can be ordered using this link to my online store. You will find ONLINE EXCLUSIVES, Clearance Rack, Sep-Dec Mini Catalog, the Annual Catalog, kits, Paper Pumpkin – you name it. Shop at your convenience :O)
When ordering from me please use my NEW HOST CODEHSJD7BR6 so that I receive proper notification and YOU GET THE Benefits of a FREE SU! item valued up to $10 :O) AND the Monthly Card Tutorial. (I like to treat my customers!) If your order is over $150, please don’t use the host code as SU! has benefits. I’ll still be notified and you can receive that FREE ITEM!
Note: Make sure that you can see my name on the final checkout page listed as your Demonstrator when you order so that you know that you’re ordering with me and you’ll get my rewards! PLUS… the monthly Online Tutorial when your order is over $50. The November Tutorial features the beautiful Winter Meadow suite of products which can found in the Jul-Dec 2023 Mini Catalog on pages 36-38!
NEW KIT (THE BEST DESTINATION KIT) ADDED AS OF NOVEMBER 1!
163186
THE BEST DESTINATION KIT
$20.00 USD | $28.00 CAD
Available starting 1 November
This kit lets you make nine tri-fold cards with a colorful, nostalgic, travel vibe.
Enough supplies to create 9 cards—3 each of 3 designs
9 coordinating envelopes
Best Destination Photopolymer Stamp Set
One Gorgeous Grape Ink Spot
Printed card bases, printed die cuts, adhesive, embellishments, and a clear block
Finished card size: 5-1/2″ x 4-1/4″ (14 x 10.8 cm)
Good Thursday morning! We have a Christmas Challenge for the blog hop today – I think you’ll like what you see!
Does this card say Christmas to you? I hope so! :O) It begins with a card base of Shaded Spruce card stock with a layer of Joy of Christmas DSP adhered directly to it. That was stamped with this glorious spray in VersaMark ink, two times, then sprinkled with Gold Embossing Powder and heat set. (tip… I usually emboss from the back side of the paper and make sure the heat tool is fully warm before heating the powder.) Next I used the Joy of Noel Dies to die cut the pine boughs from Joyful Specialty DSP and die cut two of these. I stamped in Shaded Spruce ink, the berry spray using the Joy of Noel stamp set and Basic White scrap – and stamped two of those. These were die cut with the Joy of Noel Dies. I colored the berries with Dark Cherry Cobbler Stampin’ Blends. I also pulled out two Textured Elements (see those wooden berries?) to add. I placed those items: die cut pine boughs, die cut berry spray and the Textured Elements, using liquid glue to adhere in place. I cut a length of the Burlap Ribbon, folded it over itself holding it in place with Stampin’ Seal. This ribbon comes from the Real Red & Burlap Ribbon Combo Pack. The red banner panel is die cut from Joy of Christmas DSP using the Christmas Classics banner die. and was added over the ribbon with dimensionals. I die cut the NOEL from the Distressed Gold Specialty Paper (LOVE!), backed it with the same letters die cut from Basic White card stock, and adhered this to the banner with liquid glue. I used glitter left over from last months Paper Pumpkin to color in a couple of the embossed berries. I’m not sure they show up very well in the photo.
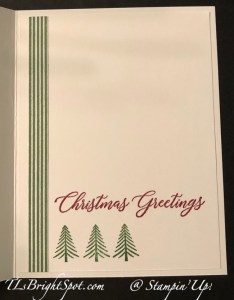
For the inside of the card I stamped the pine boughs in Shaded Spruce ink using the Joy of Noel stamp set. I really like this stamp! I stamped the sentiment with Cherry Cobbler ink and Shaded Spruce ink using the Christmas Classics stamp set. This Basic White panel was adhered directly to the inside of the card.
More of the Joy of Christmas DSP was adhered to the envelope flap & trimmed to fit. Again, using the pine bough stamp and the Joy of Noel stamp set and Shaded Spruce ink, I stamped the lower corner of the Basic White envelope. And done.
Please be sure to visit those participating in this weeks blog hop. Next up is Carol and you can click the ‘next’ button to see what she has created. Otherwise, click on a name to take you elsewhere. Enjoy the hop!
Want to purchase the supplies for this card? Supplies can be ordered using this link to my online store. You will find ONLINE EXCLUSIVES, Clearance Rack, Sep-Dec Mini Catalog, the Annual Catalog, kits, Paper Pumpkin – you name it. Shop at your convenience :O)
When ordering from me please use my NEW HOST CODEHSJD7BR6 so that I receive proper notification and YOU GET THE Benefits of a FREE SU! item valued up to $10 :O) AND the Monthly Card Tutorial. (I like to treat my customers!) If your order is over $150, please don’t use the host code as SU! has benefits. I’ll still be notified and you can receive that FREE ITEM!
Note: Make sure that you can see my name on the final checkout page listed as your Demonstrator when you order so that you know that you’re ordering with me and you’ll get my rewards! PLUS… the monthly Online Tutorial when your order is over $50. The November Tutorial features the beautiful Winter Meadow suite of products which can found in the Jul-Dec 2023 Mini Catalog on pages 36-38!
NEW KIT ADDEDAS OF NOVEMBER 1!
163186
THE BEST DESTINATION KIT
$20.00 USD | $28.00 CAD
Available starting 1 November
This kit lets you make nine tri-fold cards with a colorful, nostalgic, travel vibe.
Enough supplies to create 9 cards—3 each of 3 designs
9 coordinating envelopes
Best Destination Photopolymer Stamp Set
One Gorgeous Grape Ink Spot
Printed card bases, printed die cuts, adhesive, embellishments, and a clear block
Finished card size: 5-1/2″ x 4-1/4″ (14 x 10.8 cm)
Good Wednesday – rainy here and c-o-o-l. It will probabbly be a brisk walk today. I’ve had Garden Walk 6×6 DSP on my work table and have been playing. I’m also using the Artistically Inked stamp set & the coordinating Artistic Dies & lots of Basic White
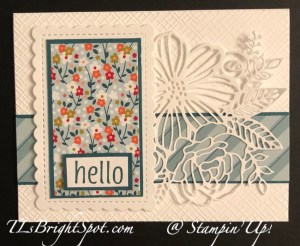
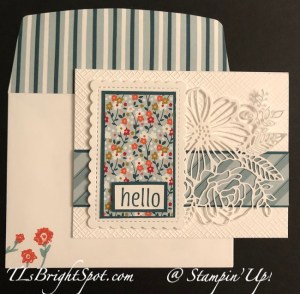
This is a very feminine card… I love the contrast of the small flowers in the Garden Walk 6×6 DSP and the Artistic Die cut in Basic White. The large flower is so similar in shape as those in the DSP and the leaves the same shape – they just ‘fit’ so well together. And of course, the very feminine Scalloped Contour Dies add a nice touch. The Garden Walk 6×6 DSP are each layered on Pretty Peacock card stock just slightly larger. The sentiment is stamped in Pretty Peacock ink and comes from the Artistically Inked stamp set. The background is Basic White that has been run through the Basics 3D Embossing Folder called Crosshatch. (It is an ONLINE EXCLUSIVE set of 3 embossing folders.) The card base is Thick Basic White card stock.
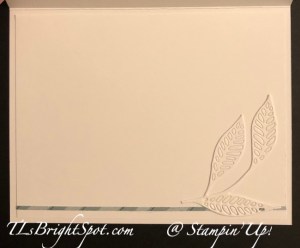
This set of three leaves is part of a die cut from a couple of days ago using the Artistic Dies and cut from Basic White card stock. I simply trimmed it to fit as shown :O). The very narrow strip of DSP is from Garden Walk 6×6 DSP and matches the diagonal stripe on the card front. These are adhered to a Basic White panel which is then added to the inside of the card.
For the envelope, another piece of the Garden Walk 6×6 DSP adhered to the flap and trimmed to fit. On the front is this set of three sweet flowers from Artistically Inked stamp set, stamped in Calypso Coral. The stems and leaves were added with a Pretty Peacock Stampin’ Blend.
Want to purchase the supplies for this card? Supplies can be ordered using this link to my online store. You will find ONLINE EXCLUSIVES, Clearance Rack, Sep-Dec Mini Catalog, the Annual Catalog, kits, Paper Pumpkin – you name it. Shop at your convenience :O)
When ordering from me please use my NEW HOST CODEHSJD7BR6 so that I receive proper notification and YOU GET THE Benefits of a FREE SU! item valued up to $10 :O) AND the Monthly Card Tutorial. (I like to treat my customers!) If your order is over $150, please don’t use the host code as SU! has benefits. I’ll still be notified and you can receive that FREE ITEM!
Note: Make sure that you can see my name on the final checkout page listed as your Demonstrator when you order so that you know that you’re ordering with me and you’ll get my rewards! PLUS… the monthly Online Tutorial when your order is over $50. The November Tutorial features the beautiful Winter Meadow suite of products which can found in the Jul-Dec 2023 Mini Catalog on pages 36-38!
NEW KIT ADDEDAS OF NOVEMBER 1 – TODAY!
163186
THE BEST DESTINATION KIT
$20.00 USD | $28.00 CAD
Available starting 1 November
This kit lets you make nine tri-fold cards with a colorful, nostalgic, travel vibe.
Enough supplies to create 9 cards—3 each of 3 designs
9 coordinating envelopes
Best Destination Photopolymer Stamp Set
One Gorgeous Grape Ink Spot
Printed card bases, printed die cuts, adhesive, embellishments, and a clear block
Finished card size: 5-1/2″ x 4-1/4″ (14 x 10.8 cm)
Good Tuesday! It’s Oct 31 – trick or treaters went around last night in our area and we had quite a few of them. Thank goodness not much of our candy is left! :O) Today is the last day of the JOINING PROMOTION. This is such a special deal that if you’re on the fence, take a leap of faith & jump right in. My team & I are here to help you. Read more info below.
I’ve a watercolor card for you today and it was fun to create. I was inspired by several folks who have posted watercolor cards, and while I’m not as good at it as I’d like to be, I’m still pleased with the card.
Let’s begin by creating the watercolor background: Misty Moonlight ink, Night of Navy ink and finally Orchid Oasis ink. What I like about this is the depth that is created – it really looks like space to me. I wet my paper thoroughly then began with the widest of the Water Painters and added Misty Moonlight ink. Keeping the paper wet, I added Night of Navy ink, but tried to leave the center area mostly just the Misty Moonlight. Then I added the Orchid Oasis ink the same way, keeping the paper wet. I dropped a few drops of clear water on the paper to give more depth, then set aside this piece to dry. Keep in mind, no two pieces are ever the same and that’s the beauty of watercolors.
While this was drying, I pulled out the Holographic Foil Paper and with the silver sheet, used the hybrid folder and die cut this beautiful embossed star (that’s in the center of the card) with the Stars At Night Dies. I also die cut a couple more stars from this same sheet using the Stars At Night Dies. On a scrap of Orchid Oasis paper, I stamped the sentiment from the Night Divine stamp set in VersaMark ink then sprinkled it with Silver Embossing Powder and heat set it. Once it was cool, I fussy cut the sentiment and set it aside.
Now that the watercolor paper was dry I used the Deckled Rectangle Dies to create this fun edge. I ran it through again with the starburst die in the upper center of the card. See all those little openings surrounding the Holographic star? That’s what it does, plus… cut out a starburst which I saved to use on the inside of the card :O). Ok, what’s next… oh yes, cut a piece of 2023-2025 In Color Shimmer Paper in Boho Blue and adhere the deckled watercolor paper over it. I flicked the watercolor piece with Wink of Stella to give it some sparkle. I used liquid glue to adhere the star and little dots of glue for the additional small stars. I put the fussy cut sentiment on dimensionals and attached it over the center of the large star. This panel got dimensionals and was added to an Orchid Oasis card base.
On a panel of Very Vanilla card stock, I stamped the sentiment from Night Divine stamp set in Orchid Oasis ink. I added the leftover starburst center then another star die cut from the Holograph Paper in the center of the starburst. This panel was added to the inside of the card and finis.
On the Very Vanilla envelope, I stamped the sentiment from Night Divine stamp set in Orchid Oasis ink. We made this in my card class two weeks ago and the ladies loved it.
The countdown is on… Stampin’ Up! offer of the Joining Promotion ends at close of day Oct 31 – today! Let me refresh your memory about the Joining Promotion
Celebrating 35 years of Stampin’ Up!, new demonstrators will be able to choose 35% OFF the cost of their Starter Kit or get 35% MORE product with their Starter Kit.
With option 1 (35% off the normal cost of the starter kit), the new demo would receive $125 worth of products and pay $64.35 + tax. and of course, shipping is FREE.
With option 2 (35% more SU! product) the new demo would pay the usual $99 plus tax of course, and get $168.75 worth of SU! product that you get to choose! And as before – – shipping is FREE! (This would probably be my suggestion – more product!)
MORE – MORE – MORE… With either option, those who sign up for the starter kit between Oct 3 and Oct 31 will automatically get signed up for the ONSTAGE@HOME Registration, again FREE! This is a virtual event being held November 11. (Normally the cost of registration would be $77) If you join as demonstrator during the time frame mentioned, you will receive in your email, all the information necessary to attend this virtual event.
Have I intrigued you, inspired you, made you think maybe this is the time to join as a demonstrator? If so, – would love to have you. Remember, hobby demonstrator (for the 20% discount) or a business demo (at least 20% off all demonstrator orders – or more) or somewhere in between. It just doesn’t matter. What does matter is if you like to stamp, color, ink up, create – that’s where it all blends into having fun and doing it with others.
Those who sign up for this offer have the opportunity to watch the event independently, gathered together with other demonstrators, or with their Team Leader.
Demonstrators who join during this promotion will be automatically added to the OnStage attendees; you won’t even need to register separately.
Demonstrators who join during this promotion will also receive an email with all the information about this event.
Whether you’d like to start a little side business or simply take advantage of the awesome 20% discount, I would very much love for you to join my Krew team! We have a great time together – even though we live all over the country!
Want to purchase the supplies for this card? Supplies can be ordered using this link to my online store. You will find ONLINE EXCLUSIVES, Clearance Rack, Sep-Dec Mini Catalog, the Annual Catalog, kits, Paper Pumpkin – you name it. Shop at your convenience :O)
When ordering from me please use my HOST CODE2J2X3YRM so that I receive proper notification and YOU GET THE Benefits of a FREE SU! item valued up to $10 :O) AND the Monthly Card Tutorial. (I like to treat my customers!) If your order is over $150, please don’t use the host code as SU! has benefits. I’ll still be notified and you can receive that FREE ITEM!
Note: Make sure that you can see my name on the final checkout page listed as your Demonstrator when you order so that you know that you’re ordering with me and you’ll get my rewards! PLUS… the monthly Online Tutorial when your oder is over $50. The October Tutorial features the beautiful Merriest Trees Bundle which can found in the Jul-Dec 2023 Mini Catalog on page 12!
Thanks for stopping by today. May you have a beautiful day!
Good Monday morning. Golly – where did the weekend go? It was glorious here on the Jersey Shore – even though we made a quick trip to PA. And it was glorious there too. My card today is a fairly new one called Garden Walk 6×6 DSP. It has an interesting mix of colors and I’ve paired it with Basic White on this card.
This is a very feminine birthday card and I like it a lot. The Artistic Dies are the leaves die cut from Basic White. I’ve also incorporated the Scalloped Contour Dies. The layers are like this: Card base is Thick Basic White; on this is a narrow layer of Garden Walk DSP adhered directly to the card base; the Scalloped Contour Basic White panel with Pretty Peacock and Garden Walk DSP all attached to one another then added to the card front with dimensionals. The Artistic Dies leaves was attached near the bottom with a couple of dabs of liquid glue, a narrow strip of Pretty Peacock added over this, then the sentiment banner on dimensionals. The sentiment is stamped using the Artistically Inked stamp set, which coordinates with the Artistic Dies, with Poppy Parade ink. Two final touches… a sweet bow using the pink in the Ribbon Combo Pack and three Iridescent Pastel Gems.
On the inside… I used Poppy Parade ink to stamp the flowers from the Artistically Inked stamp set. They look just like the flowers on this Designer Series Paper :O) I stamped the leaves in Garden Green ink from the Artistically Inked stamp set then the sentiment – also from this stamp set. The stems were my own addition, using the Garden Green Marker to draw them in. The Basic White panel was simply asdded to the inside of the card.
For the envelope, more of the same Garden Walk 6×6 DSP on the flap and the larger flower from Artistically Inked stamp set stamped in Poppy Parade ink on the front. And finis! My hubby particularly likes this card :O)
The countdown is on… Stampin’ Up! offer of the Joining Promotion ends at close of day Oct 31 – tomorrow! Let me refresh your memory about the Joining Promotion.
Celebrating 35 years of Stampin’ Up!, new demonstrators will be able to choose 35% OFF the cost of their Starter Kit or get 35% MORE product with their Starter Kit.
With option 1 (35% off the normal cost of the starter kit), the new demo would receive $125 worth of products and pay $64.35 + tax. and of course, shipping is FREE.
With option 2 (35% more SU! product) the new demo would pay the usual $99 plus tax of course, and get $168.75 worth of SU! product that you get to choose! And as before – – shipping is FREE! (This would probably be my suggestion – more product!)
MORE – MORE – MORE… With either option, those who sign up for the starter kit between Oct 3 and Oct 31 will automatically get signed up for the ONSTAGE@HOME Registration, again FREE! This is a virtual event being held November 11. (Normally the cost of registration would be $77) If you join as demonstrator during the time frame mentioned, you will receive in your email, all the information necessary to attend this virtual event.
Have I intrigued you, inspired you, made you think maybe this is the time to join as a demonstrator? If so, – would love to have you. Remember, hobby demonstrator (for the 20% discount) or a business demo (at least 20% off all demonstrator orders – or more) or somewhere in between. It just doesn’t matter. What does matter is if you like to stamp, color, ink up, create – that’s where it all blends into having fun and doing it with others.
Those who sign up for this offer have the opportunity to watch the event independently, gathered together with other demonstrators, or with their Team Leader.
Demonstrators who join during this promotion will be automatically added to the OnStage attendees; you won’t even need to register separately.
Demonstrators who join during this promotion will also receive an email with all the information about this event.
Whether you’d like to start a little side business or simply take advantage of the awesome 20% discount, I would very much love for you to join my Krew team! We have a great time together – even though we live all over the country!
Want to purchase the supplies for this card? Supplies can be ordered using this link to my online store. You will find ONLINE EXCLUSIVES, Clearance Rack, Sep-Dec Mini Catalog, the Annual Catalog, kits, Paper Pumpkin – you name it. Shop at your convenience :O)
When ordering from me please use my HOST CODE2J2X3YRM so that I receive proper notification and YOU GET THE Benefits of a FREE SU! item valued up to $10 :O) AND the Monthly Card Tutorial. (I like to treat my customers!) If your order is over $150, please don’t use the host code as SU! has benefits. I’ll still be notified and you can receive that FREE ITEM!
Note: Make sure that you can see my name on the final checkout page listed as your Demonstrator when you order so that you know that you’re ordering with me and you’ll get my rewards! PLUS… the monthly Online Tutorial when your oder is over $50. The October Tutorial features the beautiful Merriest Trees Bundle which can found in the Jul-Dec 2023 Mini Catalog on page 12!
Thanks for stopping by today. May you have a beautiful day!
Hello Saturday! We are having a bit of summer here in NJ once again… 80 degrees today! However, fall is definitely upon us ~ the trees surrounding us have turned those gorgeous shades of yellow, orange, deep reds. It is just stunning. With all this talk of fall, you would think my card would be about that, but it isn’t :O) It’s Christmas with the Beary Christmas 12 x 12 DSP and the Tiny Trees Dies.
I began this card by die cutting the Garden Green front piece with the Tiny Trees Dies. I added Foam Adhesive Stripsto the back of the die cut and attached a slightly larger panel of Granny Apple Green foil sheet. (This comes from the Melon Mambo & Granny Apple Green Foil Sheets pack.) These were added to a Garden Green card base. I die cut two Basic White circles with the Deckled Circles Dies. The smaller one I stamped with the sentiment in Balmy Blue ink from Beary Cute stamp set, then stamped again with the ‘snowflake’ stamp in the same Beary Cute stamp set. I fussy cut this bear carrying packages from the Beary Christmas 12×12 DSP and attached him to the larger circle with dimensionals. I slipped this Sparkle Ribbon under his feet to make it look as though he was walking on ice. I added three Pastel Adhesive-Backed Sequins to the circle for more bling. These two circles were attached to the card front as you see them.
For the inside… I stamped this simple outline image of a tree in Garden Green ink, using a stamp from the Beary Cute stamp set. I stamped the hat in Real Red ink from the same stamp set – and called it complete.
For the envelope… I fussy cut two more bears from the Beary Christmas 12×12 DSP and added them to the envelope front. I took another piece of the DSP for the flap.
What a bright, cheery card, right? What’s helpful about this card, is it could be sent to someone of a different faith – as it doesn’t say Merry Christmas on it. It’s good to have a few of these in your stash.
Want to purchase the supplies for this card? Supplies can be ordered using this link to my online store. You will find ONLINE EXCLUSIVES, Clearance Rack, Sep-Dec Mini Catalog, the Annual Catalog, kits, Paper Pumpkin – you name it. Shop at your convenience :O)
When ordering from me please use my HOST CODE2J2X3YRM so that I receive proper notification and YOU GET THE Benefits of a FREE SU! item valued up to $10 :O) AND the Monthly Card Tutorial. (I like to treat my customers!) If your order is over $150, please don’t use the host code as SU! has benefits. I’ll still be notified and you can receive that FREE ITEM!
Note: Make sure that you can see my name on the final checkout page listed as your Demonstrator when you order so that you know that you’re ordering with me and you’ll get my rewards! PLUS… the monthly Online Tutorial when your oder is over $50. The October Tutorial features the beautiful Merriest Trees Bundle which can found in the Jul-Dec 2023 Mini Catalog on page 12!
Stampin’ Up! has an incredible joining special going on that ends in just a few days – like end of day Oct 31, and the thing is, I don’t want you to miss it. You have a few more days to take advantage of this, so let me give you the particulars.
Starting Oct 3 and going through to Oct 31 is a Starter Kit Special you will not want to miss. Celebrating 35 years of Stampin’ Up!, new demonstrators will be able to choose 35% OFF the cost of their Starter Kit or get 35% MORE product with their Starter Kit.
With option 1 (35% off the normal cost of the starter kit), the new demo would receive $125 worth of products and pay $64.35 + tax. and of course, shipping is FREE.
With option 2 (35% more SU! product) the new demo would pay the usual $99 plus tax of course, and get $168.75 worth of SU! product that you get to choose! And as before – – shipping is FREE! (This would probably be my suggestion – more product!)
MORE – MORE – MORE… With either option, those who sign up for the starter kit between Oct 3 and Oct 31 will automatically get signed up for the ONSTAGE@HOME Registration, again FREE! This is a virtual event being held November 11. (Normally the cost of registration would be $77) If you join as demonstrator during the time frame mentioned, you will receive in your email, all the information necessary to attend this virtual event.
Have I intrigued you, inspired you, made you think maybe this is the time to join as a demonstrator? If so, – would love to have you. Remember, hobby demonstrator (for the 20% discount) or a business demo (at least 20% off all demonstrator orders – or more) or somewhere in between. It just doesn’t matter. What does matter is if you like to stamp, color, ink up, create – that’s where it all blends into having fun and doing it with others.
Those who sign up for this offer have the opportunity to watch the event independently, gathered together with other demonstrators, or with their Team Leader.
Demonstrators who join during this promotion will be automatically added to the OnStage attendees; you won’t even need to register separately.
Demonstrators who join during this promotion will also receive an email with all the information about this event.
Whether you’d like to start a little side business or simply take advantage of the awesome 20% discount, I would very much love for you to join my Krew team! We have a great time together – even though we live all over the country!