Stampin’ Up! Take A Bow 6×6 Stack & Cut C’mas Cards

This is a brand new week – and hard to believe it is September 2 already. The summer went by so darn quickly…. and yes, it isn’t ended until September 22, I get that. But somehow, Labor Day, school starting, other programs picking up again – it seems like summer ‘up & went.’ Bad English, I know. My cards today… I have resisted creating the ever popular ‘stack & cut cards’. And that’s on me. Yesterday I did it and here are the four cards I created.

Stampin' Up! Take a bow 6x6 Stack & cut #1
Take A Bow 6×6 #1
Stampin' Up! Stack & Cut Take a Bow 6x6 #3
Take A Bow 6×6 #3
Stampin' Up! Stack & Cut Take a Bow 6x6 #4
Take A Bow 6×6 #4

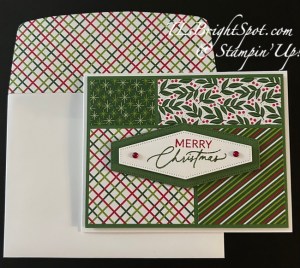
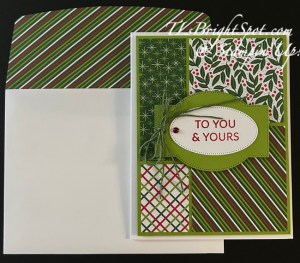
One of the reasons I have resisted making stack & cut cards is they are so similar – and I rarely make two of the same card. What I did here is use very different dies for the front sentiment panels. And if you are not familiar with stack & cut cards – here’s the idea… take 4 designer series papers that coordinate, stack them one on top of the other and cut – meaning all four papers are cut exactly the same. What changes is the order of how they appear on the card. And I made my cards as two horizontal and two vertical cards. By switching the cut papers it changes the ‘look’ of each card while using all the same papers. Make sense?

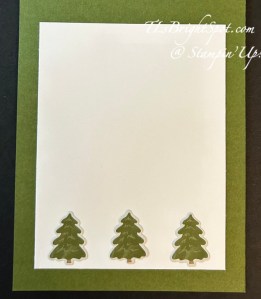
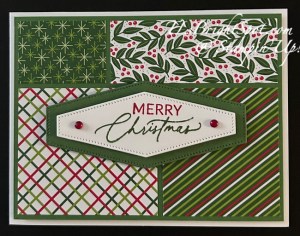
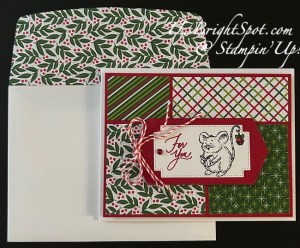
How to create these cards… the DSP is Take A Bow 6×6 DSP available Sep 4 in the new 2024 Sep-Dec Mini Catalog – choose four (4) coordinating patterns, stack them one on top of another and cut 3 3/4 x 5. On the short side cut at 2 1/2″, then cut that strip on the long side at 2 1/4″. And the remaining uncut strip that is now 1 3/4 x 5, cut it at 3 1/4″, leaving two sizes: 1 1/4 x 1 3/4 and 1 1/4 x 3 3/4. Keep papers in appropriate stacks. Cut four different coordinating card stocks 4 x 5 1/4. Begin laying out the DSP patterns by placing all of the top pieces from the same pattern on each of the four cardstock panels – using the cards above as a guide. None of the designer series papers that I chose are directional, so it didn’t matter where they were placed. If any your patterns are directional, that will make a difference. Continue each pattern of DSP until all are distributed. Adhere to cardstock with adhesive of choice, then add to card base with dimensionals.

Besides the Take A Bow 6×6 DSP, here are the various supplies needed for each card:

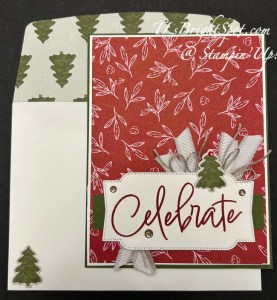
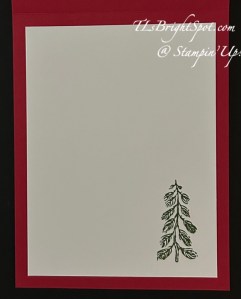
Card 1 -Something Fancy Dies, Frayed Grosgrain Ribbon in White, Greetings of the Season stamp set, Christmas Friends stamp set on the inside, Real Red ink and Granny Apple Green + Garden Green ink, Adhesive Backed Berries.

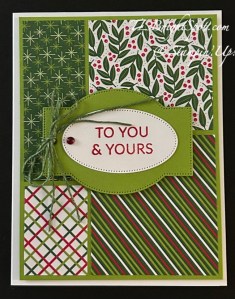
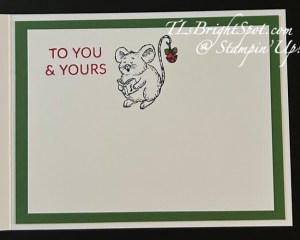
Card 2 – Nested Essentials Dies, Greetings of the Season for sentiments, Christmas Friends (mouse) and to color the mouse, Stampin’ Blends Real Red and Granny Apple Green, Adhesive Backed Berries, and inks Real Red and Garden Green.

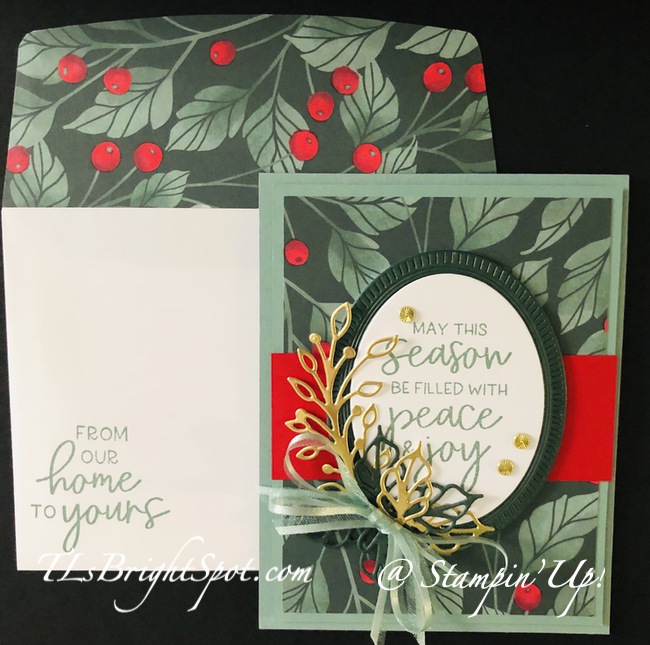
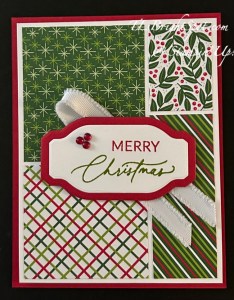
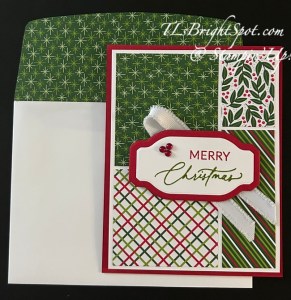
Card 3 – Greetings of the Season Bundle, Natural Tones Linen Thread in Garden Green, Adhesive Backed Berries and inks Real Red and Granny Apple Green.

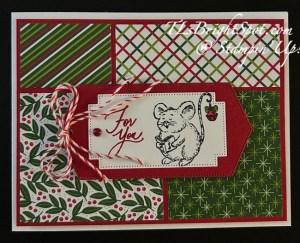
Card 4 – Greetings of the Season Bundle, Christmas Friends stamp set, (mouse)and Stampin Blends Real Red and Granny Apple Green for the mouse, Red & White Baker’s Twine, Adhesive Backed Berries.

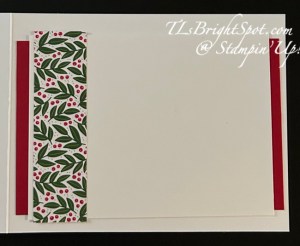
Here’s the envelope for each card + the inside of each:

Stampin' Up! Stack & Cut card & envelope, #1
Card 1 card & envelope
Stampin' Up Take A Bow DSP, card 1 inside
Card 1, inside
Stampin' Up!, Take A Bow #2 card & envelope
Stampin' Up! Take A Bow, card 2 inside
Card 2, inside

Stampin' Up! Take A Bow, card & envelope #3
Card 3, Card & envelope

Stampin' Up! Take A Bow,#3 inside
Card 3 inside

Stampin' Up! Take A Bow #4 card & envelope
Card 4, card & envelope
Stampin' Up! Take A Bow #4 inside
Card 4, inside

Card bases and cardstock for dies for the various cards: Garden Green, Granny Apple Green, Real Red and Thick Basic White. To shop for those items in the 2024-2025 Annual Catalog, click here.

To shop the ONLINE Exclusives, click here: The Greetings of the Season Bundle may be found in this section, as well as the Adhesive Backed Berries.

Stampin' Up! Sep - Dec 2024 Mini Catalog

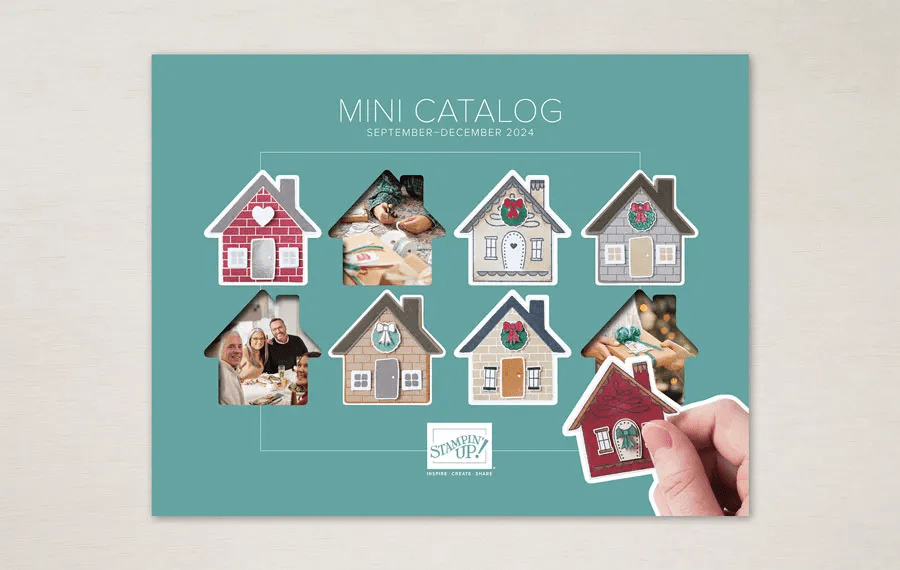
To shop the mini catalog, click on the link in the catalog photo above.

To shop the Kits Collection, click here. New kits will be posted Sep 4.

OK, how else may I help you? Remember that when you shop with me, there are benefits… with a $50 order, receive a SU! item valued up to $10. Use my HOST CODE so that I’m sure to get that item to you. Plus monthly tutorials are sent with a $50 order as well – for September it features the Autumn Expressions Bundle, a new bundle in the Sep-Dec Mini Catalog.

host code ZBAU6PKX

Thanks for stopping by. May you have a beautiful day. Make someone happy sending them a handmade card filled with love!

Stampin’ Up! Iconic Celebrations Suite Holiday Card

Good morning! It’s been hot & steamy this week and yesterday buckets of rain with more due today – all remnants of Hurricane Beryl. So what to do – make a card that reminds us of cool :O) The iconic Imagery bundle has several themes: leaves (fall), snowflakes (winter), stars & hearts & candles, and various sentiments – grateful (Thanksgiving), celebrate (birthday or anniversary or special holiday (Christmas, New Years). And the dies include several banner dies, snowflake, leaves, stars, hearts & trees.

Stampin' Up! Iconic Celebrations Holiday card front

I’ve used one of the Cherry Cobbler papers in the Iconic Celebrations 6×6 DSP pack to create a background for the gorgeous banner die that I used for the word ‘celebrate’ – all from this suite of products.

The card base is Mossy Meadow 4 1/4 x 11 scored at 5 1/2 with the fold at the top. I cut a Basic White panel and layered it with the Iconic Celebrations 6×6 DSP and adhered this to the card front with dimensionals. The sentiment is from the Iconic Imagery stamp set and stamped in Cherry Cobbler ink and die cut with Iconic Imagery Dies. I cut a 3/4″ strip of Mossy Meadow and adhered that directly to the banner, added dimensionals and adhered this in place. From one of the Iconic Celebrations 6×6 DSP papers, I die cut several of these cute trees – yep, directly from the DSP! I added a mini dimensional on the back near the top of the tree and liquid glue at the bottom of the tree and added this to the banner and card front. I colored a Rhinestone Basic Jewel with a Cherry Cobbler Stampin’ Blends and set it aside to dry while adding Pecan Pie & Clear Ribbon Adhesive-Backed Dots to the banner (from the suite!). With the Rhinestone dry, I added it to the top of the tree. I cut three short lengths of White 3/8″ Frayed Grosgrain ribbon, trimmed the ends as you see them and tucked them in behind the banner and beside the tree, then also in the lower left corner adhering in place with glue dots. With Linen Thread I tied three bows and pushed them under the banner, adhering them in place with a glue dot. What’s kinda fun – I used every product from this suite for this card :O) Finis for the front!

Stampin' Up! Iconic Celebrations Holiday card inside

Remember those extra trees I die cut from the Iconic Celebrations 6×6 DSP? Here are three more, adhered directly to a Basic White panel for the inside of the card. :O)

Stampin' Up! Iconic Celebrations Holiday Card & envelope

And here’s the last tree I die cut – on the envelope front! And the Iconic Celebrations 6×6 DSP from which I die cut the tree – a piece adhered to the flap, pulling the whole card together. This would be a card that could be used for a birthday during the winter holidays – or for a Christmas card – just add an appropriate sentiment. And – it could be a masculine card.

This Iconic Celebrations Suite of products is an ONLINE EXCLUSIVE. Check out all the products that are in the ONLINE EXCLUSIVE shop with Stampin’ Up! – here, shopping with me!

Here’s another thing… BONUS DAYS… Bonus Days are an exciting time of receiving $5 coupons for every $50 purchase. Below are ALL the details for this Stampin’ Up! promotion. Are you ALL IN? I certainly hope so, ‘cuz I certainly am.

PROMOTION DETAILS

Earning Period: 3–31 July 2024
Ordering Deadlines
Phone: 31 July 2024 at 6:59 p.m. (MT) 
Online: 31 July 2024 at 11:59 p.m. (MT) 

  • on our online store. 
  • If a participant earns multiple codes from a single order, they will receive one email with multiple codes. If they earn multiple codes from multiple orders, they will receive separate emails for each code earned.
  • All order types qualify for this promotion. Phone and email orders still require an email address.
  • Orders started before the promotion begins will not count toward earning coupon codes. For example, if you add items to your cart before 3 July and wait to purchase until that date or later, then those items will not qualify towards earning coupons. You must add items to your cart and complete your purchase during the earning period. 
  • There is no limit to the number of coupon codes participants can earn per order or throughout the duration of the earning period
  • Coupon codes can only be earned on commissionable items. Non-commissionable items (such as catalogs) do not count towards coupon earnings. 
  • Customers must use a valid email address during checkout in order to receive their coupon code. If a customer places an order over the phone, they must still provide a valid email address to receive their coupon code.
  • Starter Kit orders are excluded from this offer. All other order types qualify.
  • For workshop orders, each customer who reaches a qualifying amount will receive a coupon code to their provided email address. 
  • All coupon codes will be emailed right after a qualifying purchase has been made. Encourage your customers to create an account on our online store. 
  • If a participant earns multiple codes from a single order, they will receive one email with multiple codes. If they earn multiple codes from multiple orders, they will receive separate emails for each code earned.
  • All order types qualify for this promotion. Phone and email orders still require an email address.
  • Orders started before the promotion begins will not count toward earning coupon codes. For example, if you add items to your cart before 3 July and wait to purchase until that date or later, then those items will not qualify towards earning coupons. You must add items to your cart and complete your purchase during the earning period. 
  • There is no limit to the number of coupon codes participants can earn per order or throughout the duration of the earning period
  • Coupon codes can only be earned on commissionable items. Non-commissionable items (such as catalogs) do not count towards coupon earnings. 
  • Customers must use a valid email address during checkout in order to receive their coupon code. If a customer places an order over the phone, they must still provide a valid email address to receive their coupon code.
  • Starter Kit orders are excluded from this offer. All other order types qualify.
  • For workshop orders, each customer who reaches a qualifying amount will receive a coupon code to their provided email address.
  • All coupon codes will be emailed right after a qualifying purchase has been made. Encourage your customers to create an account on our online store. 
  • If a participant earns multiple codes from a single order, they will receive one email with multiple codes. If they earn multiple codes from multiple orders, they will receive separate emails for each code earned.
  • All order types qualify for this promotion. Phone and email orders still require an email address.
  • Orders started before the promotion begins will not count toward earning coupon codes. For example, if you add items to your cart before 3 July and wait to purchase until that date or later, then those items will not qualify towards earning coupons. You must add items to your cart and complete your purchase during the earning period. 
  • There is no limit to the number of coupon codes participants can earn per order or throughout the duration of the earning period
  • Coupon codes can only be earned on commissionable items. Non-commissionable items (such as catalogs) do not count towards coupon earnings. 
  • Customers must use a valid email address during checkout in order to receive their coupon code. If a customer places an order over the phone, they must still provide a valid email address to receive their coupon code.
  • Starter Kit orders are excluded from this offer. All other order types qualify.
  • For workshop orders, each customer who reaches a qualifying amount will receive a coupon code to their provided email address. 
Stampin' Up! Bonus Days Earning period

After earning those coupons, it’s important to know how to use/n redeem them :O)

Redemption Period: 1–31 August 2024
Ordering Deadlines
Phone: 30 August 2024 at 6:59 p.m. (MT) 
Online: 31 August 2024 at 11:59 p.m. (MT)

  • There is no limit to the number of coupon codes participants can redeem on an order during the redemption period. If using multiple codes, they must be separated by a space. 
  • Coupon codes may be redeemed one time only. They cannot be redeemed after the 31 August. 
  • Coupon codes may be redeemed for any product (excluding Starter Kits and demonstrator supply items). They cannot be used on exchanges.
  • Bonus Days coupon codes can be applied to new prepaid Paper Pumpkin subscriptions.
  • Coupon codes will reduce the commissionable amount of an order

Check out this video to see what Stampin’ Up! says about BONUS DAYS. Just click on the red arrow

Join with me by following this link...

To view all the available ONLINE EXCLUSIVES, click here.

Clearance items may be found here

While you’re looking around in my store, remember there are some stunning kits available, for all ages and all seasons – even Christmas! And while you’re shopping, I offer fringe benefits to my customers: free tutorial of the month and a FREE Stampin’ Up! item valued to $10 – all for a $50 order, before shipping and taxes. Use my current host code to receive those benefits – especially when your order does not exceed $150. Make certain my name is listed as your demonstrator when checking out! :O)

HOST CODE  HFXSJCNB

Thanks for stopping by. May you have a beautiful day. Make someone happy when sending them a handmade card filled with love.

Stampin’ Up! Beary Christmas Memories and More Card Pack

Good morning! Sometime ago I received a gift from my upline of this very fun Beary Christmas Memories & More Card Pack. It has been sitting on my desk just waiting for me to play. I have three to share today. Before I share, look at pages 22 & 23 in the Sep-Dec 2023 Mini Catalog and see all the items that come in the pack. These are larger in size: 4 1/4 x 6 1/2, so just be aware of that.

Stampin' Up! Beary C'mas Mem'ries & More cards.1
Stampin' Up! Beary C'mas Mem'ries & More Card Pack.3
Stampin' Up! Beary C'mas Mem'ries & More Card Pack.2

Card 1, far left, uses the card base from the card pack, a layer of Beary Christmas 12×12 DSP, a window sheet (to make the shaker card) and these tiny trees die cut using the Tiny Trees Die found on page 13 in the Sep-Dec 2023 Mini Catalog, a sticker from the card pack (Merry Christmas) and a twine (2022-2024 In Color Baker’s Twine Pack found in the 2023 Annual Catalog.) I also used Pearlized Enamel Effects in White and gave a dot on each of the green trees. It really does make the card sparkle! These little tiny trees are left over from another project some time ago :O)

Stampin'n Up! Beary C'mas mem'ries & More card pack.4

Card 2, middle, uses the Card base from the card pack, another panel of the Beary C’mas 12×12 DSP and two ‘cards’ layered together and on dimensionals. I also used Pearlized Enamel Effects in white on the trees.

Stampin' Up! Pearlized Enamel Effects in white
Stampin' Up! Pearlized Enamel Effects.6

It is important when using the Pearlized Enamel Effects to LET IT DRY completely. I usually add it at the end of creating a card and set it aside while I work on another project.

Card 3, far right, is another shaker card but without the shakers :O) That’s another story!!! Here I wrapped the gorgeous Silver & White 1/2″ Ribbon (from the Sep-Dec 2023 Mini Catalog) around the ‘shaker’ and tied it with Woven Metallic Ribbon in Parakeet Party from the 2023 Annual Catalog. I adhered the ‘shaker’ portion directly to the decorated card base – decorated with Beary C’mas 12×12 DSP.

This is such a cute card pack and I’ve had such fun putting it together. More cards will be shared another time.

Starting tomorrow Oct 3 and going through to Oct 31 is a Starter Kit Special you will not want to miss. Celebrating 35 years of Stampin’ Up!, new demonstrators will be able to choose 35% OFF the cost of their Starter Kit or get 35% MORE product with their Starter Kit. Having said all that – would love to have you JOIN MY TEAM HERE.

Stampin' Up! World Card Making Day

Who: Everyone, including new customers!

When: 7 October 2023 from 2:00 to 5:00 p.m. (MT)

Where: Online

Price of Event: Free

Registration Dates: 6 September–7 October 2023

Connect with me to register for this event!

Which specific browsers are supported?

For the optimal viewing experience, we recommend using Chromium based browsers such as Google Chrome or Microsoft Edge. You can also get good results on Mozilla Firefox or Safari; however, there can be times where there may be slight visual differentiation (video controls, website design, etc.). We recommend always using the latest version of your chosen browser.

Can I watch the event with people that didn’t register?
That’s a big yes! Anyone and everyone are welcome to join in the fun. Registration is the best way to keep up on event details, but it’s not required.

Stampin' Up! Amy's Inkin' Krew WCMD event

When ordering from me please use my HOST CODE 2J2X3YRM so that I receive proper notification and YOU GET THE Benefits of a FREE SU! item valued up to $10 :O) If your order is over $150, please don’t use the host code as SU! has benefits. I’ll still be notified and you can receive that FREE ITEM!

Shop CLEARANCE RACK HERE.

Shop September – December 2023 Mini Catalog HERE.

Shop 2023 Annual Catalog HERE.

And oh! There’s a NEW HANUKKAH Stamp Set available in the ONLINE EXCLUSIVE SHOP HERE

Stampin' Up! Hanukkah stamp set

Please let me know if I can support you in any way in your creativity, card making, etc. May you have a beautiful Day!

Stampin’ Up! Double Box Fun Fold for Class

Good morning! Sunshine today – and I mean FULL sunshine. After 5 full days of rain and haze and cloud cover, the shining sun is very welcome… Today’s card was inspired by one of my teammates, Carol Buckelew. I love this fun fold – so very easy and creates a stand up card that’s fun to show off. After I made a couple of them, we made this in my card class Thursday.

Stampin' Up! Double Box Fun Fold w/ One Horse Open Sleigh DSP

I used the One Horse Open Sleigh DSP both for this card and another and in the card class as well. I love how each has a different scene. (You’ll see each of the others in the photos below) I also incorporated the Forever Forest stamp set (used on the card back) and coordinating Forever Forest Dies (for the die cut trees on the front). The circle was made using the Stylish Shapes Dies.

Dimensions / Card Cuts

  • Card Base 1: 4 1/4 x 9 3/8 scored on the long side @ 3/8, 1 3/8, 2 7/8, 3 7/8
    • DSP for this base 1: 4 1/8 x 5 3/8; 4 1/8 x 1 3/8
  • Card Base 2: 3 1/2 x 5 1/8 scored on the long side @ 3/8 & 1 3/8
    • DSP for base 2: 3 3/8 x 3 58; 3 3/8 x 7/8
  • DSP for envelope flap: 2 1/4 x 6

Burnish score lines for Base 1; add DSP to long unscored end of base 1. Add Tear ‘n Tape to 3/8″ end fold under, then lay flat at 2 7/8 score line and adhere to make ‘box’. Adhere 1 3/8 DSP to appropriate panel – refer to photos. Add Tear ‘n Tape to 3/8″ section of base 2.

Stampin' Up! Double Box Fun Fold directions.1
Stampin' Up! Double Box Fun Fold.2
Stampin' Up! Double Box Fun Fold.3

Turn Base 2 to wrong side and center on Base 1, top, bottom, left & right. Add Stampin’ Seal as shown; turn over to right side and adhere to Base 1.

Stampin' Up! Double Box fun fold.4

Remove Tear ‘n Tape & adhere to create box 2

Stampin' Up! Double Box fun fold.6

Wow – almost there! Add 3 3/8 x 3 5/8 DSP to Base 2 front, then adhere 7/8 x 3 3/8 panel to panel to right of that.

Stampin' Up! Double Box fun fold.7

Decorate front as desired. On this card I used the Forever Forest Dies to die cut two trees: one in Crumb Cake (smaller) and one in Pebbled Path. I layered them on a circle – die cut using Basic White and the Stylish Shapes Dies. I added Rhinestone Basic Jewels for a bit of glam. See photo.

Stampin' Up! Double Box Fun Fold w/ One Horse Open Sleigh DSP
Stampin' Up! Double Box fun fold.8, back of card

For the back of the card I stamped a Basic White panel (4 1/8 x 5 3/8) using the trees from the Forever Forest stamp set and Mossy Meadow ink. The sentiment is from the Night Divine stamp set and stamped in Pebbled Path ink. The envelope was simple: more of the same One Horse Open Sleigh DSP for the flap & trimmed to fit. :O) :O) :O) Such a FUN CARD….

Here’s another and those made in the card class. All use the One Horse Open Sleigh DSP from the NLINE EXCLUSIVES store.

Stampin' Up! Double Fun Fold.9
Stampin' Up! Double Box fun fold.10
Stampin' Up! Double Box fun fold.11
Stampin' Up! Double Box fun fold.12
Stampin' Up! Double Box fun fold.13

The students really enjoyed this class – had so much fun and were creative in decorating the card front and the back as well. Unfortunately I didn’t take photos of the back of the card :O( ugh. I look forward to see what YOU do with this fun fold. Please share photos with me of your creations!

As you know, Stampin’ Up! is a company that keeps things alive and moving – so LOTS going on. And I have to say, I love that – lots of inspiration and opportunities. Speaking of which, there are two I want to share that are coming up VERY SOON!

The first – October 3 – 31:

Celebrate 35 Years with Us: Upcoming Starter Kit Special

We’re celebrating our 35th anniversary this year, and what better way to do that than with a special Starter Kit offer? From 3–31 October, new demonstrators will be able to choose either 35% OFF the cost of their Starter Kit or get 35% MORE product with their Starter Kit!  I haven’t seen this opportunity before – so jump in! Let me know how I can help you :O)

The second is October 7:

Stampin' Up! World Card Making Day

Who: Everyone, including new customers!

When: 7 October 2023 from 2:00 to 5:00 p.m. (MT)

Where: Online

Price of Event: Free

Registration Dates: 6 September–7 October 2023

Connect with me to register for this event!

Which specific browsers are supported?
For the optimal viewing experience, we recommend using Chromium based browsers such as Google Chrome or Microsoft Edge. You can also get good results on Mozilla Firefox or Safari; however, there can be times where there may be slight visual differentiation (video controls, website design, etc.). We recommend always using the latest version of your chosen browser.

Can I watch the event with people that didn’t register?
That’s a big yes! Anyone and everyone are welcome to join in the fun. Registration is the best way to keep up on event details, but it’s not required.

Thanks for joining me today. May you have a beautiful day!

Stampin’ Up! Santa Express Mem’ries & More

Happy THANKSGIVING! WOOHOO! HELLO TURKEY 😀 Yum… We will be celebrating with family on Saturday, not today. Our kids are with their spouses families today, then come here to celebrate with us. I’m thankful they want to come and it will be so good to have us all together. So MUCH for which to be thankful. Amen & amen.

What I’m sharing with you today is cards I have made with the Santa Express Memories & More Card Pack and Cards & Envelopes. I haven’t quite finished the pack yet, but here are twelve of them ready to go :O)

Stampin' Up! Santa Express.1
Stampin' Up! Santa Express.2

I’ve used elements from the Santa Express Mem’ries & More Card Pack and a few other items from my stash. The coordinating colors are Poppy Parade, Shaded Spruce, Basic White, Mint Macaron &Pool Party ~ so you’ll see card stocks cut to fit that utilize those colors of card stock. I’ve also used VersaMark ink & White Embossing Powder, Pearlized Enamel Effects (in red), 2022-2024 In Color Baker’s Twine (Sweet Sorbet & White), Deckled Rectangle Dies, Glittered Organdy Ribbon, Adhesive-Backed Seasonal Sequins in Red, Green & White, Snowfall Accents Puff Paint, Wintry 3D Embossing Folder (pine fronds), Real Red 3/8″ Ribbon Combo Pack, Hope & Peace Stamp set with Shaded Spruce ink, and a sentiment from the October ’22 Paper Pumpkin kit. This is such a great card pack, with matching cards & envelopes. Thank you Amy Koenders for the gift of these for attending On Stage! As I said, I have a few more to make.

If you would like to order from my online store, that’s really easy to do. And remember to use my current HOST CODE 4GWG47JC to earn credit from me. Here’s how it works… when you place an order of $50 or more (before shipping & taxes), you receive from me a SU! item valued up to $10 + Star-Studded Rewards. If your order exceeds $150, do not use my HOST CODE as SU! has it’s own rewards from which you may choose. You will still receive that FREE ITEM valued up to $10 from me + the Star-Studded Rewards. 😁👍

My Star-Studded Rewards as a THANK YOU

For every $50 that you order from my online store (before shipping & taxes) and when you add my current Host Code, you will earn 1 STAR Reward.  Orders of $49.99 or below DO NOT earn any rewards.Example $50 = 1 STAR Reward, $100 = 2 STAR Rewards , $150 = 3 STAR Rewards etc. When you have earned 8 STAR Rewards you will get a FREE product order valued up to $40.00, your choice, and mailed directly to you! Is that a deal or what??? You also earn my monthly Online Class Tutorial of exclusive projects when you place an order. For any order $50 or more you will also receive 1 free gift from me valued up to $10. Remember to use MY current HOST CODE: 4GWG47JC Click here to go my store.

Stampin' Up! Timeless Greetings kit
Stampin' Up! Timeless Greetings kit.stamps
  • Kit contains enough supplies to create 8 cards—4 each of 2 designs—and 8 coordinating envelopes.
  • Includes printed card bases, printed die cuts, adhesive, embellishments, and a clear block.
  • Available in English and French
  • Finished card size: 5-1/2″ x 4-1/4″ (14 x 10.8 cm)
  • Coordinating colors: Basic Black, Basic Gray, Cajun Craze, Crumb Cake, Evening Evergreen, Soft Suede.

Wouldn’t this kit be great for making masculine cards? For me, having a stack of these ready at my fingertips would be a real advantage. And we have several friends who love to travel and I just see this as a perfect justification 👍. We made this kit at conference recently ~ here are real-life photos

Stampin' Up! Timeless Greetings.card 1
Stampin' Up! Timeless 
Greetings. card 2

Also now available…

Stampin' Up! Fitting Florets Collection

If you would like to see cards I have made with these new products, look here, here, here and here.

The following exclusive products are only available while supplies last:

  • Framed & Festive Cling Stamp Set (item 160888)*
  • Fitting Florets Designer Series Paper (item 161814)
  • Gold Adhesive-Backed Swirls (item 161822)

The following will be available for purchase in the Mini Catalog starting January 2023:

  • Framed Florets Bundle (item 162407)
  • Framed Florets Photopolymer Stamp Set (item 161815)*
  • Framed Florets Dies (item 160623)

Let me explain just a bit… this collection is available right now. However, only those items listed in the second set will be available in the coming year. Does that clarify for you – a bit? This is a promotion to get you excited about the NEW Jan – Jun 2023 Mini Catalog. 👍👍👍 The full collection is available by using this item number 163129.

Opportunities for some gift ideas to friends, family – or yourself!

Stampin' Up! Birthday Card Organizer kit

161056 BIRTHDAY CARD ORGANIZER KIT. $25 USD | $34 CAD

  • Kit includes one 8″ x 10″ (20.3 x 25.4 cm) monthly planner with space to record birthdays each month as well as a pocket sleeve to hold birthday cards.
  • Includes 12 full-size birthday cards, 6 of 2 designs, and 12 coordinating envelopes.
  • Includes Glue Dots, Stampin’ Dimensionals, Adhesive-Backed Embellishments, and Tear & Tape Adhesive
  • Includes die-cut florals and pieces ready for you to use­—no prep work required!
  • Includes sticker sentiments and die-cut labels in Dutch, English, French, and German
  • Coordinating colors: Basic Black, Evening Evergreen, Petal Pink, Sahara Sand, and Soft Succulent

Sgtampin' Up! Christmas Gifting kit

0342 CHRISTMAS GIFTING KIT $21 USD | $29 CAD

  • Kit includes 9 tags and 9 gift card holders—3 each of 3 designs
  • Includes the exclusive Christmas Gifting Stamp Set and a Shaded Spruce Classic Stampin’ Spot
  • Sized to fit standard gift cards
  • Coordinating colors: Basic Black, black foil, Mint Macaron, Real Red, Shaded Spruce

I think there are lots of ideas for you today:, gift ideas, Retiring list

Thanks for stopping by. May you have a beautiful day. Make someone happy sending them a handmade card filled with love.

Stampin’ Up! Decorated With Happiness Bundle

It’s mid-week… how’s it going? Our week is going well at this end… getting cooler for sure. I need to bring in a couple of plants!!! My card for today uses the Decorated w/ Happiness bundle which I have not used much. I love this bundle – the pine fronds both stamped & die cut; the ornaments; the stars; the sentiments. It fits as lot of my needs :O)

Stampin' Up! Decorated w/ Happiness Bundle

I started by stamping the pine branch in Evening Evergreen ink – and yes, from Decorated with Happiness stamp set and on a Basic White panel. The filler stamp from this set is done in Soft Succulent ink. Next I die cut some of the ornaments using the Decorated Pine Dies from Gold Foil Sheets and chose this ball ornament – also die cut the ‘string’ with the bow from the same Gold Foil Sheets. I adhered the ‘string’ with dots of liquid glue, then stamped the filler image for the ornament in Cherry Cobbler second generation. I needed to ink & stamp twice cuz it wasn’t quite in the right spot 😳 Next I adhered the Gold Foil ornament over the inking. I stamped the greeting using the same Decorated with Happiness stamp set in Cherry Cobbler ink. I added the die cut stars as an afterthought and really liked them. They also come from the Decorated Pine Dies & Gold Foil Sheets. I also stamped the the dots/ asterisk stamp in Soft Succulent ink – just cuz. This Basic White panel was adhered to Cherry Cobbler card stock just a bit larger; dimensionals went on the back and this was adhered to the A2 Soft Succulent card base.

Hint… about die cutting with foil: I designate a separate plate for die-cutting foil papers. They are used less and fewer marks on them. I also choose to use foil that is very close to size to the die. This way, marks are not transferred to the die. I mark my cutting plate so it reminds me! See photo.

Stampin' Up! Foil cutting plate.2

For the inside of my card… Basic White card stock and this fun ornament stamped in Evening Evergreen ink at various levels, then the ‘filler’ stamp in Soft Succulent ink, stamped-off first. This was added with liquid glue to the inside of the card base – and done!

Stampin' Up! Decorated w/ Happiness.3

For the envelope… I used the same pine fronds stamp from Decorated With Happiness stamp set and stamped in Evening Evergreen ink – both on the envelope front and the flap. The filler stamp from the same Decorated With Happiness stamp set was inked with Soft Succulent ink and stamped on the pine fronds. I used the dot/ asterisk stamp from the same stamp set and Soft Succulent ink to add more to the envelope front & flap.

Stampin' Up! Decorated With Happiness Bundle.4

If you would like to order products to make this card, please see the images below. It’s easy to order from my store!!! Card cuts are listed at the end of this post.

Stampin’ Up! has an awesome joining special right now – which makes me ask – why wouldn’t you join now?It’s a fabulous time to join Stampin’ Up! For a limited time, new team members will get even MORE FREE products in their customizable Starter Kit. Sign up between 4–31 October and you’ll get $125 USD | $165 CAD $155 USD | $206 | $135 CAD worth of products + free business supplies + all the fun being a part of our fantastic community! You may do that here.

Stampin' Up!Joining Promotion

My Star-Studded Rewards as a THANK YOU

For each $50 that you order from my online store (before shipping & taxes) and when you add my current Host Code, you will earn 1 STAR Reward.  Orders of $49.99 or below DO NOT earn any rewards.Example $50 = 1 STAR Reward, $100 = 2 STAR Rewards , $150 = 3 STAR Rewards etc.
When you have earned 8 STAR Rewards you will get a FREE product order valued up to $40.00, your choice, and mailed directly to you! Is that a deal or what??? You also earn my monthly Online Class Tutorial of exclusive projects when you place an order. For any order $50 or more you will also receive 1 free gift from me valued up to $10. Remember to use MY current HOST CODE: 4TMA4FZU Click here to go my store.

Stampin' Up! Fitting Florets Suite

You can see cards I have made with the Fitting Florets Suite of products here, here, and here.

Add just the right touch of elegance to any occasion, including Christmas and seasonal celebrations, with the sweet Fitting Florets Collection. From color schemes to sentiments and embellishments to dies, these unique products blend together so that your cards and crafts fit whatever occasion you might need. Send birthday wishes, express your gratitude, or spread Christmas cheer—with so many options to mix and match you’ll be set no matter the celebration all year!

Starting 1 November 2022, customers can order items from the Fitting Florets Collection. All items in the collection can be ordered separately. No limits apply during the customer sales period.

The following exclusive products are only available while supplies last:

  • Framed & Festive Cling Stamp Set (item 160888)*
  • Fitting Florets Designer Series Paper (item 161814)
  • Gold Adhesive-Backed Swirls (item 161822)

The following will be available for purchase in the Mini Catalog starting January 2023:

  • Framed Florets Bundle (item 162407)
  • Framed Florets Photopolymer Stamp Set (item 161815)*
  • Framed Florets Dies (item 160623)
Stampin' Up! Birthday Card Organizer Kit

161056 BIRTHDAY CARD ORGANIZER KIT. $25 USD | $34 CAD

  • Kit includes one 8″ x 10″ (20.3 x 25.4 cm) monthly planner with space to record birthdays each month as well as a pocket sleeve to hold birthday cards.
  • Includes 12 full-size birthday cards, 6 of 2 designs, and 12 coordinating envelopes.
  • Includes Glue Dots, Stampin’ Dimensionals, Adhesive-Backed Embellishments, and Tear & Tape Adhesive
  • Includes die-cut florals and pieces ready for you to use­—no prep work required!
  • Includes sticker sentiments and die-cut labels in Dutch, English, French, and German
  • Coordinating colors: Basic Black, Evening Evergreen, Petal Pink, Sahara Sand, and Soft Succulent
Stampin' Up! Christmas Gifting Kit

60342 CHRISTMAS GIFTING KIT $21 USD | $29 CAD

  • Kit includes 9 tags and 9 gift card holders—3 each of 3 designs
  • Includes the exclusive Christmas Gifting Stamp Set and a Shaded Spruce Classic Stampin’ Spot
  • Sized to fit standard gift cards
  • Coordinating colors: Basic Black, black foil, Mint Macaron, Real Red, Shaded Spruce

Thanks for stopping by.

May you have a beautiful day.

Make someone happy sending them a handmade card filled with love.

Card cuts for today’s project:

Soft Succulent: 4 1/4 x 11 scored at 5 1/2

Cherry Cobbler: 3 5/8 x 4 7/8

Basic White: 3 1/2 x 4 3/4; 4 x 5 1/4

Gold Foil Sheets: 3 x 1 1/2

Stampin’ Up! Fitting Florets Suite for Christmas +

In yesterday’s post I mentioned a SU! box was arriving with some new products – and I’m here to share that with you and a card I made using the products and one or two others. Here’s the card…

Stampin' Up! Fitting Florets Suite.Christmas.1

Just look at that gorgeous framed oval – love! And the gold foil spray & die cut Evening Evergreen leaves – and don’t forget the Fitting Florets DSP! Oh goodness… I began by coloring the berries of the Fitting Florets DSP with my Light Real Red Stampin’ Blends. They were white and I wanted this to be full of color and – well, that’s what I did. This was mounted on a panel of Soft Succulent card stock and added to the same color card base with dimensionals. I added a strip of Real Red card stock for more color, right across the middle. I then did all these die cuts using the Framed Florets Dies: from Gold Foil Sheets, the spray and a couple of leaves; from Evening Evergreen card stock, more small leaves and this stunning oval frame. Before die cutting the Evening Evergreen frame I added Foam Adhesive Sheets to the back so it would be evenly raised. See photos

Stampin' Up! Framed Florets Dies.1
Stampin' Up! Framed Florets Dies.2

I stamped the sentiment from Framed & Festive stamp set in Evening Evergreen ink on a Basic White piece and die cut this with the same oval to create the center portion for the sentiment. Once stamped I adhered this with liquid glue to the center of the frame, then the Evening Evergreen frame to the center of the card. I added most of the die cut pieces with liquid glue to further enhance the frame. Then I tied a bow using the Open Weave Ribbon in Soft Succulent. I then clipped down the middle of each bow & strands to make this fluffy gorgeous bow. This was adhered with glue dots. The final touch was the stunning Gold Adhesive-Backed Swirls that are part of the Fitting Florets Suite of products.

Stampin' Up! Gold Adhesive-Backed Swirls

For the inside I used one of the dies from the Framed Florets Dies that coordinates with one of the flowers in the Fitting Florets DSP to die cut a flower and added it to the bottom of a Basic White panel. I stamped the sentiment from Framed & Festive stamp set (part of the suite!) in Evening Evergreen ink, adhered the panel to the inside of the card base & done!

Stampin' Up! Framed Florets Dies w/ Fitting Florets Dies
Stampin' Up! Framed & Festive Stamp set w/ Fitting Florets DSP


For the envelope, I colored another piece of the same Fitting Florets DSP with Light Real Red Stampin’ Blends and added it to the flap, and trimmed to fit. For the front of the envelope I stamped the sentiment from Framed & Festive stamp set in Evening Evergreen ink.

Stampin' Up! Fitting Florets suite of products

I love the way this turned out as it really shows off some of the die cuts and this stunning frame. Let me share more of the suite of products with you.

Stampin' Up! Fitting Florets DSP, side 1
Stampin' Up! Fitting Florets DSP, side 2
Stampin' Up! Framed & Festive stamp set
Stampin' Up! Framed Florets stamp set
Stampin' Up! Fitting Florets Suite

This could be added to your joining items as a demonstrator – only available right now to demonstrators. As a demonstrator, this can be ordered Oct 4-31, same time frame as the joining promotion 😁 just sayin’ – you may join my team here. It will be available to customers Nov 1.

Stampin’ Up! has an awesome joining special right now – which makes me ask – why wouldn’t you join now?It’s a fabulous time to join Stampin’ Up! For a limited time, new team members will get even MORE FREE products in their customizable Starter Kit. Sign up between 4–31 October and you’ll get $125 USD | $165 CAD $155 USD | $206 | $135 CAD worth of products + free business supplies + all the fun being a part of our fantastic community! You may do that here.

Please use my current host code: 4TMA4FZU and remember I offer Star-Studded Rewards . More about the rewards below :O) As a thank you to my customers I also offer a free item from Stampin’ Up! valued to $10 with your order of $50 and above. Click here to go my store. When the order is over $150, you still receive that free gift from me, but SU! has Stampin’ Rewards that may be used for additional products, so don’t use the host code at that time. If you have questions just let me know. If you would like to be able to order products early from catalogs AND enjoy that 20% discount, join my team now… you may do that here. WooHoo! We have lots of fun and are a creative bunch that encourages & supports one another. Would love to have you. :O)

My Star-Studded Rewards as a THANK YOU

With your order of $50 & above that you order from my online store (before shipping & taxes) and when you add my current Host Code, you will earn 1 STAR Reward.  Orders of $49.99 or below DO NOT earn any rewards.Example $50 = 1 STAR Reward, $100 = 2 STAR Rewards , $150 = 3 STAR Rewards etc.
When you have earned 8 STAR Rewards you will get a FREE product order valued up to $40.00, your choice, and mailed directly to you! Is that a deal or what??? You also earn my monthly Online Class Tutorial of exclusive projects when you place an order. For an order $50 or more you will also receive 1 free gift from me valued up to $10. Remember to use MY current HOST CODE: 4TMA4FZU Click here to go my store.

Happy shopping… Thanks for stopping by.

May you have a beautiful day.

Make someone happy sending them a handmade card filled with love.

Stampin’ Up! Joyful Flurry in Gold & White

Hello again… I couldn’t help it – I played with the Joyful Flurry bundle again. I had an idea about making the Wonderful Snowflakes gold and simply HAD to give it a try. And guess what… it worked. First use the embossing buddy to remove any static. Use the VersaMark ink pad to tap onto the snowflake, sprinkle on gold embossing powder and heat set. I heated from the under side of the snowflake. I did have to do this a couple of times for good coverage.

Stampin' Up! joyful Flurry in Gold & White.1

Next I took a 4 x 5 1/4 piece of Basic White and the Frosted Flurry Dies to make a card front. Some of the snowflakes in this die set cut all the way through, some do not, but create wonderful designs with some cut-outs. I chose one of those, well two of those :O) I figured out the placement of the now gold Wonderful Snowflake, removed it and ran the Basic White panel through the cut & emboss machine. I punched up from the back all the little designs, then cut a piece of Brushed Metallic Gold to put behind the cut-out snowflake, adhering it to the back of the Basic White with Tear n Tape. I adhered the gold Wonderful Snowflake with a dimensional in the center. To create the banner from the Joyful Flurry stamp set, I stamped the sentiment in VersaMark and sprinkled it with gold embossing powder and heat set – again from behind. It seems to create a nicer finish when heating the gold from the back side. I then used a banner die from the Frosted Flurry Dies to make the banner. I had die cut the remaining snowflake but it needed to be trimmed around the middle to be free to add. At this point I sprayed the card front with a Stampin’ Spritzer filled with drops of Frost White Shimmer Paint & rubbing alcohol. I added three Champagne Rhinestone Basic Jewels to the card front. All this was attached to a Thick Basic White A2 card.

Joyful Flurry in Gold & White.2
Stampin' Up! Joyful Flurry in Gold & White.3

For the inside I again used a sentiment from the Joyful Flurry stamp set with VersaMark ink and sprinkled it with gold embossing powder, heat set from the back. I spritzed the panel with the same Frost White Shimmer Paint and rubbing alcohol in the Stampin’ Spritzer. It barely shows in the photo but in person, it does!

Stampin' Up! Joyful Flurry in Gold & white.4

On the envelope, I used the Splatters embossing folder (from Stripes & Splatters) to emboss the flap. For the envelope front, I stamped a snowflake from the Joyful Flurry stamp set in Memento ink, then filled in all the openings with Wink of Stella. The camera does not capture this well :O( And the card was done. Elegant.

Stampin' Up! Joyful Flurry in Gold & White.5

What do you think? do you like the Wonderful Snowflake in Gold embossing powder? I definitely do and may try it in silver embossing powder as well :O).

This stamp bundle – Joyful Flurry and the coordinating Frosted Flurry Dies are in the Jul-Dec 2022 Mini Catalog – as are the Wonderful Snowflakes. The embossing powder, embellishments and embossing folder all all found in the Annual 2022-2023 Catalog. When ordering, please also use my current host code: KJ3MEDQ9 and remember I offer Star-Studded Rewards. More about the rewards below :O) As a thank you to my customers I also offer a free item from Stampin’ Up! item valued to $10 with your order of $50 and above. Click here to go my store. When the order is over $150, you still receive that free gift from me, but SU! has Stampin’ Rewards that may be used for additional products, so don’t use the host code at that time. If you have questions just let me know. If you would like to be able to order products early from catalogs AND enjoy that 20% discount, join my team now… you may do that here. WooHoo! We have lots of fun and are a creative bunch that encourages & supports one another. Would love to have you. :O)

My Star-Studded Rewards as a THANK YOU

For each $50 that you order from my online store (before shipping & taxes) and when you add my current Host Code, you will earn 1 STAR Reward.  Orders of $49.99 or below DO NOT earn any rewards.Example $50 = 1 STAR Reward, $100 = 2 STAR Rewards , $150 = 3 STAR Rewards etc.
When you have earned 8 STAR Rewards you will get a FREE product order valued up to $40.00, your choice, and mailed directly to you! Is that a deal or what??? You also earn my monthly Online Class Tutorial of exclusive projects when you place an order. For any order $50 or more you will also receive 1 free gift from me valued up to $10. Remember to use MY current HOST CODE: KJ3MEDQ9 Click here to go my store.
HAPPY SHOPPING!

Stampin' Up! Weekly Deals.week 3
  • New products added each week on 1, 8, 15, and 22 September.
  • Promotion ends 28 September.
  • Product options and discounts vary based on inventory availability.
  • All order types qualify for this promotion (customer, demonstrator, workshop, and online).
  • Discounted items can be added to a Starter Kit.
  • Get the most up-to-date product information on the online store beginning 1 September.
  • Please visit my online store here to learn the deals of the week – or see below!
Stampin' Up! Perfect Partners

stamp sets and dies—and that’s what the Perfect Partners promotion is all about! 

We created six new dies that coordinate with stamp sets in the 2022–2023 Annual Catalog and the July–December 2022 Mini Catalog. These coordinating dies will only be available during this promotion and will not be offered in any catalog. 

AVAILABLE 1–30 September 2022

Starting 1 September 2022, customers can order these fun and festive dies and/or bundles. Dies coordinate with stamp sets from the 2022–2023 Annual Catalog and the July–December 2022 Mini Catalog. These six new dies sets are only available for a limited time. Save 10% off when purchasing the bundle.

Items available during this promotion can be added to demonstrator, customer, workshop, and online orders.

Dies are exclusive to this promotion and are only available while supplies last. No quantity limits apply during the customer sales period.

Qualifying orders qualify for Stampin’ Rewards. Items can be added to a starter kit.

Thanks for stopping by.

May you have a beautiful day.

Make someone happy sending them a handmade card filled with love.

Inspire. Create. Share.

Stampin’ Up! Textured Chic Specialty Paper for the Happy Inkin’ Thursday Blog Hop

Happy Thursday! I’ve had such fun this week creating with the Seasons of Chic Bundle and the Textured Chic Specialty Paper. One of the best parts is the set is so versatile: summer with shells, fall with leaves, winter with snowflakes and MORE. It’s a timeless set! So here we are for the Blog Hop…

The them challenge is Designer Series Paper…and I’ve chose the Textured Chic Specialty Paper

And here’s my card for today…

Seasons of Chic. Winter.1

Isn’t it amazing there is so much variety in this DSP (Textured Chic Specialty Paper) and stamp bundle: Seasons of Chic? And what I’ve done here is add snowflakes from two sources: the large one is Wonderful Snowflakes; the other two are dies in the Chic Dies. I’ve die cut them from the paper of the Wonderful Snowflakes because I liked the shine of the paper :O) Pretty cool, right?! In the center of each of the snowflakes is a Pastel Pearl.

Textured Chic Specialty Paper is layered on Basic White card stock, adhered with liquid glue. That has dimensionals and is adhered to the Basic Gray card base. Pretty simple card front. Just the same – beautiful.

Season of Chic. Winter, inside

For the inside, I had a piece of trimmed Textured Chic Specialty Paper on the table and adhered it to the Basic White panel. I simply added this to the inside of the card and loved the simplicity.

For the envelope… more of the same Textured Chic Specialty Paper for the flap, then the front was stamped with snowflakes from the Seasons of Chic stamp set in Basic Gray – two of which were stamped off once.

Seasons of Chic. Winter.3

More info is below about purchasing these items. Still, the hop is a fun way to get some ideas about creating. You may click on a name or use the next button to advance to Amy Koenders. Have fun hopping!

Amy Koenders

Mary Deatherage

Kristi Gray

Sue Prather

Karen Finkle

Akiko Sudano

Karen Ksenzakovic

Tara Carpenter

Terry Lynn Bright ~ you are here 👍

Products to make this card are from the 2022 – 2023 Annual Catalog. If you do not have a demonstrator and need catalogs please reach out to me – happy to send one to you. The other two catalogs available right now are the Jul-Dec 2022 Catalog and the Sale-a-bration Catalog which shows all the FREE items items offered by Stampin’ Up! in Jul-Aug 31. When ordering, please also use my current host code: YM6ZTUJE. I offer my customers a free item from Stampin’ Up! item valued to $10 with your order of $50 and above. Click here to go my store. When the order is over $150, you still receive that free gift from me, but SU! has Stampin’ Rewards that may be used for additional products, so don’t use the host code at that time. If you have questions just let me know. If you would like to be able to order products early from catalogs AND enjoy that 20% discount, join my team now… you may do that here. WooHoo! We have lots of fun and are a creative bunch that encourages & supports one another. Would love to have you. :O)

Star Special kicking off the new Jul-Dec 2022 Mini Catalog

OK – DOUBLE STAR REWARDS ended a few days ago. I’m sorry you missed the deal. BUT – With the start of this new catalog I am beginning a STAR REWARDS program ~ YAY! This will continue from this day forth and below is the information about those customer rewards.

Here’s how my STAR REWARDS work:

  • For each $50 that you order from my online store (before shipping & taxes) and when you add my current Host Code, you will earn 1 STAR Reward.  Orders of $49.99 or below DO NOT earn any rewards.
    • Example $50 = 1 STAR Reward, $100 = 2 STAR Rewards, $150 = 3 STAR Rewards etc.
  • When you have earned 8 STAR Rewards you will get a FREE product order valued up to $40.00, your choice, and mailed directly to you! Is that a deal or what???
  • You also earn my monthly Online Class Tutorial of exclusive projects when you place an order.
  • For any order $50 or more you will also receive 1 free gift from me valued up to $10.

And remember too, during this time of Sale-a-bration, for every $50 order from any catalog, you’ll earn free Sale-a-bration goodies from Stampin’ Up!

Remember to use MY current HOST CODE: YM6ZTUJE Click here to go my store.

HAPPY SHOPPING!!

Thanks for stopping by. May you have a beautiful day.

Make someone happy sending them a handmade card filled with love.

Inspire. Create. Share.

Stampin’ Up! C’mas Banners Bundle for the Happy Inkin’ Thursday Blog Hop

Happy, happy Thursday! We have a fun creative challenge today for the hop and you may have come from Tara or just hopping in here. Either way this is what I’ve created for the hop.

C’mas Banners Bundle. 1

I chose to really ‘stick with’ the sketch challenge today 😏 and had lots of fun doing it. The DSP for the background is Sweetest Christmas 12 x 12 DSP and I edged it with narrow strips of Pool Party. I built on that with lots of die cuts using Decorated Pine Dies for the large pine fronds, then Christmas Banners Dies for the rest of the die cuts. I wanted to use all the colors in the DSP. The sentiment banner is stamped with the Christmas Banners stamp set in Sweet Sorbet then die cut with the same dies. I added it to the card front with dimensionals under the far ends of the banner, then slipped all the other die cuts in under and held in place with liquid glue. The large pine fronds die cut in Garden Green served as the background – as mentioned using the Decorated Pine Dies. The lower pine fronds are from the Christmas Banner Dies. Next layer is the stamped in Pool Party ink leaves (and I did three) and die cut with the Christmas Banner Dies. I used Pear Pizzazz card stock to die cut the single layer of leaves – also from the Christmas Banner Dies. For the berry spray, the branches were die cut from Soft Suede card stock (again 3). The berries are stamped in Real Red ink and die cut with the C’mas Banners Dies then adhered with dabs of liquid glue to the variousSoft Suede branches. Lastly I added Adhesive Backed Seasonal Sequins: 3 in Garden Green above the banner and 2 in white below the banner.

C’mas Banners Bundle, inside

For the inside of the card… I stamped a leaf bunch from the C’mas Banners stamp set in stamped off Pear Pizzazz ink, then over that with a pine spray from the same stamp set in Garden Green ink. I stamped the Merry in Real Red ink and the Christmas in Sweet Sorbet. Can you tell the difference? I like the contrast! This Basic White panel was adhered to Pool Party card stock then into the Thick Basic White card base ~ and the card was complete.

Christmas Banners Bundle.3

For the envelope, another bit of the same Sweetest Christmas 12 x 12 DSP on the flap and that was it. While this card has several die cuts, it is not heavy and I do not think will need extra postage – and that’s a PLUS!

Now HOP on to the next by clicking the ‘next’ link or by clicking on a name. Enjoy!

Amy Koenders

Mary Deatherage

Kristi Gray

Karen Finkle

Karen Ksenzakovic

Tara Carpenter

Terry Lynn Bright ~ you are here 😁

Star Special kicking off the new Jul-Dec 2022 Mini Catalog

With the start of this new catalog I am beginning a DOUBLE STAR REWARDS program ~ YAY! This begins today and goes through Thursday Jul 7! Today is Jul 7 – and the LAST for DOUBLE STAR REWARDS!

Here’s how my STAR REWARDS work for now:

  • For each $50 that you order from my online store (before shipping & taxes) and when you add my current Host Code, you will earn 2 STAR Rewards.  Orders of $49.99 or below DO NOT earn any rewards.
    • Example $50 = 2 STAR Rewards, $100 = 4 STAR Rewards, $150 = 6 STAR Rewards etc.
  • When you have earned 8 STAR Rewards you will get a FREE product order valued up to $40.00, your choice, and mailed directly to you!
  • You also earn my monthly Online Class Tutorial of exclusive projects.
  • For any order $50 or more you will also receive 1 free gift from me valued up to $10.

And remember too, during this time of Sale-a-bration, for every $50 order from any catalog, you’l earn free Sale-a-bration goodies from Stampin’ Up!

Remember to use MY current HOST CODE: YM6ZTUJE Click here to go my store.

HAPPY SHOPPING!!

Products to make this card are from the Jul-Dec 2022 Mini Catalog and Sale-a-bration Catalog. If you do not have a demonstrator and need those catalogs or an Annual Catalog please reach out to me (the 2022-2023 AC) – happy to send one to you. When ordering, please also use current host code: YM6ZTUJE. I offer my customers a free item from Stampin’ Up! item valued to $10 with your order of $50 and above. Click here to go my store. When the order is over $150, you still receive that free gift from me, but SU! has Stampin’ Rewards that may be used for additional products, so don’t use the host code at that time. If you have questions just let me know. If you would like to be able to order products early from catalogs AND enjoy that 20% discount, join my team now… you may do that here. WooHoo! We have lots of fun and are a creative bunch that encourages & supports one another. Would love to have you. :O)

Thanks for stopping by. May you have a beautiful day.

Make someone happy sending them a handmade card filled with love.

Inspire. Create. Share.