Unknown's avatar

About TL's Bright Spot

I love to be creative - in the garden, crafting, and in leadership roles. There is something wonderful that happens when we design something new and share it with others. It's fun and makes everyone happy.

Stampin’ Up! Seasonal Sale and Joining Special

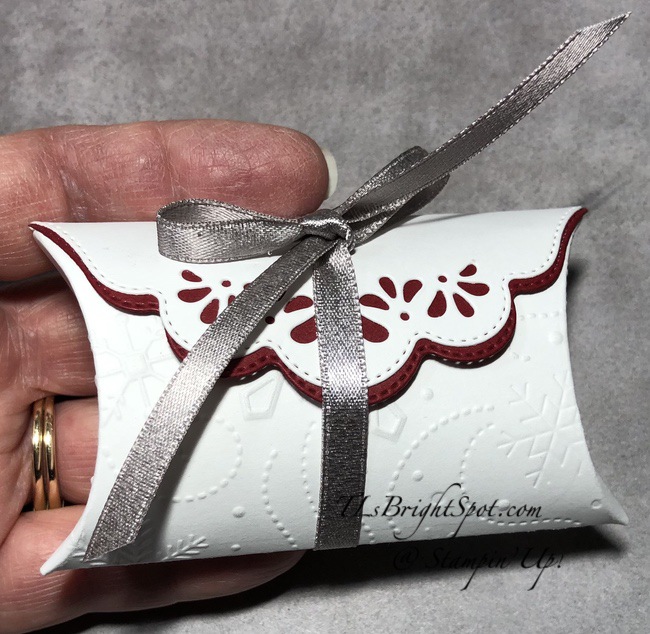
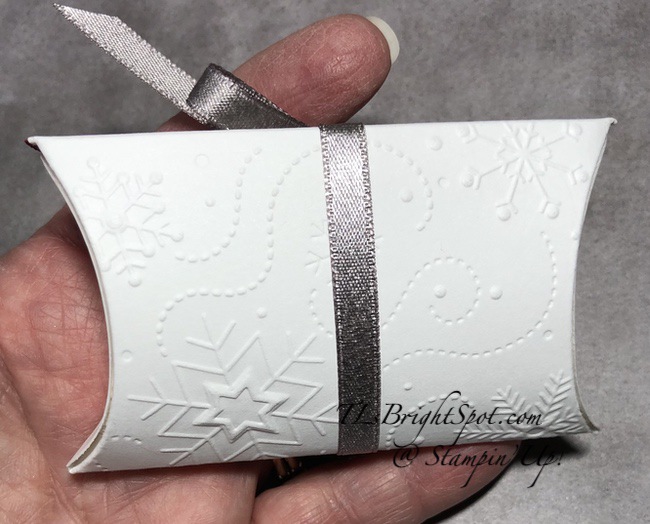
Hi everyone! Did you enjoy the Inkin’ Krew Blog Hop yesterday? Fun projects, right? Here’s what I’m encouraging and sharing with you: join to become a Stampin’ Up Demonstrator. You may do that with me – here. Joining during the month of November is $75 to create your own ‘starter kit’ ~ but you receive $125 worth of products that you get to choose. When you join, that’s free shipping for that one time, and I must say, I haven’t seen a $75 joining deal like this in my time with Stampin’ Up! This is a sweet package. Start with Savings is what they’re calling the joining promotion.

Also during a very specified time in November (16-18) is a promotion of products from the 2021-2022 Annual Catalog. Joining during that period will bring more savings, more bargains your way. I cannot encourage you enough to make good use of these two promotions. Join with me during those specified days – Nov 16-18 and get bargains galore. Again… you may do that with me – here. As a demonstrator you will continue to enjoy 20-25% off every order through Stampin’ Up! If you join Nov 16, once you have your new Demonsrator ID #, you can order even more of these amazing products at an additional 20% off – through the 18th of November.

Below are the details of the November 16-18 promotion.

PROMOTION PERIOD: 16–18 NOVEMBER 2021

  • The sale will run for three days only.
  • The discount includes 10% off cardstock, 15% off ink pads (excluding ink pad bundles and third-party pads), and 20% off dies.
  • The discount applies to products featured in the 2021–2022 Annual Catalog only. Products from the July–December 2021 Mini Catalog are not included.
  • The sale is available through both online store purchases and demonstrator orders.

ORDER PERIOD

  • Phone: 16 November 2021 at 7:00 AM (MT) to 18 November 2021 at 6:50 PM (MT)
  • Online: 16 November 2021 at 12:00 AM (MT) to 18 November 2021 at 11:50 PM (MT)

Click on the flyer at right & it will show the list of the sale items & sale prices.

11.16.21_DSHAREABLE_TH_SEASONALSALE_NA
11.16.21_FLYER_TH_SEASONALSALE_NASPUK

Not have a demonstrator so you can order? If you do not have a demonstrator and need an Annual 2021 Catalog OR Jul-Dec 2021 Mini Catalog, please reach out to me – happy to send one to you. Please also use my current host code when ordering: 62EHPGHC I offer my customers a free item from Stampin’ Up! valued to $10 with your order of $50 and above. Click here to go my store. When the order is over $150, you still receive that free gift from me, but SU! has Stampin’ Rewards that may be used for additional products, so don’t use the host code at that time. If you have questions just let me know. If you would like to be able to order products early from catalogs AND enjoy that 20% discount, join my team now… you may do that here. We have lots of fun and are a creative bunch that encourages & supports one another. Would love to have you! And… as a reminder – during the month of November only, joining is $75 and the products with joining are $125 worth of product ~ your choice too! Just sayin’, I haven’t seen this kind of deal since joining as as demo several years ago. This is the time!

Stampin’ Up Wintry 3D and Heartfelt Wishes

Hi folks – it’s time to hop w/ Amy’s Inkin’ Krew Blog Hop 👍 The theme is a Christmas and I have chosen to do a card and a coordinating gift package with the Pretty Pillow Dies.

These were fun to create as a duo ‘package’.Let mer tell you how this was done…

Card Basics:

  • Smoky Slate card base 4 1/4 x 11 scored at 5 1/2
  • Layer Cherry Cobbler card stock 4 1/8 x 5 3/8
  • Run a Basic White panel (4 x 5 1/4) through the Wintry 3D snowflake embossing folder. This panel is wider than the folder, therefore line it up and run it through again so it looks as though it’s a full size EF. Adhere this panel to the Cherry Cobbler piece

Decorate:

  • Cut a length of the Glittered Organdy Ribbon in Black. Use Seal+ to adhere to the snowflake front
  • Cut a length of the 7/8 wide Textured Ribbon in Smoky Slate, put dimensionals on the back and attached over the Organdy Ribbon.
  • Add a Wonderful Snowflake with a glue dot.
  • Stamp the sentiment in Cherry Cobbler ink from Heartfelt Wishes stamp set on a Basic White scrap. Fussy cut. Add Dimensionals in several places and attache.
  • Add Holiday Rhinestone Basic Jewels in dark red ~ and the card front is done!
inside

The inside of the card was kept super simple intentionally. Cherry Cobbler card stock cut at 4 1/8 x 5 3/8 is added to the inside of the card base. On top of that is Basic White cut to 4 x 5 1/4. A 1/2″ strip of Regals 6×6 DSP in Cherry Cobbler was added at the bottom of the panel. And that was it…

Wintry 3D EF & Heartfelt Wishes card & envelope

For the envelope I used the Wintry 3D Embossing Folder to dry emboss the flap ~ that was it. I like the simplicity & the texture & the layers the entire look of the card & envelope create together. Hope you like as well!

The little gift package is created with Thick Basic White card stock, die cut with the Pretty Pillow Dies, then dry embossed with the Wintery 3D snowflake Embossing Folder. Interestingly, this does not cover the full tab that is folded in, but it didn’t seem necessary to run it through the EF again. I did die cut another frontal piece from Cherry Cobbler card stock to fully show the delicate design on the front. That was adhered with liquid glue. I then put the side tabs in and used liquid glue to adhere them as well. I tied a length of Shimmer Ribbon in Gray Granite around the package and secured it with a bow. It can easily slide off tomopen.

The card & this little gift package are perfect for a beautiful set of earrings – hint, hint! Of course, a delicate necklace might fit nicely too :O) Just sayin!

During the month of November is a perfect time to join as a demonstrator. Stampin’ Up! has a promotion I haven’t seen them do before: $75 to join, yet get $125 worth of product at the same time… shipped free! This is a really big, big deal. Join my team now… you may do that here.

If you would like to continue with the hop, please use the ‘next’ button below or click on the name. This is a fun hop – enjoy all the wonderful projects!

  1. Karen Ksenzakovic
  2. Tara Carpenter
  3. Jillian Good
  4. Akiko Sudano
  5. Connie Troyer
  6. Jaimie Babarczy
  7. Mary Deatherage
  8. Sue Prather
  9. Terry Lynn Bright ~ you are here
  10. Amy Koenders

Not have a demonstrator so you can order? If you do not have a demonstrator and need an Annual 2021 Catalog OR Jul-Dec 2021 Mini Catalog, please reach out to me – happy to send one to you. Please also use my current host code when ordering: 62EHPGHC I offer my customers a free item from Stampin’ Up! valued to $10 with your order of $50 and above. Click here to go my store. When the order is over $150, you still receive that free gift from me, but SU! has Stampin’ Rewards that may be used for additional products, so don’t use the host code at that time. If you have questions just let me know. If you would like to be able to order products early from catalogs AND enjoy that 20% discount, join my team now… you may do that here. We have lots of fun and are a creative bunch that encourages & supports one another. Would love to have you! And… as a reminder – during the month of November only, joining is $75 and the products with joining are $125 worth of product ~ your choice too! Just sayin’, I haven’t seen this kind of deal since joining as as demo several years ago. This is the time!

Thanks for stopping by. May you have a beautiful day. Nothing beats a handmade card/ gift!

Inspire. Create. Share.

Stampin’ Up! Blessings of Home

Hello again stamping friends. It’s Friday and almost the weekend. I hope you have some fun plans made. I ha ve a pretty couple of cards for you today, made w/ Blessings of Home Suite of products that will be available in the Jan-Jun 2022 Mini Catalog. I was able to order this early as I am attending the OnStage@Home convention of Stampin’ Up! Last years convention was also virtual and it was awesome… I was inspired by speakers & projects and excited about being an Independent Stampin’ Up! demonstrator. This year I expect more of the same. :o)

Before I share my cards with you, Stampin’ Up! has a promotion going on now that beats anything I’ve seen. Join with me to be a demonstrator for $75 and get $125 worth of SU! products that you choose yourself! Once you join… 20% off every purchase you make. You may do that here. There are several advantages to being a demonstrator, besides the discount on every order. Meeting other demonstrators and having a supportive crafting, like-minded group of folks is one of the best advantages there is.

Now for the cards… :O)

This collection of products has – once again – gorgeous Designer Series Paper, Blessings of Home stamp set & coordinating Flowers of Home Die set, Denim Ribbon & Classic Matte dots. For both cards, the card cuts & instructions are the same: one is ‘landscape’ and one is ‘portrait’. I’ve used the emboss-resist technique but incorporated the Stampin’ Blends on one of the cards. On the landscape card I added the Garden Gems from Eden’s Garden suite and on the. ‘portrait’ card are the new Classic Matte Dots from the Heart & Home Collection.

Card basics:

  • Cut card base: portrait card is 4 1/4 x 11 scored at 5 1/2 (Misty Moonlight); landscape card is 8 1/2 x 5 1/2 scored at 4 1/4 (Garden Green).
  • Layer 1: Kraft 6×6 paper/ Pale Papaya ~ 4 x 5 1/4 adhered directly to the card base
  • Layer 2: Heart & Home Designer Series paper ~ 3 3/4 x 5. (Be aware of the direction of the paper!) Adhere this directly to Layer 1.
  • Layer 3: 2 3/4 x 4 ~ Kraft 6×6 paper and Pale Papaya. This layer will eventually be on dimensionals in the center of the card.
  • Layer 4: decorative panel 2 1/2 x 3 3/4 ~ Basic White card stock

Decorating the top panel:

  • Stamp the bouquet image from Blessings of Home stamp set in VersaMark on the Basic White panel. Note the direction of the panel! One bouquet will be fully seen, while the other is a partial stamp.
  • Sprinkle with Gold Embossing Powder & heat set.
  • Once cooled, with a Blending Brush, add color to the panel, Pale Papaya ink for the flower sections and Soft Succulent ink for the leaf sections. Use a soft cloth to rub any excess ink from the embossing.
  • Add this panel with liquid glue to Layer 3.
  • On the ‘portrait’ card add a length of Denim Ribbon around Layers 3 & 4, adhering in back with Seal+. Slip another length under the Denim Ribbon and tie a knot. Add a glue dot under the knot to keep it in place.
  • Put dimensionals on the back of these two layers & add to the center of the card.
  • Make a bow with the Simply Elegant Trim in Gold and attach to each card front with a glue dot.

The inside…. I treated each card differently for the inside, therefore I’ll give the directions separately :O)

Blessings of Home card class. landscape inside

For this ‘landscape’ card I cut a panel of Pale Papaya 4 x 5 1/4 and adhered it to the inside of the card. I stamped the large floral bouquet from Blessings of Home stamp set in VersaMark on a panel of Basic White 21/2 x 3 3/4. I sprinkled Gold Embossing Powder over it and heat set. I used the Emboss Resist technique once more to add color to the bouquet: Pale Papaya on the flowers and Soft Succulent on the leaves and surrounding area, covering most of the panel. I polished the panel with a soft cloth to remove any excess inks on the embossing. I then added more color with Stampin’ Blends: Pale Papaya & Cinnamon Cider for the flowers and Soft Succulent for the leaves. This added more dimension to this bouquet and I really liked it.

On a 2 1/4 x 3 3/4 panel of Basic White I stamped the sentiment from Blessings of Home in VersaMark, sprinkled it with more Gold Embossing Powder and heat set. I again used the emboss-resist technique with a Blending Bush to enhance the sentiment with Pale Papaya ink, then around the edges with Soft Succulent ink. I rubbed with a soft cloth to remove any excess ink from the embossing. Both panels were added to the inside with liquid glue ~ and the card was done.

Blessings of Home card class. portrait inside

For the portrait card I stamped the two sentiments from Blessings of Home stamp set in VersaMark ink on a Basic White panel 4 x 5 1/4; sprinkled Gold Embossing Powder over and heat set. Again using the emboss-resist technique i added the Soft Succulent with a Blending Brush, enhancing the sentiment. I used a soft cloth to remove excess ink from the embossing and adhered tghe panel to the inside of the card. Done!

This is just a lovely feminine stamp set with coordinating dies. I’m pleased with these cards. Now to do a card with the larger floral bouquet as the main focal point… yes! And the dies indicate I could do a wreath card as well – yay!

Not have a demonstrator so you can order? If you do not have a demonstrator and need an Annual 2021 Catalog OR Jul-Dec 2021 Mini Catalog, please reach out to me – happy to send one to you. Please also use my current host code when ordering: 62EHPGHC I offer my customers a free item from Stampin’ Up! valued to $10 with your order of $50 and above. Click here to go my store. When the order is over $150, you still receive that free gift from me, but SU! has Stampin’ Rewards that may be used for additional products, so don’t use the host code at that time. If you have questions just let me know. If you would like to be able to order products early from catalogs AND enjoy that 20% discount, join my team now… you may do that here. We have lots of fun and are a creative bunch that encourages & supports one another. Would love to have you! And… as a reminder – during the month of November only, joining is $75 and the products with joining are $125 worth of product ~ your choice too! Just sayin’, I haven’t seen this kind of deal since joining as as demo several years ago. This is the time!

Heart & Home OnStage Project Collection – see photos below…

I did not show the Denim Ribbon as it is on the Misti Moonlight card above.

These will be available in the Jan-Jun 2022 Mini Catalog :o) You can clearly see I used the Classic Matte Dots on the one project today 😏

Stampin’ Up! Painted Christmas Happy Inkin’ Thursday Blog Hop

Hi folks ~ it’s time for another Happy Inkin’ Thursday Blog Hop. If you’ve come from the talented Tara Carpenter, welcome to my blog. The theme this week is Christmas and I’ve chosen to do a sort of flap card that can also be used for a gift card. It’s super easy to do and the Painted Christmas DSP is perfect on the card.

May be an image of text that says 'Happy Inkin' Thursday Blog Hop november 4 Theme Challenge Christmas'

Painted Christmas Flap fold.1

Aren’t the colors wonderful in this DSP? I love all the shades of green with the sparkle of Red Rhinestone Basic Jewels. Notice how the tip of the flap goes into the corner? If you decide to insert a gift card, simply leave the card front free & not insert it into the corner piece. It works just as easily either way. Now for directions…

Basics:

  • Cut the card base to 4 1/4 x 11 and score at 5 1/2, then remove a panel 2 3/4 x 4 1/4. Save this panel for the flap. 🙂 I used Evening Evergreen for this. Cut a 2″ square then trim it diagonally point to point and set it aside.
  • Cut the next layer: 2 5/8 x 4 1/8 ( cut 2), 4 1/8 x 5 3/8 for the inside. I used Pear Pizzazz for this step.
  • Cut DSP panels: 2 1/2 x 4 (cut 2 coordinating pieces). I used Painted Christmas DSP and simply turned one of the panel to the other side.
  • Stamp the sentiment on a Basic White piece with Garden Green ink and the Christmas to Remember stamp set. Die cut the panel with the Seasonal Labels Dies.
  • Stamp leaves from the Christmas Season stamp set, both in Pear Pizzazz and Soft Succulent inks on Basic White scraps. Die cut with the Seasonal Labels Dies.
  • Stamp the inside Basic White panel with Real Red ink using the Christmas to Remember stamp set, centering the sentiment. Keep in mind the placement for the sentiment as it needs to ‘hide behind’ the front flap of the card.
  • Stamp the envelope while you’re at it – so all the stamping is done. I again used Real Red ink and the sentiment from Christmas to Remember stamp set.

Now let’s put this together…

  • Adhere the Pear Pizzazz panels to the card: front panel, flap panel and the inside of the card.
  • Adhere the DSP panels: front panel & the flap panel. Remember to reverse one side for contrast.
  • Adhere the inside sentiment panel.
  • Adhere the diagonal panel (Evening Evergreen) to the lower right corner with Tear n Tape cut in half lengthwise. Attach the Tear n Tape to the bottom of the diagonal and the right side. Because of the layers this piece needs to be held firmly in place, bottom and side, but still allow the flap to be inserted. Remember if you do not want to insert the flap it can be used for a gift card. You also do not have to add this piece!
  • Add the flap panel to the front, centering it. This will be about 1/2″ from the fold and 3/4″ from the top. I use my grid paper to keep things straight.
  • Attach the front sentiment with dimensionals. Add the die cut leaves with liquid glue. I slipped one under the front sentiment. The other I attached to the banner itself: glue on the portion on the banner & dimensionals on those off the banner.
  • Add three Red Rhinestone Jewels to the flap.This added color just brings the card to life!
Painted Christmas Flap Fold.2

You can see here that I die cut another of the fronds and added it to the side of the sentiment. It brings the design of the DSP inside and brings the theme all together. I attached another Red Rhinestone Basic Jewel to bring more glam to the inside ~ and love it!.

Painted Christmas Flap Fold.3

I added another piece of the Painted Christmas DSP to the envelope flap & trimmed it to fit. And the Merry Christmas sentiment was stamped in the beginning when all stamping was done.

What do you think? Fun, easy card and it could be created in multiples if you wanted to. Change the card base, change the DSP, change the sentiment, leave the diagonal panel for the gift card or don’t add it. Lots of options. And there’s no waste – you use all the pieces of the original cut of the card base ~ another plus!

Not have a demonstrator so you can order? If you do not have a demonstrator and need an Annual 2021 Catalog OR Jul-Dec 2021 Mini Catalog, please reach out to me – happy to send one to you. Please also use my current host code when ordering: 62EHPGHC I offer my customers a free item from Stampin’ Up! item valued to $10 with your order of $50 and above. Click here to go my store. When the order is over $150, you still receive that free gift from me, but SU! has Stampin’ Rewards that may be used for additional products, so don’t use the host code at that time. If you have questions just let me know. If you would like to be able to order products early from catalogs AND enjoy that 20% discount, join my team now… you may do that here. We have lots of fun and are a creative bunch that encourages & supports one another. Would love to have you!

Now it’s time to move on to see all the wonderful creations this week. You may click on the name or use the next button to go to Amy Koenders.

Amy Koenders

Mary Deatherage

Kristi Gray

Jaimie Babarczy

Sue Prather

Karen Finkle

Akiko Sudano

Karen Ksenzakovic

Tara Carpenter

Terry Lynn Bright

Thanks for stopping by. May you have a beautiful day. Nothing beats a handmade card.

Inspire. Create. Share.

Stampin’ Up! Order Eden’s Garden

Whoa… Eden;s Garden is such a beautiful set – a suite of products: stamp set & coordinating dies, Designer Series Paper, Jewels/ gems. Let’s take a peek at some of the cards I’ve created with this set.

Isn’t it fun to see the photos all together? This gives you a true idea of the gorgeous papers, stamp set & dies. Remember this stamp set & dies will be in the Jan-Jun 2022 catalog and this is premier preview so you can start playing now. The Designer Series Paper, gems are available only while supplies last! Should I repeat that? Papers and gems are available only while supplies last.

These cards do not show all the papers in the Designer Series Paper pack, nor do they show the Cotton Paper that is fun to play with.

And if you have questions about Eden’s Garden Collection, feel free to contact me for more information.

ITEMDESCRIPTIONPRICELIMIT
157823Also available in French (157826).EDEN’S GARDEN CLING STAMP SET Early-release product from the January–June 2022 Mini Catalog. 10 cling stampsSuggested clear blocks: a, b, dCoordinates with Eden Dies$23.00 USD
$32.00 CAD  
1
157831EDEN DIESEarly-release product from the January–June 2022 Mini Catalog.5 diesLargest die: 5-1/4″ x 3-7/8″ (13.3 x 9.8 cm)Coordinates with Eden’s Garden Cling Stamp Set$35.00 USD
$48.00 CAD
1
157832Also available in French (157833).EDEN’S GARDEN BUNDLE Includes the Eden’s Garden Cling Stamp Set and Eden Dies; early-release product from the January–June 2022 Mini Catalog.Includes the Eden’s Garden Stamp Set and Eden Dies (at a 10% discount).$52.00 USD
$72.00 CAD
1
159996EVER EDEN 12″ X 12″ (30.5 X 30.5 CM) SPECIALTY DESIGNER SERIES PAPER Exclusive specialty Designer Series Paper; available only during the Eden’s Garden promotion.12 sheets: 2 each of 6 double-sided designsAcid free, lignin freeEvening Evergreen, gold foil, Soft SucculentOnly available while supplies last.$15.00 USD
$20.00 CAD
2
159997EVER EDEN 12″ X 12″ (30.5 X 30.5 CM) COTTON PAPERExclusive cotton paper; available only during the Eden’s Garden promotion.10 sheets: 5 each of 2 colorsEvening Evergreen, Soft SucculentOnly available while supplies last.$8.00 USD
$11.00 CAD
2
159277GARDEN GEMSExclusive embellishments; available only during the Eden’s Garden promotion.140 adhesive-backed gems.Round: 3 mm, 4 mm. Marquise: 8 x 4 mm.Cherry Cobbler, Soft SucculentOnly available while supplies last.$7.00 USD
$9.50 CAD
2
160849Also available in French (160850).EDEN’S GARDEN COLLECTION The entire exclusive, early-release collection!Stems, sprigs, berries, and twigs abound in the beautiful and bountiful Eden’s Garden Collection! Explore the elegance of Eden with this exclusive, early-release collection. Only available while supplies last. Eden’s Garden Bundle (10% off)Ever Eden 12″ x 12″ (30.5 x 30.5 cm) Specialty Designer Series PaperEver Eden 12″ x 12″ (30.5 x 30.5 cm) Cotton PaperGarden Gems$82.00 USD
$112.50 CAD
1

Mini Catalog, please reach out to me – happy to send one to you. Please also use my current host code when ordering: 62EHPGHC I offer my customers a free item from Stampin’ Up! item valued to $10 with your order of $50 and above. Click here to go my store. When the order is over $150, you still receive that free gift from me, but SU! has Stampin’ Rewards that may be used for additional products, so don’t use the host code at that time. If you have questions just let me know. If you would like to be able to order products early from catalogs AND enjoy that 20% discount, join my team now… you may do that here. We have lots of fun and are a creative bunch that encourages & supports one another. Would love to have you!

Thanks for stopping by. May you have a beautiful day. Nothing beats a handmade cared!

Inspire. Create. Share.

Stampin’ Up! Snowman and Tree Christmas Tags

Hi Folks! How’s your Sunday so far? We’re really just getting started here on the East coast. After the gusts of wind and rain, today might be peaceful, weather-wise. Today’s project is kinda fun – Christmas tags! Does it seem too early? Well, not really, it’s less than eight (8) weeks away! YIKES! And today is Trick or Treat Day – quite a contrast to Christmas. We’ll see lots of goblins and vampires today. I love our neighborhood – lots of kids around. 🤗

Today’s post…

Snowman & Tree C’mas Tags

Cute, right? All the tags have a second panel that is retired DSP from Sale-a-bration. What did I do here…

  • Basic White card stock cut 4 1/4 x 11, then trimmed each one to 2 x 4 1/4; DSP same process
  • Punch each top with the Delightful Tag Topper Punch, including the DSP panel behind it
  • Use a sponge dauber & Sahara Sand ink to color the edges of all Basic White tags
  • For the snowman…
    • stamp the sentiment from Encircled in Warmth in Evening Evergreen ink
    • stamp the snowman from Snowman Season in Evening Evergreen ink
    • color the scarf with Real Red marker; the nose with Pumpkin Pie marker – this doesn’t bleed through!
    • thread ribbon through… I used both red & white crochet thread – about 8 1/2′ long
  • For the trees
    • I stamped the tree from Perfectly Plaid stamp set in Evening Evergreen ink, then punched it out with the Pine Tree Punch
    • I added various widths of DSP (Peaceful Prints) to the bottom of the tag, then added the tree – on dimensionals
    • The last step was to stamp the sentiment from Perfectly Plaid stamp set in either Real Red ink or Evening Evergreen. The red trees were punched from the retired Sale-a-bration DSP, Peaceful Prints
    • The stars on these trees came from Gold Foil or the white foil from the Wonderful Snowflakes and die cut with Stitched Stars Dies
    • There are two stamped tags with trees – and I probably should replace these so the trees are all using the Pine Tree Punch.. but… the stamped trees came from Evergreen Elegance stamp set and were stamped in Evening Evergreen ink. I added Red Rhinestone Jewels to one of the trees and dots of Shimmery Crystal Effects to the tallest tree. You MUST let this dry throughly!!!

And that’s it… a fun project you could get your kids doing too. In lieu of peaceful Prints DSP I highly recommend Tidings of Christmas 6×6 DSP, Gingerbread & Peppermint 6×6 DSP, Painted Christmas DSPSweet Stockings DSP. You may need to change up the inks to coordinate with those papers, but this would totally work :O) I hope you enjoyed my project today.

Not have a demonstrator so you can order? If you do not have a demonstrator and need an Annual 2021 Catalog OR Jul-Dec 2021 Mini Catalog, please reach out to me – happy to send one to you. Please also use my current host code when ordering: 26QYRFXB I offer my customers a free item from Stampin’ Up! item valued to $10 with your order of $50 and above. Click here to go my store. When the order is over $150, you still receive that free gift from me, but SU! has Stampin’ Rewards that may be used for additional products, so don’t use the host code at that time. If you have questions just let me know. If you would like to be able to order products early from catalogs AND enjoy that 20% discount, join my team now… you may do that here. We have lots of fun and are a creative bunch that encourages & supports one another. Would love to have you!

Thanks for stopping by. May you have a beautiful day. Nothing beats handmade!

Inspire. Create. Share.

Stampin’ Up! Criss Cross Card w/ Painted Christmas

This was such a fun, easy card to make and I like that it’s an ‘out of the ordinary’ color for a Christmas card :O) Yep, I used Calypso Coral for the card base on this card. Stampin’ Up! lists all the coordinating colors for its DSP on the packaging and Calypso Coral was listed. When I put it with the DSP I wanted to use, I liked it ~ so here we are. I used Cherry Cobbler for the sentiments and i like how it coordinates and brings out the darker colors of the DSP. And these pine needles bunches were extras from a project some time ago, die cut with the Christmas Pinecone Dies: Evening Evergreen and Basic White card stocks and they bring out the pine needles of the DSP. How clever is that!

Criss Cross w/ Painted C’mas DSP.1

Basics:

  • Cut the card stock base 4 1/4 x 11 & score at 5 1/2 (Calypso Coral)
  • Cut from outside top corner to the fold line – see photo 2
Criss Cross w/ Painted C’mas DSP.2
  • Cut a piece of DSP 4 x 5 1/4 (Painted C’mas)
  • With whatever design you want on the front right panel, have that side face up & cut it on the diagonal, corner to corner, keeping in mind the direction of the design
  • Flip one side over and adhere to card front: card front has been folded back on itself so diagonal is going different direction, see photo 3
Criss Cross w/ painted C’mas DSP.3
  • Adhere other DSP panel to remaining piece cut from original card base.
  • Adhere diagonal panel to the card front. see photo 4
Criss Cross Card w/ Painted C’mas.4

The card opens with the fold on the left, but this looks cool and is easy to do. Now we decorate the front & the inside.

  • I used the Stitched So Sweetly Dies to cut the sentiment panels: Calypso Coral for the larger piece and Basic White for the sentiment itself.
  • The sentiment comes from C’mas to Remember stamp set & is stamped w/ Cherry Cobbler ink.
  • I added three Genial Gems to the banner in green.
  • The pine boughs were die cut using the C’mas Pinecone Dies, adhered together slightly offset then cut apart. The paper is Evening Evergreen & Basic White
  • These were adhered to the larger banner with liquid glue, then the sentiment banner atop that on dimensionals. The banner was adhered in place with liquid glue
Criss Cross card w/ Painted C’mas, inside.5

For the inside, stamp the sentiment in Cherry Cobbler ink using another phrase from C’mas To Remember stamp set. When stamping the sentiment, you do want to make certain it isn’t going to show when the card is closed. hint, hint. I stamped the pine boughs in second generation Evening Evergreen ink, then the stem for the berries in full strength. These come from the C’mas Season stamp set. The berries were stamped in Cherry Cobbler ink, also second generation. I added three more Genial Gems around the sentiment then adhered the panel to the inside of the card.And the card is done!

Criss Cross Card w/ Painted C’mas.6

For the envelope I cut a strip 2 1/4 x 6 from Soft Succulent card stock and ran it through the Wintry 3D EF, then adhered it to the flap & trimmed to fit. I then stamped the same grouping of pine boughs & berries as done on the inside of the card. They come from the C’mas Season stamp set. LOVE! This is fresh & bright. Such a fun & easy card to do.

Not have a demonstrator so you can order? If you do not have a demonstrator and need an Annual 2021 Catalog OR Jul-Dec 2021 Mini Catalog, please reach out to me – happy to send one to you. Please also use my current host code when ordering: 26QYRFXB I offer my customers a free item from Stampin’ Up! item valued to $10 with your order of $50 and above. Click here to go my store. When the order is over $150, you still receive that free gift from me, but SU! has Stampin’ Rewards that may be used for additional products, so don’t use the host code at that time. If you have questions just let me know. If you would like to be able to order products early from catalogs AND enjoy that 20% discount, join my team now… you may do that here. We have lots of fun and are a creative bunch that encourages & supports one another. Would love to have you!

Thanks for stopping by. May you have a beautiful day. Nothing beats a handmade card!

Inspire. Create. Share.

Stampin’ Up! Eden Wreath C’mas

Hello TGIF! We got our boat put away this week, before the winds and rain. When I say put away – that means we got it to our winter storage marina, they took it out, cleaned the bottom, removed the mast & put it on it’s trailer. But it isn’t parked yet in it’s permanent spot so we can’t cover it. 😦 With all the rain, it is now full of water and we’ll have to drain it before covering. Draining isn’t that difficult or time consuming, we just don’t know when it will get moved so it’s a ‘things happen in stages’ kind of thing – better known as a ‘waiting game’.

Let me tell you about getting it to the wintering marina because, you are going to belly laugh. This is a little sailboat – 16′, no motor. This time of year winds are either pretty fierce or non-existent and sailing in a little boat during fierce winds is not a good idea. We have to choose – and we chose a day when the winds were to be about 6 -8 mph, which is perfect. But guess what – there was next to no wind and we still had to move the boat, cause weather was setting in and we had to have it out of its slip. We paddled… and paddled… and paddled some more. Let me just say, we’ve had this boat since 1998 and there is always a new experience awaiting us. Thanks for listening/ reading, whatever. Life is all about new experiences and how we handle them, right?

The card for today is more of the Eden’s Garden products. It’s just beautiful DSP and the dies are fun. Remember it will be available to you Nov 2 so gear up.

Eden’s Wreath C’mas.1

The card base is Evening Evergreen; the next is Gold Foil and the gorgeous DSP is Ever Eden DSP that will be available only while supplies last – just sayin’ don’t wait if you want it. (My HOST CODE is listed later in this post!) The wreath is made with one of the dies in the Eden Dies I cut apart once it was die cut. (Let’s be clear… die cut the piece from Basic White card stock, then cut the paper apart – NOT THE DIE!) I played around with the cut pieces to make this the way I wanted it and used a circle template to try & keep it round. Once I had it the way I wanted, I put cut dimensionals on the back and adhered each section, sometimes layering. I added the bow using the Open Weave Ribbon in Soft Succulent, then added a length of Simply Elegant Trim in gold and attached it with a glue dot. The final step to the wreath was to add some Holiday Rhinestone Basic Jewels

The final step was a sentiment and I chose to use Evergreen Elegance stamp set for that. I love the font! I stamped it in VersaMark ink on a Basic White strip, sprinkled Gold Embossing Powder over it and heat set. Then I fussy cut it… the angles were just right to enhance the look of the wreath :O) I put dimensionals on the back and put it in place, then added three more Holiday Rhinestone Basic Jewels for a bit more elegance.

Eden’s Wreath C’mas.2

I stamped the sentiment – again from the Evergreen Elegance stamp set, in Evening Evergreen ink. There were some pieces of wreath remaining from the original die cut and I wanted use them, so adhered them with liquid glue. I think they add a nice touch. This was adhered to the inside of the card and the card itself was done.

Eden’s Wreath C’mas.3

For the envelope, I stamped one of the ‘fronds’ from Eden’s Garden stamp set in Soft Succulent ink onto the front of the envelope, the top & bottom in full strength, the middle in second generation. I covered the flap in another piece of the Ever Eden SDSP, trimmed it to fit & voila – the set was complete. :O) I really, really like this card: maybe it’s the colors, or the glam from the rhinestones, or the glitter of the sentiment, or the ribbon, or the SDSP ~ whatever it is, I like it.

If you would like to make this card, remember you can do one of two things: become a demonstrator & order now (you may do that here to do that with me) or order Nov 2 as a customer so you don’t miss out (Click here for that).

Not have a demonstrator so you can order? If you do not have a demonstrator and need an Annual 2021 Catalog OR Jul-Dec 2021 Mini Catalog, please reach out to me – happy to send one to you. Please also use my current host code when ordering: 26QYRFXB I offer my customers a free item from Stampin’ Up! item valued to $10 with your order of $50 and above. Click here to go my store. When the order is over $150, you still receive that free gift from me, but SU! has Stampin’ Rewards that may be used for additional products, so don’t use the host code at that time. If you have questions just let me know. If you would like to be able to order products early from catalogs AND enjoy that 20% discount, join my team now… you may do that here. We have lots of fun and are a creative bunch that encourages & supports one another. Would love to have you!

Thanks for stopping by. May you have a beautiful day. Make someone happy sending them a handmade card.

Inspire. Create. Share.

Stampin’ Up! Happy Inkin’ Thursday Blog Hop

It’s Thursday!!! And time for the Happy Inkin’ Thursday Blog Hop. We have a sketch challenge for today and it was kinda fun to play around with it.

And here’s the challenge…

May be an image of text that says 'Happy Inkin Thursday Blog Hop October 28- Sketch Challenge'
Happy Inkin’ Thursday Blog Hop Challenge. Oct 28

And here’s how I interpreted that sketch.

Wintry 3D.1

What do you think? Does it resemble the sketch challenge? The ribbon was a bit fiddly to do… I needed three hands :O] I started with Pear Pizzazz card stock for the base (4 1/4 x 11 scored at 5 1/2). I cut another panel of Pear Pizzazz (4 1/4 x 5 1/2) and ran it through the Wintry 3D embossing folder two times. Why two times? Because the width of the card and the width of the embossing folder were really not the same – and I wanted the embossing on both edges of the paper. (This is a gorgeous embossing folder set. That’s right, I did say set. There are two: one is this pine evergreen gorgeousness and the other is snowflakes. This is definitely one of those ‘must have’ embossing folders.)

I adhered the embossed panel to the card front with liquid glue. I cut a piece of Heartwarming Hugs DSP 3 x 5 1/2 and adhered that in the center of the embossed piece. Then I did the fiddly part with the ribbon. Truth be told, I’m not certain how this should be done, but I’ll share how I did it. If you know a better way (less fiddly) please let me know!!! I used Seal+ on the back of the ribbon, then on the front of the ribbon too – just at the top, and started folding and holding and folding and holding. Do you have the picture? I had the card stock held in place on my grid paper in order to keep the ribbon straight – with what else, Post-it note! Post-its are an awesomely incredible product and I use them a LOT.

But back to the ribbon… somehow I got it on the paper without losing my mind AND it was pretty straight. Next I stamped the sentiment on a Real Red panel with VersaMark ink, then sprinkled White Embossing Powder over it and heat set. The sentiment comes from Christmas to Remember stamp set and was die cut with the Seasonal Labels Dies. Once cut I put dimensionals on the back and placed it over the ribbon. I added two Genial Gems – one at each end of the banner… and the card front was done! Yay. And you know what? I really like it.

Wintry C’mas.2

For the inside I added a strip of the same Heartwarming Hugs DSP to the side of a Basic White panel. I added a sentiment with Real Red ink from Christmas to Remember stamp set. What I like to do with sentiments is use the Stamparatus to make certain the sentiment is ‘square’ with the paper. It sure beats having the sentiment crooked and having to re-do the panel… ask me how I know that. Yeah, maybe don’t. 😳 Now that the card is done, what’s next… oh yes!!! the envelope. heh heh.

Wintry C’mas,3

So, the envelope… adhere a 2 1/4 x 6 strip of the same Heartwarming Hugs DSP to the envelope flap, trim to fit and ~ DONE. That’s it… the card is now added to the Christmas card stash for sending in early December. It’s probably time to count the cards again. That way I’ll know what I have and… drum roll please, how close I am to what I need. :} Nope, not even guessing…

Not have a demonstrator so you can order? If you do not have a demonstrator and need an Annual 2021 Catalog OR Jul-Dec 2021 Mini Catalog, please reach out to me – happy to send one to you. Please also use my current host code when ordering: 26QYRFXB I offer my customers a free item from Stampin’ Up! item valued to $10 with your order of $50 and above. Click here to go my store. When the order is over $150, you still receive that free gift from me, but SU! has Stampin’ Rewards that may be used for additional products, so don’t use the host code at that time. If you have questions just let me know. If you would like to be able to order products early from catalogs AND enjoy that 20% discount, join my team now… you may do that here. We have lots of fun and are a creative bunch that encourages & supports one another. Would love to have you!

Thanks for stopping by. May you have a beautiful day. Nothing beats a handmade card.

Inspire. Create. Share.

Since this is a Blog Hop, it’s important to have a list of those participating and their links – see below. You can always use the ‘next’ button, but sometimes the idea is to jump around. Enjoy… there will be some fabulous cards today!

Amy Koenders

Mary Deatherage

Kristi Gray

Jaimie Babarczy

Sue Prather

Karen Finkle

Akiko Sudano

Karen Ksenzakovic

Tara Carpenter

Terry Lynn Bright ~ you are here

Stampin’ Up! Eden Hugs

Hello… it’s Wednesday… another 1″ of rain last night after 2 1/2″ in the early morning. That’s a lot of rain! And today ~ gale force winds starting soon @ 17 mph and going up from there. Leaves are beginning to turn, so fall it is. My card today uses the new Eden Garden bundle available to customers Nov 2. I’ll be using this bundle again on Friday in a totally different way… hint, hint. But for today..

Eden Hugs.1

There is LOTS of white space on this card. But it’s elegant with that stunning die cut along the bottom using the Eden Dies. I added Gray Granite Shimmer Ribbon & Holiday Rhinestone Gems in Night of Navy. The basic White panel is layered on Night of Navy card stock, then with dimensionals added to the Gray Granite card base. The sentiment on the front is Night of Navy ink and the Eden Garden stamp set.

Eden Hugs.2

For the inside, I stamped this distinctive bouquet in Night of Navy ink, AND the sentiment in the same ink ~ both using the Eden Garden stamp set. So this bouquet is a distinctive stamp, which means it has depth variation that creates what I’ll call multiple layers or depth to the stamp. That’s quite evident with this bouquet stamp as you can see the very dark to the light. I’ve kept this card in the muted tones, but it might be really pretty in Pale Papaya or even Polished Pink. Think I’ll have to try that… :}

Eden Hugs.3

For the envelope it’s just the same bouquet stamped in Night of Navy ink on the front. This produced a better bouquet in my opinion, less ink somehow. Let me remind you that with distinctive stamps it is better if your ink pad is not too inky. And that’s it for today. I hope you like this card. I didn’t at first but I really like that die cut and the ribbon/ bow adds a nice touch.

Not have a demonstrator so you can order? If you do not have a demonstrator and need an Annual 2021 Catalog OR Jul-Dec 2021 Mini Catalog, please reach out to me – happy to send one to you. Please also use my current host code when ordering: 26QYRFXB I offer my customers a free item from Stampin’ Up! item valued to $10 with your order of $50 and above. Click here to go my store. When the order is over $150, you still receive that free gift from me, but SU! has Stampin’ Rewards that may be used for additional products, so don’t use the host code at that time. If you have questions just let me know. If you would like to be able to order products early from catalogs AND enjoy that 20% discount, join my team now… you may do that here. We have lots of fun and are a creative bunch that encourages & supports one another. Would love to have you!

Thanks for stopping by. May you have a beautiful day. Nothing beats as handmade card!

Inspire. Create. Share.