Unknown's avatar

About TL's Bright Spot

I love to be creative - in the garden, crafting, and in leadership roles. There is something wonderful that happens when we design something new and share it with others. It's fun and makes everyone happy.

Stampin’ Up! BONUS DAYS ARE ON!

Bonus Days are an exciting time of receiving $5 coupons for every $50 purchase. Below are ALL the details for this Stampin’ Up! promotion. Are you ALL IN? I certainly hope so, ‘cuz I certainly am.

AND… be sure to check out the ONLINE EXCLUSIVES as new items are available today, Jul 3, so YOU can take part in the BONUS DAYS PROMOTION.

PROMOTION DETAILS

Earning Period: 3–31 July 2024
Ordering Deadlines
Phone: 31 July 2024 at 6:59 p.m. (MT) 
Online: 31 July 2024 at 11:59 p.m. (MT) 

  • Earn a $5 USD | $6 CAD coupon for every $50 USD | $60 CAD spent (before shipping and tax). 
  • All coupon codes will be emailed right after a qualifying purchase has been made. Encourage your customers to create an account on our online store. 
  • If a participant earns multiple codes from a single order, they will receive one email with multiple codes. If they earn multiple codes from multiple orders, they will receive separate emails for each code earned.
  • All order types qualify for this promotion. Phone and email orders still require an email address.
  • Orders started before the promotion begins will not count toward earning coupon codes. For example, if you add items to your cart before 3 July and wait to purchase until that date or later, then those items will not qualify towards earning coupons. You must add items to your cart and complete your purchase during the earning period. 
  • There is no limit to the number of coupon codes participants can earn per order or throughout the duration of the earning period
  • Coupon codes can only be earned on commissionable items. Non-commissionable items (such as catalogs) do not count towards coupon earnings. 
  • Customers must use a valid email address during checkout in order to receive their coupon code. If a customer places an order over the phone, they must still provide a valid email address to receive their coupon code.
  • Starter Kit orders are excluded from this offer. All other order types qualify.
  • For workshop orders, each customer who reaches a qualifying amount will receive a coupon code to their provided email address. 

After earning those coupons, it’s important to know how to use/n redeem them :O)

Redemption Period: 1–31 August 2024
Ordering Deadlines
Phone: 30 August 2024 at 6:59 p.m. (MT) 
Online: 31 August 2024 at 11:59 p.m. (MT)

  • There is no limit to the number of coupon codes participants can redeem on an order during the redemption period. If using multiple codes, they must be separated by a space. 
  • Coupon codes may be redeemed one time only. They cannot be redeemed after the 31 August. 
  • Coupon codes may be redeemed for any product (excluding Starter Kits and demonstrator supply items). They cannot be used on exchanges.
  • Bonus Days coupon codes can be applied to new prepaid Paper Pumpkin subscriptions.
  • Coupon codes will reduce the commissionable amount of an order.

Check out this video to see what Stampin’ Up! says about BONUS DAYS. Just click on the red arrow

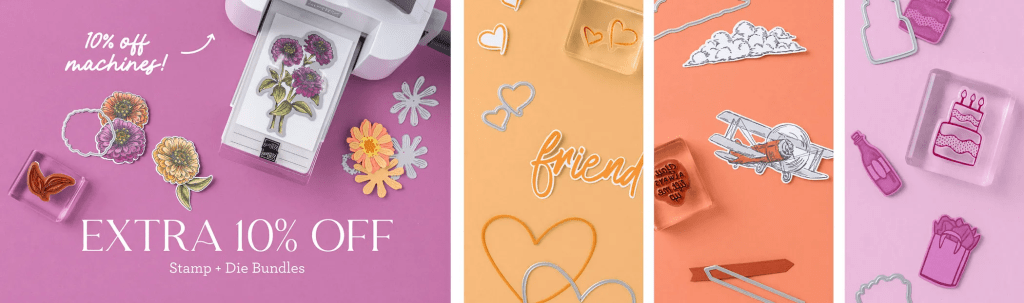
Here are some of the ONLINE EXCLUSIVE PRODUCTS AVAILABLE JUL3

Stampin' Up! ONL:INE EXCLUSIVE Iconic Celebrations
Iconic Celebrations Suite
Stampin' Up! Season of Green & Gold Suite
Season of Green & Gold Suite
Changing Leaves bundle includes Hybrid 3D Embossing Folder too!
Stampin Up! Potions & Spells Bundle
Potions & Spells Bundle

You can find ALL the ONLINE EXCLUSIVES right here

To view all thew items in the 2024-2025 Annual Catalog, click here

While you’re looking around in my store, remember there are some stunning kits available, for all ages and all seasons – even Christmas! And while you’re shopping, I offer fringe benefits to my customers: free tutorial of the month and a FREE Stampin’ Up! item valued to $10 – all for a $50 order, before shipping and taxes. Use my current host code to receive those benefits – especially when your order does not exceed $150. Make certain my name is listed as your demonstrator when checking out! :O)

HOST CODE  HFXSJCNB

Thanks for stopping by. May you have a beautiful day. Make someone happy when sending them a handmade card filled with love.

Stampin’ Up!n LAST DAY for Stamp & Die Bundle Sale + Bonus Days

Stamp & Die bundles have been an additional 10% off during this month of June – and today – Jun 30 is the VERY LAST DAY for this promotion. So… if there is a bundle you want/ need/ desire – order it today – right here. Make sure my name is at the top of the page so you know you are ordering from me. :O)

Along with the bundle sale is the 10% off machine sale – the Stampin’ Up! cut & emboss machine in the regular size and the mini machine as well. I certainly took advantage of this offer as I have had my regular size machine for a ‘bit’ (that’s a long time!) and it was getting a little quirky. With the 10% off, it was a super deal!!! Plus my demonstrator discount too :O) Remember – today – Jun 30 is the LAST DAY FOR THIS SALE. Place your order.

Sometimes in the Stampin’ Up! world there are back to back bargains and fun things happening. Bonus days is one of those bargains – and it begins Wednesday Jul 3. See details below.

PROMOTION DETAILS

Earning Period: 3–31 July 2024
Ordering Deadlines
Phone: 31 July 2024 at 6:59 p.m. (MT) 
Online: 31 July 2024 at 11:59 p.m. (MT) 

  • Earn a $5 USD | $6 CAD coupon for every $50 USD | $60 CAD spent (before shipping and tax). 
  • All coupon codes will be emailed right after a qualifying purchase has been made. Customers must have a customer account with a valid email address to earn coupons when they shop.
  • If a participant earns multiple codes from a single order, they will receive one email with multiple codes. If they earn multiple codes from multiple orders, they will receive separate emails for each code earned.
  • All order types qualify for this promotion. Phone and email orders still require an email address.
  • Orders started before the promotion begins will not count toward earning coupon codes. For example, if you add items to your cart before 3 July and wait to purchase until that date or later, then those items will not qualify towards earning coupons. You must add items to your cart and complete your purchase during the earning period. 
  • There is no limit to the number of coupon codes participants can earn per order or throughout the duration of the earning period. 
  • Coupon codes can only be earned on commissionable items. Non-commissionable items (such as catalogs) do not count towards coupon earnings. 
  • Customers must use a valid email address during checkout in order to receive their coupon code. If a customer places an order over the phone, they must still provide a valid email address to receive their coupon code.
  • Starter Kit orders are excluded from this offer. All other order types qualify.
  • For workshop orders, each customer who reaches a qualifying amount will receive a coupon code to their provided email address. 

Redemption Period: 1–31 August 2024
Ordering Deadlines
Phone: 30 August 2024 at 6:59 p.m. (MT) 
Online: 31 August 2024 at 11:59 p.m. (MT)

  • There is no limit to the number of coupon codes participants can redeem on an order during the redemption period. If using multiple codes, they must be separated by a space. 
  • Coupon codes may be redeemed one time only. They cannot be redeemed after the 31 August. 
  • Coupon codes may be redeemed for any product (excluding Starter Kits and demonstrator supply items). They cannot be used on exchanges.
  • Bonus Days coupon codes can be applied to month-to-month Paper Pumpkin subscriptions and new prepaid subscriptions.
  • Coupon codes will reduce the commissionable amount of an order.

Stampin’ Up! Special Slider Card for the Happy Inkin’ Thursday Blog Hop

Welcome to Thursday and this fun hop… … I made a slider card – something I have not done before. It’s easy enough, I just haven’t done it. We have a color challenge today and I’ve chosen Petal Pink, Pool Party and Smoky Slate. Hope you like…

Stampin' Up! Happy Inkin' Thursday Blog Hop
Stampin' Up! Blog hop color challenge
Stampin' Up! Slider card w/ Country Flowers Bundle& Wildflowers Designs Dies

The Country Flowers bundle has become a favorite. I didn’t think it would, but the coloring is fun and it relaxes me. AND… besides being a bundle and always 10% off when purchased as a bundle, it is on sale at an additional 10% off through end of June (June 30). What’s not to like about that?! I also used the dies of another bundle – Wildflower Designs Dies, but as a bundle, it is also on sale at the additional 10% off.

My first step to create this card was to stamp the images of the flower and container from the Country Flowers stamp set and color them with Stampin ‘ Blends: Petal Pink, Flirty Flamingo, Lemon Lolly, Granny Apple Green, Old Olive, Smoky Slate and Basic Black. I die cut the images with coordinating Country Flowers Dies and set them aside to create the card itself.

My next step was to cut the card stock and DSP pieces:

  • Pool Party – 8 1/2 x 5 1/2 scored at 4 & 8 on the long side; 3/4 x 3 1/4; 3 1/2 x 2 (slider)
  • DSP – Country Woods was my choice for this card – 3 3/4 x 5 1/4, adhered to the card front between the 4 & 8 score lines
  • Basic White – 3 3/4 x 5 14 (for the inside slide); 3 1/2 x 2 1/4 (slider) 2 1/2 x 4 (flowers & container)

Use the Wildflower Designs Dies to die cut the slider sections for flowers & container, adhere the two layers together. Place the flowers & container together adding adhesive just at the base of the flowers, so they are now one piece. Position them for ‘placement purposes’ on the two slider pieces to know where to stamp the sentiment. The sentiment is from Country Flowers stamp set and stamped in Memento ink. Now add dimensionals on the back of the flowers & container only where they will adhere to the slider & attach. Set aside.

For the card base… adhere the DSP (Country Woods DSP) in the area between the 4 & 8 score lines. Burnish all score lines. On the 1/2″ end add tear n’ tape. Now place the small scored end into the paper trimmer to 1 1/2″, cut from the 1″ mark to the 4 1/2″ mark on your paper trimmer. This will be cutting through both the card stock and the DSP. Take the 3/4 x 3 1/4 strip and add a dimensional to one end and slipit into the slit all the way to the bottom of the slit. Turn card over and add tear n’ tape to the back side of the 3/4 x 3 14″ strip – see photo titled … “from inside.1”. Remove cover on tear n’ tape and add Basic White panel so it is even at the top and adhere to that tear n’ tape. It will be rather floppy at this point as it is only attached at the tear n’ tape.

Stampin' Up! Slider card w/ Country Woods DSP
Slider card front
Stampin' Up! Slider card inside
Slider card from inside.1
Stampin' Up! Slider card inside, 2
Slider card from inside.2

Remove Tear n’ tape cover on the 1/2″ side, fold to inside and close back of card over the strip.

Use a 1 3/4″ circle punch to punch only the card front, not the Basic White piece that will slide. Add a length of ribbon – Petal Pink and White Diagonal Trim Combo Pack – and hold in place with a glue dot – staple it to secure. Pull panel up and stamp sentiment – again from Country Flowers stamp set in Memento ink.

Slider card closed and punched
Slider card decorated

Add the decorated piece to the single dimensional for the card front – and done! You will notice that I added another strip of the Pool Party to the inside of my card… I made a booboo and needed to cover it :O)

Inside card slides easily up & down :O). For the envelope, I kept it really simple – covered the flap in more of the Country Woods DSP and trimmed to fit. One & done.

Stampin' Up! Slider card & envelope with Country Flowers bundle

Such a fun card to make… and super easy. Now, don’t forget a couple of things… stamp & die bundles are still on sale through Jun 30. See my link below. Second thing is – check out what everyone has created for today’s hop by following the links below – the ‘next’ button or click on a name. Happy hopping.

Amy Koenders

Mary Deatherage

Karen Finkle

Akiko Sudano

Karen Ksenzakovic

Tara Carpenter

Terry Lynn Bright

Carol Buckalew

Nel Thames

here’s a link to take you directly to the items available in this catalog –

and to shop with me.

STAMPIN’ UP! STAMP & DIE BUNDLE 10% OFF SALE!!

Sales Period: 5–30 June 2024
Ordering Deadlines
Phone: 28 June 2024 at 6:59 p.m. (MT)  
Online: 30 June 2024 at 11:59 p.m. (MT)

Get an additional 10% discount on stamp and die bundles only (that’s a total of 20% discount on stamp and die bundles!). This excludes suite collections, stamp and punch bundles, bundles not yet released to customers, and any other bundles*.

Save 10% on Stampin’ Cut & Emboss Machine and Mini Stampin’ Cut & Emboss Machine (white and Boho Blue). 

The 10% discount applies automatically to stamp and die bundles in all orders… including Starter Kit orders.

See and shop all qualifying bundles in the online store. or click here.

Please note Close to My Heart products are not included in this promotion.

Stampin’ Up! Demonstrators get the SAME discounts and sales that CUSTOMERS do – on TOP OF their demonstrator discount

Keeping that information in the forefront of your mind,

NOW is a perfect time to JOIN THE TEAM!

Join with me by following this link...

To view all the available ONLINE EXCLUSIVES, click here.

Clearance items may be found here

While you’re looking around in my store, remember there are some stunning kits available, for all ages and all seasons – even Christmas! And while you’re shopping, I offer fringe benefits to my customers: free tutorial of the month and a FREE Stampin’ Up! item valued to $10 – all for a $50 order, before shipping and taxes. Use my current host code to receive those benefits – especially when your order does not exceed $150. Make certain my name is listed as your demonstrator when checking out! :O)

HOST CODE  BAQG9RSE

Thanks for stopping by. May you have a beautiful day. Make someone happy when sending them a handmade card filled with love.

Stampin’ Up! Penciled Pear for the Happy Inkin’ Thursday Blog Hop

It’s Thursday – Jun 13 – and time for another Happy Inkin’ Thursday Blog Hop. We have a theme challenge today – fruit – and I’ve chosen the Penciled Pear stamp set using watercolor paper, Water Painters and inks. There are many layers of colors here: Crushed Curry, Peach Pie, Pumpkin Pie, Granny Apple Green and Old Olive – oh, and Pool Party.

Stampin' Up! blog hop
Stampin' Up! Hop theme challenge
Stampin' Up! Penciled Pear stamp set, Watercolored

When using watercolors with a stamped image, it’s important to use Stazon ink – and then of course the Stazon Cleaner to clean the stamp. This image is perfect for watercoloring – and if you look at the 2024-2025 Annual Catalog, this stamp set is shown on page 118 and a bit of color inspiration on page 119. I liked the way it was colored but did my own thing as I went along, adding more color as I felt it needed. I began with Crushed Curry , coloring the left side of the pear and a bit on the single leaf as well. Next was Granny Apple Green, still on the left side. The final touch of green was Old Olive a couple of times, allowing it to dry a bit in between adding color and covering less space and lots of depth. This way it gently darkens. There is more Granny Apple Green on the leaf and just a bit of Old Olive near the stem. On the right side of the pear is Crushed Curry then Peach Pie, then Pumpkin Pie, each time lessening the area covered by the new color. I used the widest of the water painters to add just water outside the pear, then brushed on Pool Party, some heavier in places than others. This creates depth and space. I used my heat tool on the back of the watercolor paper to somewhat dry the paper a bit, then put a large acrylic block on the paper to keep it from wrinkling too much – and let it continue to air dry.

The photo below shows my ink pad where I have squeezed the ink pad when it was closed to get ink on the lid, then used the water painter to pick up the ink for coloring. Cool, right?

Stampin' Up! ink pad and water painter

While this was drying I worked on the inside image following the same process: stamp the Penciled Pear image with Stazon ink onto the watercolor paper; using a water painter, add ink in layers, darkening and lessening the space covered each time.

While this was drying, I cut my card base and extra layers:

  • Card base: Basic Beige 8 1/2 x 5 1/2 scored at 4 1/4; 3 5/8 x 4 5/8 (inside layer)
  • Watercolor paper 3 1/2 x 4 1/2 (front); 1 5/8 x 3 5/8 (inside)
  • Peach Pie 3 5/8 x 4 5/8 (front); 1 3/4 x 3 5/8 (inside)
  • Basic White 3 1/2 x 4 5/8 (inside)
  • Basic Black for the sentiment – size depends on the sentiment!

Sentiment… I used a sentiment from the Penciled Pear stamp set, cleaned it of any oils with my embossing buddy, then with VersaMark ink, stamped the sentiment. I sprinkled it with White Embossing Powder and heat set it with my heat tool and set it aside to assemble the card layers: Peach Pie with the single Penciled Pear water colored image adhered together, dimensionals added to the back of the Peach Pie and adhered to the Basic Beige card front. I then added the sentiment with dimensionals. I played with adding embellishments, but they were all too much. – for me.

Stampin' Up! Penciled Pear card inside

Inside… layer together the Basic Beige panel and the Basic White and add to the inside of the card. Attach the smaller piece of watercolor paper to Peach Pie and adhere to the inside of the card. FINIS!

Stampin' Up! Penciled Pear envelope

For the envelope front… stamp the image of four pears from the Penciled Pear stamp set, this time in Memento ink and color with Stampin’ Blends: Crushed Curry, Peach Pie, Pumpkin Pie, Granny Apple Green and Old Olive – in the same fashion as with the water painters. Just remember to place a scrap of card stock in the envelope so the blends do not bleed through to the back of the envelope!

Now … hop on around to see what the others on the team created with this theme challenge. Click on the ‘next’ button or click on a name. Happy hopping!

Amy Koenders

Mary Deatherage

Karen Finkle

Akiko Sudano

Karen Ksenzakovic

Tara Carpenter

Terry Lynn Bright

Carol Buckalew

Nel Thames

Today is June 13, and the incredible stamp and die bundle sale with Stampin’ Up! is going on until June 30. ASlso remember the die cut & embossing machines are 10% off as well, which I haven’t seen before!

Stampin' Up! Machine & stamp/ die bundle sale

here’s a link to take you directly to the items available in this catalog –

and to shop with me.

STAMPIN’ UP! STAMP & DIE BUNDLE 10% OFF SALE!!

Sales Period: 5–30 June 2024
Ordering Deadlines
Phone: 28 June 2024 at 6:59 p.m. (MT)  
Online: 30 June 2024 at 11:59 p.m. (MT)

Get an additional 10% discount on stamp and die bundles only (that’s a total of 20% discount on stamp and die bundles!). This excludes suite collections, stamp and punch bundles, bundles not yet released to customers, and any other bundles*.

Save 10% on Stampin’ Cut & Emboss Machine and Mini Stampin’ Cut & Emboss Machine (white and Boho Blue). 

The 10% discount applies automatically to stamp and die bundles in all orders… including Starter Kit orders.

See and shop all qualifying bundles in the online store.

Please note Close to My Heart products are not included in this promotion.

Stampin’ Up! Demonstrators get the SAME discounts and sales that CUSTOMERS do – on TOP OF their demonstrator discount

Keeping that information in the forefront of your mind,

NOW is a perfect time to JOIN THE TEAM!

Join with me by following this link...

To view all the available ONLINE EXCLUSIVES, click here.

Clearance items may be found here

While you’re looking around in my store, remember there are some stunning kits available, for all ages and all seasons – even Christmas! And while you’re shopping, I offer fringe benefits to my customers: free tutorial of the month and a FREE Stampin’ Up! item valued to $10 – all for a $50 order, before shipping and taxes. Use my current host code to receive those benefits – especially when your order does not exceed $150. Make certain my name is listed as your demonstrator when checking out! :O)

HOST CODE  BAQG9RSE

Thanks for stopping by. May you have a beautiful day. Make someone happy when sending them a handmade card filled with love.

Stampin’ Up! Country Birdhouse for Amy’s Inkin’ Krew Blog Hop Group

Welcome! It is the 2nd Tuesday of the month and time for Amy’s Inkin’ Krew Blog Hop. I hope you enjoy the creations you see today. The theme is ‘celebrate summer’ and we can interpret that any way that inspires. I think you may see a lot of different ideas here today. I have chosen to work with the Country Woods Designer Series Paper and the Country Birdhouse bundle to prepare today’s card.

Stampin' Up! AIK Blog Hop Group
Stampin' Up! Country birdhouse card front

This card uses two particular bundles: Country Birdhouse and it’s coordinating dies and Nested Friends and it’s coordinating dies. Nested Friends is now an ONLINE EXCLUSIVE set, while Country Birdhouse is in the new 2024-2025 Annual Catalog. I began by making the birdhouse portion first then the rest of the card followed.

Directions:

  • Fold a piece of the Country Woods DSP (8 1/2 x 11 to 4 1/4 x 11)
  • Lay the birdhouse die (from Country Birdhouse Dies) along the fold line with one side of the roofline extending beyond the cutting line until it is OVER the fold – meaning it will NOT cut along the fold. (You can place either side of the roof beyond the fold). Die cut. You now have a birdhouse that opens & closes along one side of the roof. :O) YAY!
  • Die cut the hole opening using the appropriate die
  • Die cut the additional roof decorations from Country Woods DSP – noting the direction of the grain (this happens to be the Misty Moonlight color in the pack)
  • Die cut the bottom panel on the birdhouse – adhere all pieces. There is one die cut from Basic White and I layered it over the other two, where they are adhered together.
  • See that little small circle piece below the opening – that is supposed to indicate a landing spot for the birds!
  • Stamp the bird on the front in Memento ink and color with Watercolor Pencils: Real Red, Early Espresso, Basic Gray
    • These are house finches – the male has the red head and a bit of red down the front breast. Intermixed is some gray & brown.
    • I used short strokes, not covering the entire bird at once, to make it look more like feathers.
    • I colored the eye with a Basic Black Marker using the fine tip end
    • I clipped the beak down the center of it, cut a short length of Linen Thread, took the fibers apart and ‘encouraged’ them into the cut of the beak. I turned this item over and added a dot of liquid glue to secure the thread in place. I put dimensional on the bird and added it to the birdhouse front. The male finch is helping it’s partner build a nest – it’s what they do!
  • To create the opposite facing bird is called ‘reverse stamping’.
    • Using Memento ink, ink the stamp and stamp a Window Sheet, then turn the window sheet over and place it on a Basic White scrap. Rub over the window sheet without it moving, then lift window sheet. A bird stamped in reverse has been created!
    • Color it with Watercolor Pencils: mostly Early Espresso, Basic Gray, just a bit of real Red and some Crushed Curry. Keep going over this until satisfied with the result. This is a female finch!
Stampin' Up! Step 1 Reverse Stamping
Step 1: stamp window sheet
Stampin' Up! Step 2, turn window sheet over onto card stock, ink side down
Step 2: turn window sheet over, ink side on card stock
Stampin' Up! Reverse stamping - bird

First of all, more photos should have been taken! What you are seeing is the female finch bird already die cut & adhered in place. :O(

I used the Nested Friends stamp set for the nest, inked with Early espresso ink then used a sponge dauber to add a bit of Copper Clay in places, then stamped it directly to the inside of the birdhouse. I adhered the female finch inplace with liquid glue. I diec ut another piece of Country Woods DSP for the bottom strip on the birdhouse inside.

The card base is Early Espresso, 4 1/4 x 11 scored at 5 1/2. Adhered to that is a Country Woods panel 4 1/4 x 5 1/2 that I ran through the Timber 3D embossing folder. I stamped this wonderful branch in Early espresso ink using the Nested Friends stamp set, then die cut it with Nested Friends Dies. I adhered the tree branch in place with mini stampin’ dimensionals. I took a length of Linen Thread and put it over the branch and adhered it in place with Seal+. I adhered the birdhouse over that with liquid glue – to make it appear as though the birdhouse was hanging from the tree branch.

With the card front complete, I worked on the inside of the card.

Stampin' Up! Country Birdhouse card w/ Nested Friends

I began by stamping the branch from Nested Friends in Early Espresso ink on the Basic White panel. Using the Country Birdhouse stamps, I stamped the bird on the left in Memento ink, then stamped the bird on the right using the Reverse Stamping method. I colored the leaves with Stampin’ Blends: Granny Apple Green. I stamped the sentiment from Country Birdhouse in Early espresso ink. With the stamping complete, I adhered this to a slightly larger Misty Moonlight, then to the inside of the card.

Stampin' Up! Country Birdhouse card & envelope

For the envelope, I used more of the Country Woods DSP to add to the flap, trim to fit. I stamped the bird on the right side using the reverse stamping technique as mentioned above.

Now … time to see what the others on the team have created. click the previous button or the next button… or click on a name. Remember to also read more info below on how to purchase these products from me.

  1. Tara Carpenter
  2. Karen Ksenzakovic
  3. Mary Deatherage
  4. Ann Louise Fodgaard
  5. Karen Finkle
  6. Terry Lynn Bright
  7. Carol Buckalew
  8. Christie King
  9. Amy Koenders
Stampin' Up! 10% off Stamp & Die Bundles

here’s a link to take you directly to the items available in this catalog –

and to shop with me.

STAMPIN’ UP! STAMP & DIE BUNDLE 10% OFF SALE!!

Sales Period: 5–30 June 2024
Ordering Deadlines
Phone: 28 June 2024 at 6:59 p.m. (MT)  
Online: 30 June 2024 at 11:59 p.m. (MT)

Get an additional 10% discount on stamp and die bundles only (that’s a total of 20% discount on stamp and die bundles!). This excludes suite collections, stamp and punch bundles, bundles not yet released to customers, and any other bundles*.

Save 10% on Stampin’ Cut & Emboss Machine and Mini Stampin’ Cut & Emboss Machine (white and Boho Blue). 

The 10% discount applies automatically to stamp and die bundles in all orders… including Starter Kit orders.

See and shop all qualifying bundles in the online store.

Please note Close to My Heart products are not included in this promotion.

Stampin' Up! 10% off machine sale

Stampin’ Up! Demonstrators get the SAME discounts and sales that CUSTOMERS do – on TOP OF their demonstrator discount

Keeping that information in the forefront of your mind,

NOW is a perfect time to JOIN THE TEAM!

Join with me by following this link...

To view all the available ONLINE EXCLUSIVES, click here.

Clearance items may be found here

While you’re looking around in my store, remember there are some stunning kits available, for all ages and all seasons – even Christmas! And while you’re shopping, I offer fringe benefits to my customers: free tutorial of the month and a FREE Stampin’ Up! item valued to $10 – all for a $50 order, before shipping and taxes. Use my current host code to receive those benefits – especially when your order does not exceed $150. Make certain my name is listed as your demonstrator when checking out! :O)

HOST CODE  BAQG9RSE

Thanks for stopping by. May you have a beautiful day. Make someone happy when sending them a handmade card filled with love.

Stampin’ Up! w/ Thoughtful Journey DSP & Emboss Resist

Good morning, good morning! It’s cool this AM – 57 – after a couple of days of 100% humidity and 87 temps. This feels much more refreshing :O) Thursday was my card class and we did a window z-fold card, similar to what I posted a week or so ago, which you see here. I’m hooked on this style card – just sayin’. I needed a couple of cards – thank you and another for a friend recovering from surgery – and here’s what I did.

Stampin' Up! Thoughtful Journey Window z-fold Thank You

I really like the colors of the thank you card with the Misty Moonlight card base than the other card. However, when making a card for a specific person, and the card on the right was, we follow what would be best for them. The card cuts and basic directions are the same for both cards. The main difference is the inside on the second card using the emboss resist technique. The Stitched Shapes Dies were used for the circles and the banner die cuts.

Stampin' Up! Window z-fold and emboss resist technique

I stamped the partial image of these flowers in VersaMark ink using the Thoughtful Wishes stamp set – re-inking and stamping across the bottom five times. I sprinkled white embossing powder over the image, heat embossed with the heat tool and let it cool for a bit. Once cool, I took a Blending Brush and Boho Blue ink and with swirling/ circling strokes went over the stamped images. Here’s a close-up.

Stampin' Up! Emboss Resist Technique

I love this effect and it mimics the Thoughtful Journey 6×6 DSP. I stamped the sentiments in Fresh Freesia ink using the Unbounded Love stamp set.

Here’s the inside of the ‘thanks’ card.

On this card I stamped the partial image in Wild Wheat ink, mimicking the image on the front of this card. I used a Blending Brush and Misty Moonlight ink to add color over this.

Stampin' Up! Window z-fold thank you card & envelope

After stamping the image on the inside of the card and not really ‘sold’ on the image, I looked over my stamps and found another image I liked better to use on the envelope front. I stamped it in Whisper White ink then heat set it since it is a pigment ink and takes a bit to dry. I then used that same Blending Brush that I had used on the inside with Misty Moonlight ink and colored over the image. In person, the image is obvious – in the photo it is not. The stamp set used for that was the Charming Ducks stamp set.

Thoughtful Journey 6×6 DSP item 163303

Thoughtful Wishes stamp set, also on pg 47 – item 163305 HOWEVER… there are coordinating dies, and when purchased as a bundle during the month of June, it is 20% off – Thoughtful Wishes bundle item 163314

These may be found on page 47 in the 2024-2025 Annual Catalog.

here’s a link to take you directly to the items available in this catalog –

and to shop with me.

Stampin' Up! Stamp & Die Bundle Sale

STAMPIN’ UP! STAMP & DIE BUNDLE 10% OFF SALE!!

Sales Period: 5–30 June 2024
Ordering Deadlines
Phone: 28 June 2024 at 6:59 p.m. (MT)  
Online: 30 June 2024 at 11:59 p.m. (MT)

  • Get an additional 10% discount on stamp and die bundles only (that’s a total of 20% discount on stamp and die bundles!). This excludes suite collections, stamp and punch bundles, bundles not yet released to customers, and any other bundles*.
  • Save 10% on Stampin’ Cut & Emboss Machine and Mini Stampin’ Cut & Emboss Machine (white and Boho Blue). 
  • The 10% discount applies automatically to stamp and die bundles in all orders… including Starter Kit orders.
  • See and shop all qualifying bundles in the online store.

*Please note Close to My Heart products are not included in this promotion.

Stampin' Up! Machine Sale

Stampin’ Up! Demonstrators get the SAME discounts and sales that CUSTOMERS do – on TOP OF their demonstrator discount

Keeping that information in the forefront of your mind,

NOW is a perfect time to JOIN THE TEAM!

Join with me by following this link...

To view all the available ONLINE EXCLUSIVES, click here.

Clearance items may be found here

While you’re looking around in my store, remember there are some stunning kits available, for all ages and all seasons – even Christmas! And while you’re shopping, I offer fringe benefits to my customers: free tutorial of the month and a FREE Stampin’ Up! item valued to $10 – all for a $50 order, before shipping and taxes. Use my current host code to receive those benefits – especially when your order does not exceed $150. Make certain my name is listed as your demonstrator when checking out! :O)

HOST CODE  BAQG9RSE

Thanks for stopping by. May you have a beautiful day. Make someone happy when sending them a handmade card filled with love.

CARD CUTS:

  • Card base 8 1/2 x 5 1/2 scored at 4 1/4
  • Basic White inside: 8 1/2 x 5 1/4 scored at 4 & 6 1/4, burnishing to make it a z-fold.

ITEMS USED:

  • Thoughtful Journey 6×6 DSP
  • Thoughtful Wishes stamp set / bundle available!
  • Stitched Shapes Dies
  • Blending Brush
  • Boho Blue nink
  • Misty Moonlight ink
  • VersaMark ink
  • White embossing powder
  • Heat tool
  • Stampin’ Die Cut machine
  • Paper Trimmer
  • Bone folder

Stampin’ Up! Frames & Flowers Sympathy Card

Frames & Flowers 12 x 12 Designer Series Paper is simply gorgeous – soft colors, leaf & flower themed, the pack of papers includes die cut images as well. This paper may be found on page 29 in the 2024-2025 Annual Catalog. To make today’s card, I used several of the die cuts, You are Beautiful stamp set and the Hope You Know stamp set for the sentiments. The card base is Lost Lagoon cut 8 1/2 x 5 1/2, scored @ 4 1/4 with a layer of Basic White 4 x 5 1/4.

Stampin' Up! Frames & Flowers Sympathy card front

I began by adhering the frame die cut from the pack of Frames & Flowers 12 x 12 DSP onto a basic White panel. I stamped the sentiment in Lost Lagoon ink using the Hope You Know stamp set. I added a couple of die cuts from the DSP pack attaching them with dimensionals: the leaves in the lower right and the flower & leaves corner die cut. I added Wink of Stella to the several of the darkest leaves on the lower left and on the flowers of the corner die cut. This doesn’t show in the photo, but in person it adds a beautiful touch of elegance.

Stampin' Up! Frames & Flowers Sympathy card inside

For the inside of the card, I stamped the sentiment in Lost Lagoon ink using the Hope You Know stamp set. The leaf image is another of the die cuts from the Frames & Flowers 12 x 12 DSP pack, and was adhered with dabs of liquid glue. And yes, I added Wink of Stella to several of the leaves here as well.

Stampin' Up! Frames & Flowers 
Sympathy Card & envelope

For the Basic White envelope I stamped the leaf images using the You are Beautiful stamp set and Lost Lagoon ink. This is a ‘distinctive’ stamp set, meaning when the images are stamped there is depth. Notice how some of the leaves on the flap are darker than others – that’s what I mean.

Frames & Flowers 12 x 12 DSP may be found on page 29 – item 163765

Hope You Know stamp set may be found on page 85 – item 161409

You Are Beautiful stamp set may be found on page 93 – item 163704

The 24-25 Annual Catalog is now live… here’s a link to take you directly to the items available in this catalog – and to shop with me.

Stampin' Up! Stamp & Die bundle sale

STAMPIN’ UP! STAMP & DIE BUNDLE 10% OFF SALE!!

Sales Period: 5–30 June 2024
Ordering Deadlines
Phone: 28 June 2024 at 6:59 p.m. (MT)  
Online: 30 June 2024 at 11:59 p.m. (MT)

  • Get an additional 10% discount on stamp and die bundles only (that’s a total of 20% discount on stamp and die bundles!). This excludes suite collections, stamp and punch bundles, bundles not yet released to customers, and any other bundles*.
  • Save 10% on Stampin’ Cut & Emboss Machine and Mini Stampin’ Cut & Emboss Machine (white and Boho Blue). 
  • The 10% discount applies automatically to stamp and die bundles in all orders… including Starter Kit orders.
  • See and shop all qualifying bundles in the online store.

*Please note Close to My Heart products are not included in this promotion.

Stampin’ Up! Demonstrators get the SAME discounts and sales that CUSTOMERS do – on TOP OF their demonstrator discount

Keeping that information in the forefront of your mind,

NOW is a perfect time to JOIN THE TEAM!

Join with me by following this link...

To view all the available ONLINE EXCLUSIVES, click here.

Clearance items may be found here

While you’re looking around in my store, remember there are some stunning kits available, for all ages and all seasons – even Christmas! And while you’re shopping, I offer fringe benefits to my customers: free tutorial of the month and a FREE Stampin’ Up! item valued to $10 – all for a $50 order, before shipping and taxes. Use my current host code to receive those benefits – especially when your order does not exceed $150. Make certain my name is listed as your demonstrator when checking out! :O)

HOST CODE  BAQG9RSE

Thanks for stopping by. May you have a beautiful day. Make someone happy when sending them a handmade card filled with love.

Stampin’ Up! Round We Go Birthday Cardb for the Happy Inkin’ Thursday Blog Hop

Good morning, good morning! It’s that time of week for a fabulous Happy Inkin’ Thursday Blog Hop. We have a fun sketch challenge today and I’ve used the Round We Go bundle to create my card. This bundle and all of Stampin’ Up! stamp & Die bundles are now selling with a 10% discount. With their already 10% off for bundles – this is really 20% off stamp and die bundles – now though June 30. More at the end of this post!

Stampin' Up! Happy Inkin' Thursday Blog Hop
Stampin' Up! Blog Hop Sketch Challenge
Stampin' Up! Round We Go card front

This is a new bundle for me – in other words, I hadn’t played with it before – and I had such fun! It could be the colors, the light-heartedness of the card, whatever, it was a different kind of creating. Can’t you see these pinwheels in sparkly colors for a Christmas decoration – hanging in a doorway or over a mantle? Anyway – fun to do.

I cut three 1 3/4 strips from 24-26 In Color 6×6 DSP in Summer Splash and die cut them with the appropriate die from Round We Go Dies to create this fun pinwheel. The die actually does all the scoring for you, so all you have to do is fold along the score lines accordion style. There is a tab on one end – use that to adhere to the next strip on the non-tab end – adhering three strips end to end. Then adhere together. I used liquid glue for this although you could use Tear ‘n Tape or Stampin’ Seal. The only thing there is, those are really too wide – so just take a moment to hold the strips ends together until the glue dries. Once the strips are together, bring the two ends together to create the pinwheel. I used the 1 3/4″ circle punch (ONLINE EXCLUSIVE purchase) to create a circle for the back of the pinwheel – to keep it’s shape. I used Seal+ to cover the circle, squished the pinwheel together and set it on the circle, holding it in place with an acrylic block while I kept working on the rest of the card.

I pulled out my Spotlight on Nature Dies and die cut a Basic White circle on which to adhere the pinwheel to the card front. I used the 24-26 In Color Glimmer Paper in Peach Pie to die cut this fun glittery circle for the front of the pinwheel. I’m not sure you can see it, but this die cut creates lines in the circle, similar to score lines – but just for added interest. I added that to the front of the pinwheel with glue dots. Now the pinwheel will not pop open any more!!! While the 24-26 In Color Glimmer paper was out on my desk, I cut a multifaceted circle in Summer Splash for the sentiment backing, using the Round We Go Dies. I used another die from Spotlight On Nature Dies for the sentiment circle, die cut in Basic White. I stamped the sentiment from Round We Go stamp set in Summer Splash ink and the little “splashes” in Peach Pie ink that were stamped off first – this also is from the Round We Go stamp set. I added this to the sparkly circle with dimensionals. At this point I took a length of the Bordered Ribbon in Peach Pie and adhered it in place with glue dots, wrapping it behind the DSP and adhering with Seal +. I adhered the completed faceted glimmer circle in place, then tied a knot with an additional length of the same ribbon. Everything was added to the Basic White card base cut 4 1/4 x 11 and scored at 5 1/2. The final touch – three 24-26 In Color Shimmer Gems :O)

Stampin' Up! Round We Go card inside

For the inside of the card, I took another panel of Basic White 4 x 5 1/4 and stamped the line image across the bottom: Summer Splash ink and the stamp is from Round We Go stamp set. The sentiment is from the same stamp set and stamped in Summer Splash ink. The other stamp is in Peach Pie ink. This was adhered to the inside of the card and ready to be gifted.

Stampin' Up! Round We Go Bundle Birthday card & envelope

For the envelope… more of the stamped lines across the bottom in summer Splash ink, and more ‘splashes’ in Peach Pie ink. Fun card!

OK… time to see what others on the team have created. Be sure to read below the names how to purchase this stamp & die bundle and other items from me.

Click on the next button or click on a name to take you to specific team members. Enjoy the hop!

Amy Koenders

Mary Deatherage

Jaimie Babarczy

Karen Finkle

Karen Ksenzakovic

Tara Carpenter

Terry Lynn Brightyou are here!

Carol Buckalew

Nel Thames

STAMPIN’ UP! STAMP & DIE BUNDLE 10% OFF SALE!!

Sales Period: 5–30 June 2024
Ordering Deadlines
Phone: 28 June 2024 at 6:59 p.m. (MT)  
Online: 30 June 2024 at 11:59 p.m. (MT) 

  • Get an additional 10% discount on stamp and die bundles only (that’s a total of 20% discount on stamp and die bundles!). This excludes suite collections, stamp and punch bundles, bundles not yet released to customers, and any other bundles*.
  • Save 10% on Stampin’ Cut & Emboss Machine and Mini Stampin’ Cut & Emboss Machine (white and Boho Blue). 
  • The 10% discount applies automatically to stamp and die bundles in all orders… including Starter Kit orders.
  • See and shop all qualifying bundles in the online store.

*Please note Close to My Heart products are not included in this promotion.

Stampin' Up!

And here’s the thing – you should know…

Stampin’ Up! Demonstrators get the SAME discounts and sales that CUSTOMERS do – on TOP OF their demonstrator discount

Keeping that information in the forefront of your mind,

NOW is a perfect time to JOIN THE TEAM – join my team!

Join with me by following this link...

To view all the available ONLINE EXCLUSIVES, click here.

Clearance items may be found here

The 24-25 Annual Catalog is now live… here’s a link to take you directly to the items available in this catalog – Happy shopping!

While you’re looking around in my store, remember there are some stunning kits available, for all ages and all seasons – even Christmas! And while you’re shopping, I offer fringe benefits to my customers: free tutorial of the month and a FREE Stampin’ Up! item valued to $10 – all for a $50 order, before shipping and taxes. Use my current host code to receive those benefits – especially when your order does not exceed $150. Make certain my name is listed as your demonstrator when checking out! :O)

HOST CODE  BAQG9RSE

Thanks for stopping by. May you have a beautiful day. Make someone happy when sending them a handmade card filled with love.

Stampin’ Up! Sketched Butterflies Thinking of You card

Good Tuesday morning! I have a sweet thinking of you card today using the awesome Sketched Butterflies stamp & die bundle. I also incorporated the Labeled with Love stamp set and die bundle – both of which will be available as part of the 10% off stamp & die set bundle sale that goes live Jun 5 and continues through Jun 30. That 10% off is IN ADDITION TO the always 10% off when purchasing stamp & die bundles. Let’s look…

Stampin' Up! Sketched Butterflies card front

I like the idea of versatility for a card when I’m not creating for a specific individual – and this card is just that. The card front is layers of Balmy Blue for the card base, then Highland Heather, Basic White and Subtles 6×6 DSP in Balmy Blue. The ‘frame’ for each butterfly comes from the Labeled with Love stamp set, stamped in Memento ink & die cut with it’s coordinating die. On each ‘frame’ is a stamped butterfly from the Sketched Butterflies stamp set. Stamped with Memento ink on a Basic White scrap, the two outside butterflies were colored with Stampin’ Blends: Light Balmy Blue on the body center & inner wings, Light Highland Heather then Light Fresh Freesia on the outer portions of each wing – both adhered with dimensionals to the ‘frame’. The center butterfly has two parts: the same Memento stamped image but stamped on a scrap of Thoughtful Journey 6×6 DSP and die cut with the butterfly outline die from Sketched Butterfly Dies. The overlay is the intricate die cut from the same scrap of Thoughtful Journey 6×6 DSP. These two were adhered together in the middle with a dab of liquid glue and a Purple Fine Shimmer Gem was added to it. This was attached to the ‘frame’ with mini dimensionals. I added little doodle dots with my Basic Black Marker on the two outside ‘frames’. Attaching the frames to the card front: I attached the center ‘frame’ first, centering it on the card front, then added the outer two, creating equidistant margins.

Stampin' Up! Sketched Butterflies card inside

For the inside, I stamped the sentiment from Labeled with Love stamp set in Memento ink on a scrap of the Thoughtful Journey 6×6 DSP and fussy cut it with my paper snips. This was adhered to the Basic White inside panel and that was adhered to a Highland Heather panel and both to the inside of the card. As I’m writing this, a friend is having surgery tomorrow, and since the sentiment is ‘thinking of you’, it will be perfect! But it could also easily be a sympathy card, an ‘in general’ note or a birthday card!

Stampin' Up! Sketched Butterfly Thinking of You card & envelope

The envelope flap has the very same Subtles 6×6 DSP in Balmy Blue adhered & trimmed to fit. I stamped a different butterfly from the Sketched Butterflies stamp set – in Memento ink – directly on the DSP. On the envelope front is the same butterfly as the flap, stamped in Memento ink and colored as those on the card front: Stampin’ Blends Light Balmy Blue, Light Highland Heather & Light Fresh Freesia. When working on an envelope, remember to slip a card scrap inside so the alcohol blends do not bleed through!

Stampin’ Up! has a new offer beginning June 5 – 30, 10% off any Stamp & Die set bundle AND 10% off the Mini Die Cut & Emboss machine as well as the standard size Die Cut & Emboss machine. I encourage you to make your list and take advantage of this generous offering.

Stampin' Up! 10% off Stamp & Die Bundle SALE

Click here to see all SU! bundles available in the

Stampin’ Up! 2024-2025 Annual Catalog.

And remember, bundles in the ONLINE EXCLUSIVE SU! store are also part of this offering – click here to see those

Sales Period: 5–30 June 2024
Ordering Deadlines
Phone: 28 June 2024 at 6:59 p.m. (MT)  
Online: 30 June 2024 at 11:59 p.m. (MT) 

  • Get an additional 10% discount on stamp and die bundles only (that’s a total of 20% discount on stamp and die bundles!). This excludes suite collections, stamp and punch bundles, bundles not yet released to customers, and any other bundles*.
  • Save 10% on Stampin’ Cut & Emboss Machine and Mini Stampin’ Cut & Emboss Machine (white and Boho Blue). 
  • The 10% discount applies automatically to stamp and die bundles in all orders… including Starter Kit orders.
  • See and shop all qualifying bundles in the online store.

*Please note Close to My Heart products are not included in this promotion.

Stampin' Up! 10% off Machines

Thanks for stopping by. May you have a beautiful day!

Stampin’ Up! Thoughtful Journey Gatefold

Welcome to JUNE! I can’t believe it is the 6th month of the year already… time marches on. :O) The Thoughtful Journey 6×6 DSP has lots of watercolor type images of streams, landscapes with flowers, grasses, etc, and is perfect for cutting apart and piecing back together again. A traditional gatefold uses panels on each ‘gate’, while this uses panels attached to each ‘gate’. Let’s look…

Stampin' Up! Thoughtful Journey Gatefold card front
Stampin' Up! Thoughtful Journey Gatefold, 2

In the two photos at left, you can see how the panels are attached to each side of the card front – or gates – and it allows the card to be opened easily. Here are some simple instructions for re-creating this type of gatefold.

  • The card base is 4 1/4 x 11 scored at 2 3/4 on the long side. You can score again @ 8 1/4 but I prefer to close the scored left side and fold the left side to meet it and burnish well with my bone folder. This guarantees no gap or possible overlapping if you have not been particular about scoring.
  • Layers for the front: cut and adhere together
    • Misty Moonlight: cut 2, 1 3/4 x 5
    • Basic White:: cut 2, 1 5/8 x 4 7/8
    • DSP: cut 2, 1 1/2 x 4 3/4 (in this case Thoughtful Journey 6×6)
      • I stamped my DSP at this point: butterflies on the top are from Sketched Butterflies stamp set, stamped with Pumpkin Pie ink; sentiment on the bottom panel is also from Sketched Butterflies stamp set and is stamped in Misty Moonlight ink.
  • Close left ‘gate’ of card base and adhere top completed layer to the ‘gate’ only, leaving equal distance at top & left at score line
  • Now do the same on the right side. Notice that when the card is closed there are equal distances between the top & bottom panels as well.
Stampin' Up! Sketched Butterflies, card inside

For the inside:

  • Misty Moonlight 4 x 5 1/4 is adhered to the inside of the card
  • On Basic White 3 7/8 x 5 1/8, stamp the butterfly image in the center with Pumpkin Pie ink. This is from Sketched Butterflies stamp set. Add color to specific areas with Stampin’ Blends Peach Peach Pie and Misty Moonlight.
  • I added some doodles around the body of the butterfly with my Basic Black Marker.
  • Stamp the sentiment from Sketched Butterflies stamp set in Misty Moonlight ink; adhere panel to the inside of the card

To complete the card front, I added three Adhesive-Backed Textured Dots.

Stampin' Up! Thoughtful Journey Gatefold card & envelope

For the envelope, I added another panel of Thoughtful Journey 6×6 DSP to the flap and trimmed to fit. I then stamped the butterflies from Sketched Butterflies stamp set in Pumpkin Pie ink on the envelope front. And done!

Interestingly, there is no die cutting on this card! It’s just stamps, ink, paper and an easy fun fold. There are so many ways to make this gatefold different.

Stampin’ Up! has a new offer beginning June 5 – 30, 10% off any Stamp & Die set bundle AND 10% off the Mini Die Cut & Emboss machine as well as the standard size Die Cut & Emboss machine. I encourage you to make your list and take advantage of this generous offering.

Click here to see all SU! bundles available in the Stampin’ Up! 2024-2025 Annual Catalog.

And remember, bundles in the ONLINE EXCLUSIVE SU! store are also part of this offering – click here to see those

Thanks for stopping by. May you have a beautiful day!