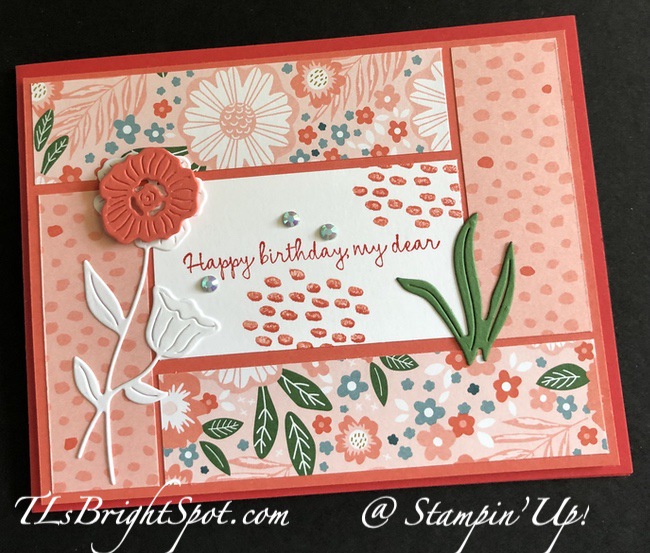
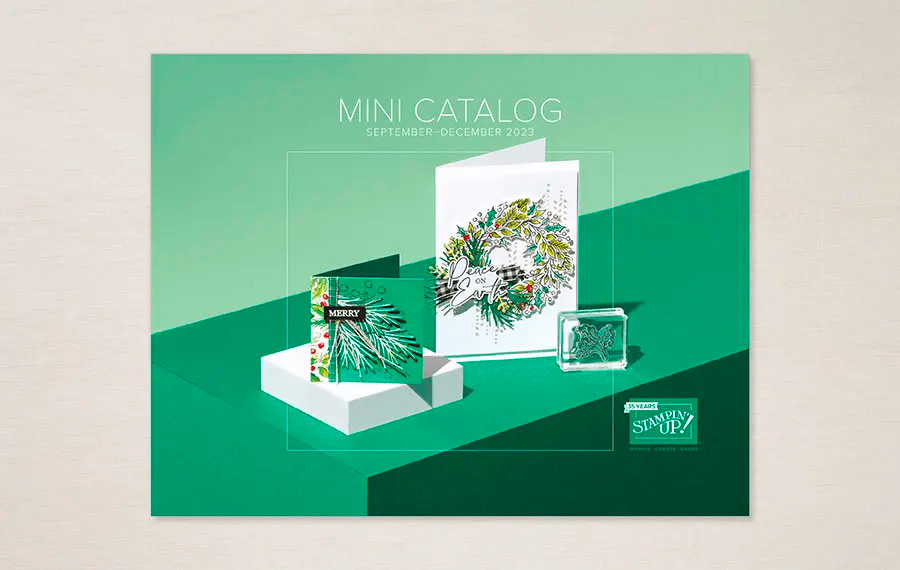
Good Wednesday – happy Sep-Dec 2023 Mini Catalog opening day!!! Wheee. It’s time for customer ‘happy day’, right? My card today features one of the Designer Series Paspers in this new catalog – Garden Walk 6×6 DSP.
I’ve paired this designert series paper with Timeless Charm bundle which is part of an ONLINE EXCLUSIVE as I do not yet have the coordinating stamps & dies to the DSP. Aren’t the colors pretty? Calypso Coral, Poppy Parade, and Garden Green plus some softer tones of maybe Balmy Blue, although that is not mentioned on the color coordination label.
The Garden Walk DSP is cut 1 x 4 for the two longer strips & 1 x 2 3/4 for the two end strips. And the cool part about this particular pattern is that the dotted side is the reverse of the flower pattern side :O). These were adhered to a Calypso Coral piece 4 x 5 1/4.n The Basic White piece is 1 5/8 x 2 7/8 and stamped prior to adhering in place. The sentiment comes from Timeless Charm stamp set and was stamped in Poppy Parade ink. The splotches are from the Timeless Charm stamp set and stamped in second generation Calypso Coral ink. Once adhered in place, the die cut flower was adhered with liquid glue. This is a Basic White die cut from the Timeless Charm Dies. The Garden Green leaves are a die cut from Timeless Charm Dies and also adhered with liquid glue. I die cut an additional flower center in Calypso Coral and adhered in in place with mini dimensionals. The final touch for the card front was the Iridescent Pastel Gems in Balmy Blue.
Again, using Timeless Charm stamp set, I stamped this ‘blob’ in second generation Calypso Coral then added the flower from Timeless Charm stamp set in Poppy Parade – all on a Basic White panel.
For the envelope, more of the Garden Walk 6×6 DSP for the flap, adhered & trimmed to fit. The fun leaf stamp is from Timeless Charm stamp set and stamped in stamped off Garden Green ink. A very thin strip of the Garden Walk 6×6 DSP was added at the bottom to tie it all together. A fun, quick and easy card :O)
With the Sep-Dec 2023 Mini Catalog going live today, you can purchase that paper easily right here. And for the Timeless Charm bundle and other Stampin’ Up! ONLINE EXCLUSIVES, shop with me here. While you’re viewing the ONLINE EXCLUSIVES, please note, there is a Special Release of new Designer Series Papers available WHILE SUPPLIES LAST beginning today Sep 6.
Surprise, surprise! We’re offering a special release of five beautiful new Designer Series Paper options! These papers include fabulous holiday prints, gorgeous seasonal styles, and some spectacular timeless designs.
We originally created these papers to be part of our second Sale-A-Bration offering. However, since our next release of new Online Exclusive products won’t happen until November (and you won’t be able to find any of these papers in a catalog), we’ve adjusted our strategy and decided to release these paper options starting 6 September! That way, you and your customers have the chance to get ahead on Christmas cards, seasonal crafts, and much more. These products are available while supplies last.
When you do shop with me, be sure I’m listed as your demonstrator so that I can send you gifties when your order is $50 or more. That gift is something of your Stampin’ Up! choice valued up to $10. Happy shopping. Use my CURRENT HOST CODE HDN4VQHR so I’m notified properly.
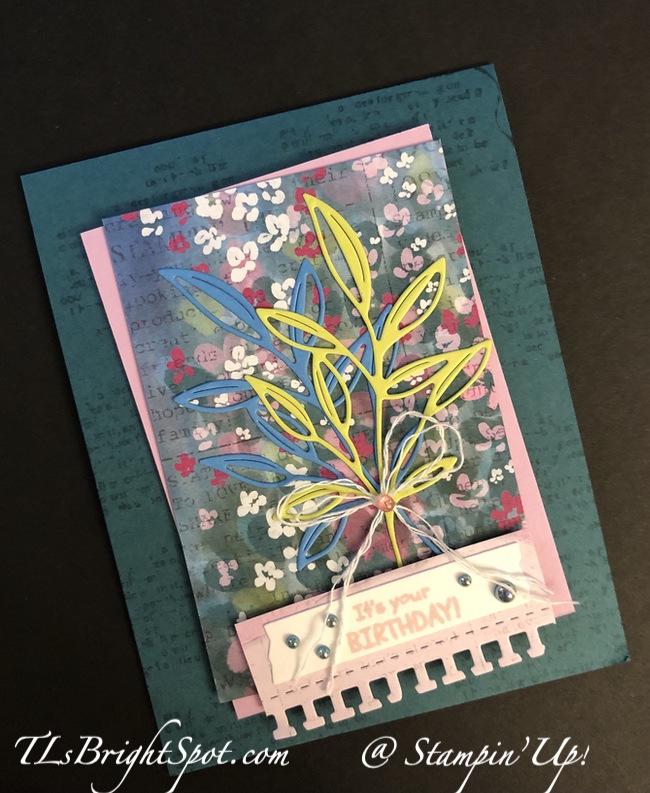
Stampin’ Up! has some really beautiful papers – and sometimes I get working with a certain Designer Series Paper and just can quit. That’s the way it is with the Masterfully Made DSP – so another card it is…
Look at these beautiful colors. Here’s what I did….
Pretty Peacock is the card base and after trimming it to size I stamped the front with the word stamp from the Gorgeously Made stamp set in Pretty Peacock ink.
I layered one of the Masterfully Made DSP to a Bubble Bath panel, adhering them together and adding them with dimensionals to the card base.
I pulled out two papers: Azure Afternoon and Lemon Lime Twist and using the Gorgeously Made Dies, die cut these two leaves. They were added to the card from with various dot of liquid glue.
I pulled out this fun ‘notebook edge’ die from the Gorgeously Made Dies and die cut a scrap of the Masterfully Made DSP. This was to be my background for the sentiment.
The sentiment is from the Hey Chuck stamp set and is stamped on Basic White in bubble Bath ink.. It was die cut with Gorgeously Made Dies then added to the ‘notebook edge’ die cut piece, dimensionals on back and added to the card front.
I added several Blooming Pearls in Pretty Peacock to the sentiment.
I tied a bow with lengths of White twine from the Basic Twine pack, and adhered it in place with a glue dot.
For the inside of the card, I stamped this fun image using an August Paper Pumpkin stamp and Memento ink. I colored it with Stampin’ Blends to coordinate with the Masterfully Made DSP: Bubble Bath, Berry Burst, Lemon Lime Twist and Lemon Lolly. I added strips of the Masterfully Made DSP then stamped the sentiment – again using Bubble Bath ink and an August Paper pumpkin sentiment. And the card was complete!
For the envelope, more of the Masterfully Made DSP for the envelope flap and a strip for the envelope front to bring it all together. This is a fun, happy, encouraging card and I can’t wait to send it to a favorite person :O)
Today is August 27 and the Mini Sep-Dec 2023 Catalog goes live Sep 6. As I have mentioned before, Stampin’ Up! offers the best Designer Series Papers – and I am offering Designer Series Paper Shares from the new catalog. Here are the deets:
How my shares work: I order full packs of all the Designer Series Papers listed below. I cut them into 6×6 pieces (or 6×12 for double shares) and give you one panel of each design from each pack on the list. I pack up the paper and get it back out to you just as quickly as possible! Shares give you a good working sample of all of the papers and makes it easier to decide which papers you like most and want to order.
Below is a list of the papers for this Designer Series Paper Share.
A single paper share is $30 plus $8.50 Priority Mail Shipping.
A double paper share is cut 6 x 12 and is $60 plus Priority Mail Shipping.
Remember, one 6×6 sheet of each design from these DSP packs. Most original DSP packs come in 12 x 12 size unless otherwise noted.
The list includes: name of DSP, number of sheets of that DSP in the pack.
A Walk in the Forest – 6
All About Autumn – (6×6 size) -12
Beary Christmas – 6
Melon Mambo & Granny Apple Green Foil Sheets – 2
Garden Walk – (6×6 size) – 8
Glow-In-The-Dark 6×6 Specialty Paper – 1
Joy of Christmas – 6
Joyful Specialty Paper – 4
Merry Bold & Bright – 6
O Holy Night – 6
Oxidized Copper Specialty Paper – 2
Shining Brightly Specialty Paper – 6
Snowflake Magic Specialty Paper – 3
Them Bones – 6
Winter Meadow – 6
Anyone is welcome to join this paper share opportunity, but shipping is limited to addresses within the US. If you would like to join in these shares, please email the following information to tlsbrightspot@gmail.com
Your first & last name (yep, I need both :O)
The email address connected to your PayPal account. You DO NOT need to have a PayPal account to pay the invoice; you can choose to pay by credit card without having a PayPal account.
Deadline to sign up for my shares: Monday, September 4 @ 3 PM ET
If you do not have a demonstrator nor a catalog, please reach out to me – we can FIX that! There are lots of Stampin’ Up! opportunities for shopping:
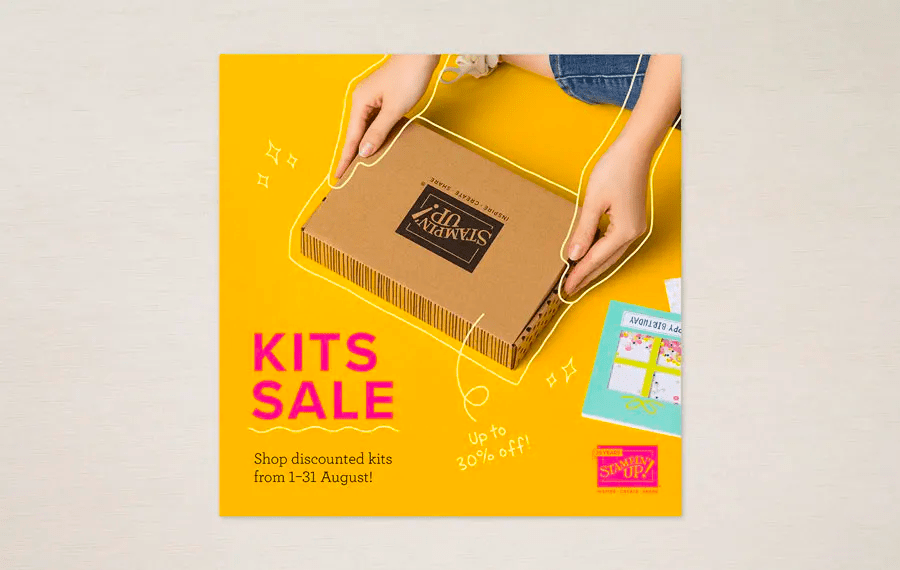
Kits Collection SALE is through the end of August. You can shop those products with me here.
Paper Pumpkin is a monthly subscription: You may find more information and subscribe here.
Stampin’ Up ONLINE EXCLUSIVES – not in any Stampin’ Up! catalog: Visit here to shop these EXCLUSIVES.
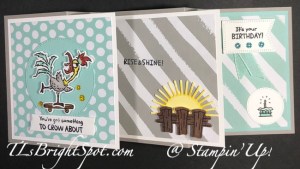
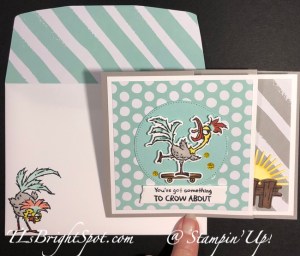
Hello Saturday! We had a couple of days of wonderful temps and now we are back to humidity. Ugh. Well, this is summer and I’m not going to wish it away! Let’s take a peek at my card for today.
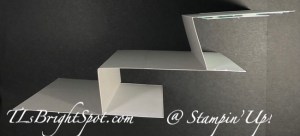
I’m going to confess, I don’t know the name of this fun fold and it needs a name. Help me out here, folks – let’s name it! The card base is 4 1/4 x 11 scored at 2 1/2, 3 3/4, 6 3/4 and 8 1/4. Burnish the folds in an accordion style: mountain, valley, mountain, valley.
I used Gray Granite for my card base. The next layer is Basic White with a layer of DSP: I used Subtles and Neutrals 6×6 DSP. How these layers are attached is important: leaving a border of the card base in each case.
In the first photo, the card base border is about 1/4″ on the left, top & bottom, with the excess free. In the second photo the same is true, 1/4″ from scoreline on left and 1/4″ top & bottom b order. The final panel is smaller and the layer is Pool Party with Subtles 6×6 DSP in Pool Party.
Now let’s decorate each panel:
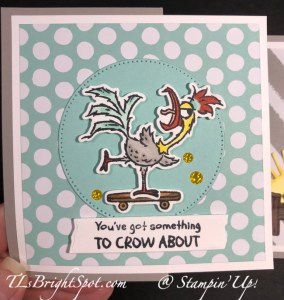
Panel 1: The circle is die cut from Pool Party using the Stylish Shapes Dies and adhered in the center. The chicken and skateboard (from Hey Chuck stamp set) are stamped in Memento ink on Basic White and colored with Stampin’ Blends: Pool Party, Calypso Coral, Gray Granite, Lemon Lolly and Pecan Pie (skateboard). Both were die cut with the Hey Chuck Dies, dimensionals added and adhered to the center of the circle. The sentiment is also from Hey Chuck stamp set and stamped in Memento ink then die cut with the Gorgeously Made banner die and added with dimensionals. Three Glossy Dots Assortment in Daffodil Delight were added for sparkle.
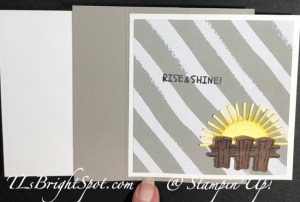
Panel 2: Subtles 6×6 DSP in Gray Granite to the Basic White panel. Die cut the rising sun from Lemon Lolly card stock using the Hey Chuck Dies and color with a bit of Dark Lemon Lolly Stampin’ Blends. Stamp the fence from Hey Chuck stamp set on a scrap of One Horse Open Sleigh 6×6 DSP (ONLINE EXCLUSIVES) in Memento ink and die cut with die from Hey Chuck Dies. Adhere the fence with dimensionals then slip the rising sun behind adhering with liquid glue. The final step for this panel is the sentiment stamped in Memento ink using the Hey Chuck stamp set.
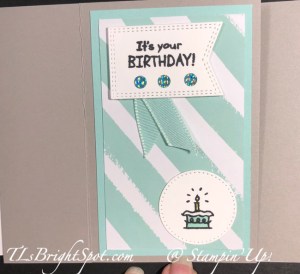
Panel 3: Pool Party card stock with Subtles 6×6 DSP in Pool Party layered together. The birthday cake from Hey Chuck stamp set is stamped in Memento ink on a Basic White scrap and colored with Stampin’ Blends: Lemon Lolly, Pool Party and Wink of Stella on the icing. This was die cut with the smallest circle die from Stylish Shapes Dies and adhered with liquid glue. The sentiment banner was stamped on Basic White using another stamp from Hey Chuck stamp set and Memento ink. It was die cut with a banner die from Nested Essentials Dies, dimensionals added to the back and attached. The ribbon is Grosgrain Ribbon in Pool Party added under the banner with glue dots. Three Glossy Dots Assortment in Pool Party were added to the banner for more sparkle… and the card was done.
For the envelope… more Subtles 6×6 DSP in Pool Party was added to the flap and trimmed to fit. Another chicken from Hey Chuck stamp set was stamped in Memento ink on the envelope front and colored with Stampin’ Blends: Pool Party, Calypso Coral, Lemon Lolly and Gray Granite.HINT: When coloring with Stampin’ Blends on an envelope, always slip a heavy card stock inside to prevent color bleeding through to the back of the envelope. :O)
Fun, bright card, right? Ok, what else is going on in the Stampin’ Up! world…
Redeem your coupons this month!
the Mini September-December 2023 Catalog is available to demonstrators and my order for catalogs to my customers has shipped. I just don’t have it yet – Monday they say :O( Once I receive the catalogs though, the labels are ready and will be sent first class to my customers. Wait till you see all the fun, new products! I can’t wait to play with what I’ve ordered and share those with you. If you would like to order from the catalogs early as well, join my team. We have lots of fun: support from several team leaders, challenges to participate in, projects to share & inspire. If you join now, you can order items from the new catalog right away. :O) The catalog goes live to customers September 6. You may join my team here.
Kits are fun, quick and easy, and all-inclusive so there’s nothing extra to buy and nothing to store afterward.
Completing a kit gives everyone a sense of artistic accomplishment.
Completed kits make great gifts. Make the projects and then give them away for someone else to use.
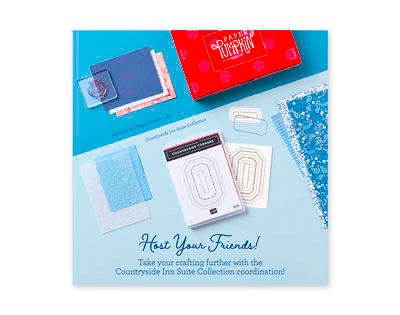
Because kits come in so many styles and project types, there’s something for everyone. Want to HOST a kits collection party? Let me know and I’ll help pull that off. Kt together in September with kits on sale now. :O)
KITS COLLECTION BY STAMPIN’ UP! You can shop with me here.
Sales Period: 1–31 August
Card cuts for today’s project:
Card base – Gray Granite 4 1/4 x 11 scored at 2 1/2, 3 3/4, 6 3/4, 8 1/4
Basic White – 4 x 4 (2) + scraps for sentiments, chicken & other images
DSP: Subtles 6×6 DSP – Pool Party 3 3/4 x 3 3/4 + 2 1/4 x 3 3/4 + 2 1/4 x 6 (envelope flap); Gray Granite 3 3/4 x 3 3/4
Pool Party card stock – 2 3/4 square (die cut circle); 2 1/2 x 4 (last panel)
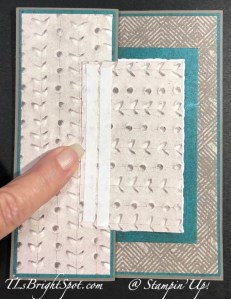
Good Sunday morning! Wow – it’s a beautiful c-o-o-l 65 this morning! I’ll take it. My card today is a very fun Pop-Up card that’s really pretty easy & quick. It’s a birthday card for a gentleman and I used He’s All That stamp set for the sentiments and Earthen Elegance Designer Series Paper.
This is a bit like a Z-fold card: 8 1/2 x 5 1/2 card base scored at 2 1/8 & 4 1/4. You can see in the photo how to fold it. I used the Earthen Elegance DSP for the mat layer as well as the top layer. It saves on the weight of the card.
The photo at left shows the mat layers in place: the front and the inside sections. The next step is the inside pop-up 4 x 5 1/2 scored @ 1/2, 1, 2, & 2 1/2. Burnish gently since this is DSP, then add tear n’ tape to sections 1, 3, & 4. Remove cover on Tear n’ Tape in section 1 & fold i8n to itself to create the pop-up. Remove Tear n Tape covers in section 3 and attach to inside back panel of card. Remove cover of last strip of Tear n Tape and adhere to 2nd panel of card.
This last photo shows the insert (pop-up) looking from the top and how it fits in the card. Now it’s time to decorate the pop-up. I die cut a Basic White piece with the Deckled Rectangle Dies then stamped the image from He’s The Man stamp set in Pretty Peacock ink, adhered it to the pop-up so it had an even border on three sides. I added four 2023-2025 In Color Dots in Pebbled Path under the stamped image.
To create the front image, I used a smaller Deckled Rectangle Die to die cut another Basic White piece to stamp another image from He’s All That stamp set in Pebbled Path ink. I layered a slightly larger piece of Earthen Elegance in Pretty Peacock to this to carry out the ‘frame’. I turned this piece over to know exactly where to add the tear n tape to adhere it to the front section (see photo). Then I removed the cover of the tear n tape & added to the front so you could see a continuous frame of color.
When the card is closed it shows the front panel and the poop-up panel framing it. That’s what I wanted to do. The next photo shows the card open.
You can see that I also added four Adhesive-Backed Sequins Trio in Pretty Peacock under the sentiment. For the envelope.. more of the Earthen Elegance DSP in Pretty Peacock on the flap and several stamped stars from Alphabest stamp set in Pretty Peacock ink. At the last minute I decided to decorate the card back so I would have a place to write. I stamped the Happy in Pretty Peacock ink using the Biggest Wish stamp set. The numbers were done with the Alphabest stamp set and punched with the Best Label Punch. And now the card was complete!
Hello – it’s Friday and I have a fun fold for you today… a Double Pop-Up Card that I saw on Splitcoast Stampers. You can go to YouTube for a video. This fun fold intrigued me and I simply had to make it. We made this card in my card class a bit ago and everyone had a REALLY good time :O)
These little birds are so stinkin’ cute! And I love them with glasses, which is a stamp in the set :O)
I used Stampin’ Blends to color everything: on the front – Daffodil Delight for the bird, S300 & S400 for the Branch, Old Olive for the leaves and I fussy cut them. The sentiment on the front comes from Cheerful Daisies stamp set and stamped in Basic Gray on Basic White card stock, die cut with Cheerful Daisies Dies. It was adhered with dimensionals to an Old Olive piece die cut with Deckled Rectangles Dies and adhered with liquid glue to the card front. Tinsel Gems 4 pack in Berry Burst were added for sparkle & glam.
Delightfully Eclectic was my choice of DSP and I used Old Olive for all the constructive parts. Let me walk you through this card, cuz it’s a fun one. You do need to pay attention to measurements and score lines. :O)
Measurements & detail:
Card base is 8 1/2 x 5 1/2 scored at 4 1/4. Lightly mark the center of the score line @ 2 3/4
Cut DSP for inside back: 5 3/8 x 4 1/8 and adhere to inside back
Cut panel 5 1/2 x 5 1/2, score @ 3, burnish
cut DSP to decorate: 5 3/8 x 2 7/8 (left inside section); 5 3/8 x 2 3/8 (right inside section)
stamp or decorate as desired (this is a thick card, so I
highly recommend only stamping)
add to inside of card base with front edges even with one another – see photo
You can see I colored here again… Stampin’ Blends Daffodil Delight for the birds; books are Copper Clay, Pebbled Path, and Pecan Pie. For the book edges I used Light Smoky Slate.
Adhere panel 5 1/4 x 4 of Designer Series Paper Delightfully Eclectic to the inside back panel.
With 1/2″ end on left, lightly draw lines from first score line to 3rd score line, diagonally to create an X
score over these lines, erase pencil marks and burnish
add Tear n tape to the 1/2″ end
at opposite end of mechanism, add liquid adhesive and adhere to inside card base, left side, centering with score line and pencil mark. You do not want to interfere with the fold, so butt it up against the centerfold
Decorated squares of pop-up:
Cut 2 panels 2 3/8 x 2 3/8 same color as card base. Here it is Old Olive.
Cut 2 panel 2 1/4 x 2 1/4 from Basic White or patterned paper. I chose Basic White and stamped, colored the 2 squares
top square is colored with Daffodil Delight. The ‘branch’ is a die cut from Cheerful Daisies Dies that is really a stem. But cut in Early Espresso it looks like a branch – and is adhered with liquid glue.
bottom square is all over stamped eye glasses from the Birds Eye View stamp set.
Add these two squares together then to mechanism. Notice how they are separated about 1/4″ This is so they do not interfere in the opening and closing of the card. When the card is closed these pop-ups simply fold right into the card. :O)
For the envelope… I added more of the stripe from Delightfully Eclectic to flap and trimmed it to fit. For the envelope front I stamped this cute bird from Birds Eye View in Basic Gray ink and colored it with Daffodil Delight Stampin Blends. Gads – no photo! What the heck…
If you wish to order the products to make this card, be sure to use my current HOST CODE to receive rewards. What does that mean? With every order of $50 you receive a FREE GIFT from me of a SU! items of your choice valued to $10. If your order is over $150, don’t use my host code, but you’ll still get my free gift item.
HOST CODE CV4N6Y6M
Note: Make sure that you can see my name on the final checkout page listed as your Demonstrator when you order so that you know that you’re ordering with me and you’ll get my rewards!
BONUS DAYS for Stampin’ Up! have begun… and run for this entire month
BONUS DAYS! Because do you know what’s a great deal? Getting rewarded for all the crafting supplies you’re already going to buy! When you shop between 6–31 July and spend $50 USD | $60 CAD you will earn a $5 USD | $6 CAD coupon! Make sure you save all your coupons because you can redeem them (and we mean ALL of them) between 1–31 August.
Coupon codes may be redeemed for any product (excluding Starter Kits, demonstrator supply items, and Paper Pumpkin month-to-month subscriptions).
If a participant earns multiple codes from a single order, they will receive one email with multiple codes. If they earn multiple codes from multiple orders, they will receive separate emails for each code earned. Make sense?
New prepaid Paper Pumpkin codes may be discounted using Bonus Days coupon codes.
New Product release in the Online Store as of Jul 6.
ONLINE EXCLUSIVES are just that – ONLINE ONLY products not shown in any Stampin’ Up! Catalog. New products mean new inspiration and new ways to express your creativity and develop your business! 6 July, there will be even more Online Exclusive products for you to shop. The best way to see what is available is to view the online store.
The size of a notecard is 3 1/2 x 5 and is simply a sweet size. And, it is not too small to be mailed. My card today is made with one of the Basic White Notecards and Envelopes.
I began by stamping this cute cupcake from Circle Sayings stamp set in Crumb Cake ink and coloring it with Stampin’ Blends Bubble Bath for the icing and Light Smoky Slate for the wrap, I wanted it to look like a foil so added Wink of Stella for the shine. It doesn’t show in the photo but it does in person :O) I stamped the ‘circle saying’ in Crumb Cake as well and die cut with a circle from Sylish Shapes Dies. For more sparkle (cuz birthdays are special occasions) I die cut a larger circle from Soft Shimmer paper in Bubble Bath – yep, Stylish Shapes Dies. I added a bow made from the Simply Elegant Trim in silver and attached it with a glue dot. This item I set aside.
On a piece of Crumb Cake I stamped repeatedly the words Happy Birthday using a stamp from Go To Greetings – in Crumb Cake ink. I attached the stamped and decorated circle with dimensionals. I cut small strips of the same Soft Glimmer paper in Bubble Bath and attached them to the Notecard front, then added the Crumb Cake panel. The Pastel Adhesive-Backed Sequins in Petal Pink seemed to match pretty well, so I added those as well.
For the inside… I used Bubble Bath ink and Crumb Cake ink to stamp sentiments from Circle Sayings stamp set on a Basic White piece. This was added to a very slightly larger panel of Crumb Cake and added to the inside of the card.
For the envelope I used another sentiment from Go To Greetings stamp set to stamp in Crumb Cake ink – and that was it. I kept it very simple.
For the card cuts and products, see below. And if you wish to order these products, be sure to use my current HOST CODE to receive rewards. What does that mean? With every order of $50 you receive a FREE GIFT from me of a SU! items of your choice valued to $10. If your order is over $150, don’t use my host code, but you’ll still get my free gift item.
HOST CODE CV4N6Y6M
BONUS DAYS for Stampin’ Up! have begun… and run for this entire month
BONUS DAYS! Because do you know what’s a great deal? Getting rewarded for all the crafting supplies you’re already going to buy! When you shop between 6–31 July and spend $50 USD | $60 CAD you will earn a $5 USD | $6 CAD coupon! Make sure you save all your coupons because you can redeem them (and we mean ALL of them) between 1–31 August.
Coupon codes may be redeemed for any product (excluding Starter Kits, demonstrator supply items, and Paper Pumpkin month-to-month subscriptions).
New prepaid Paper Pumpkin codes may be discounted using Bonus Days coupon codes.
New Product release in the Online Store as of Jul 6.
ONLINE EXCLUSIVES are just that – ONLINE ONLY products not shown in any Stampin’ Up! Catalog. New products mean new inspiration and new ways to express your creativity and develop your business! 6 July, there will be even more Online Exclusive products for you to shop. The best way to see what is available is to view the online store.
Be sure to use my HOST CODE when you shop! This gets you a free $10 SU! item of your choice with a $50 order. If your order is over $150, don’t use my host code, but you’ll still receive the FREE GIFT FROM ME. Here’s my
HOST CODE: CV4N6Y6M
Thanks for stopping by. May you have a beautiful day.
Share yourself with others in the creativity of handmade cards – another way of connecting with love.
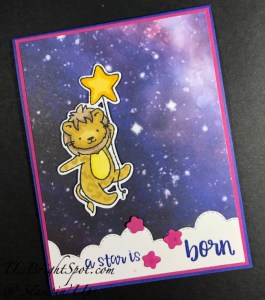
Happy 4th of July! Today’s card is a ‘take’ on the 4th of July using the LIttle Dreamers bundle AND the Stargazing DSP.
Isn’t this lion CUTE!? This card could so easily be given for a 4th birthday, but it is intended for the 4th of July post :O) This DSP, Stargazing is stunning, AND it has a hint of reddish color in the upper right corner. What it says on the package is Berry Burst is a coordinating color, so I did use that for accent – but pretend it’s red, ok? You know, red, white and blue… The Basic White cloud at the bottom of the card is die cut with the Basic Border Dies and 1 1`/4″ of card stock. The stamped sentiment is done with Starry Sky ink, covering a portion of the stamp in the Little Dreamers stamp set, stamping then cleaning the stamp and re-inking just the last word, also in Starry Sky ink. In between, I die cut stars using one of the dies in the Little Dreamers Dies and Berry Burst card stock. Just the top star was adhered with a mini dimensional, the other two and the cloud were added with liquid glue onto the Stargazing DSP. The lion is of course, from Little Dreamers stamp set and stamped in Memento ink on the Basic White panel. I colored it with Stampin’ Blends: Daffodil Delight for the star, Wild Wheat for the larger portion of the lion, Crumb Cake & SU300 for the mane and Lemon Lolly for the lions belly. He was die cut with the Little Dreamers lion die and attached to the card with dimensionals. This whole Stargazing panel was added to a Berry Burst piece, then to the Starry Sky card base.
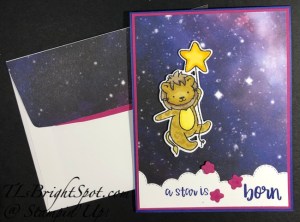
For the inside, Starry Sky ink on the Biggest Wish stamp set ‘happy’, stamped on the Basic White panel. Then the 4th was stamped in Berry Burst ink using the Alphabest stamp set. A 1/2″ strip of the Stargazing DSp was added to the bottom to continue the theme from the front. In hindsight, it should have been adhered to the top of the Basic White panel – but you know, hindsight. This piece was added to Berry Burst and adhered to the inside of the card.
For the envelope – real simple… a bit of the Stargazing DSP on the flap + a small strip of Berry Burst to continue the theme of red, white & blue – HAPPY 4TH OF JULY!
Be careful out there on this fourth of July. Fireworks are fun & beautiful to watch, just be careful if you light them yourself.
Bonus days are right around the corner… July 6 as a matter of fact. Here’s the scoop.
BONUS DAYS! Because do you know what’s a great deal? Getting rewarded for all the crafting supplies you’re already going to buy! When you shop between 6–31 July and spend $50 USD | $60 CAD you will earn a $5 USD | $6 CAD coupon! Make sure you save all your coupons because you can redeem them (and we mean ALL of them) between 1–31 August. And there’s no limit to the number of coupons you can earn!
Coupon codes may be redeemed for any product (excluding Starter Kits, demonstrator supply items, and Paper Pumpkin month-to-month subscriptions).
New prepaid Paper Pumpkin codes may be discounted using Bonus Days coupon codes.
Say hello to summer and get crafting under the sun with this month’s kit! With beach designs, fun accordion-fold cards, along with sentiments to support, encourage, say hello, and more, wave at those you love through uplifting cards and send family and friends oceans of kind words all summer long!
PAPER PUMPKIN 48-HOUR SALE!
Surprise! On 6–7 July, all current Paper Pumpkin subscribers can save up to 50% on Paper Pumpkin past kits, refills, and add-ons! Items are available while supplies last n- so order EARLY!
Due to increased costs to produce kits for the Kits Collection by Stampin’ Up!, we need to slightly increase the prices on all the kits that were released in 2021 and some of the kits released 2022. These price changes will go into effect on 6 July. At this time, we are not increasing pricing on any kits released in 2023.
Good Sunday morning, July 2. First of all, I cannot believe it is July – did I say that yesterday? It still doesn’t seem like July. Maybe it will grow on me. :O) Today’s card uses a technique I haven’t done in a while and it’s so easy and just gives a card a different look. It’s called a ‘floating technique,’ which means an element looks as though it is sitting on top and unattached. It IS attached.
I’ve also used a new bundle that is part of the ONLINE EXCLUSIVES and will be available July 6 – just a few days from now – Timeless Charm bundle. The die cut flower and the sentiment come from this set. The floating technique is the circle… 1/2″ strips adhered to a window sheet then die cut. For this card I used the Stylish Shapes Dies – the largest circle. This was added to the card base with dimensionals just on the strips so they don’t show. The paper is part of the Delightfully Eclectic pack of DSP. The flower, from Timeless Charm Dies, has lots of detail and is delicate. It too, is adhered with dimensionals – and was die cut from Crushed Curry, one of the coordinating colors for the pack of DSP. The sentiment is stamped in Memento ink on a Basic White strip and comes from the Timeless Charm stamp set. I angled the ends and added it to the card with dimensionals as well. The embellishments are Pastel Adhesive-Backed Sequins in gold.
Ha! I wrote on this card before taking the picture!!! Silliness. For the inside I used the die cut of the flower from Basic White as a stencil to create the inside flower. I used a Small Blending Brush and Fresh Freesia ink to color the flower heads, then switched to a sponge dauber and Old Olive ink to color the leaves & stems. I used a post it note tom cover areas I did not want inked.
This new bundle – Timeless Charm – has a couple of stamps that can be used as a color block or background, and I used one of those after stamping the sentiment in Memento ink. That background was stamped in Fresh Freesia after stamping off once. The Basic White panel was attached to the inside of the card – and all done.
Let me talk just a bit about ONLINE EXCLUSIVES… they are just that, not in any SU! catalog, but digital only. So for those of you who like doing everything digitally, this is one way to do that.
Here is a photo of the Timeless Charm bundle where you can see the flower die cut, the sentiments I used and the ‘background’ kind of stamp as well as other stamps & dies in the set. Since this just arrived on my doorstep the other day, this is my first play – and I can’t wait to create with it some more. Love the leaves and the dies that coordinate. If you are interested in purchasing this product and others from the ONLINE EXCLUSIVES, this bundle will be available July 6 along with the Santa Sleigh bundle. However, there are many other products available on line from my store. You may shop those products here.
BONUS DAYS! Because do you know what’s a great deal? Getting rewarded for all the crafting supplies you’re already going to buy! When you shop between 6–31 July and spend $50 USD | $60 CAD you will earn a $5 USD | $6 CAD coupon! Make sure you save all your coupons because you can redeem them (and we mean ALL of them) between 1–31 August. And there’s no limit to the number of coupons you can earn!
Coupon codes may be redeemed for any product (excluding Starter Kits, demonstrator supply items, and Paper Pumpkin month-to-month subscriptions).
New prepaid Paper Pumpkin codes may be discounted using Bonus Days coupon codes.
With beach designs, fun accordion-fold cards, along with sentiments to support, encourage, say hello, and more, wave at those you love through uplifting cards and send family and friends oceans of kind words all summer long!
Good Memorial Day! Men and women gave their lives that we might be free ~ free to practice our faith, free to speak out, etc and etc. The list is pretty long of the freedoms we have that other countries do not. Thank you to those who served both us and our country ~ for your dedication, for your strength of character, for your willingness. Bless you. I am so very grateful.
My card today is a fun fold and could be used for graduation, a birthday, a job promotion, for just about any type of celebration. It includes a place for a gift card or money or an additional note.too.
What a fun card to create. My juices were flowing. This card has three layers: card base, middle layer and the top decorated layer. I began with a card base of Azure Afternoon (what a beautiful shade of blue.) After scoring and burnishing, I punched the top two corners for a different look, using the Very Best Trio Punch. I added a layer of Blueberry Bushel to each of the three panels. The next layer is Bright & Beautiful 6×6 DSP on the top & bottom panels. For the center panel, I stamped with Azure Afternoon ink on a Basic White panel using the Beautiful Balloons stamp set. Next I attached an adhesive sheet to a small piece of the Bright & Beautiful DSP (part of the DSP Sale June 1!!!), removed the top of the adhesive sheet and added a piece of the Gold Celebrations Acetate. I die cut two balloons and a piece for the card holder. That acetate really added something special to the card! I added the smaller balloon to the center panel then added a length of the Simply Elegant trim in gold and adhered the Basic White panel to the center. The larger balloon was put on dimensionals and I added a bit of a tassel die cut from Gold Foil Sheets and attached these to the upper panel. I used the Radiating Stitches Dies to die cut a circle, then stamped the sentiment from Beautiful Balloons stamp set in Azure Afternoon ink. I used the 1 3/4 circle punch (from SU! ONLINE EXCLUSIVES) to punch an Azure Afternoon circle and adhered the two circles together. I added a Textured Ribbon in Wild Wheat to the top panel and placed the circle over (yep, it is on dimensionals as well.
For the bottom panel, I had added the Gold Celebrations Acetate to a Bright & Beautiful piece, then added the Tear n’ Tape to the sides and bottom and attached it to the card. And the card is done! Whoops – not quite… the ribbon at top… I punched an oblong opening using the Very Best Trio Punch, slipped another length of Textured Ribbon in Wild Wheat and tied it with a piece of Simply Elegant Trim in Gold.
Measurements:
Card base 4 1/4 x 11 scored at 4 & 6 3/4
Layer: 4 1/8 x 3 7/8; 4 1/8 x 2 5/8; 4 1/8 x 4 1/8
DSP layer: 4 x 3 3/4; 4 x 2 12; 4 x 4
Gift card panel: 2 x 4
SALES PERIOD: 1–30 JUNE you may find these on pages 129-133 in the 2023-2024 Annual Catalog – except for the ONLINE EXCLUSIVE PAPER.
All order types qualify for this promotion.
There is no limit to how many packages of Designer Series Paper may be purchased during this promotion.
Only select Designer Series Papers are available at a 15% discount during this promotion. Please reference the table below or the flyer in the marketing toolkit to see the papers included in the sale.
Orders must be placed—and closed—during the promotion period for the 15% discount to apply.
Designer Series Paper ordered as part of a Starter Kit or with Stampin’ Rewards qualify for the 15% discount.
Designer Series Papers are from the new 2023–2024 Annual Catalog (p. 129–132) and Online Exclusives.
Stampin’ Up! has a monthly subscription for Paper Pumpkin that is also a kit all in one. The first order includes an acrylic block which can be used for all Paper Pumpkin kits after that. This particular kit must be ordered by June 10. Click on the photo above to go straight to my Paper Pumpkin area to subscribe :O) Click here to purchase Paper Pumpkin.
Stampin’ Up! ONLINE EXCLUSIVES are just that – products not offered in any catalog. My post today used two products from this list. You may shop those products here.
If you do not have a demonstrator and would like to order from me or need a catalog, I would like to help you create. When ordering $50 or more in product (before shipping/ taxes), use my HOST CODE 64NDVS4D to receive Star Rewards and a SU! gift valued to $10. Star Rewards build up so that when you have 8 rewards from me, you can receive a stamp set valued to $40. :O) And when your order is $50 or more prior to Shipping/ taxes, you also receive the monthly tutorial. :O)
Good Saturday morning to you – and Memorial Day weekend. A special thank you to all those who have served in the military – you are honored and remembered… thank you for your service and dedication to this country.
My card for you today is a fun fold – called Triple Panel Pop-Up card. We made this in my class yesterday and everyone loved it. This fun fold can be used with lots of other stamps & dies, but the request from my students was to use Zany Zoo and the coordinating Zoo Crew DSP.
Is this alligator cute or what?! That look on his face says delight to me. And I’ve used him to make this a birthday card. My card base is a standard A2 Thick Basic White. Additional card stock for the front is embossed Pumpkin Pie (embossed with the Cross-Hatch embossing folder from the Basic Embossing Folders from the ONLINE EXCLUSIVES). This was layered onto a Pool Party panel and attached with liquid glue to the card base. All die cuts use the Zany Zoo dies: clouds, balloons, banner and the alligator. The alligator was die cut directly from one of the papers in Zoo Crew DSP. The balloons are die cut from scraps of Petal Pink, Lemon Lolly, Lemon Lime Twist and Pool Party. The clouds and banner are die cut from Basic White. The sentiment comes from Zany Zoo stamp set and is stamped in memento ink. I used the Black twine from the Baker’s Twine Essentials Pack to ‘attach’ the balloons to the alligator. The little back embellishments are from the Classic Matte Dots. Oh, & I wrapped Linen Thread around the banner for a bit more texture and masculinity :O).
More fun animals for the inside of the card… all fussy cut from the Zoo Crew DSP. The DSP on the inside is from Zoo Crew DSP as well. Embossing folder used is the Hobnail Embossing Folder from the Basics Embossing Folders from the ONLINE EXCLUSIVES set of 3. Card stocks for the embossed panels are – from the top – Pool Party, Crumb Cake and Pumpkin Pie. The balloons are die cut from scraps of Lemon Lolly, Zoo Crew DSP, Petal Pink and Pool Party. The sentiment on the left panel is from the Zany Zoo stamp set and the embellishments are from the same pack of Classic Matte Dots but in Basic Gray.
For the very back of the card… this fun skater of a bird fussy cut from Zoo Crew DSP and adhered to a Basic White panel. This panel is for writing your very own special message to the recipient. :O)
I bet you want directions, don’t you?! The mechanism for holding the three panels looks like this from the top ~
Directions for mechanism:
Mechanism measurements: 3 x 5 1/4: score on short side @ 3/4, 1 1/2, 2 1/4
Fold score line and burnish
Fold ends to center, flattening and not overlapping
Add adhesive (liquid or tear n’ tape) to open ends, add directly to score line of card base
Panels will be added to this mechanism on opposite sides – what you see above is the top panel adhered to left side of mechanism. The middle panel is attached to the right side of the mechanism. Bottom panel is adhered same as top panel.
Triple panel dimensions/ directions:
cut 3 – 1 3/4 x 3 3/8
cut 3 – 1 5/8 x 3 3/8 (these are either embossed or DSP)
Add the embossed or DSP pieces to the larger cuts
Adhere top & bottom panels first to assure proper spacing: remember these are attached to the left side of the mechanism.
Adhere center panel to the right side of mechanism.
Decorate as desired
Card base & other piece measurements:
Card base 8 1/2 x 5 1/2 scored @ 4 1/4
Front panels: 4 1/8 x 5 3/8; embossed piece 4 x 5 1/4
Inside left: 3 1/4 x 5 1/4; 3 x 5
Inside right: 4 x 5 1/4 DSP
Back: 4 x 5 1/4
Here are photos of student cards: notice the card base is Pool Party.
Notice how the format of each is the same but also how each individual created their own theme for their card. Fun. They so concentrated to make it their own and they really got into it. :O) This Designer Series Pack of papers will be on sale beginning June 1. Continue to read to see the entire list of DSP on sale.
If you do not have a demonstrator and would like to order from me or need a catalog, I would like to help you create. When ordering $50 or more in product (before shipping/ taxes), use my HOST CODE 64NDVS4D to receive Star Rewards and a SU! gift valued to $10. Star Rewards build up so that when you have 8 rewards from me, you can receive a stamp set valued to $40. :O) And when your order is $50 or more prior to Shipping/ taxes, you also receive the monthly tutorial. :O)
SALES PERIOD: 1–30 JUNE you may find these on pages 129-133 in the 2023-2024 Annual Catalog – except for the ONLINE EXCLUSIVE PAPER.
All order types qualify for this promotion.
There is no limit to how many packages of Designer Series Paper may be purchased during this promotion.
Only select Designer Series Papers are available at a 15% discount during this promotion. Please reference the table below or the flyer in the marketing toolkit to see the papers included in the sale.
Orders must be placed—and closed—during the promotion period for the 15% discount to apply.
Designer Series Paper ordered as part of a Starter Kit or with Stampin’ Rewards qualify for the 15% discount.
Designer Series Papers are from the new 2023–2024 Annual Catalog (p. 129–132) and Online Exclusives.
Stampin’ Up! has a monthly subscription for Paper Pumpkin that is also a kit all in one. The first order includes an acrylic block which can be used for all Paper Pumpkin kits after that. This particular kit must be ordered by June 10. Click on the photo above to go straight to my Paper Pumpkin area to subscribe :O) Click here to purchase Paper Pumpkin.
Stampin’ Up! ONLINE EXCLUSIVES are just that – products not offered in any catalog. My post today used two products from this list. You may shop those products here.
Thanks for stopping by. May you have a beautiful day!