Unknown's avatar

About TL's Bright Spot

I love to be creative - in the garden, crafting, and in leadership roles. There is something wonderful that happens when we design something new and share it with others. It's fun and makes everyone happy.

Stampin’ Up! Darling Donkey Birthday Fun Fold

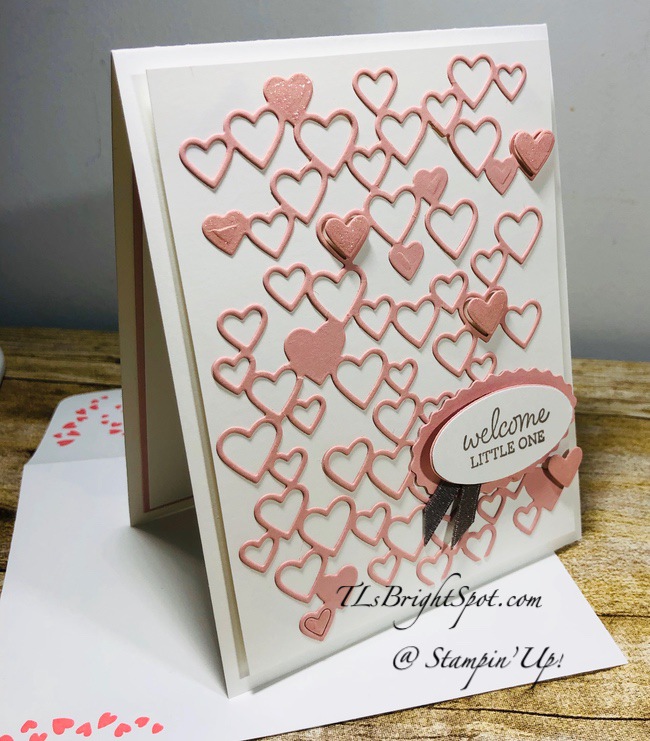
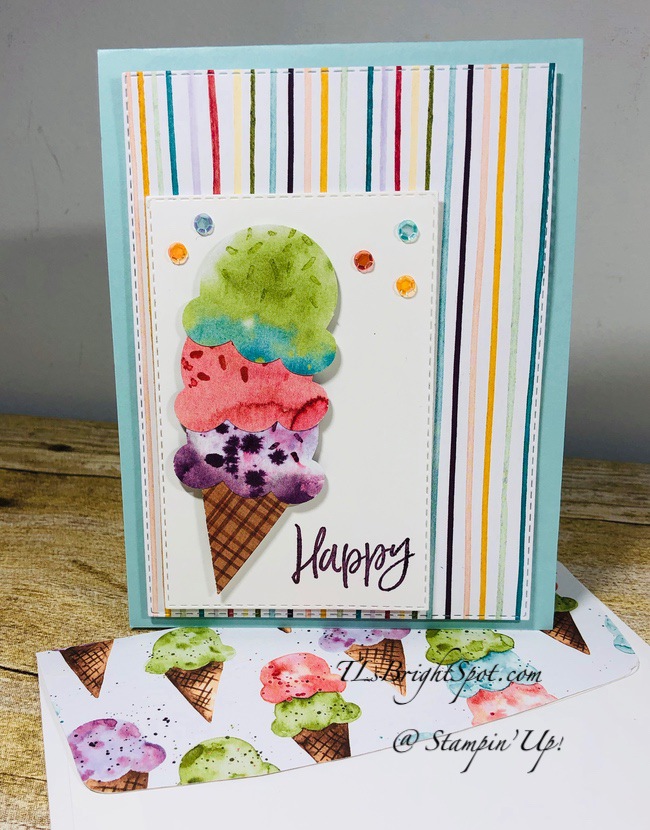
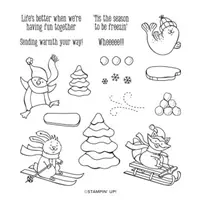
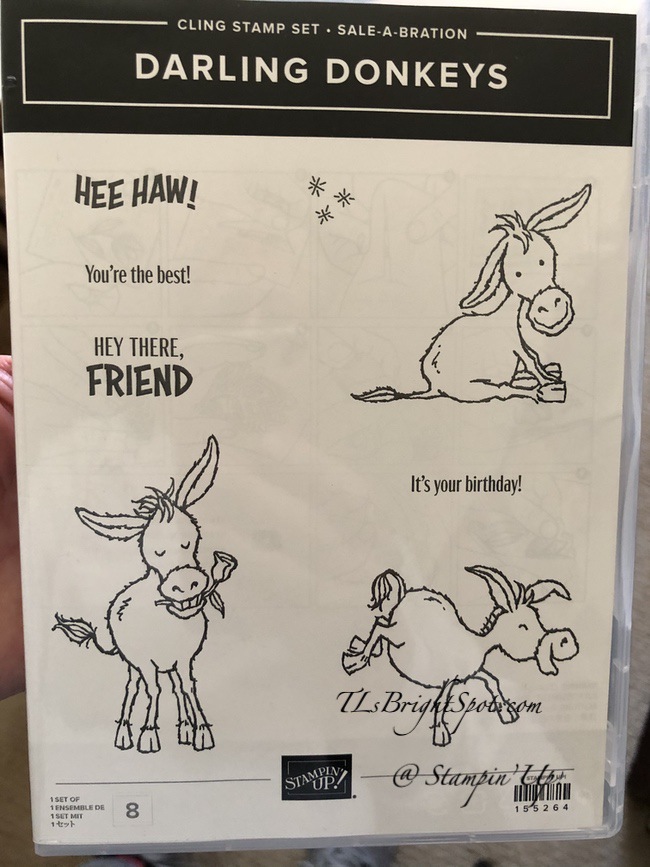
Hello again… Today’s card is full of fun – a birthday card using the Darling Donkey stamp set that will be available Jan 5, 2021 as a FREE ITEM when you purchase $50 in product – it’s Sale-a-bration time Jan 5 – end of Feb 2021. Woohoo! :O)

Darling Donkey stamp set available Jan 5, 2021 – Sale-a bration item

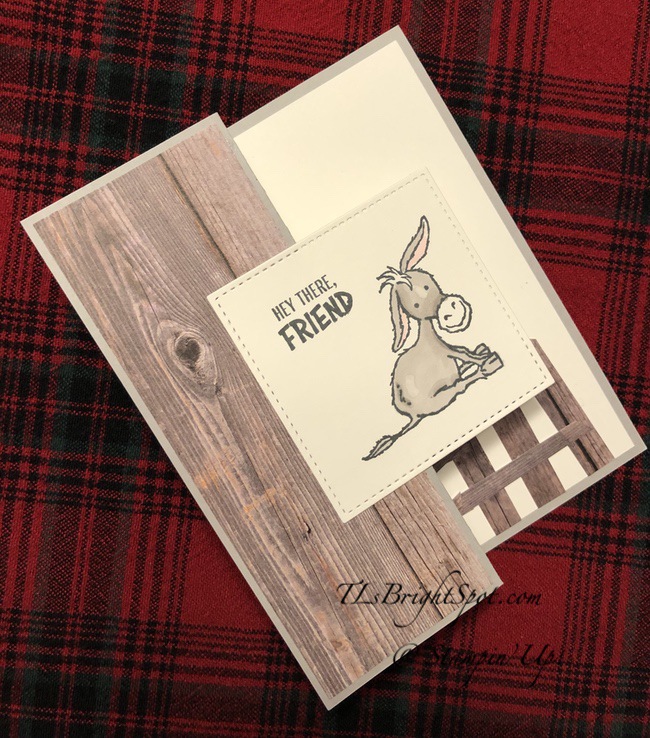
This little donkey is just too cute – love the impish smile… that square needs a back to it though so I may take that off, add a backing and put it on again. But let’s talk through how I did this. It’s a z-fold, so scored in the center and the front panel folded back on itself exactly in half, then the square added. Here’s what you need to create this card…

Darling Donkey Birthday Fun Fold – #1
  • Smokey Slate card base
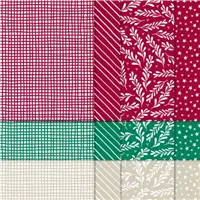
  • In Good Taste DSP
  • Whisper White card stock
  • Stitched Shapes (largest square)
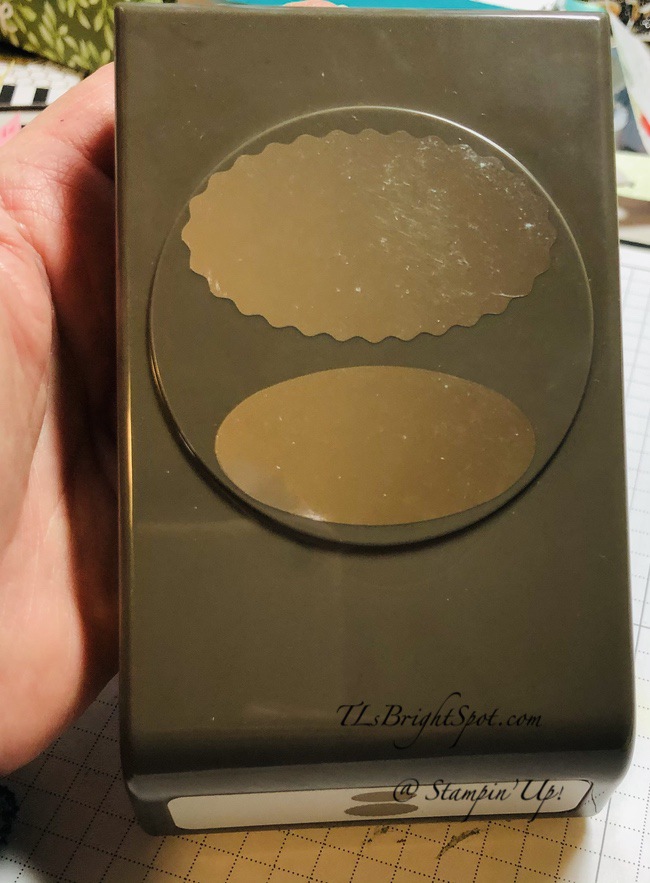
  • Classic Label Punch (fence)
  • Balloon Punch (balloon)
  • Tuxedo Black Memento ink
  • Blends: Flirty Flamingo (ears), Crumb Cake/ Gray Granite (donkeys), Color Lifter
  • Black Marker (tail for balloon)
  • Wink of Stella (color ther balloon)
Darling Donkey Birthday – #2
Darling Donkey Birthday Fun Fold – #3

Details:

  • Fold card base (Gray Granite) in half and fold the front flap in half back on itself – to create a z-fold
  • Cover the front fold using In Good Taste DSP
  • Stamp the front donkey in Tuxedo Black Memento ink on Whisper White card stock; color with Stampin’ Blends – light & dark Gray Granite. Use the Color Lifter to highlight – between the eyes & near his backside. (Yes – this one is definitely a male donkey!) Die cut with largest Stitched Shapes Dies (largest square). Here’s where I should have cut a scalloped square out of Basic Black card stock for a backing. Adhere to the front panel with liquid glue, centering.

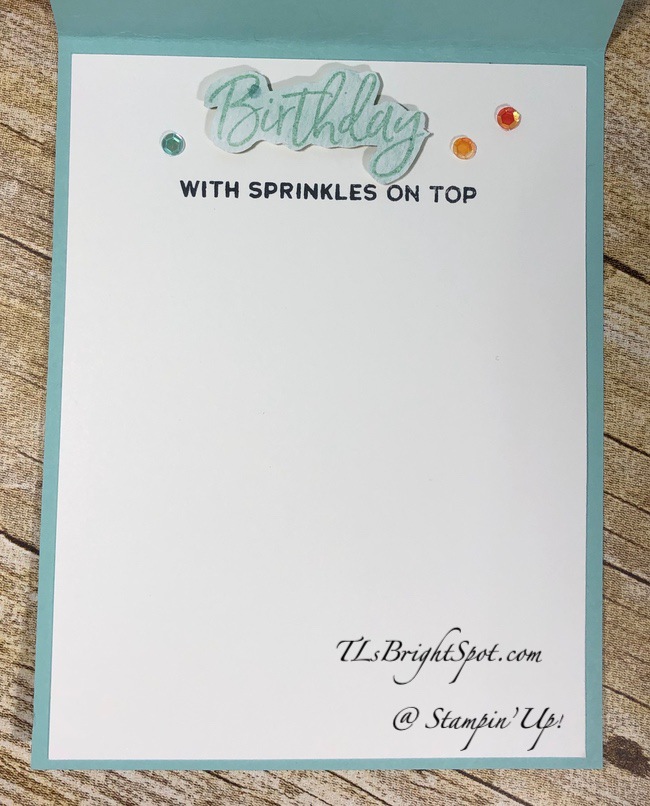
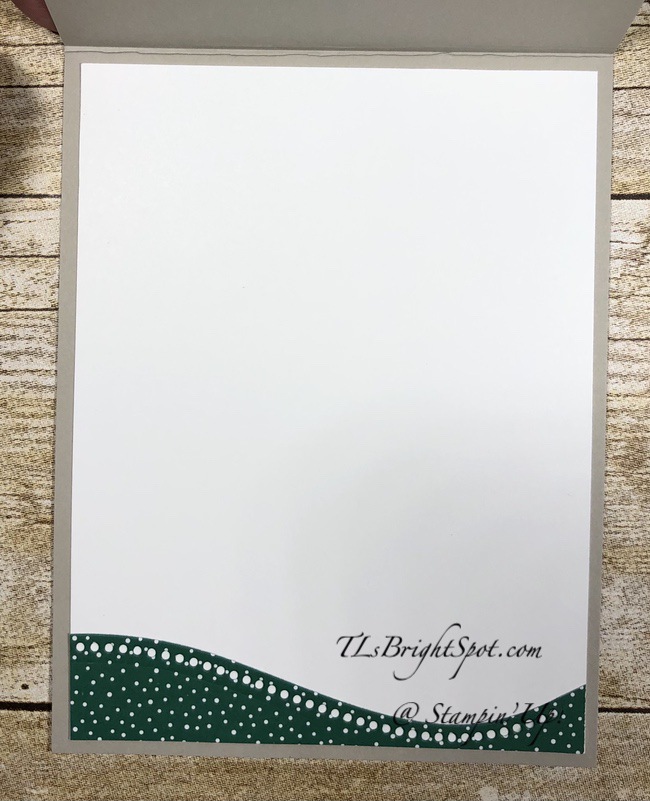
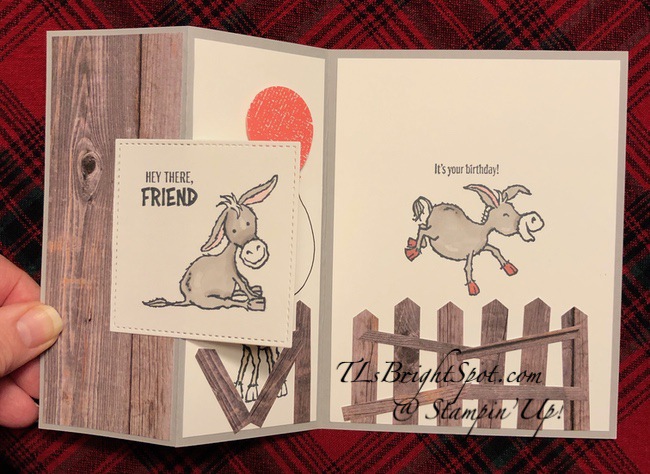
For the inside: there are two panels, the far right and the folded ‘in’ . Often the ‘in fold’ is not covered but for this card, I definitely wanted to do that.

  • Right panel ~ stamp the donkey from Darling Donkey stamp set in Tuxedo Black Memento ink in the center of the Whisper White panel, making certain it will be covered when the card is closed. Color in Stampin’ Blends: light & dark Gray Granite, light Flirty Flamingo for the ears, dark Flirty Flamingo for the hooves – after all this is a girl donkey 🙂 Stamp the sentiment above it from the same stamp set and in Tuxedo Black Memento ink. Adhere to the right panel of the card base with liquid glue, creating the inside of the card. It was at this point I decided the donkey need a fence and punched several ‘fencing’ using the Classic Label Punch and more of the same In Good Taste DSP. I punched various heights and widths then adhered to the panel with liquid glue.
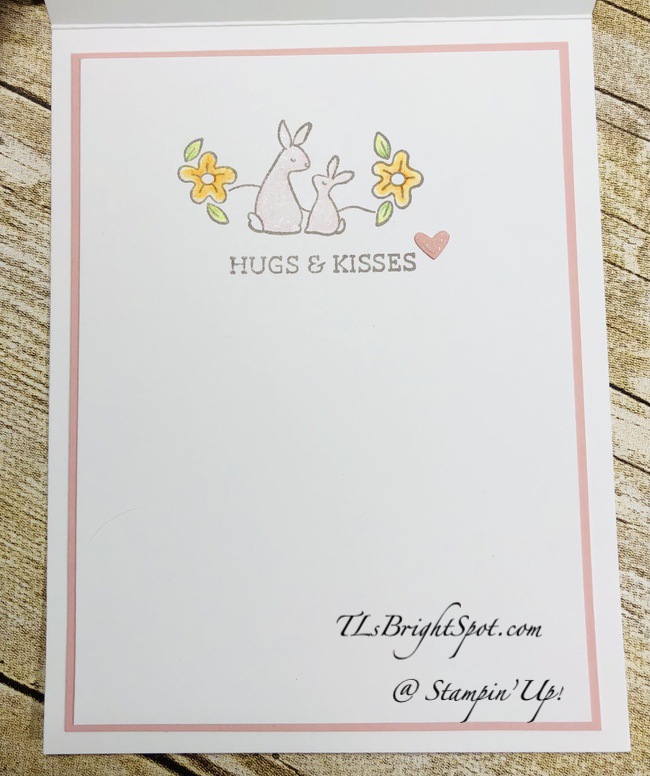
  • Folded in panel ~ stamp the donkey from Darling Donkey stamp set in Tuxedo Black Memento ink on a Whisper White panel, blocking off the flower so it doesn’t get ink. Color in Stampin’ Blends light & dark Crumb Cake, light Flirty Flamingo for the ears. And yes, I used a bit of Color Lifter for highlight. Punch a small balloon using the Balloon Punch from Bright 6×6 DSP – Flirty Flamingo. Adhere with dimensionals and color with Wink of Stella. Add a balloon ‘tail’ from the balloon to the donkeys mouth. Cute right? Adhere this panel to the card and the card is complete. OOPS! I did add some more fencing to this guy.
Darling Donkey Birthday Fun Fold – #4

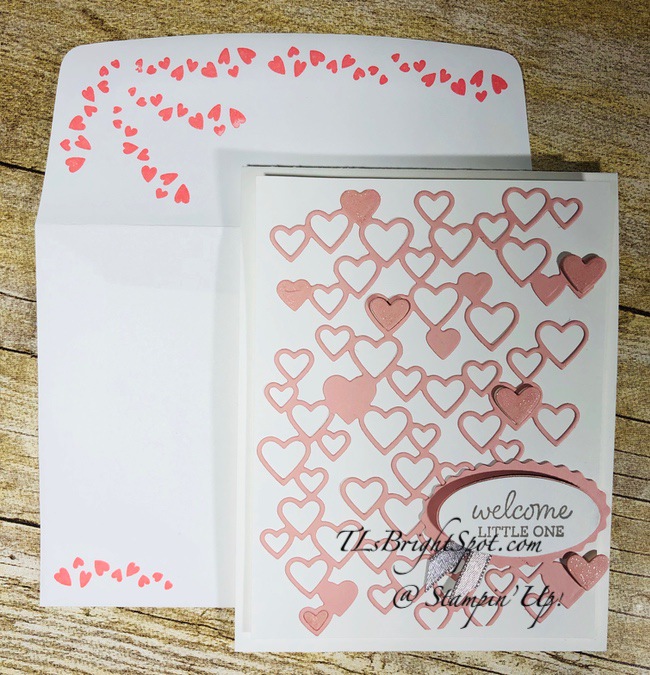
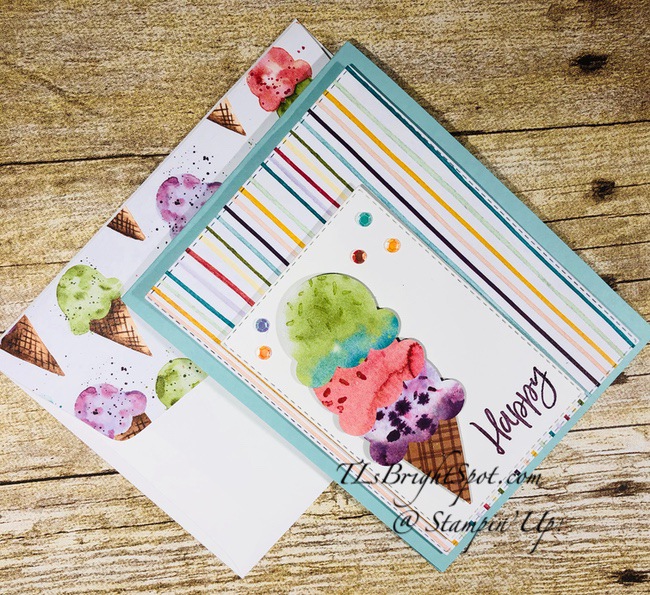
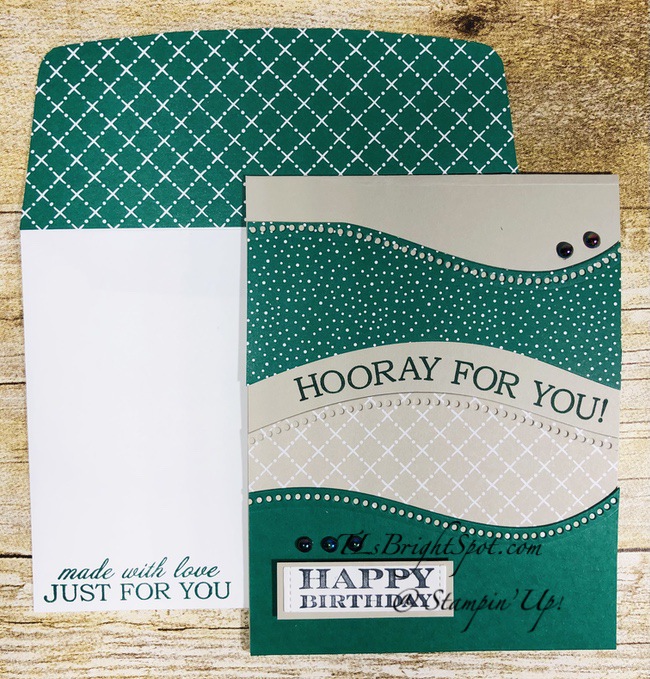
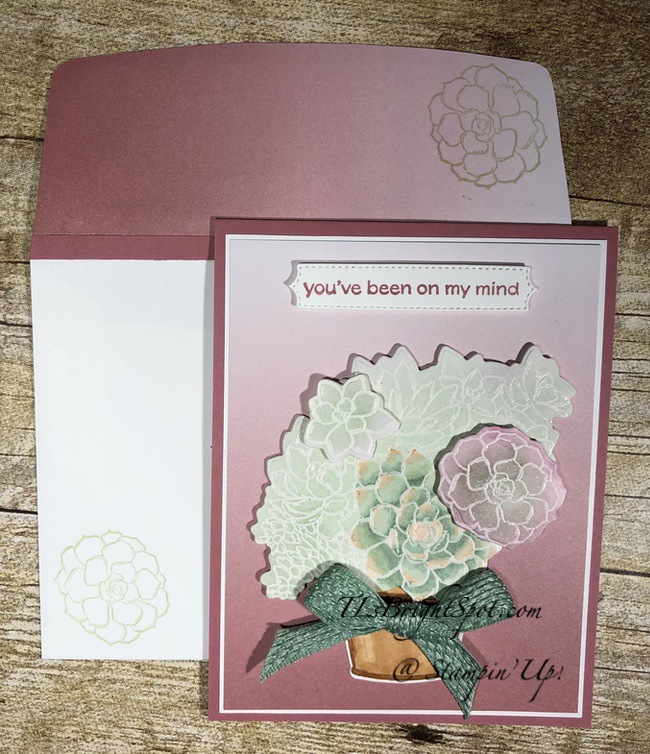
For the envelope… I used more of the same In Good Taste DSP to the envelope flap & trimmed to fit. For the envelope front I stamped the sentiment and the ‘sparkels’ in Tuxedo Black Memento ink and called it done.

Card Cuts are listed at the end of this post. Products used for today’s project may be found below. As a thank you to my customers, when the order is between $50-$150 I offer a SU! item of your choice valued at $10. Remember to use MY CURRENT HOST CODE SAZV3JTK– good until Jan 3. When the order is over $150, you still receive that free gift from me, but SU! has Stampin’ Rewards that may be used for additional products 😁

Card Cuts:

  • Smoky Slate 8 1/2 x 5 1/2, scored @ 4 1/2 & 2 1/8: fold in half, then fold back on itself the small panel
  • In Good Taste DSP 2 x 5 1/4 + 2 1/4 x 6 for envelope + scraps for fencing
  • Whisper White 4 x 5 1/4, 2 x 5 1/4

Thanks for stopping by.

May you have a beautiful day.

Make someone happy sending them a handmade card filled with love.

WooHoo! Stampin’ Up! has gone over the top… check out the Giant Year-end sale here

Year End Closeout Sale Details:

Sale Dates:  December 8, 2020 through January 4, 2021

  • No minimum purchase required.
  • Retiring items are available while supplies last.
  • Exclusions apply: Carryover items will not be discounted.
  • Due to increased shipping times and possible shipping delays during the month of December, we can’t guarantee delivery before Christmas.
  • Ordering Deadlines:  January 4, 2021 at 11:50 PM (MT)

Shop early!  The items that are retiring are only while supplies last!!

Stampin’ Up! Oval Occasions Baby Card

Oh Goodness – I AM enjoying the new products being offered in the new Jan-Jun 2021 Mini Catalog! Today’s project features the Oval Occasions Bundle: Oval Occasions stamp set + Double Oval Punch. These can be ordered Jan 5, 2021 ~ unless of course if you join my team 😏, then you can order these products as part of your demonstrator order. Hint, hint.

I have also used the Detailed Hearts Die, which is kinda fun to work with. It’s in the 2020 Annual Catalog. Are you ready to take a peek?

Oval Occasions Bundle – Baby Card – #1

Here’s what I did…

  • Adhere an Adhesive sheet to the back of Blushing Bride card stock. Die cut using the Detailed Hearts Die: peel the backing and adhere to a panel of Whisper White card stock. Yes, remove the hearts. Some will be adhered to this card, others will be saved in a small ziploc bag for later use.
  • I put some of the hearts on dimensionals and covered them in Wink of Stella. This adds a bit of glam 🙂
  • I punched a scalloped oval from Blushing Bride card stock using the Double Oval Punch thewn added a length of Grayb Granite 1/4″ Shimmer Ribbon with Stampin Seal.
  • I then stamped the front sentiment on a Whisper White panel with Gray Granite ink, punched it out using the Double Oval Punch from the Jan-Jun 2021 Mini Catalog (can be ordered Jan 5!) I put dimensionals on the back and adhered it to the scalloped oval punched with the ribbon. This was adhered to the card front with liquid glue
  • This Whisper White panel is ready for dimensionals and to be adhered to the Thick Whisper White card base – and the card front is done…

For the inside…

Oval Occasions stamp set – baby #2

I stamped the bunny/floral image in Gray Granite ink on a Whisper White panel. I colored it using the ‘fun to use’ Watercolor Pencils and Blending Pen: Flirty Flamingo for the bunnies (lightly), Granny Apple Green for the leaves then shaded with Garden Green, Daffodil Delight for the flowers and shaded with Pumpkin Pie – each blended with the Blending Pen. This really smooths the pencil lines and blends the shading nicely. I added Wink of Stella to the bunnies. I then stamped the sentiment in Gray Granite ink. The heart was added from one of the leftover hearts from the Detailed Hearts Die. I simply peeled the adhesive backing and put it right on the card. Adhere this Whisper White panel to a piece of Blushing Bride with liquid glue then add to the inside of the card, again with liquid glue. Voila – the card is finis!

For the envelope…

Oval Occasions Bundle Baby Card – #3

I stamped the heart stamp from the Oval Occasions stamp set in Flirty Flamingo and this set is ready to be sent to a friend who just had a bay girl. LOVE that I can create and send right away.

Card Cuts are listed at the end of this post. Products used for today’s project may be found below. As a thank you to my customers, when the order is between $50-$150 I offer a SU! item of your choice valued at $10. Remember to use MY CURRENT HOST CODE SVFB9YJY – good until Dec 10, 2020. When the order is over $150, you still receive that free gift from me, but SU! has Stampin’ Rewards that may be used for additional products 😁

Thanks for stopping by.

May you have a beautiful day.

Make someone happy sending them a handmade card filled with love.

Card cuts for today’s project:

  • Thick Whisper White 4 1/4 x 11 scored at 5 1/2
  • Whisper White (2) 3 3/4 x 5 + enough for oval punch
  • Blushing Bride (2) 3 7/8 x 5 1/8 + enough for oval punch

WooHoo! Stampin’ Up! has gone over the top… check out the Giant Year-end sale here

Sale Dates:  December 8, 2020 through January 4, 2021

  • No minimum purchase required.
  • Retiring items are available while supplies last.
  • Exclusions apply: Carryover items will not be discounted.
  • Due to increased shipping times and possible shipping delays during the month of December, we can’t guarantee delivery before Christmas.
  • Ordering Deadlines:  January 4, 2021 at 11:50 PM (MT)

Shop early!  The items that are retiring are only while supplies last!!

Stampin’ Up! Sweet Ice Cream Birthday Card

Today’s card is bright and cheery (not that others haven’t been) and for our granddaughter who is turning 11 this next week. I kept trying to decide what kind of card to make when a Stampin’ Up! pre-order box arrived. This granddaughter loves ice cream with lots of sprinkles and very different flavors… therefore when you see the colors of the ice cream on the card, hopefully you’ll understand.

Sweet Ice Cream Birthday – #1

Isn’t this card full of fun colors? Here’s list of the products used…

  • * Sweet Ice Cream stamp set with coordinating Ice Cream Cone Builder Punch
  • * Ice Cream Corner DSP
  • Stitched Rectangle Dies
  • Artistry Blooms Adhesive-Backed Sequins
  • * Blending Brushes
  • Wink of Stella
  • Pool Part card stock (card base)
  • Whisper White card stock (inside)
  • Inks: Old Olive, Terracotta Tile, Blackberry Bliss, Pool Party and Tuxedo Black Memento

NOTE: those items with an * are new in the Jan – Jun 2021 Catalog and will be available Jan 5, 2021

How to create this card…

  • Cut card base – for this card I used pool Party card stock.
  • Die cut with the largest die in the Rectangle Stitched Dies, a panel using one of the papers in the Ice Cream Corner DSP pack. Adhere to the card base with dimensionals.
  • Using various papers of the Ice Cream Corner DSP, punch the four layers for the ice cream cone. Stamp with the sprinkles stamp using Old Olive ink, Terracotta Tile ink and Blackberry Bliss ink. Put these four pieces together with liquid glue from the bottom – up. Cover lightly with Wink of Stella.
  • Die cut a Whisper White panel using the Stitched Rectangle Dies. Color with Pool Party ink and the new Blending Brushes.
  • Stamp the word ‘Happy’ in Blackberry Bliss on the Whisper White panel. NOTE: know the placement of the ice cream cone prior to stamping!
  • Adhere the ice cream cone to the Whisper White panel with dimensionals.
  • Adhere several Artistry Blooms Adhesive-Backed Sequins. These bring out the colors of the ice cream cone!
  • Adhere this panel to the card front – and the front is complete

For the inside… and the envelope…

Stamp the word ‘Birthday” in PoolParty ink on one of the ‘color blobs’ on the Ice Cream Corner DSP; fussy cut the word; adhere with dimensionals to a Whisper White panel. Stamp the rest of the sentiment in Tuxedo Black Memento ink from the Sweet Ice Cream stamp set.. Adhere several of the Artistry Blooms Adhesive-Backed Sequins. Secure the panel to the card base with liquid glue.

For the envelope, adhere a panel of the Ice Cream Corner DSP to a Whisper White envelope and call it done!

Here are photos of the stamp set and the punch…

Card Cuts:

  • Pool Party card stock 4 1/4 x 11 scored at 5 1/2
  • Whisper White 4 x 5 1/4
  • Various Ice Cream Corner DSP: stitched rectangle 3 3/4 x 5 1/8 + small amounts from other papers in the pack to fit the punch

As a thank you to my customers, when the order is between $50-$150 I offer a SU! item of your choice valued at $10. Remember to use MY CURRENT HOST CODE SVFB9YJY – good until Dec 10, 2020. When the order is over $150, you still receive that free gift from me, but SU! has Stampin’ Rewards that may be used for additional products 😁

Thanks for stopping by.

May you have a beautiful day.

Make someone happy sending them a card made with love.

Stampin’ Up! Whisper White Going Away…

Straight from headquarters…

Stampin Up! announced this information about Whisper White paper products:

Whisper White has been a Stampin’ Up! staple for so long. We love it and we know you love it, too. We are sad to announce that the suppliers mill producing our Whisper White cardstock has permanently closed due to impacts from the COVID-19 pandemic. Unfortunately, we weren’t given much notice on this closure. This means that the technology unique to this particular supplier is now unavailable to us and we can no longer offer our Whisper White cardstock and related products, such as Whisper White Note Cards & Envelopes. Please note that this won’t affect any of our other cardstocks, this only affects Whisper White.

We know Whisper White has a huge fan base; we’re big fans, too! And we are crushed that it’s going away. Even though this decision was out of our hands, rest assured that we jumped right into action to find the best replacement paper possible. We have dedicated many hours to source and test alternative cardstock options from several suppliers to find the perfect fit that still maintains the Stampin’ Up! quality you know and trust. We are happy to share that we have found a winner for our new cardstock, Basic White!

The quality of our new Basic White was thoroughly tested by our quality assurance and product teams. It also tested very well with demonstrators and concept artists who gave it a huge thumbs up. We believe in the quality of the new Basic White cardstock and we know it will become your new crafting staple!

What does this mean for you?

With Whisper White going out of production, this means a number of Whisper White products will be affected. Below is a list of all products that will be replaced with our new Basic White cardstock. These items are now available while supplies last with an order limit of 2 per item per order.

  • Whisper White 12 x 12 (30.5 x 30.5 cm) Cardstock (124302)
  • Assorted Memories & More Cards & Envelopes (149710)
  • Whisper White Note Cards & Envelopes (131527)  SOLD OUT
  • Whisper White 3 x 3 (7.6 x 7.6 cm) Envelopes (145829)
  • Whisper White 8-1/2 x 11 Cardstock (100730)
  • Whisper White 8-1/2 x 11 Thick Cardstock (140272) – SOLD OUT
  • Whisper White Medium Envelopes (107301)

Stop by the online store to get the following Whisper White products that you love before they’re gone forever!

The Thick Whisper White card stock and Note Cards & Envelopes are already sold out!  So….get some quick if you need it!

As a thank you to my customers, when the order is between $50-$150 I offer a SU! item of your choice valued at $10. Remember to use my NEW HOST CODE: SAZV3JTK when ordering. When the order is over $150, you still receive that free gift from me, but SU! has Stampin’ Rewards that may be used for additional products 😁

Get your Whisper White now!

Stampin’ Up Wrapped in Christmas Easel Card

So sorry for the late post – hubby and I bought a fresh cut tree yesterday and it was extra heavy- it took both of us to carry it in and get it set up. Then lights, etc…. No, not done yet; hubby is still working on the lights. I’ll share a picture Monday as we won’t get it done until late Sunday afternoon. 🌲🎄🤶🏻

Such fun making this card… an easel card – which I haven’t made in some time. One of my teammates sent an easel card and I was inspired to create several.

Wrapped in Christmas with Snowflake Splendor Easel card – #1

I love the bling from the Balmy Blue Glimmer Paper. Hear are details on how to do this…

  • Cardstock base is 8 1/2 x 11, scored at 4 1/4 (this happens to be Misty Moonlight, but I also used Pacific Point card stock which coordinates with the DSP. When I used Pacific Point card stock, I also used Pacific Point ink.
  • Use your paper trimmer to make two cuts JUST TO THE SCORE LINE on the card front: 1 1/2 & 4
  • Fold the center portion in half and burnish well with your bone folder. This becomes the stand up on the card.
  • Cut 2 strips of Snowflake Splendor DSP and adhere with liquid glue to the side panels
  • Cut 2 additional panels of coordinating Snowflake Splendor DSP and adhere with liquid glue to the center folded panel, one piece above the fold, the other below it. NOTE: I think it looks best if these pieces are cut so the pattern on the DSP matches top to bottom panels
  • Cut a panel of Whisper White and adhere to the INSIDE of the card, centering
  • Adhere side panels to card base with liquid glue.
  • Stamp the sentiment from Freezin’ Fun stamp set in Misty Moonlight ink on Whisper White. Punch out with the Classic Label Punch. Adhere to a strip of Misty Moonlight with liquid glue. Put dimensionals on back and adhere to the Whisper White panel, about 3/4″ from bottom. This creates the easel :O) and allows the upper panel to stand up.
  • Punch a starburst with the Starburst Punch (OOPS! retired item 😞)and Balmy Blue Glimmer Paper
  • Stamp the sentiment from Wrapped in Christmas in Misty Moonlight ink and punch with the 1 1/2″ circle punch. Adhere to the Glimmer paper. NOTE: by scrapping some of the ‘glimmer’ away the paper will adhere more readily. Add liquid glue to that area and bingo, the sentiment adheres.
  • Put dimensionals ON THE LOWER HALF of the Glimmer Paper and attach to the lower center panel near the fold line. Because the lower sentiment is on dimensionals, this allows the upper portion of the card to ‘stand’.
Wrapped in Christmas with Snowflake Splendor Easel Card – #2

I have made several of these, which I don’t usually do, but they were fun and easy and look pretty neat. Notice how the color variations in the DSP make the cards look so different. Hope you enjoyed this design. Card cuts will be listed at the end of this post. Let me know if you have questions.

Card cuts:

  • Card base: 8 1/2 x 11, scored at 4 1/4: top of the card cut to score line at 1 1/2″ and 4″
  • DSP strips for side panels- 1 3/8 x 4 1/8 (cut 2)
  • DSP panels for folded area – 2 3/8 x 2 (cut 2)
  • Whisper White – 3 x 4 1/4 + banner sentiment + circle sentiment
  • Misty Moonlight / Pacific Point for sentiment banner 2 1/4 x 5/8
  • Glimmer paper – use circle dies for 1 3/4 or slightly larger frame for circle sentiment

Thanks for stopping by.

May you have a beautiful day.

Make someone happy sending them a handmade card filled with love.

Stampin’ Up! Whisper White Going Away…

Straight from headquarters…

Stampin Up! announced this information about Whisper White paper products:

Whisper White has been a Stampin’ Up! staple for so long. We love it and we know you love it, too. We are sad to announce that the suppliers mill producing our Whisper White cardstock has permanently closed due to impacts from the COVID-19 pandemic. Unfortunately, we weren’t given much notice on this closure. This means that the technology unique to this particular supplier is now unavailable to us and we can no longer offer our Whisper White cardstock and related products, such as Whisper White Note Cards & Envelopes. Please note that this won’t affect any of our other cardstocks, this only affects Whisper White.

We know Whisper White has a huge fan base; we’re big fans, too! And we are crushed that it’s going away. Even though this decision was out of our hands, rest assured that we jumped right into action to find the best replacement paper possible. We have dedicated many hours to source and test alternative cardstock options from several suppliers to find the perfect fit that still maintains the Stampin’ Up! quality you know and trust. We are happy to share that we have found a winner for our new cardstock, Basic White!

The quality of our new Basic White was thoroughly tested by our quality assurance and product teams. It also tested very well with demonstrators and concept artists who gave it a huge thumbs up. We believe in the quality of the new Basic White cardstock and we know it will become your new crafting staple!

What does this mean for you?

With Whisper White going out of production, this means a number of Whisper White products will be affected. Below is a list of all products that will be replaced with our new Basic White cardstock. These items are now available while supplies last with an order limit of 2 per item per order.

  • Whisper White 12 x 12 (30.5 x 30.5 cm) Cardstock (124302)
  • Assorted Memories & More Cards & Envelopes (149710)
  • Whisper White Note Cards & Envelopes (131527)  SOLD OUT
  • Whisper White 3 x 3 (7.6 x 7.6 cm) Envelopes (145829)
  • Whisper White 8-1/2 x 11 Cardstock (100730)
  • Whisper White 8-1/2 x 11 Thick Cardstock (140272) – SOLD OUT
  • Whisper White Medium Envelopes (107301)

Stop by the online store to get the following Whisper White products that you love before they’re gone forever!

The Thick Whisper White card stock and Note Cards & Envelopes are already sold out!  So….get some quick if you need it!

As a thank you to my customers, when the order is between $50-$150 I offer a SU! item of your choice valued at $10. Remember to use my NEW HOST CODE: SAZV3JTK when ordering. When the order is over $150, you still receive that free gift from me, but SU! has Stampin’ Rewards that may be used for additional products 😁

Get your Whisper White now!

Stampin’ Up! Corner Bouquet Sympathy

Today’s card is made with Sale-a-bration products, which begins Jan 5, 2021. And that, my friends is not far off. Yep, hard to believe, it is right around the corner.

Corner Bouquet Sympathy #1

Isn’t it pretty? I don’t use Blackberry Bliss card stock very often but with this Oh So Ombre 6×6 DSP, it really is quite nice. The stamps are from the Corner Bouquet stamp set, and is FREE with a $50 purchase during Sale-a-bration. The Oh So Ombre 6×6 DSP is also FREE with a $50 purchase during Sale-a-bration.

Stampin’ Up! has changed (for the better BTW) the length of Sale-a-bration to two months twice a year, the first beginning Jan-Feb of 2021. It coincides with the release of the Jan – Jun Mini Catalog Jan 5. I’m sharing three of those free products today to get you excited about the new catalog. Let’s get to the card.

Corner Bouquet Sympathy #1
  • Cut a panel of Oh So Ombre 6×6 DSP; using the Stamparatus, stamp one corner with this smaller corner stamp in Tuxedo Black Memento ink. Why use the Stamparatus? Couple of reasons… 1) if the stamp is not clear enough after the first stamping, it is easy to re-ink and stamp again in exactly the same spot. It is next to imposssible to do that by eye: it gets a bit of a shadow and that paper couldn’t be used. 2) The Stamparatus allows for perfect placement.
  • Turn the paper 180 degrees to stamp in the opposite corner. Stamp with Tuxedo Black Memento ink.
  • Place the sentiment from the Heal your Heart stamp set (FREE with a $50 purchase during Sale=a=bration) in the center of the paper and stamp with Tuxedo Black Memento ink.
  • Using the largest die in the Stitched So Sweetly Dies, cut the center.
  • Adhere the larger panel to a piece of Basic Black card stock.
  • Adhere the die cut piece with dimensionals, being certain to line up the stamping just right. NOTE: the die cut piece is placed so the gradation of color is the opposite of the larger panel. I was able to do this because of the perfect placement of the corner stamp and use of the Stamparatus.
  • Add Pearl Basic Jewels.
  • Adhere this panel to a Blackberry Bliss card base with dimensionals ~ and your card front is done.

For the inside I stamped the corner with the same stamp from the Corner Bouquet stamp set in Tuxedo Black Memento ink on a panel of Whisper White card stock. Adhere with liquid glue to a piece of Basic Black card stock; then adhere this to the inside of the card & voila!

For the envelope I adhered another piece of the Oh So Ombre 6×6 DSP to the envelope flap. I stamped the small leaf on this and again on the front of the envelope – all in Tuxedo Black Memento ink ~ and the card is ready to send.

This card will go out today to a neighbor who just lost her father. I don’t know the circumstance other than he had health issues for some time. But the circumstances of his death aren’t needed. The focus is the loss of a loved one and to be supportive and caring.

Today’s card is not my design… it was from my upline, Mary Deatherage, who participated in a team training recently. She used different colors and embellishments, but the layout and design are hers. Thank you, Mary, for the inspiration!

Here are photos of the stamp sets and the DSP used in today’s project.

Products not part of Sale-a-bration are listed below. As a thank you to my customers, when the order is between $50-$150 I offer a SU! item of your choice valued at $10. Remember to use MY CURRENT HOST CODE SVFB9YJY – good until Dec 10, 2020. When the order is over $150, you still receive that free gift from me, but SU! has Stampin’ Rewards that may be used for additional products 😁

Card cuts for today’s project are listed at the end of this post.

Card cuts:

  • Blackberry Bliss 4 1/4 x 11, scored at 5 1/2
  • Basic Black (2) 4 x 5 1/4
  • Oh So Ombre 6×6 DSP 3 7/8 x 5 1/8
  • Whisper White 3 7/8 x 5 1/8

Thanks for stopping by.

May you have a beautiful day.

Make someone happy sending them a handmade card filled with love.

Stampin’ Up! Year-end Sale & Clearance Rack Update

WooHoo! Stampin’ Up! has gone over the top… check out the Giant Year-end sale here

Also… they updated their Clearance Rack and it went liv e today as well. Click here

Enjoy shopping…

Current HOST CODE: SVFB9YJY until Dec 10. As a thank you to my customers, when the order is between $50-$150 I offer a SU! item of your choice valued at $10. Remember to use When the order is over $150, you still receive that free gift from me, but SU! has Stampin’ Rewards that may be used for additional products 😁

Stampin’ Up! Celebrate in Style

Today is the blog hop for Amy’s Inkin’ Krew and the theme is ‘celebrate’, however we wish to interpret that. Thursday is our son-in-laws birthday and we are celebrating that with todays card.

Let me share the card with you…

Quite Curvy Birthday – #1

I have used the Quite Curvy stamp set with coordinating Curvy Dies and the Classic Christmas 6 x6 DSP. These are order-able right now but the DSP will not be available after Jan 4.So how did I do this?

  • Sahara Sand card base cut 4 1/4 x 11 snd scored at 5 1/2
  • Shaded Spruce card stock 2 x 4 1/4 and die cut with one of the Curvy Dies
  • Classic Christmas 6×6 DSP 3 x 4 1/4 and die cut with the same die from Curvy Dies
  • Lay the papers on the card base to position the photopolymer stamp from Quite Curvy stamp set. I used my Stamparatus and because the stamp is flexible I could position the stamp just the way I wanted :O)
  • Stamp using Shaded Spruce ink directly to the Sahara Sand card base.
  • Adhere the two papers mentioned above with liquid glue, first the DSP since it is taller, then the Shaded Spruce panel. These will sit just below the sentiment just stamped.
  • Die cut another panel from the Classic Christmas 6×6 DSP. My panel started at 2 1/2 x 4 1/4. Cut both sides
  • Adhere this panel with liquid glue just above the stamped sentiment
  • The ‘Happy Birthday’ sentiment was stamped some time ago with the Many Messages stamp set and die cut with the coordinating Messages Dies (available Jan 5, 2021!) in Tuxedo Black Memento ink. The panel was adhered with liquid glue to a scrap of Shara Sand card stock about 5/8 x 2. This was attached to the card with dimensionals.
  • Iridescent Pearls were placed just above this panel. More were added on the curve at the upper right.

For the inside… and the envelope

I adhered a scrap of the die cut Classic Christmas 6×6 DSP to the bottom of a Whisper White panel cut 4 x 5 1/4 ~ with liquid glue. The Whisper White panel was adhered to the inside of the card and finis!

For the envelope I adhered yet another panel of the Classic Christmas 6×6 DSP (2 1/4 x 6) to the flap, trimmed to fit. I then stamped the sentiment in Shaded Spruce ink using the Quite Curvy stamp set. And the card was done.

This made a wonderfully masculine card and I’m really happy with it ~ think my son-in-law will be as well. I hope you like… a product list will be at the bottom of this post. As a thank you to my customers, when the order is between $50-$150 I offer a SU! item of your choice valued at $10. Remember to use MY CURRENT HOST CODE SVFB9YJY – good until Dec 10, 2020. When the order is over $150, you still receive that free gift from me, but SU! has Stampin’ Rewards that may be used for additional products 😁

Remember that today is the day of the Stampin’ Up Year-end Clearance for items in the Aug- Dec Mini Catalog.

This image has an empty alt attribute; its file name is 11.24.20_shareable_yearendsale_na.jpg
  • No minimum purchase required.
  • Retiring items are available while supplies last.
  • Exclusions apply: Carryover items will not be discounted.
  • Due to increased shipping times and possible shipping delays during the month of December, we can’t guarantee delivery before Christmas.
  • Ordering Deadlines:  January 4, 2021 at 11:50 PM (MT). The items that are retiring are only while supplies last!!  And everything on this list is retiring!!

Please continue the blog hop by clicking on the ‘next’ or ‘previous’ button – enjoy… there are some awesome projects today!

  1. Jaimie Babarczy: https://wp.me/p79UhD-4xN
  2. Karen Finkle: https://karenscardkorner.blogspot.com/2020/12/stampin-up-forever-fern-for-amys-inkin.html
  3. Karen Ksenzakovic: https://wp.me/paaNf4-3Aq
  4. Akiko Sudano: https://wp.me/paOv8E-26v
  5. Tara Carpenter: https://tarabethstamps.blogspot.com/2020/12/stampin-up-celebrate-sunflowers-happy.html
  6. Mary Deatherage: https://wp.me/p5snyt-fTS
  7. Sue Prather: https://wp.me/p5yitZ-2hX
  8. Julie Johnston: https://wp.me/p8SzmQ-2sg
  9. Terry Lynn Bright: https://tlsbrightspot.com/2020/12/08/stampin-up-celebrate
  10. Donna Leonard: http://stampdabbles.com/?p=3570
  11. Amy Koenders: https://wp.me/p2SFwf-luA

Thanks for stopping by.

May you have a beautiful day.

Make someone happy sending them a handmade card filled with love.

Stampin’ Up! New Simply Succulents

It’s Monday – and another week begins… tomorrow is Dec 8 – a GIANT Year-end Clearance Day for Stampin’ Up! Before I get to my card for the day, here are the details about the sale.

Lots going on in the Stampin’ Up world: giant year-end clearance of retiring items from the 2020 Aug – Dec Mini Catalog. Look carefully at the list. Some items will not be offered as a bundle in the new catalog but are returning items. If you have questions, please contact me.

This image has an empty alt attribute; its file name is 11.24.20_shareable_yearendsale_na.jpg
  • No minimum purchase required.
  • Retiring items are available while supplies last.
  • Exclusions apply: Carryover items will not be discounted.
  • Due to increased shipping times and possible shipping delays during the month of December, we can’t guarantee delivery before Christmas.
  • Ordering Deadlines:  January 4, 2021 at 11:50 PM (MT). The items that are retiring are only while supplies last!!  And everything on this list is retiring!!

Please see my Dec 5 post for the complete list. Now that I have your attention 😏, let’s look at today’s card.

Simply Succulents – #1

This card has a couple of really nice elements to it: the Oh So Ombre 6×6 DSP, that center succulent colored in alcohol Blends, the bow, and I love the color of the flowerpot, and the sentiment banner is awesome.

Supplies you will need to create this card:

  • Simply Succulents stamp set and coordinating Potted Succulents Dies ~ available Jan 5, 2021
  • Rococco Rose card base 4 1/4 x 11 scored at 5 1/2
  • Whisper White card stock (2) 4 x 5 1/4 + another 4 x 5 1/4 for all the die cuts. Helpful TIP: you can die cut some of the pieces from the Whisper White panel used on the front of the card since it is covered by the DSP.
  • Oh So Ombre 6×6 DSP – available Jan 5, 2021
  • Basketweave & Metallic Ribbon Combo Pack – using the Mint Macaron Basketweave ribbon
  • Stampin Blends: Soft Sea Foam, Mint Macaron, Petal Pink, Cinnamon Cider, Color Lifter
  • Inks: Soft Sea Foam, Mint Macaron, Highland Heather, Rich Razzleberry, Cinnamon Cider
  • extras…Versamark & Clear Embossing Powder, Wink of Stella
  • Blending Brushes – available Jan 5, 2021 ~ these are w-o-n-d-e-r-f-u-l

Yes, that’s a lot of supplies.. and let me just say ~ you could get by not using the Stampin Blends OR not using the Blending Brushes. There are two different effects going on in this card: the Blends for coloring the one large succulent and the Blending Brushes and inks for the very soft coloring using many inks. I wanted to try them together, The Blends really bring out all the detail of the succulent, while the Blending Brushes create a very soft look. Both are effective and it depends on what you’re wanting. I rather like the combined use here.

  • Stamp the large succulent and the two smaller succulents with Versamark ink on Whisper White card stock that has been rubbed with the embossing buddy. The embossing buddy helps remove static so the embossing powder sticks just to the ink. 🙂
  • Cover with Clear Embossing Powder, flick off the extra and heat set with your heat gun.
  • Color these pieces prior to die cutting.
    • With the Stampin Blends, color the largest succulent, first using the Soft Sea Foam, then Mint Macaron, then move the dark with more Soft Sea Foam. Add the Petal Pink blends to the tips of the succulent and a final touch of Blushing Bride Marker
    • With the Blending Brushes and inks, begin coloring with the lightest shade of green (Soft Sea Foam) using a circular motion and starting off the page. Begin adding color where you want more darkness: Mint Macaron, then the Highland Heather and finally Rich Razzleberry, but only a little of that.
  • Die cut your pieces using the Potted Succulent Dies
  • Stamp the flower pot in Cinnamon Cider ink on Whisper White card stock, color in using the Cinnamon Cider Blends. Use the Color Lifter to create highlights. Cover the pot with Wink of Stella. Die cut the flower pot with the Potted Succulent Dies.
  • Layer your pieces:
    • Adhere 4 x 5 1/4 Whisper White to the Rococco Rose card base with liquid glue
    • Adhere the 3 7/8 x 5 Oh So Ombre panel next, using liquid glue
    • Adhere the flower pot with liquid glue
    • Adhere the large succulent with dimensionals, then add the other two succulents, also with dimensionals
    • Add the bow with a glue dot: Basketweave & Metallic Ribbon Combo Pack, Mint Macaron
  • Stamp the sentiment from the Simply Succulent stamp set in Rococco Rose ink on Whisper White card stock and die cut with one of the awesome banner dies from the Potted Succulent Dies. Adhere to the card front with dimensionals. Your card front is done!

For the inside, on a panel of Whisper White 4 x 5 1/4, stamp one of the succulent stamps from the Simply Succulents stamp set in Soft Sea Foam ink. Stamp in the corners a few times. Adhere the panel to the inside of the card with liquid glue.

For the envelope, cover the flap with more of the Oh So Ombre 6×6 DSP with an added piece of Rococco Rose. Trim to fit. Stamp the same succulent used on the inside of the card in Soft Sea Foam, both on the flap and on the card front. Nicely done!

The product list may be found below ~ except for those items not available until Jan 5, 2021! As a thank you to my customers, when the order is between $50-$150 I offer a SU! item of your choice valued at $10. Remember to use MY CURRENT HOST CODE SVFB9YJY – good until Dec 10, 2020. When the order is over $150, you still receive that free gift from me, but SU! has Stampin’ Rewards that may be used for additional products 😁

Thanks for stopping by.

May you have a beautiful day.

Make someone happy sending them a handmade card filled with love.