
Welcome to our weekly blog hop! We have a sketch challenge today and I’m using the Delicate Pines stamp set to create the snowflake for my centerpiece and the Snowflake Kisses Dies for the background. These are ONLINE EXCLUSIVES being released Wed. Sep 3 and are part of the Elegant Pines Snowflakes Suite of products – both are bundles. The Designer Series Paper in the suite is called Elegant Pines Snowflakes DSP & it comes in the 12×12 size. It’s gorgeous – I used the ‘back side of one of the papers.

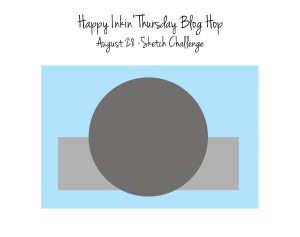
These. are so non-traditional colors that it sorta makes me second guess myself – and yet, it’s growing on me! I used the Color Wheel for help… 😀 So how to make this card.
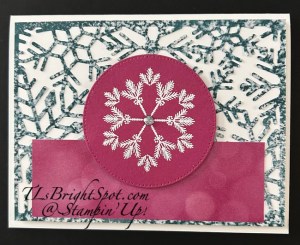
- Add an adhesive sheet to the Elegant Pines Snowflakes DSP cut 4 x 5 1/4. Run through the cut & emboss machine to create die cut, remove backing on Adhesive Sheet and add to a Basic White panel 4 x 5 1/4. Put dimensionals on the back and add to a Thick Basic White card base 8 1/2 x 5 1/2 scored at 4 1/4.
- Cut a strip of Beautiful Bokeh 6×6 DSP 1 1/2 x 4 and add over the die cut piece.
- Stamp the snowflake image using the Delicate Pines stamp set (remember this is also a bundle, so it has dies!) with VersaMark ink on a 3″ square of Berry Burst card stock. Sprinkle with WOW! White Embossing Powder and heat set. Once cooled, die cut with 2nd largest circle of Stitched Shapes Dies and add to card front with dimensionals.
- Add a single embellishment in the center of the snowflake – Two-tone Sparkle Gems.
- Card front is complete!!!

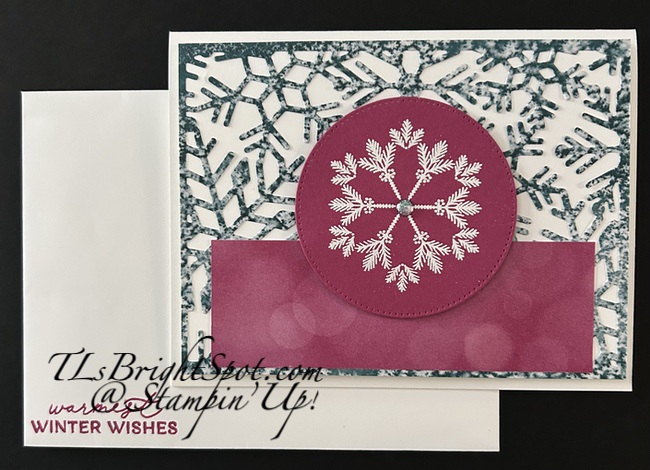
For the inside… when die cutting the snowflake background, there is a center circle that also is die cut. I set it aside at the time and added it to a Basic White inside panel (4 x 5 1/4), removing the adhesive sheet to attach it. The Greetings For All Seasons Mix & Match Ephemera pack has the perfect sentiment – and I added it with liquid glue. As a final touch, I added two more of the Two-Tone Sparkle Gems next to the sentiment. I added the panel to the inside of the card – and one & done!
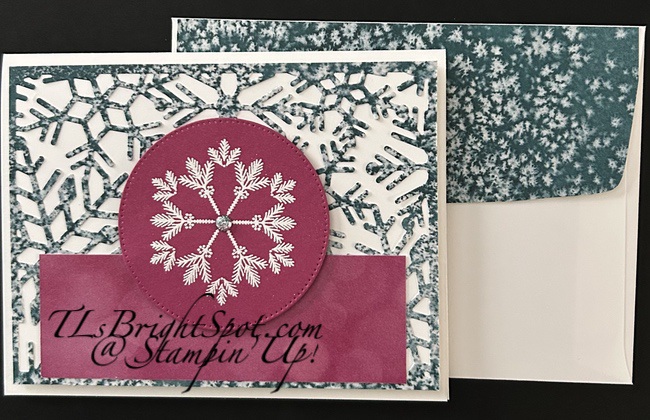
For the envelope… pictures below… I stamped the sentiment in Berry Burst ink using the Delicate Pines stamp set on the front of the envelope. For the flap, I added more of the Elegant Pines Snowflakes DSP and trimmed to fit. As I said… it’s growing on me 😀
To continue on the hop, click on the ‘next’ button or click on a name. Enjoy – you will be amazed at the creations!

Thanks for stopping by. May you have a beautiful day. Make someone happy by sending them a handmade card filled with heart

Pingback: Fluffy Squirrel for Happy Inkin’ Thursday Blog Hop – The Signing Stamper
So pretty Terry Lynn! 😊
LikeLike
Very pretty card Terry Lynn! Love that snowflake image. 🙂
LikeLike
So pretty Terry Lynn 🙂 Love that snowflake focal point and that background is stunning
LikeLiked by 1 person
Thanks Karen – fun background, right?!
LikeLike
That’s such a pretty snowflake and it’s perfect embossed in white on Berry Burst! Love it! 🙂
LikeLiked by 1 person
Thanks Mary – I’m liking the contrast, finally. 😀
LikeLike