Good morning! Here we are at the end of another week – whoa, it’s going by so quickly. I’ve had trouble with my computer for too many days now. All of a sudden everything started working again… I am shocked but pleased as punch! Photos are coming through – in other words, being synched to my computer – amazing! I’ll keep my finger crossed :O)
In my most recent card class we have been playing with the Kraft Note Cards which come as a set of 20 note cards & envelopes plus a box that is ready to put together. We have also been using the Abundant Beauty Masks to create the cards and decorate the box. And each persons personality is coming through in their own way. Today I’ll share photos of my box.
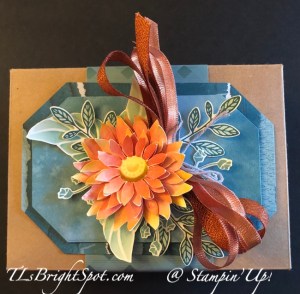

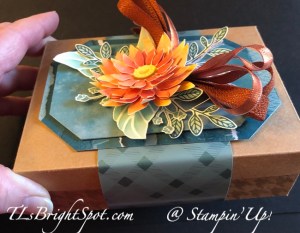
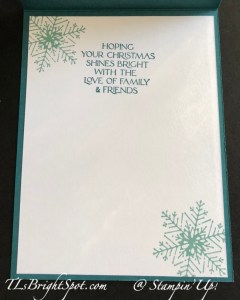
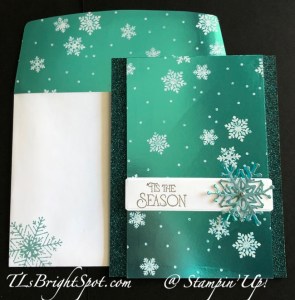
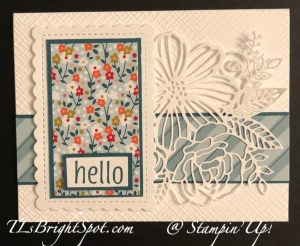
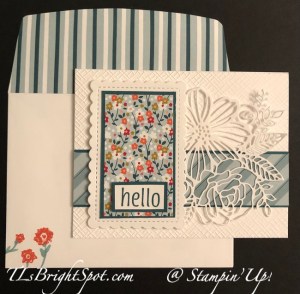
In the first photo you can see the many layers of the Abundant Beauty floral mask. I used five layers, each colored with Blending Brushes & Crushed Curry for an overall color, then Pumpkin Pie, Cajun Craze and maybe even some Real Red. It’s multi layered just as most flowers are not one solid color. The flower centers are Crushed Curry followed by soft Early Espresso – all using Blending Brushes. The second photo shows that I added Wink of Stella to many of the petals for a bit of bling. To color the larger leaves that are part of the mask, I used Lost Lagoon and Pretty Peacock for shading the tips of the leaves – of course with Blending Brushes. The additional leaves were stamped in those same two colors and Layering Leaves stamp set and the coordinating Leaves Punch. The bow was made with Copper Ribbon from the Burlap & Ribbon Combo Pack, plus a bit of Linen Thread. It’s adhered with a couple of glue dots.
This floral display sits on two die cuts of Designer Series Papers using the Countryside Corners Dies. The larger panel is die cut from Masterfully Made DSP and the top layer is Winter Meadow DSP. These two were adhered together with dimensionals then attached to the belly band with Tear ‘n Tape. The belly band is 2 1/2″ wide x 12 and is cut from Tartan Foil SDSP in Lost Lagoon.
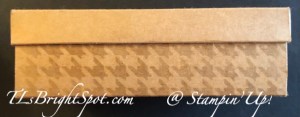
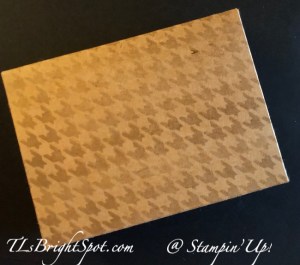
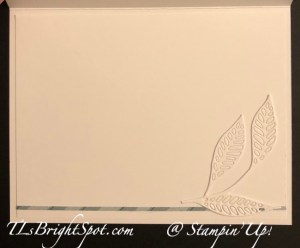
The box… prior to putting it together, I used the houndstooth mask to completely cover the bottom and sides of the box, keeping the mask going in the same direction. I used post-it tape to hold it in place in each section. The color is Early espresso ink with the Blending Brushes of course and I tried to vary the depth of color.
To order Stampin’ Up! products, please use this link to my online store. The Seasonal Sale is for products in the ANNUAL CATALOG ONLY. You will find ONLINE EXCLUSIVES, Clearance Rack, Sep-Dec Mini Catalog, the Annual Catalog, kits, Paper Pumpkin – you name it. Shop at your convenience :O)
When ordering from me please use my NEW HOST CODE HSJD7BR6 so that I receive proper notification and YOU GET THE Benefits of a FREE SU! item valued up to $10 :O) AND the Monthly Card Tutorial. (I like to treat my customers!) If your order is over $150, please don’t use the host code as SU! has benefits. I’ll still be notified and you can receive that FREE ITEM!
Note: Make sure that you can see my name on the final checkout page listed as your Demonstrator when you order so that you know that you’re ordering with me and you’ll get my rewards! PLUS… the monthly Online Tutorial when your order is over $50. The November Tutorial features the beautiful Winter Meadow suite of products which can found in the Jul-Dec 2023 Mini Catalog on pages 36-38!
Join my team here and still order these products as part of your starter kit – wow! Great time to join!!!
Other fun products Stampin’ Up! has right now…
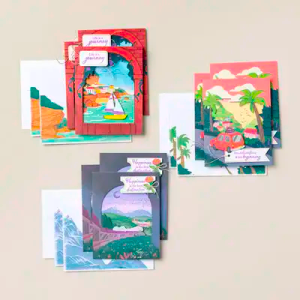
NEW KIT (THE BEST DESTINATION KIT) ADDED AS OF NOVEMBER 1!

163186
THE BEST DESTINATION KIT
$20.00 USD | $28.00 CAD
Available starting 1 November 1.
This kit lets you make nine tri-fold cards with a colorful, nostalgic, travel vibe.
- Enough supplies to create 9 cards—3 each of 3 designs
- 9 coordinating envelopes
- Best Destination Photopolymer Stamp Set
- One Gorgeous Grape Ink Spot
- Printed card bases, printed die cuts, adhesive, embellishments, and a clear block
- Finished card size: 5-1/2″ x 4-1/4″ (14 x 10.8 cm)
- Coordinating colors: Balmy Blue, Boho Blue, Cajun Craze, Calypso Coral, Coastal Cabana, Crushed Curry, Daffodil Delight, Early Espresso, Flirty Flamingo, Fresh Freesia, Gorgeous Grape, Granny Apple Green, Misty Moonlight, Pecan Pie, Petal Pink, Pretty Peacock, and Shaded Spruce
Kits can be ordered using this link to my online store.
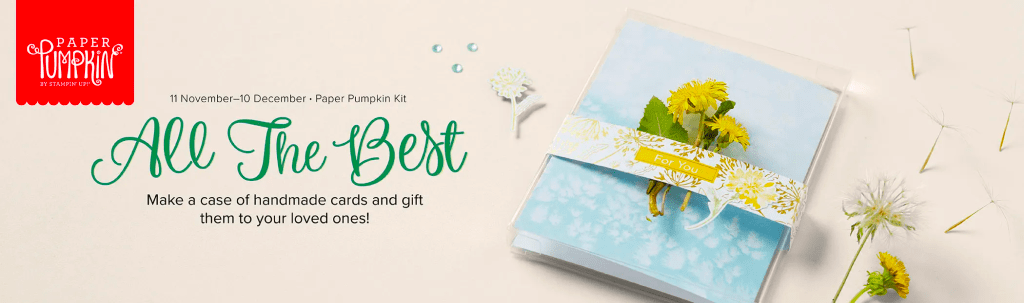
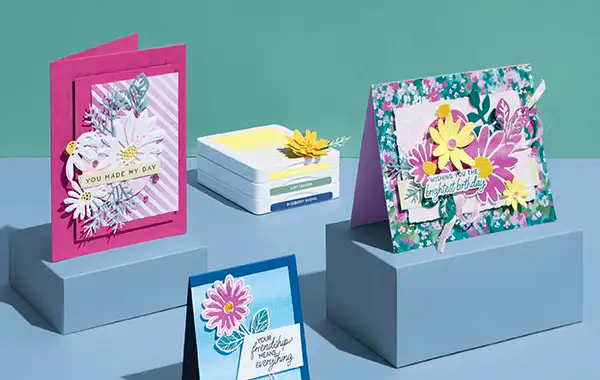
Paper Pumpkin is an all time favorite for many. Each month something new appears in your mailbox. Nov 11 to Dec 10 is the ALL THE BEST PP Kit. Send a wish to all your loved ones with the December Paper Pumpkin Kit! It comes with nine card fronts, three each of three designs, and nine coordinating envelopes. It has paper pieces detailed with gold foil, embellishments, an all-occasion stamp set, and an acetate box where you can store your finished cards! You can gift the kit itself or the finished product in the acetate box; either way, it’s the perfect last minute gift for any occasion.
ACETATE BOX
The All the Best Paper Pumpkin Kit comes with an acetate box that fits your finished cards and envelopes! This makes easy storage of a finished product or allows you to gift your cards to someone. The kit also comes with a belly-band, so you can add your own personal touch to the box. Subscribe by 10 December to make a handmade gift for those you love.
GOLD FOIL DETAILS
The paper pieces in the December Paper Pumpkin kit have gold foil detailing. Whether it’s an elegant boarder, or woven into the floral artwork, it’s a detail that will surely catch your recipient’s eye! It’s the perfect way to take any paper craft to the next level.
HAND DRAWN ARTWORK
The beauty of the December Paper Pumpkin Kit lies in the hand drawn artwork. The bright blue skies and elegant yellow flowers compliment the different design elements perfectly. It’s a simple yet sophistacted design that will catch any recipient’s eye!
Subscribe to the December Paper Pumpkin Kit between 11 November and 10 December by clicking here!
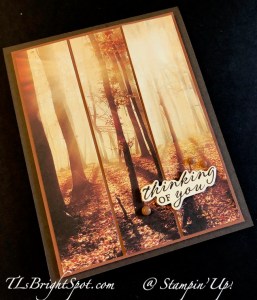
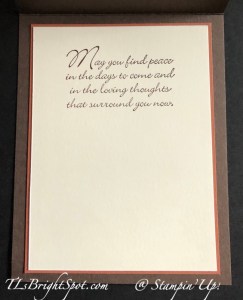
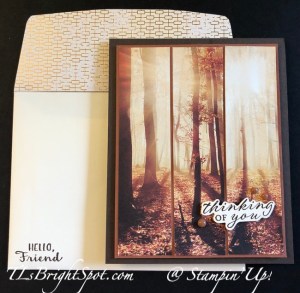
Thanks for stopping by. I hope you enjoyed my card today. Would love to hear from you. If I can be of help in some way, please let me know.


)