Stampin’ Up! More All Squared Away

Remember the stash I spoke of yesterday – the one with die cuts not yet used on a card? Well – here’s another die cut from All Squared Away using the Bloom Where You’re Planted DSP – and yep, it’s a birthday card.

All Squared Away.1

Super simple today, not many layers. This card starts with a card base of Gray Granite card stock. To that is a Basic White panel run through the with one of the Meadow Moments Embossing Folders. This folder is so delicate and sweet. The die cut mentioned earlier was added to the panel with small amounts of liquid glue. And notice, the flower center has one of the little dots from the embossing folder. 🙂 The next thing I did was stamp the sentiment in Gray Granite ink, also using the All Squared Away stamp set. I added three 2021-2023 In Co0lor Jewels in Pale Papaya then wrapped Gray Granite Baker’s twine around it twice and tied a knot. The twine is from the Essential Baker’s Twine Pack. The Basic White panel was now complete and adhered to the Gray Granite card stock with liquid glue – done!

All Squared Away.2

For the inside, I used an oval stamp from Watercolor Shapes stamp set and Pale Papaya ink to create a spot for the sentiment. I taped of a portion of the stamp I didn’t want to use and inked it with Gray Granite ink, removed the tape and stamped it over the oval. The Basic White panel was adhered to the inside of the Gray granite card base – and voila!

All Squared Away.3

For the envelope I ran more Gray Granite card stock through the Meadow Moments Embossing Folder, this time using the other folder in the two-pack. This is every bit as delicate & sweet. The panel was adhered to the envelope flap and trimmed to fit. Finis… and ready to send.

Yesterdays card was multi-layered and bold while today’s is monochromatic and pretty much single layered. I love that we can do that, show creativity in various ways and still be beautiful. Definitely not something one would find in a store! Handmade at it’s best… Card cuts are listed at the end of this post.

Products for todays project are from the 2021-22 Annual Catalog. They may be found in the list below. I’ve made it easy for you to simply ‘add all to cart’. If I can help you in any way to order these items, or others, please give me a holler. As a thank you to my customers, when the order is between $50-$150 I offer a SU! item of your choice valued at $10. Remember to use MY NEW HOST CODE – 4A6RJ2TA . When the order is over $150, you still receive that free gift from me, but SU! has Stampin’ Rewards that may be used for additional products, so don’t use the host code at that time. If you have questions just let me know. If you would like to be able to order products early from catalogs AND enjoy that 20% discount, join my team now… you may do that here. We have lots of fun and are a creative bunch that encourages & supports one another.

Remember the 2020-2021 Annual catalog products are retiring the end of this month, Jun 30 – just days away – some at very reduced prices. Purchase while supplies last.

KITS PROMOTION BEGINS 1 JUNE

I’m excited to share with you a new line of creative products called the Kits Collection by Stampin’ Up! Stampin’ Up! has taken the guess work out of creativity and done the hard parts, and you get to do the fun stuff: craft! Each kit is all-inclusive and includes the predesigned projects, preprinted pieces, and even the adhesives you need to complete the projects.

There’s a wide variety of kits for all different occasions, and new kits are being added regularly. You can shop the current selection at www.stampinup.com/kits. But hurry! Kits are available only while supplies last! 

Pick the kit that’s right for you!

5.01.21_DHEADER_KITSPREORDER_NA

Thanks for stopping by. May you have a beautiful day. Be inspired. Create. Share.

Card cuts for today’s project:

Gray Granite – 4 1/4 x 11 scored at 5 1/2, 2 1/4 x 6 (envelope flap)

Basic White – 4 x 5 1/2 (run through embossing folder), 4 x 5 1/4 (inside)

Stampin’ Up! Polished Pink & Pool Party Birthday

Who would have thought Polished Pink & Pool Party would compliment each other? Not me! But as I was playing with colors, I really liked this combo ~ and the Gray Granite is just enough to soften things a bit. And this came together because I was rooting around in my stash and found these die cuts from the All Squared Away bundle!

Polished Pink & Pool Party Birthday.1

The flower die cut comes from Bloom Where You’re Planted DSP using the Floral Squares Dies and the background is stamped in Polished Pink on a Basic White panel with the All Squared Away stamp set. I trimmed that down and adhered the die cut with liquid glue, put dimensionals on the back and attached it to a larger square of Basic White cut with the Layering Squares Dies (OOPS>>> these are a retired item – bummer!). I used a scalloped square from the Layering Squares Dies to create a Polished Pink and the squares were adhered to that with liquid glue. This is when I discovered this fun contrast with Pool Party… using the Fine Art Floral DSP and the Scallop & Contour Dies. I made a square by die cutting only a portion of the Scallop, matching the contours and die cutting the other end. And I really like the smaller scallop paired with the larger scallop.; it provides a nice contrast. The Polished Pink layers were adhered to this new scalloped square with liquid glue, then onto a larger panel of Basic White. I pulled in another Pool Party using the Subtles 6×6 DSP and adhered that to a Thick Basic White card base (yep, lisuid glue) then added all the layers using liquid glue. The sentiment banner comes from the Artistically Inked stamped set and I stamped that in Gray Granite on a Basic White strip then angled the ends. That was attached to a Polished Pink strip and added to the card front with liquid glue. For a final bit of bling, I added three 2021-2023 In Color Jewels in Polished Pink ~ and the card front was done!

Polished Pink & Pool Party
Birthday, inside.2

For the inside of the card I added another panel of the Fine Art Floral DSP. On the Basic White panel, I stamped this extra fun ‘blotch’ using the Artistically Ink stamp set with Pool Party ink. Over that I stamped the sentiment with Basic Gray ink from the Inspired Thoughts stamp set. I adhered the Basic White panel to the DSP and the card itself was complete.

Polished Pink & Pool Party Birthday.3

For the envelope, I used the Subtles 6×6 DSP to adhere to the envelope flap and that was it. I’m rather excited about this new color combo… hope you like it too. Card cuts are listed at the end of this post.

Products for todays project are from the 2021-22 Annual Catalog. They may be found in the list below. I’ve made it easy for you to simply ‘add all to cart’. If I can help you in any way to order these items, or others, please give me a holler. As a thank you to my customers, when the order is between $50-$150 I offer a SU! item of your choice valued at $10. Remember to use MY NEW HOST CODE – 4A6RJ2TA . When the order is over $150, you still receive that free gift from me, but SU! has Stampin’ Rewards that may be used for additional products, so don’t use the host code at that time. If you have questions just let me know. If you would like to be able to order products early from catalogs AND enjoy that 20% discount, join my team now… you may do that here. We have lots of fun and are a creative bunch that encourages & supports one another.

KITS PROMOTION BEGINS 1 JUNE

I’m excited to share with you a new line of creative products called the Kits Collection by Stampin’ Up! Stampin’ Up! has taken the guess work out of creativity and done the hard parts, and you get to do the fun stuff: craft! Each kit is all-inclusive and includes the predesigned projects, preprinted pieces, and even the adhesives you need to complete the projects.

There’s a wide variety of kits for all different occasions, and new kits are being added regularly. You can shop the current selection at www.stampinup.com/kits. But hurry! Kits are available only while supplies last! 

Pick the kit that’s right for you!

5.01.21_DHEADER_KITSPREORDER_NA

Thanks for stopping by. May you have a beautiful day. Make someone happy by creating something handmade.

Card cuts:

Basic White, Thick – 4 1/4 x 11 scored at 5 1/2

Basic White – 3 1/2 x 4 3/4, 2 1/4 square, 1 7/8 square, 3 3/4 x 5 (inside), 1/2 x 3 3/8

Subtles 6×6 DSP – 4 x 5 1/4, 2 1/4 x 6 (flap)

Fine Art Floral DSP – approx 3 1/8 for the scalloped square, 4 x 5 1/4 (inside)

Polished Pink – 2 1/2 square, 5/8 x 4

Stampin’ Up! Elegantly Said Anniversary

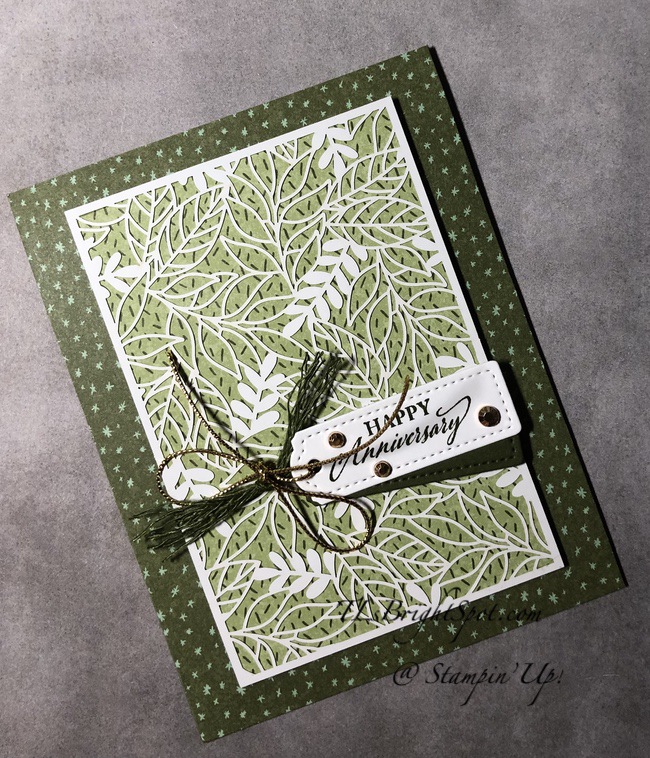
It’s Tuesday… still going strong into the week. My card today is an anniversary card using products that are new and some products retiring the end of June. I’m trying really hard to use the retiring items but combining them with new. Stampin’ Up! does such an amazing job of coordinating their products that it’s fairly easy to do this.

Elegantly Said Anniversary.1

The Forever Gold Laser-Cut SDSP really makes this card stand out. And it’s placed against Flowering Cactus Product Medley from the Mini Catalog. The sentiment is from the Elegantly Said bundle and the tag is created with the Tailor Made Tag Dies, both of which are new in the 2021-2022 Annual Catalog. Let me break down how I made this card…

Adhere a panel of the DSP from the Flowering Cactus Product Medley (if you have the stamp set bundle, the refill kit has this DSP!) to a card base of Mossy Meadow. Cut down a coordinating piece of the same DSP packet and adhere the Forever Gold Laser-Cut SDSP with liquid glue. I cut a panel of Basic White the same size as the SDSP and adhered that to the back for strength. I wrapped the Mossy Meadow Braided Linen Trim around and tied a knot, securing the knot with a glue dot. (this trim is part of the Dandy Garden suite of products). Stamp the sentiment from Elegantly Said stamp set on Basic White in Mossy Meadow ink and die cut with the Tailor Made Tag Dies. Die cut another the sameI size in Mossy Meadow and adhere together with liquid glue, off-setting a bit. Adhere to the card with dimensionals. Slip a Simply Elegant Trim in Gold through the hole and tie a bow, attaching it to the Braided Linen Trim. Add three Gilded Gems to the sentiment banner. Add dimensionals to the back of this panel and adhere to the card front – voila!

Elegantly Said Anniversary, inside.2

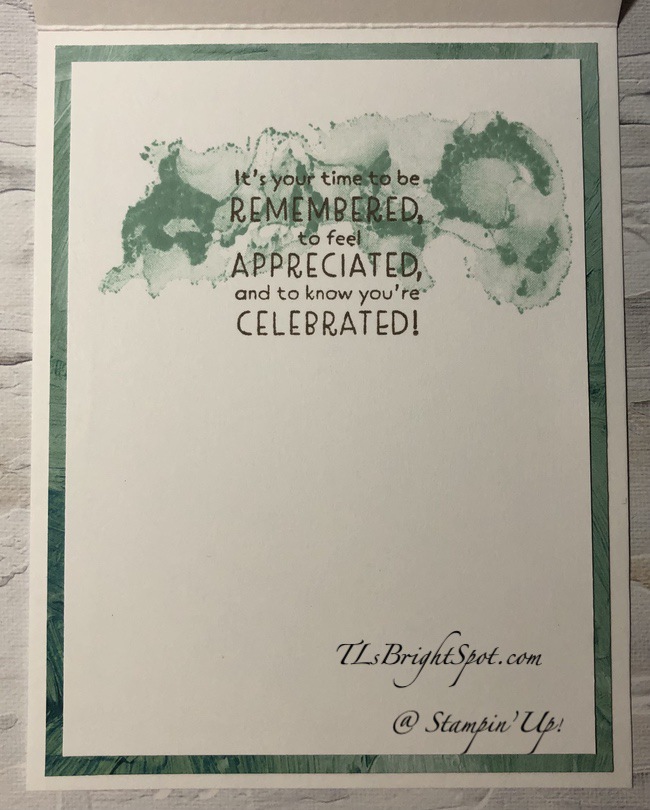
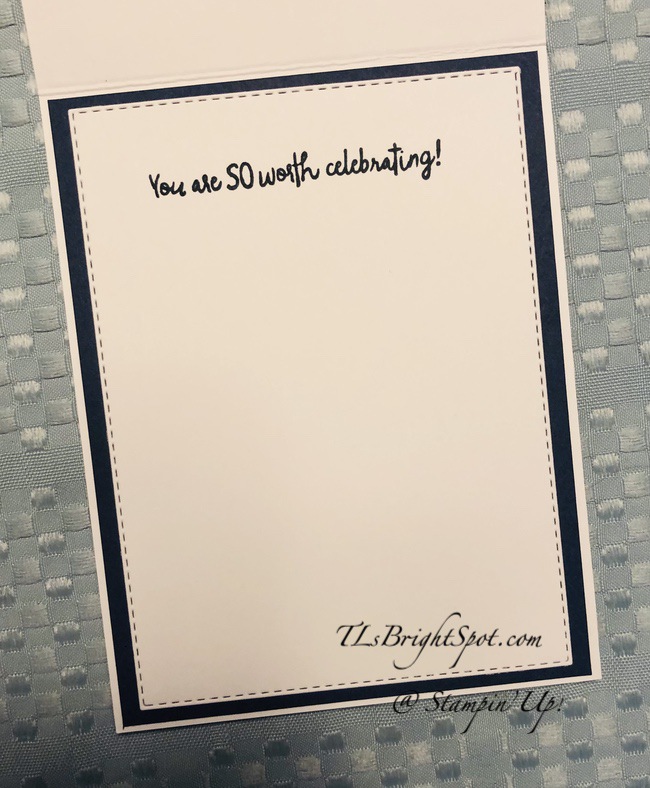
For the inside, I stamped another sentiment from the Elegantly Said stamp set in Mossy Meadow ink on a Basic White panel. I found a ‘frame’ in my stash cut from Mossy Meadow card stock and adhered that to the panelwith liquid glue. (It’s easy to create a similar frame using the Stitched Rectangles Dies.) This Basic White panel was adhered to the card base and the card was complete.

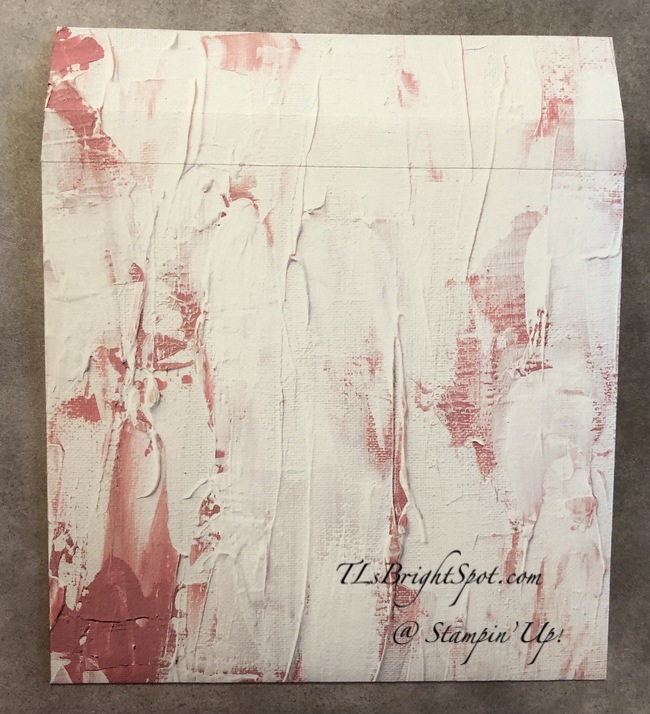
For the envelope, I adhered a strip of the same DSP from the Flowering Cactus Product Medley to the envelope flap and that was it.

Elegantly Said Anniversary.3

A friend has placed an order for several cards (20 to be exact!) of various needs: birthday, anniversary, masculine, congratulations. They need to be fairly simple cards with not a lot of dimension. This has some, but should be able to be sent with regular postage. Since this is a decent size order, I will be posting more of these to share with you 🙂 I hope you find them worthy… Card cuts are listed below.

Products for todays project are from the 2021-22 Annual Catalog. They may be found in the list below. I’ve made it easy for you to simply ‘add all to cart’. If I can help you in any way to order these items, or others, please give me a holler. As a thank you to my customers, when the order is between $50-$150 I offer a SU! item of your choice valued at $10. Remember to use MY NEW HOST CODE – 4A6RJ2TA . When the order is over $150, you still receive that free gift from me, but SU! has Stampin’ Rewards that may be used for additional products, so don’t use the host code at that time. If you have questions just let me know. If you would like to be able to order products early from catalogs AND enjoy that 20% discount, join my team now… you may do that here. We have lots of fun and are a creative bunch that encourages & supports one another.

KITS PROMOTION BEGINS 1 JUNE

I’m excited to share with you a new line of creative products called the Kits Collection by Stampin’ Up! Stampin’ Up! has taken the guess work out of creativity and done the hard parts, and you get to do the fun stuff: craft! Each kit is all-inclusive and includes the predesigned projects, preprinted pieces, and even the adhesives you need to complete the projects.

There’s a wide variety of kits for all different occasions, and new kits are being added regularly. You can shop the current selection at www.stampinup.com/kits. But hurry! Kits are available only while supplies last! 

Pick the kit that’s right for you!

5.01.21_DHEADER_KITSPREORDER_NA

Thanks for stopping by. May you have a beautiful day!

Card cuts:

Mossy Meadow – 4 1/4 x 11 scored at 5 1/2 + scrap for sentiment banner

Basic White – 3 1/4 x slightly less than 4 3/4 (backing for small SDSP panel), 4 x 5 1/4 (inside) + scrap for sentiment banner
Stampin’ Up! Birthday

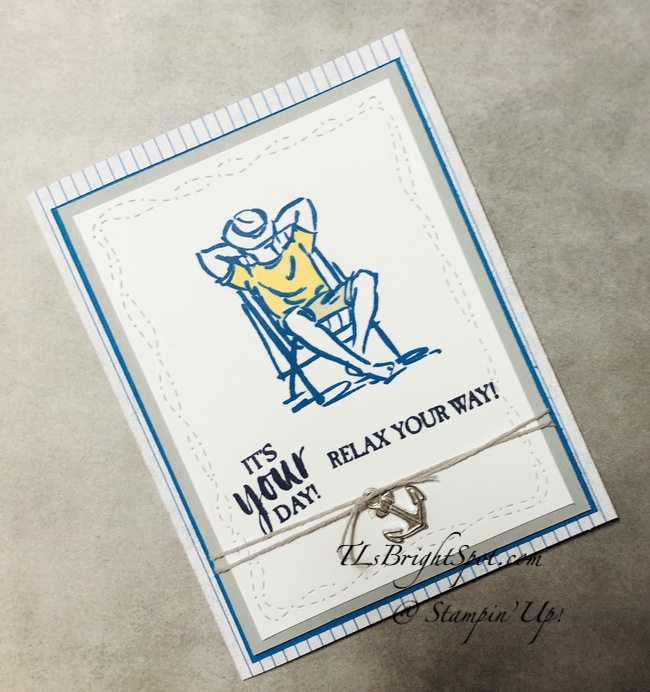
Today’s card is for my sweetheart of a hubby, his birthday! He loves to sail our little 16′ Bullseye and therefore the Sailing Home stamp set is perfect for a card for him.

Sailing home birthday.1

I started by using the Stitched Rectangle Dies and Beauty of the Earth DSP to create a rectangle, then stamped the sailboat in Misty Moonlight ink and the birds in Smoky Slate ink. I die cut the same size panel in Basic White and adhered it to the back of the panel for strength. I then die cut with the largest of the Stitched Rectangles Dies, a Basic White panel. I stamped the anchor in Smoky Slate ink from the Sailing Home stamp set, then the two sentiments. The ‘Happiest…’ sentiment is from All squared Away stamp set and stamped in Misty Moonlight ink. The other sentiment is from Days to Remember stamp set and done in Smoky Slate ink. I added five retired 2020-2022 Enamel Dots in Misty Moonlight, then wrapped Baker’s Twine from the Essentials Pack around the Basic White panel 2 times and tied a knot. I then adhered the sailboat panel with dimensionals. This Basic White panel also got dimensionals and was added to the card base. The card base is Basic White with a panel of Misty Moonlight card stock adhered with liquid glue. This frames the white panel nicely. Card cuts are listed at the end of the post.

Sailing Home Birthday.2

The inside was kept really simple – using the largest of the Stitched Rectangles dies, cut a panel of Basic White, stamp the sentiment from All Squared Away stamp set in Misty Moonlight ink and adhere with liquid glue to a larger Misty Moonlight panel, then attach to the inside of the card – yep, with liquid glue. And the card is complete… 🙂

For the envelope, I took a piece of Misty Moonlight card stock and ran it through the new Bark 3D embossing folder and attached it to the flap. Love this new folder!!!

Products for todays project are from the 2021-22 Annual Catalog. They may be found in the list below. I’ve made it easy for you to simply ‘add all to cart’. If I can help you in any way to order these items, or others, please give me a holler. As a thank you to my customers, when the order is between $50-$150 I offer a SU! item of your choice valued at $10. Remember to use MY NEW HOST CODE – 4A6RJ2TA . When the order is over $150, you still receive that free gift from me, but SU! has Stampin’ Rewards that may be used for additional products, so don’t use the host code at that time. If you have questions just let me know. If you would like to be able to order products early from catalogs AND enjoy that 20% discount, join my team now… you may do that here. We have lots of fun and are a creative bunch that encourages & supports one another.

Stampin’ Up! has two promotions going on right now: a HOST promotion AND a KIT promotion,

which are shown next.

HOST PROMOTION 4 MAY- 14 JUN, 2021

Connect, Craft & Collect

From 4 May–14 June 2021, qualifying orders will receive our generous Stampin’ Rewards PLUS additional rewards! Hosts can earn Stampin’ Rewards based on order totals for an entire party. Outside of the party setting, Stampin’ Rewards are available to those who place individual orders that meet the order totals shown here.

  • Workshop orders, customer orders, and online orders all qualify for the extra $25 in Stampin’ Rewards if they reach the $250 level.
  • The order must reach the qualifying amount of $250 in merchandise prior to shipping and tax.The extra $25 rewards are only valid once per order no matter how high the order total.
  • Starter Kit orders do not qualify for this promotion.
  • Stampin’ Rewards can not be used on a 50% off item.
  • Deadline to submit an order and receive the extra $25 in free Stampin’ Rewards:  June 14, 2021 at 11:50 PM (MT).

KITS PROMOTION BEGINS 1 JUNE

I’m excited to share with you a new line of creative products called the Kits Collection by Stampin’ Up! Stampin’ Up! has taken the guess work out of creativity and done the hard parts, and you get to do the fun stuff: craft! Each kit is all-inclusive and includes the predesigned projects, preprinted pieces, and even the adhesives you need to complete the projects.

There’s a wide variety of kits for all different occasions, and new kits are being added regularly. You can shop the current selection at www.stampinup.com/kits. But hurry! Kits are available only while supplies last! 

Pick the kit that’s right for you!

5.01.21_DHEADER_KITSPREORDER_NA

Thanks for stopping by. May you have a beautiful day!

Card cuts for today’s project:


Thick Basic White – 4 1/4 x 11 scored at 5 1/2

Basic White – 4 x 5 1/4 (2) for largest die cuts; 2 1/4 x 3 5/8 for backing on DSP

DSP (Beauty of the Earth) – 2 1/4 x 3 5/8

Stampin’ Up! DSP for Large Envelopes

Today’s post is about creating our own envelopes using SU! DSP. The other day I created a fun Pinwheel card whose final dimensions were 6×6. That is not my favorite size card as it requires a handmade envelope and may require more than one 12 x 12 DSP. I have made an envelope for the Pinwheel Tower card which you may see here– and am not real happy with it, but will share it nonetheless.

DSP for large envelopes.1

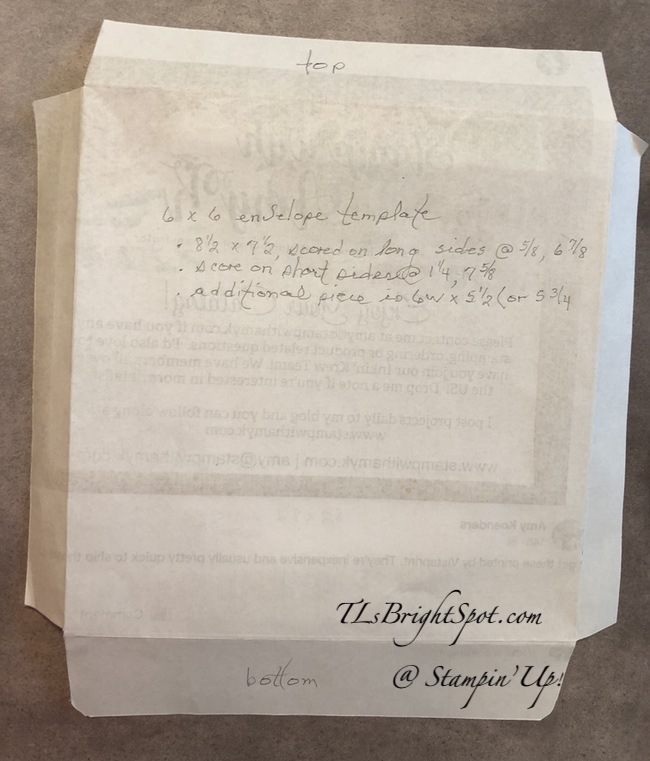
I should have photographed this while putting it together, so it would be very clear (obvious) where the Tear n Tape should be placed and how to trim – ugh. You will have to accept the template shown below instead 🥴. Above is the final envelope – not as heavy as card stock and once a label is on it is perfect. Because the card itself is heavy and the envelope an odd size, this will reuqire extra postage if mailing it. Therefore – I encourage this be hand delivered :O)

The envelope is 8 1/2 x 7 1/2, scored on the long side at 5/8 and 6 7/8. On the short side, score at 1 1/4 & 7 5/8. There is an additional piece 6 wide x 5 1/2 (or 5 3/4 if you prefer). Burnish each of the score lines and trim as shown.

DSP for large envelopes.2

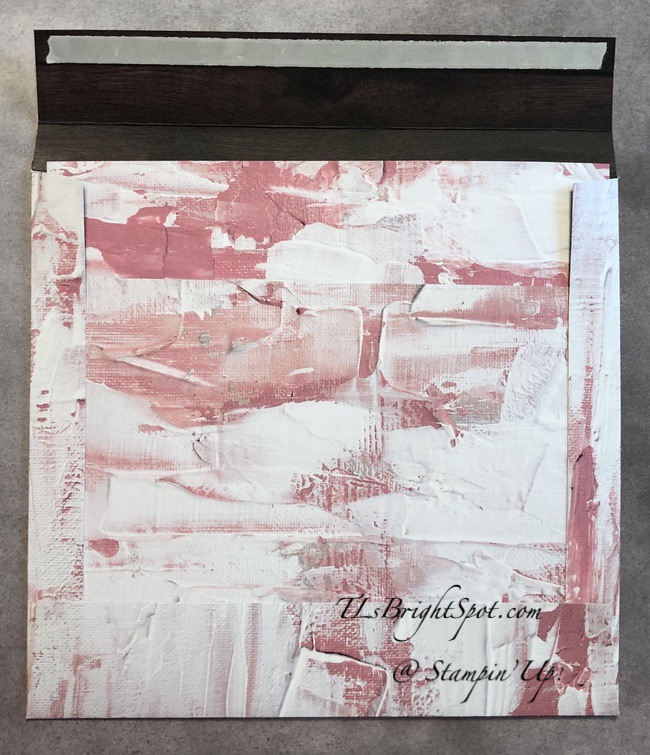
Add Tear n Tape to each of the edges (on the inside). Remove the cover on the tape on the long sides, insert additional piece and seal. Remove cover on tape of bottom flap and seal to the additional piece. It will look like this –

DSP for large envelope.3

The problem with this envelope is… I had to piece the additional panel AND the direction doesn’t match 😦 It doesn’t really show in the photo or in real life, so I guess it’s OK. I just happen to like things that match and aren’t pieced. Here’s a photo of the Pinwheel Tower card for which this envelope was made.

Products for todays project are from the 2021-22 Annual Catalog. They may be found in the list below. I’ve made it easy for you to simply ‘add all to cart’. If I can help you in any way to order these items, or others, please give me a holler. As a thank you to my customers, when the order is between $50-$150 I offer a SU! item of your choice valued at $10. Remember to use MY NEW HOST CODE – 4A6RJ2TA . When the order is over $150, you still receive that free gift from me, but SU! has Stampin’ Rewards that may be used for additional products, so don’t use the host code at that time. If you have questions just let me know. If you would like to be able to order products early from catalogs AND enjoy that 20% discount, join my team now… you may do that here. We have lots of fun and are a creative bunch that encourages & supports one another.

That’s it for today… May you have a beautiful & fulfilling day. Make someone happy sending them a handmade card filled with love.

Stampin’ Up! Retirement with A Good Man

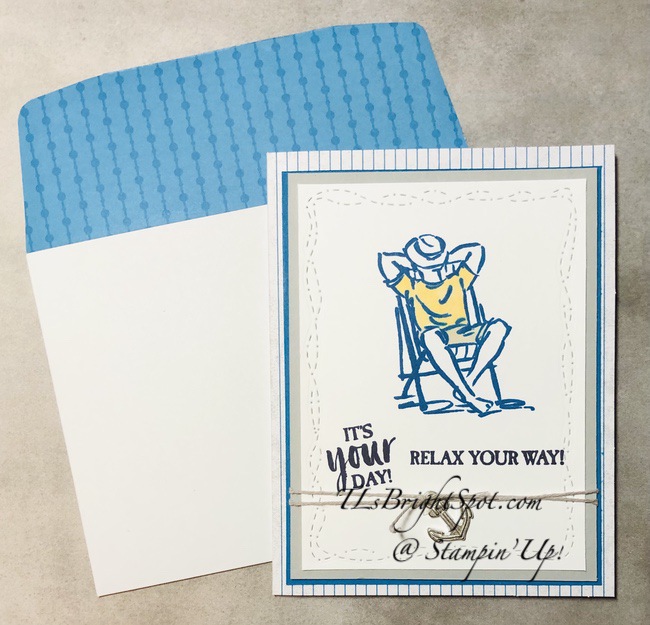
Wow – the temperature has dropped 20 degrees – and it is a bit cool. It’s going to be a long sleeve and sweater kind of day today and that unusual on the East Coast this time of year. But… I’ll take it! My card today is made using A Good Man stamp set. A man we know is retiring, lives simply, doesn’t like a fuss and it’s hard to know what to do for him. Making a card is a start.

Retirement w/ A Good Man.1

I fist stamped the main image of the man in Pacific point ink on a Basic White panel, then colored him with Stampin’ Blends So Saffron and Crumb Cake. Next I ran this panel through using the Stitched Whimsy Dies to create a border. I then stamped the two sentiments from A Good Man in Night of Navy ink. Next step was to adhere this panel to a slightly larger piece of Smoky Slate card stock. I then wrapped Gray Granite Bakers Twine from the Essentials Pack twice around both layers and tied a knot. Because this man has worked for a local Yacht Club, I attached an anchor that is a retired item from a couple of years ago. Sorry… I shouldn’t do that, use retired items, but this card really did call for it! The anchor was secured with a couple of glue dots to keep it in place.

The base of my card is part of the May Paper Pumpkin kit. I adhered a panel of Pacific Point to it with liquid glue, then attached the completed panel with dimensionals.

Retirement w/ A Good Man.2

To the inside I first added a panel of Pacific Point card stock with liquid glue. I began by running the Basic White panel through the die cutting machine using the largest of the Stitched Whimsy Dies. Next I stamped the Thank You using The Best Year stamp set – and it was done in Pacific Point ink. I cut out the numbers with the Playful Alphabet Dies and Smoky Slate card stock and adhered them with liquid glue. The years sentiment is from A Wish for Everything stamp set, also in Pacific point ink. The stars were ones in my ‘pile’ of unused items and die cut from the Messages Dies. 🙂 This panel was adhered to the inside of the card with liquid glue and the cardn was done.

For the envelope, I added a piece of Brights 6×6 DSP in Pacxiic Point to the envelope flap, trimmed to fit & voila!

Retirement w/ A Good Man.3

Products for todays project are from the 2021-22 Annual Catalog. They may be found in the list below. I’ve made it easy for you to simply ‘add all to cart’. If I can help you in any way to order these items, or others, please give me a holler. As a thank you to my customers, when the order is between $50-$150 I offer a SU! item of your choice valued at $10. Remember to use MY NEW HOST CODE – 4A6RJ2TA . When the order is over $150, you still receive that free gift from me, but SU! has Stampin’ Rewards that may be used for additional products, so don’t use the host code at that time. If you have questions just let me know. If you would like to be able to order products early from catalogs AND enjoy that 20% discount, join my team now… you may do that here. We have lots of fun and are a creative bunch that encourages & supports one another.

Stampin’ Up! has two promotions going on right now: a HOST promotion AND a KIT promotion,

which are shown next.

HOST PROMOTION 4 MAY- 14 JUN, 2021

Connect, Craft & Collect

From 4 May–14 June 2021, qualifying orders will receive our generous Stampin’ Rewards PLUS additional rewards! Hosts can earn Stampin’ Rewards based on order totals for an entire party. Outside of the party setting, Stampin’ Rewards are available to those who place individual orders that meet the order totals shown here.

  • Workshop orders, customer orders, and online orders all qualify for the extra $25 in Stampin’ Rewards if they reach the $250 level.
  • The order must reach the qualifying amount of $250 in merchandise prior to shipping and tax.The extra $25 rewards are only valid once per order no matter how high the order total.
  • Starter Kit orders do not qualify for this promotion.
  • Stampin’ Rewards can not be used on a 50% off item.
  • Deadline to submit an order and receive the extra $25 in free Stampin’ Rewards:  June 14, 2021 at 11:50 PM (MT).

KITS PROMOTION BEGINS 1 JUNE

I’m excited to share with you a new line of creative products called the Kits Collection by Stampin’ Up! Stampin’ Up! has taken the guess work out of creativity and done the hard parts, and you get to do the fun stuff: craft! Each kit is all-inclusive and includes the predesigned projects, preprinted pieces, and even the adhesives you need to complete the projects.

There’s a wide variety of kits for all different occasions, and new kits are being added regularly. You can shop the current selection at www.stampinup.com/kits. But hurry! Kits are available only while supplies last! 

Pick the kit that’s right for you!

5.01.21_DHEADER_KITSPREORDER_NA

Thanks for stopping by. May you have a beautiful day!

Card cuts:

Pacific Point – 3 7/8 x 5 1/8 (front), 4 1/8 x 5 3/8 (inside)

Smoky Slate – 3 3/4 x 5 (front)

Basic White – 3 1/2 x 4 3/4 (front), 4 x 5 1/4 (inside)
DSP – 2 1/4 x 6 (flap)

Stampin’ Up Fun Fold with Fine Art Floral DSP

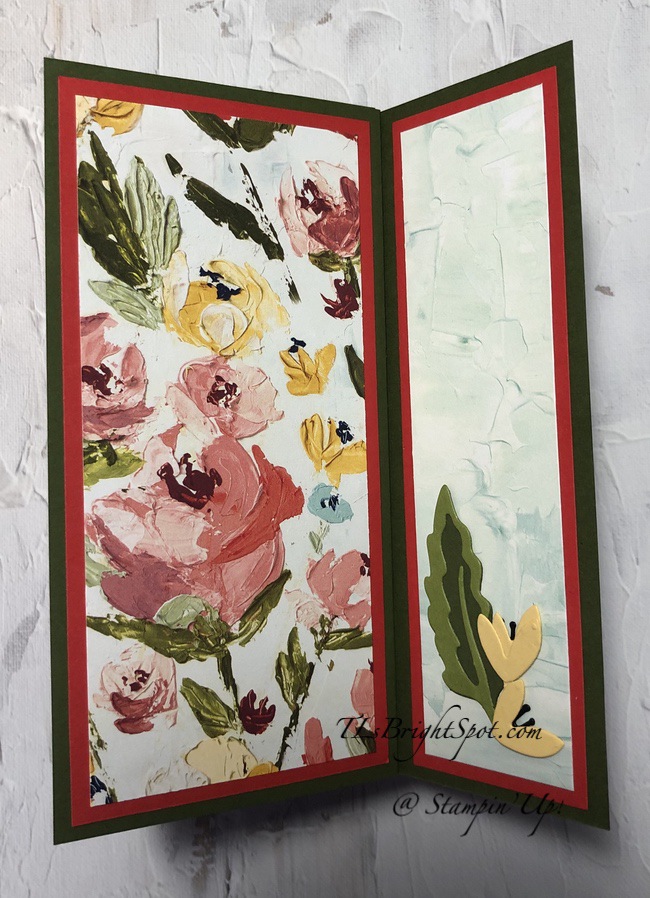
Oh this was fun to create…and to build. And yes, when the fun fold is a new one, it really does seem like a building project 🙂 The concern is, the finished product is 6 x 6 and that’s problematic creating an envelope. Having said that, I still like the card… and the idea.

Pinwheel Tower Card.1

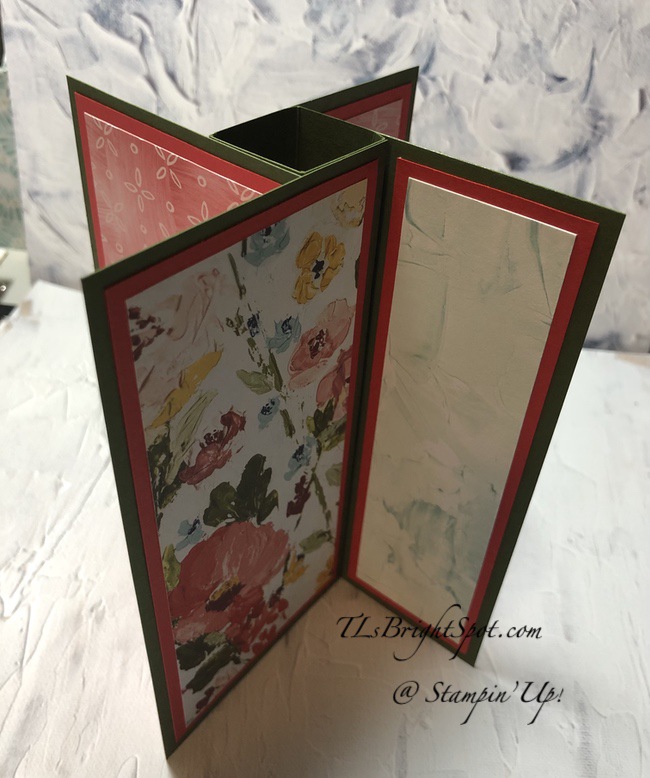
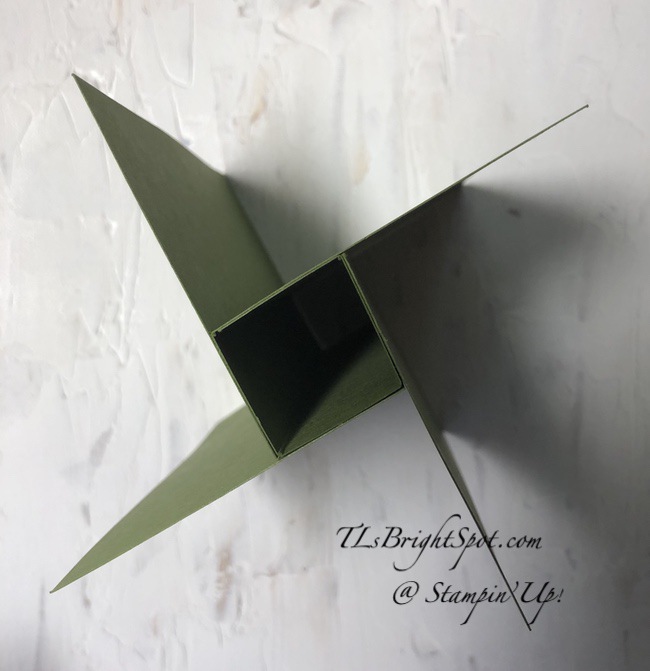
Begin by cutting & scoring your card base: 7 x 6 and scored on the long side at 1, 2, 3, & 4. Burnish the folds and roll together to create a box. Adhere with liquid glue. It should look like this…

Pinwheel Tower Card.2

Attach to each of the flat edges a panel cut 3 x 6. There are three panels. It will look like this.

Pinwheel Tower Card.3

Decorate each side of the pinwheel – there are eight sides, four narrow and four wider. And you can embellish as much as you like. I kept mine fairly simple as I used the Fine Art Floral DSP and it is showy all by itself. Here are some of the decorated sides and I’ll give the card cuts below.

You can see I used the Tailor Made Tags Dies, Mossy Meadow Braided Trim and Poppy Moments Dies. For the sentiments I used Peaceful Moments and the Stamparatus for the ‘Happy Birthday’ and Encircled in Friendship for ‘You’re the BEST’.

Layer measurements:

  • Mossy Meadow card base 7 x 6 scored at 1, 2, 3, & 4; 3 x 6 (3) [for pinwheels]
  • Poppy Parade – 2 3/4 x 5 3/4 (4), 1 3/4 x 5 3/4 (4)
  • DSP layer (Fine Art Floral DSP, coordinating patterns) – 2 1/2 x 5 1/2 (4), 1 1/2 x 5 1/2 (4)

Decorations: I used Mossy Meadow & old Olive for the leaves; So Saffron and Basic Black for the flower buds.

When doing the layering panels, I found it helpful to have those that would be facing each other, side by side to make certain the layers matched in pattern and in spacing, then attached them to the pinwheel panels.

Thanks to craftykarendesigns for the card inspiration!

Products for todays project are from the 2021-22 Annual Catalog. They may be found in the list below. I’ve made it easy for you to simply ‘add all to cart’. If I can help you in any way to order these items, or others, please give me a holler. As a thank you to my customers, when the order is between $50-$150 I offer a SU! item of your choice valued at $10. Remember to use MY NEW HOST CODE – 4A6RJ2TA . When the order is over $150, you still receive that free gift from me, but SU! has Stampin’ Rewards that may be used for additional products, so don’t use the host code at that time. If you have questions just let me know. If you would like to be able to order products early from catalogs AND enjoy that 20% discount, join my team now… you may do that here. We have lots of fun and are a creative bunch that encourages & supports one another.

I want to help you in your creativity, to share in your progress, to witness your growth. Feel free to ask questions.

Thanks for stopping by. May you have a beautiful day!

Stampin’ Up! Grand Kid Graduation

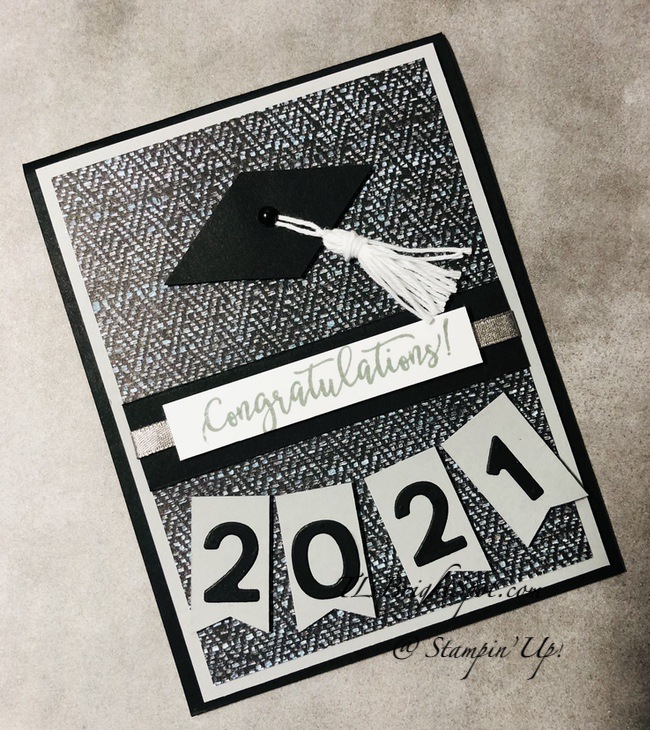
Masculine cards are sometimes difficult for me ~ I want to get it right on so many levels. Well, I think this card does that – gets it right. It’s a graduation card for a young man with learning disabilities: his graduating from high school is a big deal and he is so excited. Let’s take a peek.

Grand Kid Graduation.1

I began with the In Good Taste DSP and worked around that. And… I’ll be honest, I found a card on Pinterest that I CASEd (Etsy to be exact – from several years ago). The ‘cap’ is made with the Tailored Tag Punch and Basic Black card stock. I found that idea on Pinterest as well 🙂 Punch the tag, then trim to the longest points – perfect cap!. Next I punched a small hole in the center for the homemade tassel. I wrapped White Baker’s twine from the Baker’s Twine Essential Pack, around a credit card several times – and well, this is how it turned out. I pushed the twine through the hole in the cap and secured it with Seal+ then taped over that. A single Black Matte Dot was perfect to cover the opening and give the cap the finishing touch. I put dimensionals on the back and secured it to the card front. I added a glue dot under the tassel knot to keep it in place.

Next I created the banner to show the year of graduation. With Smoky Slate card stock I trimmed the ends of each banner with the Banners Pick a Punch. The numbers were created using the Playful Alphabet Dies and Basic Black card stock and adhered with dabs of liquid glue. Each banner got dimensionals on the back and adhered as you see them. I used Black card stock once again to create the center area and simply glued that in place with liquid glue. I then wrapped a bit of Shimmer Ribbon in Gray Granite on top of the black strip and adhered it in back with Seal+ The ‘Graduation’ banner is stamped in Smoky Slate on Basic White using the A Wish for Everything stamp set. This was adhered over the ribbon with dimensionals. I adhered the completed DSP panel to a larger piece of Smoky Slate card stock with liquid glue, added dimensionals to the back and attached it to the Basic Black card base.

Grand Kid Graduation.2

The inside is super simple… the sentiment is stamped in Memento Black ink using A Grand Kid stamp set onto Basic White card stock. That was adhered to Smoky Slate (yep, liquid glue) then to the inside of the card – and voila! Card is complete.

For the envelope I covered the flap with the same In Good Taste DSP. Done, done.

Grand Kid Graduation.3

This card could be made feminine by simply changing out the DSP – and using the same layout. I really like it. Card cuts will be listed at the end of the post.

Products for todays project are from the 2021-22 Annual Catalog. They may be found in the list below. I’ve made it easy for you to simply ‘add all to cart’. If I can help you in any way to order these items, or others, please give me a holler. As a thank you to my customers, when the order is between $50-$150 I offer a SU! item of your choice valued at $10. Remember to use MY NEW HOST CODE – 4A6RJ2TA . When the order is over $150, you still receive that free gift from me, but SU! has Stampin’ Rewards that may be used for additional products, so don’t use the host code at that time. If you have questions just let me know. If you would like to be able to order products early from catalogs AND enjoy that 20% discount, join my team now… you may do that here. We have lots of fun and are a creative bunch that encourages & supports one another.

Stampin’ Up! has two promotions going on right now: a HOST promotion AND a KIT promotion,

which are shown next.

HOST PROMOTION 4 MAY- 14 JUN, 2021

Connect, Craft & Collect

From 4 May–14 June 2021, qualifying orders will receive our generous Stampin’ Rewards PLUS additional rewards! Hosts can earn Stampin’ Rewards based on order totals for an entire party. Outside of the party setting, Stampin’ Rewards are available to those who place individual orders that meet the order totals shown here.

  • Workshop orders, customer orders, and online orders all qualify for the extra $25 in Stampin’ Rewards if they reach the $250 level.
  • The order must reach the qualifying amount of $250 in merchandise prior to shipping and tax.The extra $25 rewards are only valid once per order no matter how high the order total.
  • Starter Kit orders do not qualify for this promotion.
  • Stampin’ Rewards can not be used on a 50% off item.
  • Deadline to submit an order and receive the extra $25 in free Stampin’ Rewards:  June 14, 2021 at 11:50 PM (MT).

KITS PROMOTION BEGINS 1 JUNE

I’m excited to share with you a new line of creative products called the Kits Collection by Stampin’ Up! Stampin’ Up! has taken the guess work out of creativity and done the hard parts, and you get to do the fun stuff: craft! Each kit is all-inclusive and includes the predesigned projects, preprinted pieces, and even the adhesives you need to complete the projects.

There’s a wide variety of kits for all different occasions, and new kits are being added regularly. You can shop the current selection at www.stampinup.com/kits. But hurry! Kits are available only while supplies last! 

Pick the kit that’s right for you.

5.01.21_DHEADER_KITSPREORDER_NA

LOTS of information shared… if you have questions, please ask.

I want to help you in your creativity, to share in your progress, to witness your growth.

Thanks for stopping by. May you have a beautiful day.

Card cuts for today’s project:

Basic Black – 4 1/4 x 11 scored at 5 1/2; 7/8 x 3 3/4 + 2 1/2 x 1 3/4 + scrap for numbers

Smoky Slate – 4 x 5 1/4 (2)

DSP – 3 3/4 x 5

Basic White 3 3/4 x 5, 9/16 x 3

Stampin’ Up! Seascape Thanks

Hello and welcome to my blog. We have had family visiting for several days, some of whom we have not seen in person since last August! Needless to say – my focus was on them… it was awesome BTW…

My card today is a thank you card featuring a couple of new products: the Seascape bundle and the Ombre Specialty DSP. Oh my, the DSP is just sparkly and variable in shade and easy on the eye :). And the seahorse in the dies ( Sea Life Dies) is beautiful, as is the coral. There are other dies in the set just as stunning, but these are what I used for this card.

Seascape Thanks.1

I began with a Balmy Blue panel that I ran through the Painted Texture 3D Embossing Folder. I used the wonderful Blending Brush to add some depth to this textured surface, begging with the lightest color to darker shades. By doing this, there is no need to change to a different Blending Brush. My colors were Balmy Blue, Misty Moonlight and Pacific Point, with the lighter colors at the top and getting darker as I moved down the panel. I next stamped the ‘sand’ in Crumb Cake ink at the bottom, then seaweed in both Garden Green and Old Olive inks. I then die cut the two shapes from the Ombre Specialty DSP, the coral in Mango Melody and the Seahorse in Night of Navy. It’s possible to see the shading more especially on the Seahorse in the photos. I added the seahorse with liquid glue, leaving the tail a bit loose so it could grasp a bit of the coral to keep itself from floating away:) The coral is added with mini dimensionals. The sentiment is from this same Seascape bundle and is stamped in Night of Navy ink on a Very Vanilla strip. Before stamping, I used the Lovely Labels Pick a Punch to create the one end. The sentiment is added with dimensionals, then Rhinestone Basic Jewels were added for the Seahorse eye and near the sentiment banner. This completed front panel was adhered to Crumb Cake with liquid glue, then dimensionals on the back of that to attach to the Night of Navy card base. And the card front was done!

Seascape Thanks.2

For the inside, on a Very Vanilla panel, I stamped the sentiment in Balmy Blue ink, then the bubbles in Night of Navy ink. The fish was stamped in Crumb Cake ink, then colored just a bit with the Pumpkin Pie Blends. This was adhered with liquid glue to a Crumb Cake piece, then right into the inside of the card n- and voila!

For the Very Vanilla envelope I chose the three small fishies to stamp in Pacific Point ink (stamped off once), then the bubbles in Balmy Blue ink. For the flap I pulled out the Whale of a Time 6×6 DSP (retiring end of Jun), adhered it with liquid glue and trimmed to fit. And bingo – this card is ready! Card cuts are listed at the bottoms of this post.

Products for todays project are from the 2021-22 Annual Catalog. They may be found in the list below. I’ve made it easy for you to simply ‘add all to cart’. If I can help you in any way to order these items, or others, please give me a holler. As a thank you to my customers, when the order is between $50-$150 I offer a SU! item of your choice valued at $10. Remember to use MY NEW HOST CODE – 4A6RJ2TA . When the order is over $150, you still receive that free gift from me, but SU! has Stampin’ Rewards that may be used for additional products, so don’t use the host code at that time. If you have questions just let me know. If you would like to be able to order products early from catalogs AND enjoy that 20% discount, join my team now… you may do that here. We have lots of fun and are a creative bunch that encourages & supports one another.

Stampin up has two promotions going on right now: a HOST promotion AND a KIT promotion, which are shown next.

HOST PROMOTION 4 MAY- 14 JUN, 2021

Connect, Craft & Collect

From 4 May–14 June 2021, qualifying orders will receive our generous Stampin’ Rewards PLUS additional rewards! Hosts can earn Stampin’ Rewards based on order totals for an entire party. Outside of the party setting, Stampin’ Rewards are available to those who place individual orders that meet the order totals shown here.

  • Workshop orders, customer orders, and online orders all qualify for the extra $25 in Stampin’ Rewards if they reach the $250 level.
  • The order must reach the qualifying amount of $250 in merchandise prior to shipping and tax.The extra $25 rewards are only valid once per order no matter how high the order total.
  • Starter Kit orders do not qualify for this promotion.
  • Stampin’ Rewards can not be used on a 50% off item.
  • Deadline to submit an order and receive the extra $25 in free Stampin’ Rewards:  June 14, 2021 at 11:50 PM (MT).

KITS PROMOTION BEGINS 1 JUNE

I’m excited to share with you a new line of creative products called the Kits Collection by Stampin’ Up! Stampin’ Up! has taken the guess work out of creativity and done the hard parts, and you get to do the fun stuff: craft! Each kit is all-inclusive and includes the predesigned projects, preprinted pieces, and even the adhesives you need to complete the projects.

There’s a wide variety of kits for all different occasions, and new kits are being added regularly. You can shop the current selection at www.stampinup.com/kits. But hurry! Kits are available only while supplies last! 

Pick the kit that’s right for you.

5.01.21_DHEADER_KITSPREORDER_NA

LOTS of information shared… if you have questions, please ask.

I want to help you in your creativity, to share in your progress, to witness your growth.

Card cuts for today’s project:

Night of Navy – 4 1/4 x 11 scored at 5 1/2

Crumb Cake – 4 1/8 x 5 3/8 (2)

Balmy Blue – 4 x 5 1/4

Very Vanilla – 4 x 5 1/4, 3/4 x 2

Ombre SDSP – Night of Navy 2 x 3 3/4, Mango Melody 3 x 2 3/4

Stampin’ Up! Butterfly Brilliance Birthday Shines Again

It’s interesting how we get on a roll of using a particular stamp set and sometimes it’s hard to do something else 🙂 That’s the case with the Butterfly Brilliance bundle ~ it’s hard to stop playing with it… Today’s card was inspired by one I posted a few days ago. My key colors were So Saffron, Smoky Slate & Basic White – and layers.

Butterfly Brilliance Birthday.1

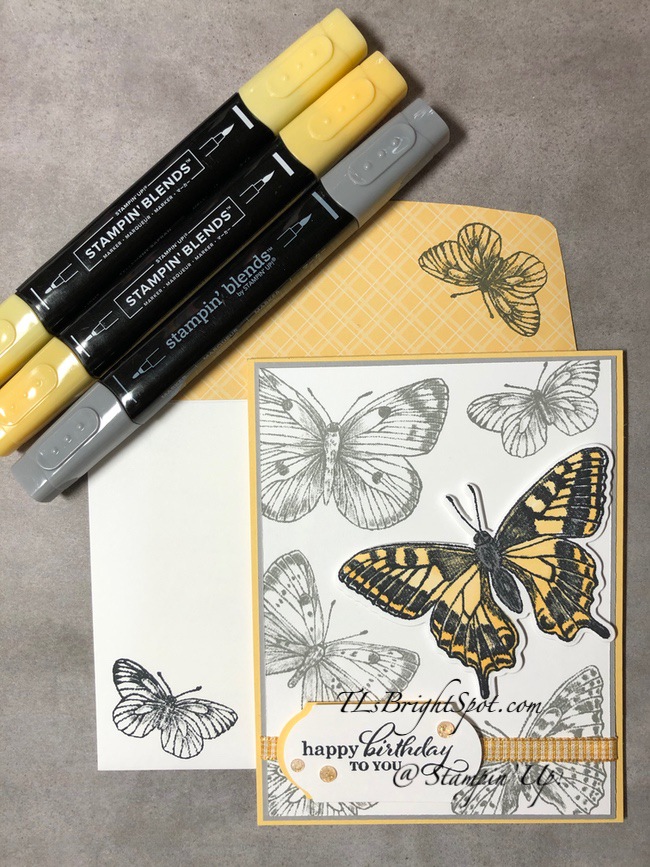
This card really pops for me; I really appreciate the contrast. The Butterfly Brilliance is stamped full strength in Smoky Slate ink on a Basic White panel. The swallowtail is stamped in Memento Black ink on another piece of Basic Whtie, colored with So Saffron Blends and dark Smoky Slate Blends, die cut with the Brillinat Wings Dies, put on dimensionals and added to the card front panel. I adhered this with liquid glue to a Smoky Slate piece slightly larger, wrapped Bumblebee Gingham ribbon around and tacked it in place with Seal+, then added this to a So Saffron Card base with liquid glue. I stamped the sentiment in Memento ink on a Basic White scrap using the Best Year stamp set then punched it out with the Timeless Label Punch. I punched another from So Saffron card stock and added it to the sentiment banner with dimensionals. I put this in place over the ribbon with liquid glue. I added three Genial Gems for a bit of bling ~ and the card front was complete.

Butterfly Brilliance Birthday.1

For the inside, I stamped the Swallowtail in an upside down position in stamped off Memento ink (Butterfly Brilliance stamp set) then stamped the sentiment in full strength Memento ink from the Best Year stamp set. I love these fonts! I adhered the Basic White panel to a slightly larger Smoky Slatge with liquid glue then to the inside of the card base. Voila!

For the envelope I added Subtles 6×6 DSP in So Saffron to the envelope flap with liquid glue and trimmed to fit. I stamped one of the smaller butterflies from the Butterfly Brilliance stamp set in Smoky Slate both on the envelope flap and on the front of the envelope. Done, Done! Love this card – so soft and gorgeous – and as I said, these fonts are wonderful. Card cuts are listed at the bottom of this post.

Products for todays project are from the 2021-22 Annual Catalog. They may be found in the list below. I’ve made it easy for you to simply ‘add all to cart’. If I can help you in any way to order these items, or others, please give me a holler. As a thank you to my customers, when the order is between $50-$150 I offer a SU! item of your choice valued at $10. Remember to use MY NEW HOST CODE – ZD9N2JRR . When the order is over $150, you still receive that free gift from me, but SU! has Stampin’ Rewards that may be used for additional products, so don’t use the host code at that time. If you have questions just let me know. If you would like to be able to order products early from catalogs AND enjoy that 20% discount, join my team now… you may do that here. We have lots of fun and are a creative bunch that encourages & supports one another.

Stampin up has two promotions going on right now: a HOST promotion AND a KIT promotion, which are shown below the product list.

HOST promotion 4 May – 14 June

Connect, Craft & Collect

From 4 May–14 June 2021, qualifying orders will receive our generous Stampin’ Rewards PLUS additional rewards! Hosts can earn Stampin’ Rewards based on order totals for an entire party. Outside of the party setting, Stampin’ Rewards are available to those who place individual orders that meet the order totals shown here.

  • Workshop orders, customer orders, and online orders all qualify for the extra $25 in Stampin’ Rewards if they reach the $250 level.
  • The order must reach the qualifying amount of $250 in merchandise prior to shipping and tax.The extra $25 rewards are only valid once per order no matter how high the order total.
  • Starter Kit orders do not qualify for this promotion.
  • Stampin’ Rewards can not be used on a 50% off item.
  • Deadline to submit an order and receive the extra $25 in free Stampin’ Rewards:  June 14, 2021 at 11:50 PM (MT).

KITS PROMOTION BEGINS 1 JUNE

5.01.21_DHEADER_KITSPREORDER_NA

I’m excited to share with you a new line of creative products called the Kits Collection by Stampin’ Up! Stampin’ Up! has taken the guess work out of creativity and done the hard parts, and you get to do the fun stuff: craft! Each kit is all-inclusive and includes the predesigned projects, preprinted pieces, and even the adhesives you need to complete the projects.

There’s a wide variety of kits for all different occasions, and new kits are being added regularly. You can shop the current selection at www.stampinup.com/kits. But hurry! Kits are available only while supplies last! 

Pick the kit that’s right for you.

LOTS of information shared… if you have questions, please ask. I want to help you in your creativity, to share in your progress, to witness your growth.

Card Cuts:

So Saffron – 4 1/4 x 11 scored at 5 1/2 + 2 x 3 for punched element

Smoky Slate – 4 1/8 x 5 3/8

Basic White – 4 x 5 1/4 (2); 3 x 4 (extra butterfly); 2 x 3 (sentiment punch)

Thanks for stopping by. May you have a beautiful day!