SU! Merry Moose

Woohoo – it’s Saturday and World Card Making Day!

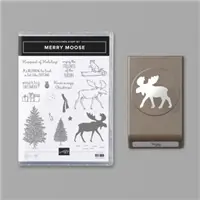
For my cards today I have chosen to play with the Merry Moose stamp set and the coordinating Moose Punch. Lots of clever sayings and stamps in this set. Let’s take a look at what I created – two different cards, same layout, DSP is simply turned over to use the other side for the background.

Merry Moose card 1
Merry Moose card 2

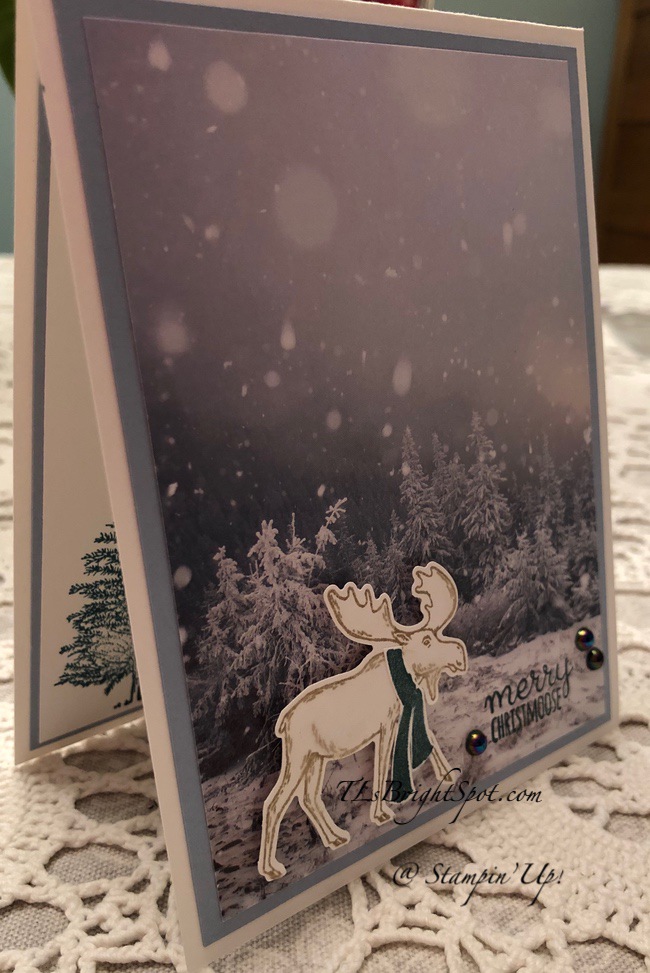
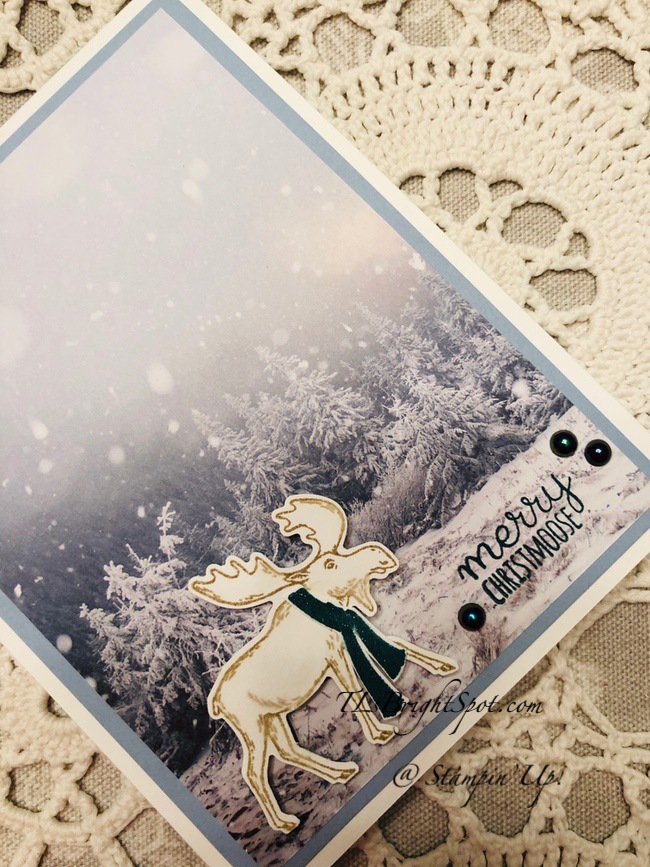
For card 1 I used the Feels Like Frost 6×6 DSP adhered to seaside Spray cs, stamped & punched the moose from Whisper White card stock and mounted it with dimensionals then stamped the sentiment directly on the DSP. I also stamped the scarf, fussy cut it, added the glamorous Wink of Stella, some Iridescent Pearls and the card front was done.

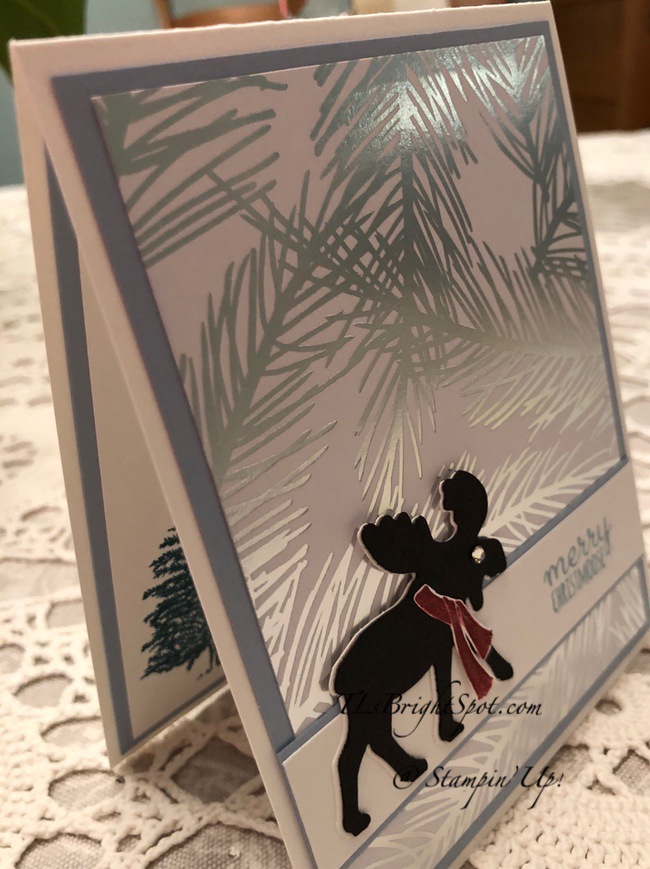
For card 2 I began with the same Feels Like Frost 6×6 DSP but turned it over to use the other side! I adhered it to Seaside Spray cs, then cut a banner for the bottom out of Seaside Spray & Whisper White. I stamped the sentiment in Seaside Spray ink on the Whisper White panel then adhered it to the Seaside Spray strip and adhered this to the card front with liquid glue. I then punched the moose from Basic Black cs & Whisper White cs (to create a shadow effect for the moose), adhered them together with liquid glue and attached this to the banner. He needed a scarf too and that was stamped in Cherry Cobbler ink, fussy cut and adhered with liquid glue. And oh yes, that scarf got Wink of Stella as well. A small Rhinestone Basic Jewel was added for his eye.

Two completely different cards – similar by using the same basic colors, just changing it up a bit. Love how easy this was to do…

Merry Moose card 2
Merry Moose card 1

Now for the insides of these two cards. Remember there are so many stamps in this Merry Moose stamp set to allow you to be creative.

Merry Moose Card 1 inside

For card 1 inside, I first stamped the tree in Pretty Peacock ink then stamped the cute packages in Tuxedo Black Memento ink and colored them with Stampin Blends: Poppy Parade and Just Jade.

Merry Moose card 2 inside

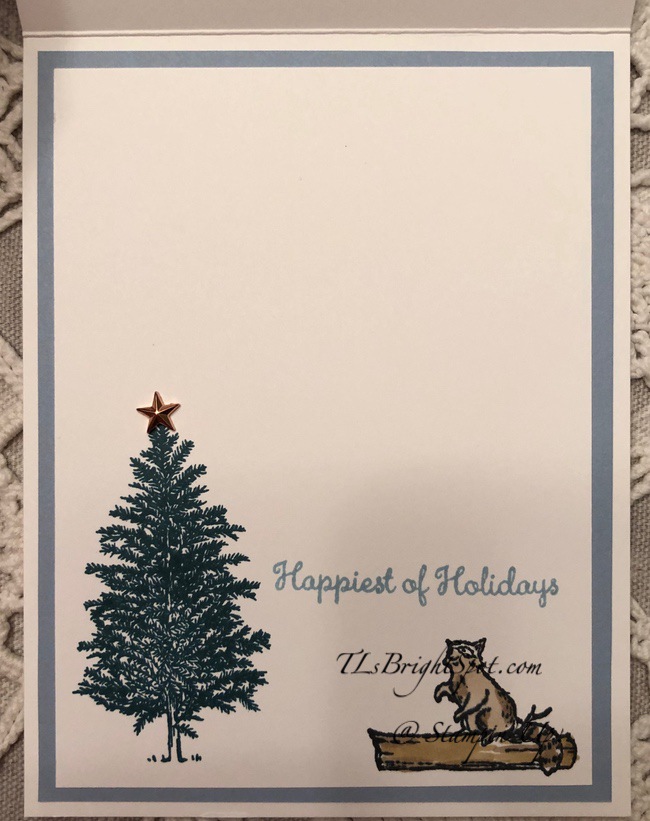
For card 2 inside I again stamped the tree in Pretty Peacock ink then stamped this cute raccoon on a log in Tuxedo Black Memento ink and colored it with Stampin Blends: Crumb Cake combo pack and the log with light Crumb Cake and ______. For an added touch I added a fun Star Element to the tree top, which the raccoon is watching with awe. The sentiment was stamped in Seaside Spray ink.

For the envelopes…

Merry Moose Card 1 envelope

Stamp the tree in Pretty Peacock ink then the cute Santa hat in Tuxedo Black Memento ink. Color the hat with Poppy Parade Stampin Blends.

Merry Moose card 2 envelope

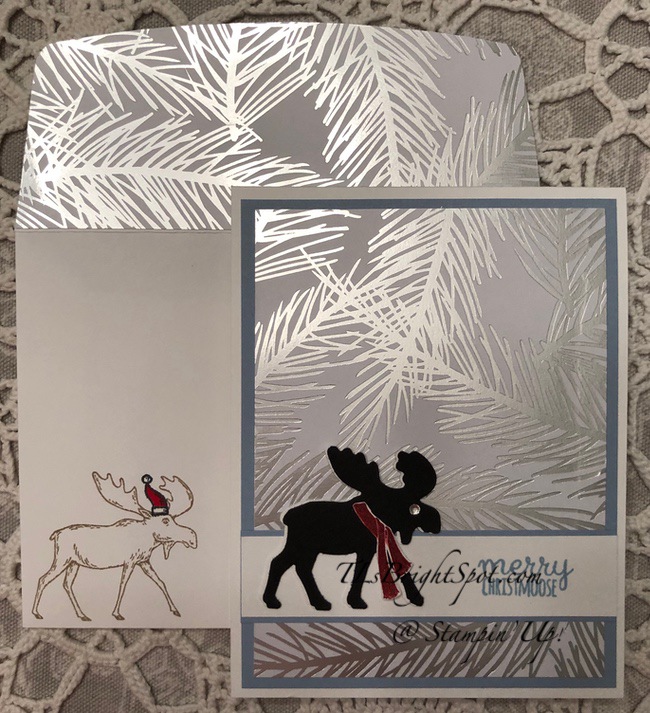
For this set I stamped the moose in Crumb Cake ink then the Santa hat in Tuxedo Black Memento ink and colored it with the Poppy Parade Stampin Blends. I used the same DSP to cover the envelope flap.

Both cards completed in likidy split time using mostly the same colors and layouts… love how these turned out. If you have this set I encourage you to pull it out and play.

Items used for todays projects can be found below the paper sale information. Card cuts are at the end of this post.

Thanks for stopping by.

May you have a beautiful day.

Make someone happy by sending them a handmade card.

Shop with my HOST CODE HXXMKN2X… if your purchase is between $50- $150 to receive a free SU! item of choice worth $10!

SU! has a 15% off specific DSP paper sale going on right now. Check this out!

152492

Forever Greenery Designer Series Paper – 152492

Sale: $9.78

Price: $11.50

152460

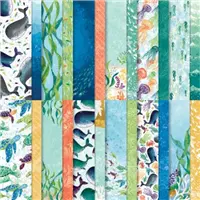
Whale Of A Time 6″ X 6″ (15.2 X 15.2 Cm) Designer Series Paper – 152460

Sale: $9.78

Price: $11.50

152489

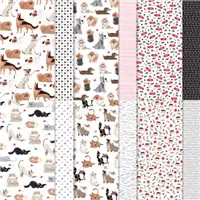
Playful Pets Designer Series Paper – 152489

Sale: $9.78

Price: $11.50

152495

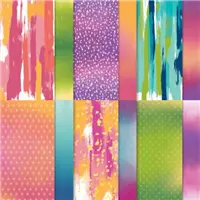
Artistry Blooms Designer Series Paper – 152495

Sale: $9.78

Price: $11.50

153517

Magic In This Night Designer Series Paper – 153517

Sale: $9.78

Price: $11.50

153491

Trimming The Town Designer Series Paper – 153491

Sale: $9.78

Price: $11.50

150432

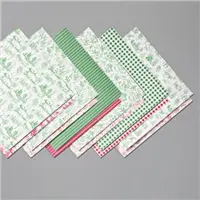
Toile Tidings Designer Series Paper – 150432

Sale: $9.78

Price: $11.50

153512

Snowflake Splendor Designer Series Paper – 153512

Sale: $9.78

Price: $11.50

153527

Plaid Tidings 6″ X 6″ (15.2 X 15.2 Cm) Designer Series Paper – 153527

Sale: $9.78

Price: $11.50

153489

‘Tis The Season 6″ X 6″ (15.2 X 15.2 Cm) Designer Series Paper – 153489

Sale: $9.78

Price: $11.50

152490

Playing With Patterns 6″ X 6″ (15.2 X 15.2 Cm) Designer Series Paper – 152490

Sale: $9.78

Price: $11.50

152494

In Good Taste Designer Series Paper – 152494

Sale: $17.85

Price: $21.00

152483

Peony Garden Designer Series Paper – 152483

Sale: $9.78

Price: $11.50

153487

Poinsettia Place Designer Series Paper – 153487

Sale: $9.78

Price: $11.50

153492

Heartwarming Hugs Designer Series Paper – 153492

Sale: $9.78

Price: $11.50 Add All to Cart

Supply List

Items used in todays projects.

153015

Merry Moose Bundle – 153015

Price: $31.50

150444

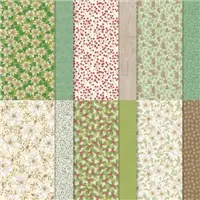
Feels Like Frost 6″ X 6″ (15.2 X 15.2 Cm) Specialty Designer Series Paper – 150444

Price: $15.00

150883

Seaside Spray 8-1/2″ X 11″ Cardstock – 150883

Price: $8.75

140272

Whisper White 8-1/2″ X 11″ Thick Cardstock – 140272

Price: $8.25

153549

Iridescent Pearls – 153549

Price: $7.50

150430

Star Designer Elements – 150430

Price: $9.00

150083

Pretty Peacock Classic Stampin’ Pad – 150083

Price: $7.50

132708

Tuxedo Black Memento Ink Pad – 132708

Price: $6.00

154958

Poppy Parade Stampin’ Blends Combo Pack – 154958

Price: $9.00

154882

Crumb Cake Stampin’ Blends Combo Pack – 154882

Price: $9.00

153107

Just Jade Stampin’ Blends Combo Pack – 153107

Price: $9.00

141897

Wink Of Stella Clear Glitter Brush – 141897

Price: $8.00 Add All to Cart

Supply List

Card Cuts for todays projects:

Thick Whisper White – 4 1/4 x 11 scored at 5 1/2

Seaside Spray cs – 4 x 5 1/4 (cut 2 for each card)

Feels Liked Frost 6×6 DSP – 3 3/4 x 5

Whisper White cs – 3 3/4 x 5 + scrap for punching moose

Basic Black cs – scrap for punching moose

SU! Masculine – In Good Taste

Hi Everyone… do you have trouble making masculine cards? I do! But with the In Good Taste Designer Series Paper, most of the work is done for us. That paper, the Tasteful Labels Dies and the Subtle Textured embossing folder have created my card for me. Wheee. Let’s take a peek.

In Good Taste #1

And here’s how I’ve done it…

I started with a Thick Whisper White card stock. To that I added a layer of Basic Gray card stock after running it through the Subtle Textured embossing folder. Then I pulled out these gorgeous papers from the In Good Taste Designer Series Paper. I die cut two of them using the same Stitched Rectangle Dies – 3rd from the smallest by the way. These I layered together, off set with Stampin Seal. (Yes, I usually use liquid glue for just about everything, but for today I used the Stampin Seal.) They were then adhered to the card front, again with Stampin Seal.

In Good Taste #2

I found another piece of the In Good Taste DSP that coordinated well and die cut a background banner. The Tasteful Labels Dies are so versatile, I love the curves and variety in this die set. Before adhering this to the card front, I felt the card needed something extra. I found this gorgeous 1/4″ Gray Granite Shimmer Ribbon, cut a length and added it to the back of the banner piece with Stampin Seal. Because the ribbon is thin, I was able to I add this to the card front with Stampin Seal.

In Good Taste #3

For the sentiment banner, I pulled out the Beautiful Autumn stamp set and stamped my sentiment in Basic Gray ink on a scrap of Whisper White cs. I die cut this sentiment with another of the dies from Tasteful Labels Dies, put dimensionals on the back and attached over the DSP banner. My final touch for the card front was to add these shiny Iridescent Pearls. And voila! – my card front is done.

For the inside of my card I used the rim of the die cuts from the card front rectangles and adhered them with liquid glue. This gives the inside a very artsy and creative look and frames the simple sentiment. The sentiment comes from the same stamp set, Beautiful Autumn, and was stamped in Basic Gray ink.

In Good Taste #4

With the card completed I moved on to do the envelope – no ‘neked’ envelopes, right? Right! I adhered a strip of the In Good Taste DSP with liquid glue to the envelope flap and trimmed to fit. I then stamped the sentiment from. the Beautiful Autumn stamp set in Basic Gray ink and called it a day. I love this card! It speaks from my heart… and I can’t wait to give it to someone very special.

In Good Taste #5

Below shows the products used in todays project. Card cuts are at the end of this post.

Thanks for stopping by.

May you have a beautiful day.

Make someone happy by sending them a handmade card filled with love.

152494

In Good Taste Designer Series Paper – 152494

Sale: $17.85

Price: $21.00

151820

Rectangle Stitched Dies – 151820

Price: $35.00

151775

Subtle 3D Embossing Folder – 151775

Price: $10.00

152886

Tasteful Labels Dies – 152886

Price: $31.00

152463

Gray Granite 1/4″ (6.4 Mm) Shimmer Ribbon – 152463

Price: $7.00

153450

Beautiful Autumn Photopolymer Stamp Set (English) – 153450

Price: $17.00

140272

Whisper White 8-1/2″ X 11″ Thick Cardstock – 140272

Price: $8.25

121044

Basic Gray 8-1/2″ X 11″ Cardstock – 121044

Price: $8.75

149165

Basic Gray Classic Stampin’ Pad – 149165

Price: $7.50 Add All to Cart

Supply List

Card cuts:

Thick Whisper White – 4 1/4 x 11 scored at 5 1/2

Whisper White for banner – about 1 1/2 x 3

Basic Gray – 4 x 5 1/4

In Good Taste DSP – 3 1/2 x 4 3/4 (cut 2) + about 3 3/4 x 2 for background banner

SU! Designer Series Paper Sale – SELECT PAPERS

Designer Series Paper sale

SALES PERIOD: 1–31 OCTOBER

  • All order types qualify for this promotion.
  • There is no limit to how many packages of Designer Series Paper may be purchased during this promotion.
  • Only select Designer Series Papers are available at a 15% discount during this promotion.
  • Orders must be placed—and closed—during the promotion period for the 15% discount to apply.
  • Designer Series Paper ordered as part of a Starter Kit or with Stampin’ Rewards qualify for the 15% discount


10.01.20_FLYER_DSP_SALE_US

Contact me if you have questions… http://www.tlsbrightspot.com OR TLsBrightSpot@gmail.com

SU! Online Store Update!!!!

Stampin’ Up! is updating the look and function of the online store!  Yay!!  The store will be updated beginning tomorrow, August 4 with a new look and feel to help you better navigate it while you shop!  Here is what you need to know so that you’re all set to shop on August 4!

The new online store will go live at 7:00 AM (MT) on 4 August.  Be aware that the online store will be offline temporarily from midnight until around 7:00 AM MT on August 4 as they transition to the new store.  It should be back up and running no later than 7:00 AM MT for ordering from the new August-December 2020 Mini Catalog!

A few things to know:

  1. Your account information and passwords will still work with the new site.
    • Be sure that you know your current login information so that you can log in right away on Tuesday!
    • If you don’t know your login information by heart (or if you do like I do and have it saved to your browser so that you don’t have to remember it every time):
      • Log into your account today and then click on “my account” and then “email/passwords” and either record the information that is shown or, if it’s not shown, update your password and then write it down.
  2. While old bookmarks and links will forward you to the new store, your browser will see it as a “new” site. If you rely on your browser to remember your login information, the first time that you log in, it will not associate the new site with that saved information.
  3. Be sure that you see my name at the top on the right when you are shopping with me to earn my rewards and benefits for ordering!

If you have trouble logging in on Tuesday:

  1. Once the new store is up and running on Tuesday, if you have trouble logging in, you can click the “Forgot Password” link on the new online store’s sign-in page and follow the steps to reset your password. The password reset email will come from noreply@info.stampinup.com. Adding this email address to the contacts list in your email program and/or searching for your email program’s spam settings can help you ensure that you receive the email.
  2. Should you run into any problems, there is a link in the password reset window to a page with additional information.
  3. If you have trouble accessing your account, Stampin’ Up! can also help you reset your password.  Just call them at 1-800-STAMPUP and they’ll be happy to help!  Unfortunately, I’m not able to assist with password changes as it’s a security issue for you. But Stampin’ Up! can definitely help you!

Hopefully this will be a seamless transition for you on August 4!  I’m looking forward to seeing the new site design too!

SU! Mini PP Box, Forever Fern bundle + Forever Greenery DSP

Hello again ! Yesterday afternoon I posted these two fun Mini PP boxes all decorated. One of the neat deals behind these boxes is they are food safe. That means you could make some awesome chocolate dodads – maybe chocolate covered peanut butter. Oh my, that sounds good to me… Anyway, my boxes are filled with, what else, notecards and envelopes. For some reason (don’t ask me what that is, I don’t know) I worked with the Vary Vanilla notecards – and made five. Here they are…

Card #1

Card #2

Card #3

Card #4

Card #5

They turned out pretty cute, right? And yes, #3 & #5 are similar – different DSP in the Forever Greenery DSP pack, different sent and ribbon, same sequin pack but different color. My original plan was to make all five the same layout and change a couple of things on each one, but somehow – I got carried away and went in another direction. I’m guessing I’m not the only one that happens to! All papers came from the same Forever Greenery DSP package. I tried ton stay within the Forever Fern stamp set, but I wanted to vary the sentiments so the cards could be a fun gift to someone.

Here is a list of products used to make all these cards:

Stamps…

  • Forever Fern bundle
  • Comfort & Hope stamp set (circle/ wreath on card #4)
  • Itty Bitty Greetings stamp sets (there are two in this set!)

Inks…

  • Pear Pizzazz, Just Jade, Mossy Meadow, Soft Sea Foam, Shaded Spruce

Card stocks…

  • Note cards and envelopes in Very Vanilla
  • Soft Sea Foam
  • Very Vanilla
  • Subtles 6×6 DSP
  • Pear Pizzazz
  • Shaded Spruce
  • and of course… Forever Greenery DSP

Ribbons/ Embellishments

  • 1/4″ Old Olive from the Ornate Garden Ribbon Combo Pack
  • Linen Thread
  • Reversible Ribbon that is a combo of Old Olive/ Pretty Peacock
  • and of course Gold trim from the Forever Greenery Trim Combo Pack
  • Artistry Blooms Adhesive-backed sequins (these are so great! they come in four colors – Calypso Coral, Coastal Cabana, Mango Melody and Rich Razzleberry)
  • 2020-2022 In Color Enamel Dots

SU! Mini PP Box + Forever Fern Bundle + Forever Greenery DSP

Hi Everyone -no posts for two days – ugh! I was having a crafty ‘blank’ and working outside in this heat did it… how’s that for an explanation? :O) It’s true – 7 am -9 am and I was done in…I DID some good stuff the rest of the day, just not my best… Here’s a teaser… and I’ll post the rest tomorrow.

Mini PP Box & Forever Fern
#1

Mini PP Box & Forever Fern
#2

See these two boxes? What is different between them – and yes, you have to tell me! How do I know you are paying attention if you don’t respond? Hmmm. Does that sound like a parent???? Anyway – when you respond your name goes into a spinner and one name plops out and you get – – – a prize! And I’ll send it right away… won’t that be fun? We have to change things up now and then ya know.

Bonus days are coming to an end soon – now through 3 Aug, just six (6) days. That $5 coupon (s) should be eating a hole in your pocket… to use in Aug. Did you make your list?


Bonus Days. Earn in July, spend in August.

And when you order from me, please use my July host code to receive a SU! item worth $10 when your purchase is $50-$150. Sounds like another good deal, right?! It is…

Thanks for stopping by.

May you have a beautiful day.

Make someone happy by sending them a handmade card made with love.


SU! Arrange A Wreath and Wreath Builder Dies

Hi Everyone! Rain last night was a welcome relief… S-I-L is progressing after his elbow surgery, especially now that he’s home!

Today I have two cards for you today, both using bits of the Arrange A Wreath stamp set and coordinating Wreath Builder Dies. LOVE THIS WREATH DIE!!! And the little flowers are really cute.

Card #1 uses the Wreath Builder Dies and Small Bloom Punch, also Flowers For Every Season 6×6 DSP. The ribbon is the 1/4″ Gingham in Bumblebee. I added the sweet flower centers from the 20-22 In Color Enamel Dots. Blossoms in Bloom stamp set offered the sentiment “Thinking of You” and Timeless Tulips was used for the sentiment in the circle.  Daisy Lane was used for the inside of the card and front of the envelope.

Wreath Builder Dies
Small Bloom Punch
#1

Daisy Lane for the inside of card #1


Card #2 uses the Wreath Builder Dies for the wreaths and the flowers: Gold Glitter Enamel Dots for the flower centers; Tasteful Texture 3D Embossing Folder for the Whisper White layer and envelope flap and the Polka Dot Tulle 5/8″ Whisper White ribbon. Ornate Frames Dies was used for the sentiment banner: Prized Peony stamp set for the sentiments.

Wreath Builder Dies
Card #2

Daisy Lane for inside
Card #2

What I like so much about these two is using the same dies but creating two very different cards. Think I’ll have to do a fall card with these wreaths :O) Do you have a favorite of these two. I think mine is #2, but then I often like tone on tone (white on white here). I also like the simplicity. While both are for losing someone special in your life, they are both uplifting – not dour.

That’s is for today… I’m not going to bug you about the Aug-Dec 2020 Mini catalog going live 4 Aug. Hopefully you know that already and have seen a lot of products (just from me) to add to your wish list. Bonus Days are here as well..Here’s a bit more info on that.

For every purchase of $50 from now until 3 Aug. you will receive from SU! by email, a $5 coupon that is redeemable 4-31 Aug. Such a deal!

Bonus Days. Earn in July, spend in August.

And when you order from me, please use my July host code to receive a SU! item worth $10 when your purchase is $50-$150. Sounds like another good deal, right?! It is…

Thanks for stopping by.

May you have a beautiful day.

Make someone happy by sending them a handmade card made with love.


SU! Forever Fern and Forever Flourish Dies

Hi Everyone! Some days just do not go as planned – what can I say… I have a beautiful card for you, one using those gorgeous Forever Gold Laser-Cut SDSP pieces, Gold Hoops Embellishments, and several die cuts. It was so fun to layer these pieces , adhering was really easy too.

Forever Fern stamp set
Forever Flourishing Dies
#1

I started with a piece of Just Jade cs and one of the rectangles in the Forever Gold Laser-Cut SDSP, keeping the gold side up and adhering with Stampin Seal where the wreath was going. I die cut a leaf from the the Forever Flourish Dies in Whisper White and another in Soft Sea Foam. Then I stamped several leaves from the Forever Fern stamp set on Whisper White with these inks: Pear Pizzazz, Garden Green, Gorgeous Grape, and Shaded Spruce – and die cut them. I also pulled out gold berries and a leaf garland from the SDSP.

Forever Fern stamp setForever Flourishing Dies
#2

I began the layering with the Whisper White leaves first, then the Soft Sea Foam then the Gold Hoops Embellishments. Next was the Pear Pizzazz going up, the Garden Green going down, then Gorgeous Grape followed by the gold berries. On top of that was the Shaded Spruce leaf the the garland spray on the white side. Each of these was adhered with either liquid glue or a glue dot… and I slipped in dimesnionals under some of the leaves to keep them raised a bit. What ribbon to use – I tried several and settled on. the Magenta Madness 1/4″ ribbon which really adds some zing.

This entire panel was adhered to Pear Pizzazz cs then onto Thick Whisper White card base, using liquid glue each time. The card front was now complete and I love the look!

Forever Fern stamp set
Forever Flourishing Dies
#1

Inside I took another panel of Pear Pizzazz and adhered it with liquid glue. On the Whisper White panel, I stamped  the leaf in Pear Pizzazz, stamping off at least once. Then I stamped the sentiment in Gorgeous Grape. This was adhered with liquid glue to the Pear Pizzazz and the card was complete.

Forever Fern stamp set
#3

For the envelope… Forever Greenery DSP was adhered to the flap. The leaf for the front got some extra treatment 😏… With sponge daubers, Pear Pizzazz and Shaded Spruce inks, daub in various places for coloring, then stamp on the envelope. Makes it look just like the DSP on the flap… ta da! Isn’t that an awesome look? And so easy!!!

Forever Fern stamp setForever Flourishing Dies
#2

Forever Fern stamp set
Forever Flourishing Dies
#4

Thanks for stopping by.

May you have a beautiful day.

Make someone happy by sending them a handmade card.


Not for nothin’ – the new 2020 Aug- Dec Mini Catalog goes live today for demonstrators. Want to be one? Join my team and get a FREE BUNDLE from Stampin’ Up! at the same time… Here are some deets…06.03.20_FLYER_RECRUITING_PROMO_NA