
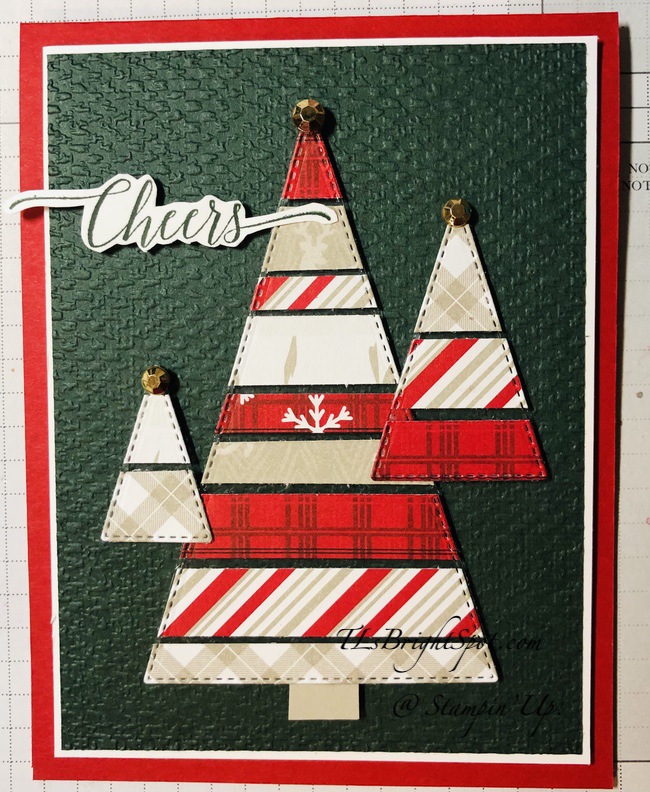
Welcome to MONDAY! It’s the beginning of a new week, new challenges, various obligations. I hope yours goes well! Today’s post is a rather different & fun card using the Stitched Triangles Dies and various widths of Christmas paper scraps, along with acrylic sheets. I strongly recommend having grid paper under the acrylic sheet to keep papers straight!

First, choose your papers and cut in various widths. I chose Peaceful Prints DSP and the strips range in width from from 1/4″, 3/8″, 1/2″ and even one is 3/4″ in width. Hold the acrylic sheet in place on the grid paper with tape of some sort. Place papers as desired & hold them in place on the acrylic sheet. Adhere with Stampin’ Seal or liquid glue, depending on width of paper. Place the Stitched Triangle Die over top, move to die cutting machine & cut. Voila – perfect trees! Add a ‘trunk’ to the large tree ~ mine is in Sahara Sand 1/2″ square. You could do the same for the other trees, just make them smaller.
Now create the rest of the card… card base is Real Red. Run a panel of Evening Evergreen card stock through the Tasteful Textile 3D embossing folder and adhere to a slightly larger Basic White panel. Add dimensionals to the back of the Basic White and adhere to the card front. Now add dimensionals to the back of trees making certain they do not show through where strips are separated. Also keep in mind the placement of the trees and if overlap, pay special attention to where the dimensionals are placed. Stamp the sentiment from Heartfelt Wishes stamp set in Evening Evergreen and fussy cut. Put dimensionals on the back and place. Add Gilded Gems to the tree tops.
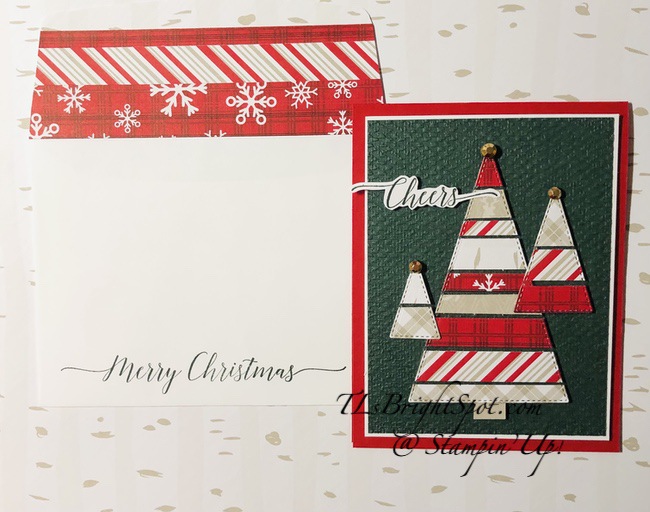
For the inside… Again I used the Heartfelt Wishes stamp set, again in Evening Evergreen ink on a Basic White panel. Adhere the panel to the inside of the card – and done!

The envelope, I still had several strips so used them to cover the flap and trimmed to fit. For the front, I stamped the sentiment from Heartfelt Wishes stamp set in Evening Evergreen ink. Another for my Christmas stash! This design was inspired by another demonstrator and found on Pinterest ~ whose name I forget! My sincerest apologies… 😳 Card cuts are listed at the bottom of the post.
Not have a demonstrator so you can order? If you do not have a demonstrator and need an Annual 2021 Catalog OR Jul-Dec 2021 Mini Catalog, please reach out to me – happy to send one to you. Please also use my current host code when ordering: 26QYRFXB I offer my customers a free item from Stampin’ Up! item valued to $10 with your order of $50 and above. Click here to go my store. When the order is over $150, you still receive that free gift from me, but SU! has Stampin’ Rewards that may be used for additional products, so don’t use the host code at that time. If you have questions just let me know. If you would like to be able to order products early from catalogs AND enjoy that 20% discount, join my team now… you may do that here. We have lots of fun and are a creative bunch that encourages & supports one another. Would love to have you!
Thanks for stopping by. May you have a beautiful day. Inspire. Create. Share.
There’s nothing like a handmade card.
Card cuts:
Real Red ~ 4 1/4 x 11 scored at 5 1/2
Basic White ~ 3 7/8 x 5 1/8 (front), 4 x 5 1/4
Evening Evergreen ~ 3 3/4 x 5

So cute!! Love the design, great way to use up those designer paper scraps! 🙂
LikeLiked by 1 person
Scrap? Oh yes!!! BTW – LOVE your new picture :O)
LikeLike
How clever! I love it!!
LikeLiked by 1 person
Thank you!
LikeLike
WOW! I love this SO SO much! Totally clever design, Terry Lynn! 🙂
LikeLiked by 1 person
Thank you soooo much :O)
LikeLike
Pingback: Stampin’ Up! Stitched Triangles Part 2 – Terry Lynn Bright, Stampin' Up! Demonstrator
Hi Terry Lynn, I like your triangle tree, but could you please tell me about the acrylic sheet please, what is it for? Cheers and thankyou
LikeLiked by 1 person
The acrylic sheet or window sheet does two things… give the strips stability/ background as it is popped up on dimensionals. It is also see-through. Leave more space in between strips if so desired. Hope this answers your question.
LikeLiked by 1 person
yes thankyou.
LikeLiked by 1 person