Stampin’ Up! New Simply Succulents

It’s Monday – and another week begins… tomorrow is Dec 8 – a GIANT Year-end Clearance Day for Stampin’ Up! Before I get to my card for the day, here are the details about the sale.

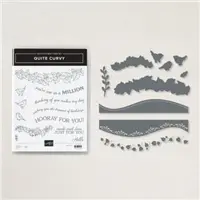
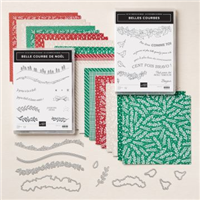
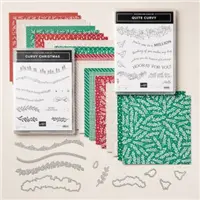
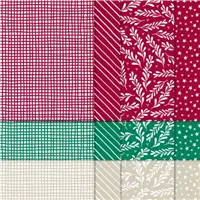
Lots going on in the Stampin’ Up world: giant year-end clearance of retiring items from the 2020 Aug – Dec Mini Catalog. Look carefully at the list. Some items will not be offered as a bundle in the new catalog but are returning items. If you have questions, please contact me.

This image has an empty alt attribute; its file name is 11.24.20_shareable_yearendsale_na.jpg
  • No minimum purchase required.
  • Retiring items are available while supplies last.
  • Exclusions apply: Carryover items will not be discounted.
  • Due to increased shipping times and possible shipping delays during the month of December, we can’t guarantee delivery before Christmas.
  • Ordering Deadlines:  January 4, 2021 at 11:50 PM (MT). The items that are retiring are only while supplies last!!  And everything on this list is retiring!!

Please see my Dec 5 post for the complete list. Now that I have your attention 😏, let’s look at today’s card.

Simply Succulents – #1

This card has a couple of really nice elements to it: the Oh So Ombre 6×6 DSP, that center succulent colored in alcohol Blends, the bow, and I love the color of the flowerpot, and the sentiment banner is awesome.

Supplies you will need to create this card:

  • Simply Succulents stamp set and coordinating Potted Succulents Dies ~ available Jan 5, 2021
  • Rococco Rose card base 4 1/4 x 11 scored at 5 1/2
  • Whisper White card stock (2) 4 x 5 1/4 + another 4 x 5 1/4 for all the die cuts. Helpful TIP: you can die cut some of the pieces from the Whisper White panel used on the front of the card since it is covered by the DSP.
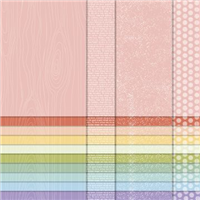
  • Oh So Ombre 6×6 DSP – available Jan 5, 2021
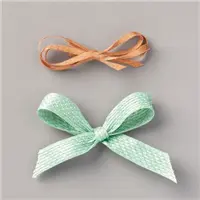
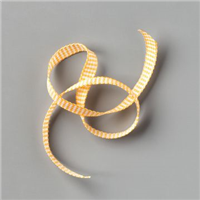
  • Basketweave & Metallic Ribbon Combo Pack – using the Mint Macaron Basketweave ribbon
  • Stampin Blends: Soft Sea Foam, Mint Macaron, Petal Pink, Cinnamon Cider, Color Lifter
  • Inks: Soft Sea Foam, Mint Macaron, Highland Heather, Rich Razzleberry, Cinnamon Cider
  • extras…Versamark & Clear Embossing Powder, Wink of Stella
  • Blending Brushes – available Jan 5, 2021 ~ these are w-o-n-d-e-r-f-u-l

Yes, that’s a lot of supplies.. and let me just say ~ you could get by not using the Stampin Blends OR not using the Blending Brushes. There are two different effects going on in this card: the Blends for coloring the one large succulent and the Blending Brushes and inks for the very soft coloring using many inks. I wanted to try them together, The Blends really bring out all the detail of the succulent, while the Blending Brushes create a very soft look. Both are effective and it depends on what you’re wanting. I rather like the combined use here.

  • Stamp the large succulent and the two smaller succulents with Versamark ink on Whisper White card stock that has been rubbed with the embossing buddy. The embossing buddy helps remove static so the embossing powder sticks just to the ink. 🙂
  • Cover with Clear Embossing Powder, flick off the extra and heat set with your heat gun.
  • Color these pieces prior to die cutting.
    • With the Stampin Blends, color the largest succulent, first using the Soft Sea Foam, then Mint Macaron, then move the dark with more Soft Sea Foam. Add the Petal Pink blends to the tips of the succulent and a final touch of Blushing Bride Marker
    • With the Blending Brushes and inks, begin coloring with the lightest shade of green (Soft Sea Foam) using a circular motion and starting off the page. Begin adding color where you want more darkness: Mint Macaron, then the Highland Heather and finally Rich Razzleberry, but only a little of that.
  • Die cut your pieces using the Potted Succulent Dies
  • Stamp the flower pot in Cinnamon Cider ink on Whisper White card stock, color in using the Cinnamon Cider Blends. Use the Color Lifter to create highlights. Cover the pot with Wink of Stella. Die cut the flower pot with the Potted Succulent Dies.
  • Layer your pieces:
    • Adhere 4 x 5 1/4 Whisper White to the Rococco Rose card base with liquid glue
    • Adhere the 3 7/8 x 5 Oh So Ombre panel next, using liquid glue
    • Adhere the flower pot with liquid glue
    • Adhere the large succulent with dimensionals, then add the other two succulents, also with dimensionals
    • Add the bow with a glue dot: Basketweave & Metallic Ribbon Combo Pack, Mint Macaron
  • Stamp the sentiment from the Simply Succulent stamp set in Rococco Rose ink on Whisper White card stock and die cut with one of the awesome banner dies from the Potted Succulent Dies. Adhere to the card front with dimensionals. Your card front is done!

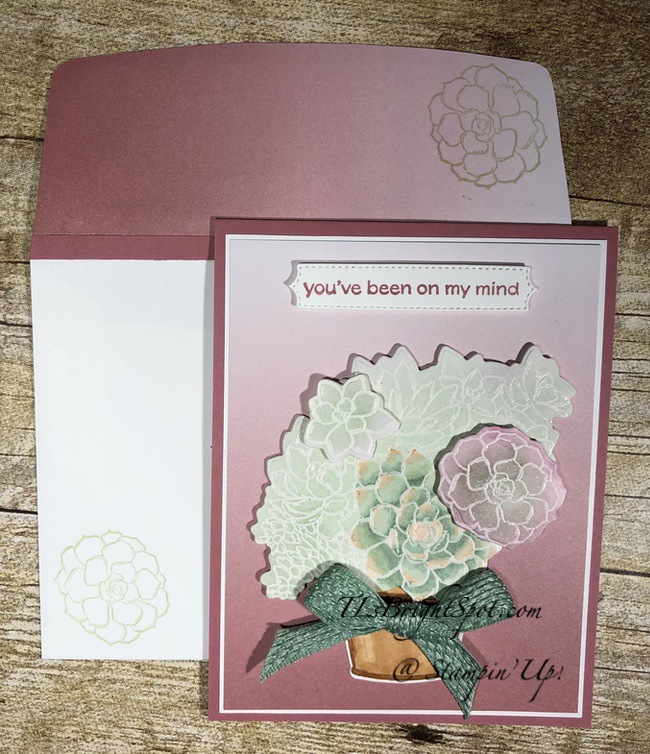
For the inside, on a panel of Whisper White 4 x 5 1/4, stamp one of the succulent stamps from the Simply Succulents stamp set in Soft Sea Foam ink. Stamp in the corners a few times. Adhere the panel to the inside of the card with liquid glue.

For the envelope, cover the flap with more of the Oh So Ombre 6×6 DSP with an added piece of Rococco Rose. Trim to fit. Stamp the same succulent used on the inside of the card in Soft Sea Foam, both on the flap and on the card front. Nicely done!

The product list may be found below ~ except for those items not available until Jan 5, 2021! As a thank you to my customers, when the order is between $50-$150 I offer a SU! item of your choice valued at $10. Remember to use MY CURRENT HOST CODE SVFB9YJY – good until Dec 10, 2020. When the order is over $150, you still receive that free gift from me, but SU! has Stampin’ Rewards that may be used for additional products 😁

Thanks for stopping by.

May you have a beautiful day.

Make someone happy sending them a handmade card filled with love.

Stampin’ Up! Garden Wishes & Dragonfly Garden

I started working with the new Dragonfly Punch and was having way too much fun… mixed in Garden wishes stamp set and some Dandy Garden Memories & More cards plus a bit of Dandy Garden 6×6 DSP.

Here are two cards to add to my sympathy stash…

The Garden Wishes card is created with a Calypso Coral card base 8 1/2 x 5 1/2, scored at 4 1/4. The next layer is Dandy Garden 6×6 DSP 2 1/8 x 5 1/4 with Whisper White card stock on top 1 7/8 x 5 1/4 ~ both adhered with liquid glue. My next step was to cut a panel of Whisper White 2 5/8 x 4 and stamp it in Smokey Slate ink with the Garden wishes stamp set. I adhered this to a Calypso Coral piece 2 3/4 x 4 1/8 and attached dimensionals to it and popped it in the center of the card. For the sentiment I pulled out my Dandy Garden Memories & More Card Pack and peeled a sticky sentiment and just added it to the small panel. I really like that burst of color on the card – not too overwhelming, but adds something to it. Next I had already punched a dragonfly from the Dandy Garden 6×6 DSP, covered it in Wink of Stella for some galm, put a couple of dimensionals on it and on it went. The bow is from the Ornate Garden Ribbon Combo (Terracotta Tile) and goes perfectly. Card front complete!

For the inside I stamped the sentiment in Smokey Slate ink from Woven Heirlooms stamp set on a panel of Whisper White 3 1/4 x 5. I added a smaller panel at the bottom to create something different – 1/2 x 5. I had a piece of the DSP left from the front of the card so added it with liquid glue.

The envelope flap got a strip of the same Dandy Garden 6×6 DSP plus a strip of Calypso Coral to finish. The front was stamped in Smokey Slate ink with the Garden Wishes stamp set.

Card #2 is the Dragonfly Garden bundle – and of course more…

Dragonfly Garden Bundle – #5

The card base is Thick Whisper White 8 1/2 x 5 1/2, scored at 4 1/4. The next layer is regular Whisper White 4 x 5 1/4 run through new Painted Texture Embossing Folder and adhered with liquid glue. I stamped the floral bunch in Tuxedo Black Memento ink so I could color it with Stampin Blends. It was stamped on a piece of the Dandy Garden 6×6 DSP 1 3/4 x 4 3/4. The Stampin Blends used were: Daffodil Delight, Old Olive, Highland Heather, Bronze and a bit of the Color Lifter. I adhered this to a panel of Bumblebee card stock just a bit larger 1 7/8 x 4 7/8. I cut yet another piece of Whisper White 2 1/4 x 5 1/4, ran it through the Tasteful Texture Embossing Folder, adhered it with liquid glue to the card front, then added the Bumblebee/ stamped panel with dimensionals. A dragonfly punched from a piece of the Dandy Garden 6×6 DSP was covered in Wink of Stella and added to the panel with more dimensionals. A smaller dragonfly was also added to the panel – on dimensionals. Finally I added the sentiment panel created days ago with the Many Messages stamp set & coordinating die – liquid glue on the right, directly on the panel and a mini dimensional or two on the left side. For a final touch I added one of the Ladybug Trinkets with a glue dot and the front was complete.

For the inside I stamped the small ‘squadron’ of dragonflies in Tuxedo Black Memento ink on a 4 x 5 1/4 Whisper White card stock and colored with the Highland Heather Stampin Blends. I then stamped the sentiment from the Dragonfly Garden stamp set in the same ink. I adhered this to the inside of the card with liquid glue and the card was complete. For the envelope, I covered the flap with the same Dandy Garden 6×6 DSP as card #1 and stamped the ‘squadron’ of dragonflies on top of it. Love Black Memento ink then stamped the wings with Bumblebee ink, from the same stamp set. And yes, I covered the wings with Wink of Stella.

These are my two cards for the day. I had such fun working with these new supplies and can’t wait until you can have them in your stash. Jan 5, 2021 is the order date for customers – so put it on your calendar.

As a thank you to my customers, when the order is between $50-$150 I offer a SU! item of your choice valued at $10. Remember to use MY CURRENT HOST CODE SVFB9YJY – good until Dec 3, 2020. When the order is over $150, you still receive that free gift from me, but SU! has Stampin’ Rewards that may be used for additional products 😁

Thanks for stopping by.

May you have a beautiful day.

Make someone happy sending them a handmade card filled with love.

Stampin! Dandy Garden Memories & More

Hello again! If you have been reading my ‘publication’, you know that Stampin’ Up! will be premiering a new catalog Jan 5. As a demonstrator it is a privilege to order particular items from that catalog. Today I am sharing a few cards that I made yesterday using the Dandy Garden Memories & More Card Pack AND the coordinating Memories & More Cards & Envelopes.

The first card really shows off the Cards & Envelopes… The colorful daisy scene on the front is one of the ‘cards’ in the Card Pack. I simply mounted said card on a panel of Mossy Meadow card stock using liquid glue, wrapped some of the Braided linen Thread (in Mossy Meadow of course) around it, put it on dimensionals and added it to the center of the card front. In the card pack are these delightful stickers: I added the word ‘celebrate’ and if you look closely, you will also see a bumblebee sticker. :o) Depending on what I stamp on the inside (which I haven’t just yet) will determine if it says birthday or you or words of congratulations. I love that it’s ready for a final touch.

from the Dandy Garden Memories & More Card Pack – #1

Card #2 uses two more panels from the Dandy Garden Memories & More Card Pack: the large green one and the smaller panel too. Here I mounted the smaller card on a panel of Bumblebee card stock with liquid glue, used a punch to make notches on each side and wound Linen Thread twice around the panel and tied a bow. I added the sticker ‘Thinking of you’, put dimensionals on the back of the panel and voila. This one could easily be a sympathy card. Oh, the large green floral panel was adhered to a Dandy Garden Card (with liquid glue) from the cards & envelopes.

from the Dandy Garden Memories & More Card Pack – #2

Card #3 uses two more panels from the Dandy Garden Memories & More Card Pack: the larger darker panel is adhered with liquid glue to a Dandy Garden Card; the smaller panel was trimmed a bit, going around the sweet floral image on the left and stamped with a sentiment from the Dragonfly Garden stamp set (in Tuxedo Black Memento ink). I die cut a panel of Whisper White card stock using the Ornate layers Dies. I adhered this beauty with liquid glue to the large yellow panel then added the smaller panel with dimensionals. I punched a dragonfly from a piece of the Dandy Garden 6×6 DSP using the Dragonfly Punch, popped it on a mini dimensional and voila – another card!

from the Dandsy Garden Memories & More Card Pack, Dragonfly Punch, & Dragonfly Stamp Set + Ornate Layers Dies – #3

And card #4… a card for encouragement or.. thank you. This card uses another floral green panel from the Dandy Garden Memories & More Card Pack, layered on a Dandy Garden Card (from cards & envelopes). I die cut a panel from Whisper White card stock using the Rectangle Stitched Dies. To that I added the smaller card from the card pack using liquid glue; adhered the yellow sticker from the card pack and stamped a sentiment from the Dragonfly Garden stamp set. I added another floral sticker for fun. Then I wrapped a Bumblebee 2020-2022 In Color Ribbon around the end and tied a knot. This panel was adhered with liquid glue to the card front and bam – another card. (I’m probably going to add a cute Ladybug Trinket to this card, cuz it needs it!)

from the Dandy Garden Memories & More Card Pack – #4

Stampin’ Up! has what they call a Dandy Garden Suite ~ and this suite has several products in it: the Dragonfly Garden stamp set & coordinating Dragonfly Punch, the Dandy Garden Memories & More Card Pack, Dandy Garden Memories & More Cards & Envelopes, Ladybug Trinkets, Braided Linen Thread in Mossy Meadow, another stamp & die set I haven’t opened yet (Garden Wishes stamp set & Dandy Wishes Dies), Dandy Garden 6×6 DSP AND two sheets of stunningly glorious Dandy Laser-Cut Paper.

So why promote the suite? 10% off when purchased as a suite in lieu of purchasing individually! How is that for a reason?! Below are pictures of these products – but pictures do not give them beauty justice, just so ya know.

The Dandy Garden Suite will be available to purchase Jan 5, 2021. A Jan-Jun 2021 Mini Catalog will be sent or hand delivered to you (if you have been a customer during the last year) in early December. In that package will also be a Sale-A-Bration catalog which will feature products that are a bonus with every product purchase of $50 or $100. Those will be available only Jan-Feb. If you have been used to Sale-A-Bration running a longer period, it is changing to run only two months.

Thanks for being a customer! As a thank you I offer with a $50 – $150 purchase a SU! item valued at $10 – your choice of item! Please use my current HOST CODE XS4MSSFN when ordering now through Nov 18 to receive your free item. Besides the Dandy Garden Suite, other products used in todays project may be found below. Please let me know if I may assist you in some way.

Another coordinated product that is available RIGHT NOW is the Curvy Celebrations products. Curvy Christmas stamp set & Classic Christmas 6×6 DSP will only be available to the end of the year, while the Quite Curvy Bundle will be in the Jan-Jun 2021 Mini Catalog – but all of it is AVAILABLE TO PURCHASE NOW in the Quite Curvy Variety Bundle seen below.

Thanks for stopping by.

May you have a beautiful day.

Make someone happy by sending them a handmade card filled with love.

Stampin’ Up! Art Gallery

Hello folks… Stampin’ Up is readying for a new catalog ~ the Jan-Jun 2021 Mini Catalog and the Jan-Feb Sale-a-bration. Today’s project features Art Gallery stamp set & coordinating dies, Floral Gallery Dies. Here’s a picture of both.

This is a two-step stamp set as you might realize from the florals at the top of the set. And I’ll confess, I haven’t played with the floral stamps – yet… I had an in-person class yesterday and my new products arrived l-a-t-e the night before. Sooo – what I DID DO is create this fun card using the large sentiment in the dies.

Floral Gallery Dies #1

I also used two fun Designer Series Papers that will be free with a $50 purchase during Jan-Feb. (more on that later) The first is Oh So Ombre 6×6 DSP – the Blackberry Bliss & Bermuda papers you see here. And notice how they fade to lighter shade? That’s the ombre 😏 The floral paper is called Flower & Field DSP, again free with a $50 purchased in Jan-Feb.

OK, enough about the papers – the sentiment comes from the Art
Gallery stamp set
and that fun Granny Apple Green die cut is also from this set of the Floral Gallery Dies. Aren’t those edges fun? They look as though they came from a movie ticket or something. And here’s what is left after the sentiment is die cut… which of course can be used on another card.

Floral Gallery Dies #2

Let’s talk the new catalogs for a minute – the Jan-Jun 2021 Mini Catalog and Sale-a-bration catalogs will be available for you to see in early December with ordering beginning Jan 3. If you have been a customer of mine this past year I will be sending (or giving if you are local) those catalogs as soon as I am able to get them. And just for clarity… the Sale-a-bration catalog shows free products available with purchases of $50 and $100, so two levels of free items. And these are available Jan-Feb only. Hope that helps.

Thanks for stopping by.

May you have a beautiful day.

Make someone happy by sending them a handmade card filled with love.

Stampin’ Up! Enjoy The Moment Small Note

Good morning… Today’s card is a sneak peek of a stamp set that will be available in the Jan-Jun 2021 Mini Catalog. You may remember that for the last couple of days we had a SU! virtual convention – On Stage @ Home. This was one of the sets we received in our goody bag after registering to attend. Love the outlining/ drawing concept of these stamps. Here’s the card…

Enjoy the Moment – #1

This stamp set is all about seed pods – and honestly I cannot tell you to what plants they belong. Whatever they are, they are well done! And what I did here after stamping on Whisper White card stock with Crumb Cake ink was take my Crumb Cake Blends and outline the area with the dark blends, then follow that with the light blend, but not covering the entire thing. Then I went in with the Light So Saffron blend and colored some to show it off a bit. I went back in a did a bit more highlighting with the dark Crumb Cake blend.

Enjoy The Moment – #2

I stamped the sentiment from the Enjoy The Moment stamp set in Crumb Cake ink, layered it on a panel of Subtles 6×6 DSP with liquid glue and wrapped the Gingham Ribbon in Bumblebee around it and tied a knot, securing it with a glue dot. To complete the card front I added three Artistry Blooms Adhesive-Backed Sequins for added charm. All of this got dimensionals and was adhered to a Whisper White Note Card.

The inside and the envelope…

Enjoy The Moment, inside – #3

Again I stamped the image in Crumb Cake ink and darkened areas with the dark Crumb Cake Blends, then going over it with the light Crumb Cake Blends. I also used light So Saffron Blends to add a bit of color. The envelope got more of the same Subtles 6×6 DSP for the envelope flap and a sweet sentiment ‘a little note’ on the front also in Crumb Cake ink. I intentionally stuck with only using the one stamp set – Enjoy The Moment to highlight many of the pods and sentiments in the set. Here’s a photo of the stamp set.

available in the Jan-Jun 2021 Mini Catalog

I’m really enjoying this set. The pods are beautifully drawn and i especially appreciate the sketch look.

I hope you have enjoyed this sneak peek of one of the stamp sets in the Jan-Jun 2021 catalog. There will be more to come in the not-so-distant future. Other products for todays project may be found below.

Thanks for stopping by.

May you have a beautiful day.

Make someone happy by sending them a handmade card filled with love.

Stampin’ Up! Onstage – Part II

All I can say is WOW – what an incredibly inspiring day 1 of On Stage @ Home for this years convention. Yes, the Covid 19 outbreak kept us at home but the uplifting side is how much I learned from Sara’s opening remarks to the creativity of staff at the home office to demonstrators world wide.

While yesterday was a big Stampin’ Up day, it was also hubby’s and my 54th anniversary. Wow again, right? This gentle man has so supported me in this new venture of being a demonstrator, but he has also done that our whole marriage. There are just no words at how blessed I feel ~ a true gift from God. While I don’t have any pictures of us from yesterday, I might be able to share one or two from this past summer. Here they are…

These pictures are from our early morning walks to a nearby County park. Thanks for our many wonderful years together dear man…

Now… back to our card making… we had received card stock colors & cuts but no layout for the cards we were to create. So when I chose the various DSP to use from the Dandy Garden 6×6 DSP pack, I didn’t really know how it was to be used. In other words, I’ve changed things up just a bit for a couple of the cards because I preferred one card base over another~ or whatever. Here are the cards…

Aren’t these gorgeous? They use one of the new bundles in the Jan-Jun 2021 Mini Catalog: Dragonfly Garden + a Dragonfly Punch. These cards also show off some of the fabulous DSP: Dandy Garden 6×6 DSP and the cute Ladybug Trinkets and of course the Braided Linen Trim in Mossy Meadow. I did finish off the insides of the cards and prepared envelopes as well, but I won’t show those today. I’ll give more detail on these cards in another day or two. This is just a sneak peek 😏

Thanks for stopping by.

May you have a beautiful day.

Make someone happy by sending them a handmade card filled with love.