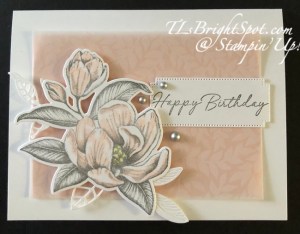
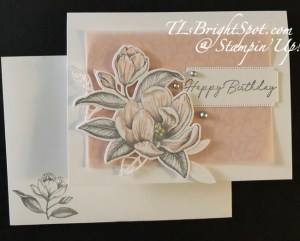
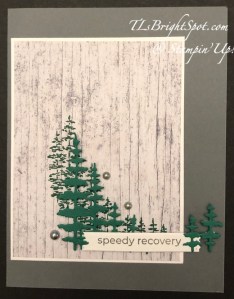
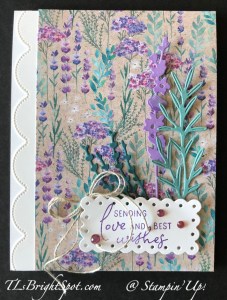
Welcome! It’s Thursday and we have a sketch challenge for the Happy Inkin’ Thursday Blog Hop. I’ve pulled a new stamp from the 24-25 Annual Catalog (goes live to customers May 1) called Leaf Collection and love it! It’s big – a single stamp. I used two colors on this – Pumpkin Pie and Crushed Curry and added Citrus Blooms Dies as well on the card front.


Here’s what I did.. I used the Stampin’ Up! Glass Mat & placed the stamp leaf side up, inked a portion with the Pumpkin Pie ink pad, then right away inked the other portion with Crushed Curry ink pad. I then used the SU! Brayer to roll over it, blending the colors. I did NOT go back & forth, one direction only from light to dark, then placed my Basic White card stock on top of the inked stamp and pressed with a cardboard piece to make certain the ink transferred evenly. I removed the cardboard and lifted the card stock panel straight up, turned it over and left it alone for a bit to make certain it was good and dry. I then cut it down to size (3 7/8 x 5 1/8. I added this to a Pumpkin Pie cut 4 x 5 1/4, added dimensionals and adhered to a Crushed Curry card base 4 1/4 x 11 scored at 5 1/2. I cut a piece of Basic White 2 3/8x 2 3/8 and adhered it to a Pumpkin Pie 2 1/2 x 2 3/8. I cut a piece of Inked Botanicals DSP (retiring Apr 30) 1 x 2 3/8 and adhered it to Crushed Curry 1 1/8 x 2 3/8. Both were added to the card front with dimensionals. I die cut leaves using the Citrus Blooms Dies as they look similar to the leaves of the stamp :O) – in Pumpkin Pie & Crushed Curry. Two were added with dabs of Liquid glue, the other with trimmed dimensionals. As a final touch I added three Glossy Dots.

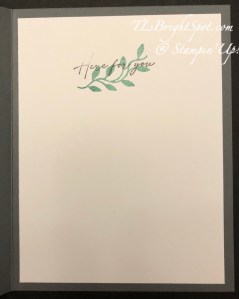
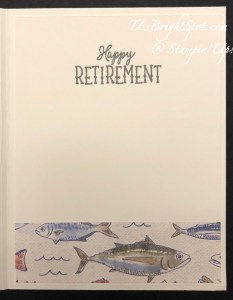
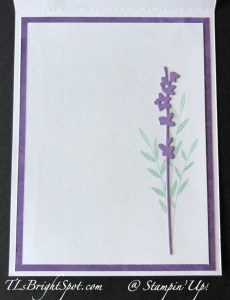
For the inside of the card I kept it really simple… I stamped the word happy in Pumpkin Pie ink, then the rest of the sentiment in Crushed Curry ink – both from the Citrus Blooms stamp set. I added this Basic White panel to a Pumpkin Pie piece then both to the inside of the card.

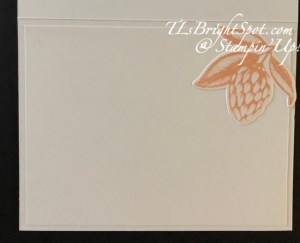
For the envelope, I used another stamp in the Citrus Blooms stamp set and Crushed Curry ink to stamp the envelope front, then added the same Inked Botanicals DSP as on the card front to the envelope flap. This is such a simple, easy card – and could easily be used as a masculine card, which I sometimes struggle making. Such fun working with the Leaf Collection stamp and the Brayer to create this!
Now, time to see what others have created for this hop – I’m always curious as to what other team members create – so don’t miss anyone. Click the next button or click on a name – either way – enjoy the hop!
For more information how to purchase these products – see below the list of names.

Terry Lynn Bright – you are here :O)
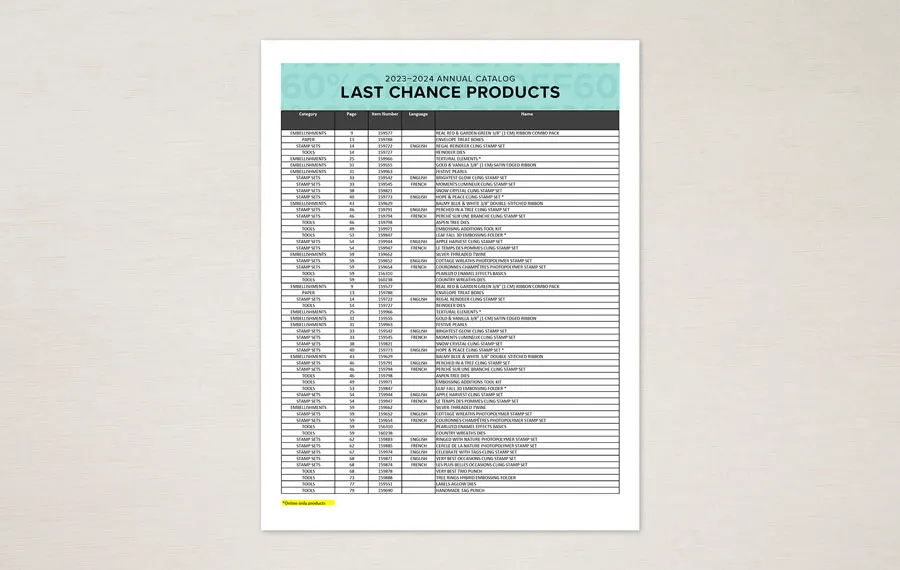
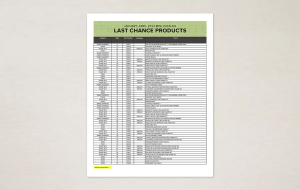
LAST CHANCE PRODUCTS such as the Inked Botanicals 6×6 DSP be found here –
and that sale began April 9
Clearance items may be found here
23-24 Annual Catalog products (card stock, Glossy Dots, paper trimmer, Cut & Emboss machine, dimensionals, liquid glue) may be found here
While you’re looking around in my store, remember there are some stunning kits available, for all ages and all seasons – even Christmas! And while you’re shopping, I offer fringe benefits to my customers: free tutorial of the month and a FREE Stampin’ Up! item valued to $10 – all for a $50 order, before shipping and taxes. Use my current host code to receive those benefits – especially when your order does not exceed $150.
HOST CODE 4JF6ZWC9