

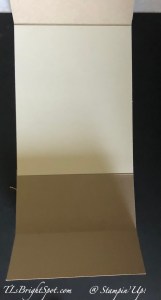
This is how it looks from the side.

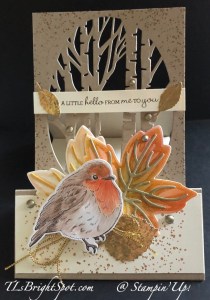
This is a double easel card and not complicated. There ARE a lot of steps cuz there’s coloring with both Watercolor Pencils and Blending Brushes. So… let’s start with those first.
Leaves from Autumn Leaves stamp set & Autumn Leaves Dies
- Ink the leaf from the Autumn Leaves stamp set in Crushed Curry ink.
- With that still ink on the stamp, with various Blending Brushes add dabs of Pumpkin Pie, Cherry Cobbler and Mossy Meadow. I find it best to tap the ink on lightly, especially if the color is strong.
- Stamp on a Very Vanilla panel. Clean stamp and repeat process so there are two leaves stamped. You will note in my photo, one is much lighter than the other – that was intentional!
- Die cut leaves using the Autumn Leaves Dies & set aside.
- Die cut leaf veins with appropriate die from Autumn Leaves Dies using scraps from both Crushed Curry and Crumb Cake card stock.
- Adhere to appropriate stamped & die cut leaves with dabs of liquid glue – DO NOT PUT GLUE ON THE TAIL OF THE VEIN!
Bird – Perched In A Tree stamp set with coordinating Aspen Tree Dies
- Stamped this very fat robin in Stazon ink on a Basic White scrap. Stazon because it stamps so very clearly and does not bleed at all when colored.
- Watercolor Pencils: Early Espresso & Cajun Craze, Pumpkin Pie & Real Red. I listed them this way as they will be used in pairs as listed.
- With a flicking motion, begin adding color to the robin with Early Espresso Watercolor Pencil. This is a base layer and need not be too heavy. The reason for the flicking motion in lieu of back & forth coloring is it look more natural, more feather like. Refer to the photo for where this color should be added.
- Add Cajun Craze Watercolor Pencil in the same way.
- Now add more Early Espresso Watercolor Pencil until you are satisfied.
- Switch to Pumpkin Pie and do the head & chest, flicking as you go to make it look like real feathers. Change direction of the flicking too – or… turn the robin to make the motion easier for the particular direction.
- Add Real Red Watercolor Pencil, more on the top and under the beak, still flicking making it feather-like.
- Add Early Espresso Watercolor Pencil to the beak and to the feet
- Die cut with die from Aspen Tree Dies – set aside.
The base for a Double Easel Card:
- I used Crumb Cake card stock… 4 1/4 x 11 scored at 5 1/2 & 2 3/4; the bottom half is also Crumb Cake card stock 4 1/4 x 4 1/4, scored at 2 & 1/4. Burnish well all score lines.
- Adhere the 1/4 scored area to the inside of the card base that is not scored.
- Add a Very Vanilla panel 4 1/4 x 5 3/8 to the 4 1/4 x 5 1/2 area of the card base, covering the adhered Crumb Cake front piece. This is the inside of the card and could be stamped if you so desired. I left it blank.
Now let’s decorate… :O)
- Die cut a piece of Crumb Cake card stock cut to 4 1/4 x 5 3/8 with this wonderful open Aspen Tree Die.
- Add this die cut piece to the front folded section of the card base. NOTE: you are adding this die with glue only on the lower half. HINT: I turned the die over and marked lightly with a pencil, the area to add glue. :O)
- Lay die right in place over the die cut panel, place cutting plate to score line & run through, cutting that front fold section. You may have to go back & forth a bit, but only cut to the score line!
- With a craft knife, cut pieces that should be removed per the die.
- Stamp sentiment on a piece of Very Vanilla in Early Espresso ink. My sentiment is from the Perched In A Tree stamp set and the Very Vanilla is approximately 5/8 by 5. Adhere sentiment with dimensionals over the score line.
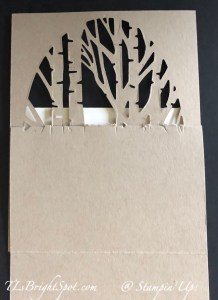
This is what it looks like from the back once adhered and die cut the second time. It’s clear my Exacto knife was not quite sharp enough to make clean cuts. :O(
- Die cut additional leaves using the Autumn Leaves Dies, Aspen
Tree Dies and Distressed Gold Specialty DSP.- adhere the two like leaves on the sentiment banner with liquid glue.
- FRONT section of the double easel…
- With stamp from Perched in a Tree, stamp the splotches with on Very Vanilla panel 1 3/4 x 4 14 with stamped-off Pecan Pie ink.
- Add panel to very front of easel section, centering top to bottom.
- Add reserved stamped leaves colored with Blending Brushes – Autumn Leaves stamp set & Autumn Leaves Dies – with liquid glue.
- Add Aspen Tree Die in Distressed Gold with liquid glue on one end and dimensional on leaf tip end. This adds depth.
- Add double bow made with Simply Elegant Trim in Gold with glue dot.
- Add robin die cut with Aspen Tree Dies with double dimensionals
- For a final touch… add several Brushed Metallic Adhesive Backed Dots to this panel and to the Aspen Tree die cut on the top section of the easel.

For the envelope… I added Neutral 6×6 DSP in Crumb Cake to the flap & trimmed it to fit. For the envelope front I stamped the leaf vein from Autumn Leaves stamp set in Early Espresso ink. My card was inspired by Jo Blackman and a card she made in 2022.
Hopefully you will WANT to make the full round of visits to those participating this week in our awesome hop. Enjoy what you see. Click the ‘next’ button to go straight to Carol… or click on a name. Either way – enjoy!

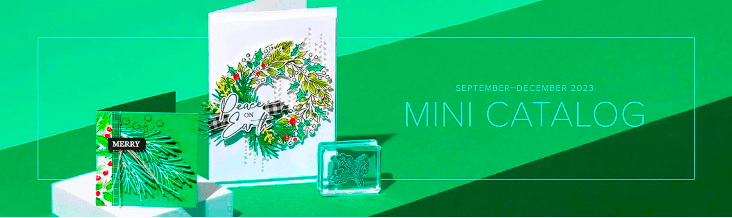
Click the catalog image to see all the new stamps, dies, ribbons, designer series papers, embossing folders and ideas! It is full of exciting products!
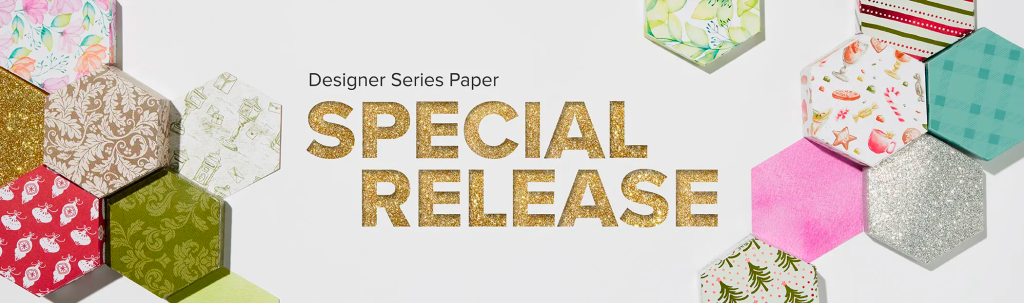
There are more Designer Series Papers released on the ONLINE EXCLUSIVE
Surprise, surprise! We’re offering a special release of five beautiful new Designer Series Paper options! These papers include fabulous holiday prints, gorgeous seasonal styles, and some spectacular timeless designs.
We originally created these papers to be part of our second Sale-A-Bration offering. However, since our next release of new Online Exclusive products won’t happen until November (and you won’t be able to find any of these papers in a catalog), we’ve adjusted our strategy and decided to release these paper options starting 6 September! That way, you and your customers have the chance to get ahead on Christmas cards, seasonal crafts, and much more. These products are available while supplies last.
You can shop these products with me here
Remember that when you shop with me and your order is over $50 before shipping & taxes, you will receive a SU! items of your choice valued up to $10. It’s helpful to use my CURRENT HOST CODE HDN4VQHR so I receive full notification and you get my gift. :O)
There’s lots more going on in the Stampin’ Up world and this time of year with several holidays approaching, you will not want to miss a thing! And what better way to do that than to JOIN MY TEAM – join my team here
- 20%+ Discount on your demonstrator orders
- Be a part of a fun and supportive team and the Stampin’ Up! community – this is one of the best parts, meeting new folks and new ideas, creating together
- Early access to new catalogs and promotion information
- Early ordering for new products
- Be a hobby demonstrator or start a business
- No pressure to sell products
- My full support when you join my team
- access to monthly class tutorials :O) Each month it’s different, this month it’s the Autumn Leaves bundle – yippee!
Thanks for stopping by. May you have a beautiful day!

Pingback: Stampin’ Up! Inked & Tiled Embossed Thank You Card for the Happy Inkin’ Thursday Blog Hop – Inky Bee Stampers
Beautiful card! I love the colors of the bird! TFS
LikeLike
WOW!!! This is just gorgeous Terry Lynn 🙂
LikeLike
Such an awesome fancy fold design! The little bird is perfectly colored too! Love it! 🙂
LikeLike
Oh. My. Goodness! This is simply gorgeous, Terry Lynn! I love this design! 🙂
LikeLike
Stunning card, Terry Lynn! You colored the bird perfectly and your design is awesome! Like the fun fold, too! TFS!
LikeLike
Beautiful coloring.
LikeLike
Beautiful card! I love the fun fold, I love the bird and your colors are gorgeous! 😊
LikeLike
I love this. The bird is beautifully colored. I’d love to see you do a video of this card!
LikeLike
Such an intricate, elegant card. Truly masterful!
LikeLike
Gorgeous, gorgeous, card! Your instructions are wonderful, but my pea-brain is having trouble putting the parts together. Any chance you might do a video?
LikeLike