Stampin’ Up! ‘Painted” True Love DSP

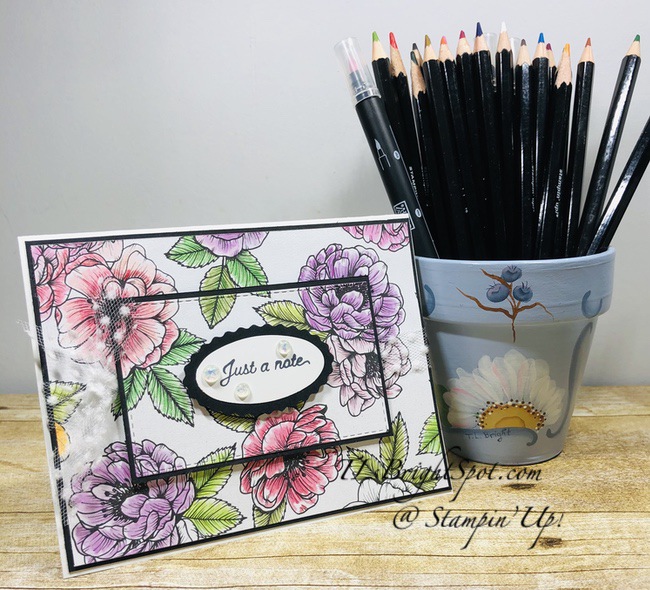
I’ve been at it again – coloring that is. This time with Stampin’ Blends as they are so EASY to use. I enjoy coloring ~ with pencils, Blends, Blending Brushes, sponge daubers, even watercolors. I’m not so good at watercoloring and would like to play with that more. So what are you up to? What is your favorite medium?

‘Painted’ True Love DSP – #1

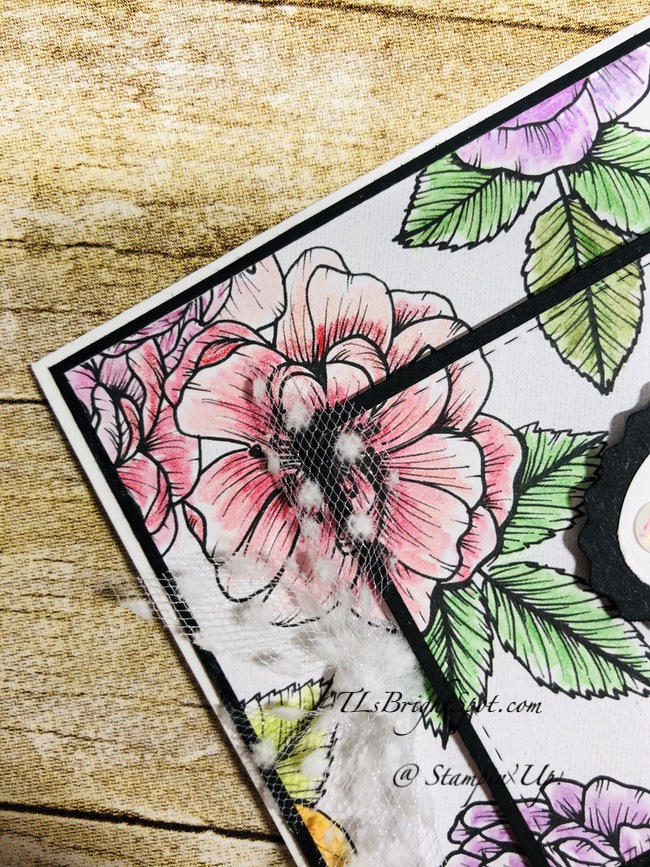
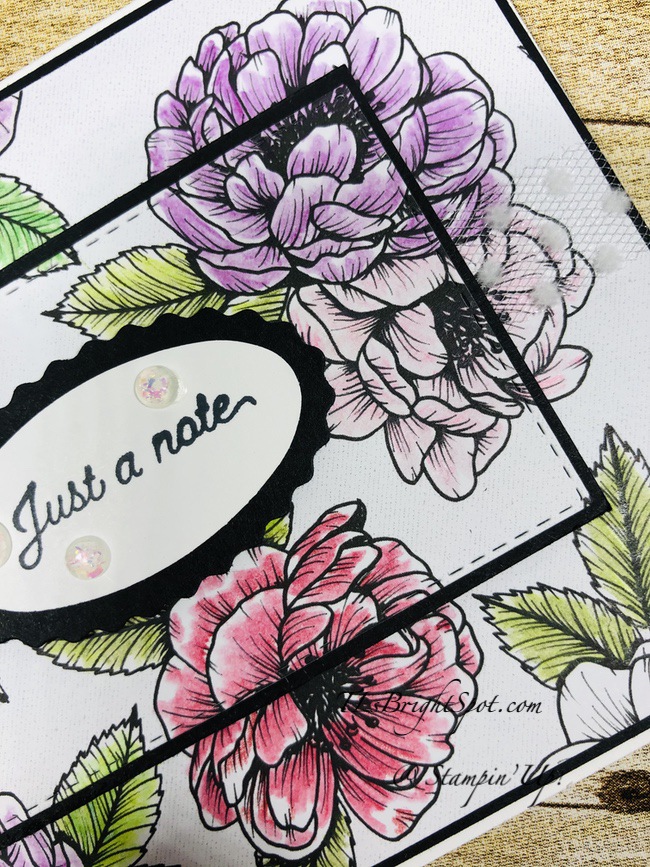
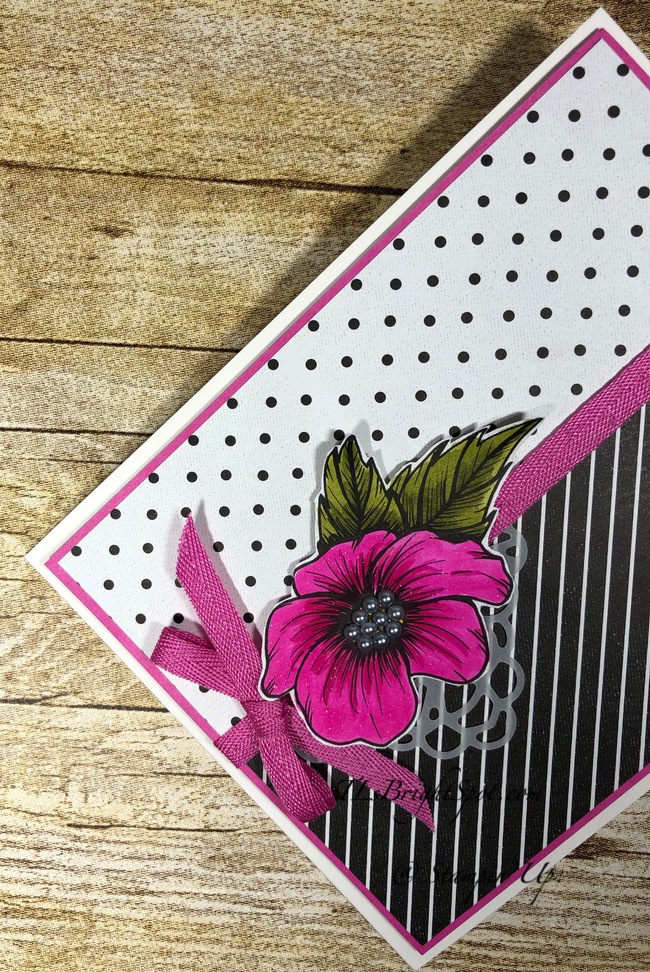
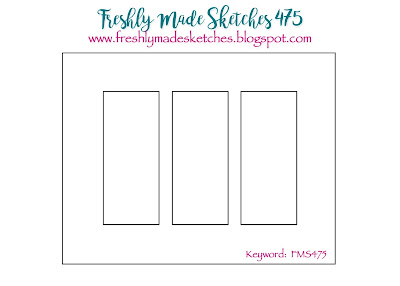
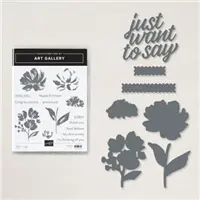
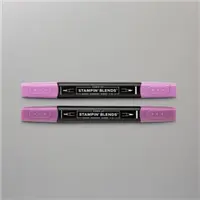
This shouts SPRING to me, maybe because of the purple, or Easter. Nonetheless… it uses both Highland Heather and Rich Razzleberry Stampin’ Blends for the purples, Old Olive and Granny Apple Green for the leaves, and just a bit of Daffodil Delight for the centers of the flowers. I cut them down to size, mounted them on panels of Highland Heather, put them on dimensionals and added them to a Basic White panel. I then stamped the sentiment from Art Gallery stamp set in Memento Black ink. This panel also got dimensionals and was adhered to a Highland Heather card base. I added three Metallic Pearls in Gold and the card front was done…. The hardest part was deciding how to use the ‘painted’ panel. And I settled on the sketch at Freshly Made Sketches 475 to use my colored panel.

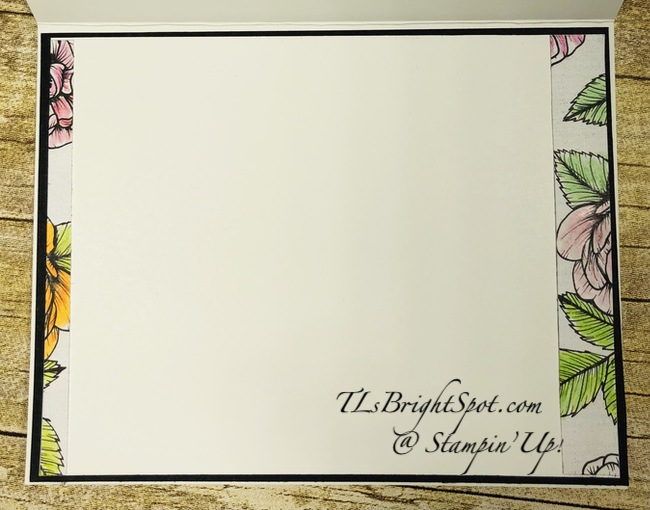
For the inside I used one of the strips left over and adhered it to the Basic White panel with liquid glue and then into the Highland Heather for the inside to be ‘fait accomplis’. And the envelope was super simple: more True Love DSP adhered to the flap and a smaller piece of the ‘painted’ DSP I fussy cut and adhered to the card front with liquid glue. VOILA!

‘Painted’ True Love DSP
inside – #2
‘Painted True Love DSP – #3

Card cuts are listed at the bottom of this post. Products for todays card are from the 2020-2021 Annual Catalog as well as the Jan- Jun Mini Catalog ~ and those products are available now for purchase. You will find them in the product list below. As a reminder… I’ve made it easy for you to simply ‘add all to cart’. If I can help you in any way to order these items, or others, please give me a holler. As a thank you to my customers, when the order is between $50-$150 I offer a SU! item of your choice valued at $10. Remember to use MY CURRENT HOST CODE QDCUDHDC – good Mar 1 – 15. When the order is over $150, you still receive that free gift from me, but SU! has Stampin’ Rewards that may be used for additional products, so don’t use the host code at that time. If you have questions just let me know.

Card Cuts for todays project:

  • Highland Heather 4 1/4 x 11 scored at 5 1/2; e panels cut 1 1/8 x 3 1/8
  • Basic White (2) 4 x 5 1/4
  • True Love DSP (3) 1 x 3; 1 x 4 for inside + scrap for envelope front + 2 1/4 x 6 for envelope flap

Thanks for stopping by.

May you have a beautiful day.

Make someone happy sending them a handmade card filled with love.

Stampin’ Up! Watercolor Pencils and True Love DSP

Hello! I hope today finds you well, in good spirits and ready to create something beautiful ~ oh, and have fun while you’re doing it. 😍 I happen to like coloring and chose to work with my Watercolor Pencils, which I haven’t used in what seems like forever. They give a wonderfully soft look, unlike the Alcohol Blends which are much more bold. Don’t get me wrong, I like the Blends too. They just give a different result. One of the nice parts about coloring, at least for me, is I don’t have to think about it much. I can listen to a podcast, or have the TV on (I don’t do that very often!) – it’s called multi-tasking 😁

Watercolor Pencils & True Love DSP – #1

Isn’t this just soft and lovely? I kept changing the pencils I was using for every flower and the leaves as well. It was so fun to play… The painted flower pot holding my pencils is one I did many, many years ago when I was teaching Tole Painting. 😌 Let’s do a close-up of the flowers on the card.

You can see in these photos how the colors vary. The largest flower in the top left, the pencils used were Flirty Flamingo and Melon Mambo – Melon Mambo for the center. The leaves were Granny Apple Green and Garden Green. The smaller flower in the upper left was the same, just more Melon Mambo. The upper right leaf in that same photo is Granny Apple Green and Old Olive. And the orangey flower & leaf… Pumpkin Pie and the leaf is Granny Apple Green. After using the Watercolor Pencils on each flower, I then used the Blender Pen to smooth the pencil lines.

In the photo at right I used Rich Razzleberry for one of the flowers and Flirty Flamingo by itself for the flower closest to it. The darkest flower is mostly Cherry Cobbler and Melon Mambo in places. I always used the darker colors in the middle and left bare areas for contrast. They almost look real, don’t they?

  • I colored a panel of True Love DSP 4 x 6 then trimmed it to 4 x 5 1/4, removing a portion from each end. I used those trimmings on the inside of the card, which you will see in a bit.
  • Next I took a Stitched Rectangle Die to die cut the inside of the panel.
  • I layered the larger panel on Basic. Black, adhering with liquid glue.
  • I wrapped that panel with Polka Dot Tulle Ribbon and tied it in a knot. I took another, smaller length and tied it on as well.
  • Layer this on the card base with liquid glue. (If I were hand delivering this card I would put it on dimensionals.)
  • Now layer the smaller panel on Basic Black with liquid glue, then to the card front with dimesnionals, matching the flowers and leaves. You do have to be careful as it would be easy for this layer to go on upside down…
  • Using the Double Oval punch and Basic Black, punch the larger oval using the scallop.
  • On Basic White card stock, stamp the sentiment from the Posted For You stamp set in Memento Black ink and punch with the smaller of the ovals using the Double Oval Punch.
  • Add three Opal Rounds to the sentiment banner, add dimensionals to the back and add to the center of the3 card.

For the inside…

Watercolor Pencils & True Love DSP – #4

Remember I removed the ends of the 4 x 6 DSP panel after coloring? And… here they are! The Pumpkin Pie flower is to the left and the Flirty Flamingo to the right. Each strip was adhered with liquid glue to a Basic White panel, then to a slightly larger Basic Black piece – also with liquid glue. This went into the card base with liquid glue and finis… the card is complete! Love, love, love. And I hope you like it too.

Because this card will be part of my class on Tue, Feb 9, I will demonstrate the coloring on a strip for the envelope flap. You’ll just have to use your imagination 🙂

Products for todays card are from the new Jan-Jun 2021 Mini Catalog and the 2020-2021 Annual Catalog ~ and those products are available now for purchase. You will find them in the product list below. As a reminder… I’ve made it easy for you to simply ‘add all to cart. If I can help you in any way to order these items, or others, please give me a holler. As a thank you to my customers, when the order is between $50-$150 I offer a SU! item of your choice valued at $10. Remember to use MY CURRENT HOST CODE WZBPZ7N4- good Feb 4 (today) – Feb 28. When the order is over $150, you still receive that free gift from me, but SU! has Stampin’ Rewards that may be used for additional products, so don’t use the host code at that time. Now is also Sale-a-bration – a time from now through the end of February when Stampin’ Up! offers FREE items with $50 and $100 purchases. Those products are shown below today’s product list as well. Happy shopping!

Sale-a-bration items FREE with $50 purchase – Level 1

Sale-a-bration items FREE with $100 purchase – Level 2

Sale-a-bration items FREE with a $300 order – gather together some friends orders to get this total!

And now is a perfect time to JOIN MY TEAM… get $125 worth of product for $99 + five free packs of 6×6 DSP!!! There are other benefits as well. You can do that here.

Thanks for stopping by.

May you have a beautiful day.

Make someone happy sending them a handmade card filled with love.

Card cuts for todays project:

  • Basic White Thick card stock 8 1/2 x 5 1/2 scored at 4 1/4
  • Basic White 4 x 5 1/4 + scrap for oval
  • Basic Black 4 1/8 x 5 3/8 (2) + 3 11/16 x 2 3/8 + scrap for oval
  • True Love DSP 4 x 6 trimmed to 4 x 5 1/4

Stampin’ Up! True Love Shines

Woohoo! Sale-a-bration & the NEW Jan-Jun 2021 Mini Catalog went live yesterday… did you order? And what was your favorite item? Just curious… So, yes, I placed an order too – and will be super excited when it arrives. I couldn’t choose just one fav… the more I work with a product, the more it becomes a favorite. I used to hoard Designer Series Paper – in other words, I thought it was too pretty to cut into. Once I got over that a couple of years ago (thank goodness!) I really started having fun with the various papers. I really like coloring and the True Love DSP is perfect for that. I have two cards for you today using that paper and coloring with Blends.

Bright colors with this black & white DSP really works! Card 1 is coordinated with Magenta Madness, which takes on a life of its own. The flower is fussy cut after coloring with the Magenta Madness Blends for the flower and Old Olive for the leaves. And of course the coordinating Magenta Madness ribbon and the DSP is layered on Magenta Madness card stock. And there’s a fun Square Vellum doily that I cut and used just a portion, slipped under the ribbon. Although it doesn’t show in this photo, the flower was covered in Wink of Stella and then I added the Metallic Pearls in Silver.

The color coordination on Card #2 is Bumblebee and I love this contrast too. Again the flower was fussy cut after coloring with Mango Melody Blends on the flower and Granny Apple Green on the leaves. For the center of the flower I used the Bronze Blend. This card got as strip of the Bumblebee covered in the Whisper White Polka Dot Ribbon and 2020-2022 In Color Enamel Dots which don’t show in the photo above.

Here you can see the whole card with the Bumblebee strip, ribbon, the enamel dots & the sentiment. The sentiment comes from Many Messages stamp set and cut with the Messages Dies.

This shows card #1 in all its splendor – with another flower colored and fussy cut and adhered with liquid glue to the envelope front.

And here are the insides of both cards…

You can see what I did on each card and I love the finished look. Cut a strip of the True Love DSP and color just a few of the flowers. More photos….

Card #2 also uses the Stitched Circles Dies (Whisper White) and the Layering Circles Dies (scalloped in Basic Black. The circles are adhered together, then placed on dimensionals over the Bumblebee strip. The sentiment banner is also on dimensionals.

Card #1: the Magenta Madness panel is on dimensionals as you can see, with the ribbon wrapped around the entire panel. The flower is also on dimensionals. Card cuts will be listed at the bottom of this post. All product used to make these two cards are listed for your convenience in ordering. If I can help you in any way to order these products, please give me a holler. As a thank you to my customers, when the order is between $50-$150 I offer a SU! item of your choice valued at $10. Remember to use MY CURRENT HOST CODE RSVNH4XW- good Jan 5-20. When the order is over $150, you still receive that free gift from me, but SU! has Stampin’ Rewards that may be used for additional products. Below are the products listed for todays card – feel free to send an order.

Click on the banner below to see the FREE Sale-a-bration items available when your purchase is $50 and up.

Sale-A-Brate 2021 Header

Click on the catalogue image to take you to the Jan – Jun 2021 Mini Catalog.

11.10.20_TH_CATALOG_122020_JJ_US-en-1

Thanks for stopping by.

May you have a beautiful day.

Make someone happy sending them a handmade card filled with love.

Card Cuts:

  • Basic White, Thick, card base 4 1/4 x 11, scored at 5 1/2
  • Magenta Madness 4 x 5 1/4 (2)
  • True Love DSP: 1 7/8 x 5 1/8, 2 x 5 1/8 + strip for inside 1/2 x 3 7/8 + envelope flap; flowers fussy cut
  • Basic White 3 7/8 x 5 1/8 (inside)
  • Basic White, Thick, card base 4 1/4 x 11, scored at 5 1/2
  • Bumblebee 4 x 5 1/4 (2) + 5/8 x 3 7/8
  • True Love DSP 3 7/8 x 5 1/8 + 1/2 x 3 7/8 (inside card) + envelope flap + 1/2″ strip for front of envelope + flowers fussy cut
  • Basic White 3 7/8 x 5 1/8 (inside)

Stampin’ Up! True Love in Black & White

WOOHOO! Today is THE DAY… Jan to Jun 2021 Mini Catalog and Sale-a-bration are LIVE! Order, order order 😁 Yeeha… OK, enuf of that, right? Right! On with the show… Today’s card was super fun to make – I had not done one of these before and I don’t really know what to call it – so… calling it ‘Quilting in Paper Strips’. It’s made with the True Love Designer Series Paper available TODAY – just sayin’.

True Love Designer Series Paper – Quilting in Paper Strips – #1

TGIF has a challenge with the theme being black & white – and I’m entering this card in that challenge. No doubt there will be lots of entries – what the heck.

This True Love Designer Series Paper is just beautiful… to say the least. I don’t have the stamps & dies that coordinate with this paper – yet… but will soon… but as you can see, the paper did all the work for this card. And it was really super easy. Strips were added in a dark/ light kind of pattern. In true quilting, there is dark, medium, then light, and I got some of that but not totally. Nonetheless, I think this looks really sharp and I’m excited, especially since it’s my first try with this process.

The strips are cut in various widths – no need to really measure – anywhere from 3/8″ to 5/8″. I adhered them to a basic black card stock 3 7/8 x 5 1/8. I began with three strips going in the same direction, then three strips in another direction, spacing them a bit apart so you see the background color (in this case, the Basic Black), until the entire page was covered. And sometimes I adhered with liquid glue and sometimes with Stampin Seal. It just depended. I trimmed the edges so they were even, then attached this to a slightly larger piece of Whisper White card stock (4 x 5 1/4) with liquid glue. I then wrapped this with fun ribbon – Glittered Organdy Ribbon – around the card and secured in back with glue dots. I prepared a bow out of the same ribbon but did not attach it just yet. I wanted a sentiment… the Simply Succulent stamp set was right on my desk and I pulled from that the sentiment ‘thanks’, stamped that with Memento Black ink on a Whisper White scrap. I cut it with the smallest die from the Stitched So Sweetly Dies. I die cut another piece from the same die set – Stitched So Sweetly Dies in Basic Black card stock. I adhered the two together with liquid glue, put dimensionals on the back and adhered right over the ribbon. Then I adhered the bow with a glue dot. I added some more glam with three Rhinestone Basic Jewels. This completed panel was adhered to a Basic Black card base (4 1/4 x 11, scored at 5 1/2) with dimensionals and the card front was complete.

True Love Designer Series Paper – inside, #2

I fussy cut from one of the True Love Designer Series Papers, these gorgeous flowers. Normally I would cover them in color… but for the TGIF challenge, I couldn’t do that. I adhere them with liquid glue to this panel of Whisper White card stock, again at 3 7/8 x 5 1/8. I adhered this directly to the card base and the inside was done.

Despite the final picture… I redid the envelope… I actually did strips in the lower left corner 😁 I’ll see if I can upload the photo… having trouble. YAY – got it.. the photo at right.

For the envelope, I covered the flap in coordinating paper from True Love DSP and adhered one of the fussy cut flowers with leaves from the same paper with liquid glue – FINIS!

So – what do you think? I hope you like… If I can help you in any way to order these products, please give me a holler. As a thank you to my customers, when the order is between $50-$150 I offer a SU! item of your choice valued at $10. Remember to use MY CURRENT HOST CODE RSVNH4XW- good Jan 5-20. When the order is over $150, you still receive that free gift from me, but SU! has Stampin’ Rewards that may be used for additional products. Below are the products listed for todays card – feel free to send an order.

Price: $8.50

Sale-A-Brate 2021 Header

Click on the video to watch or click on the Sale-a-bration banner to see the FREE SU! products available when ordering between now & Feb 28.

THANKS FOR STOPPING BY.

May you have a beautiful Day,

Make someone happy sending them a handmade card filled with love.

Supply List