Stampin’ Up! The Sep-Dec Mini Catalog is LIVE!

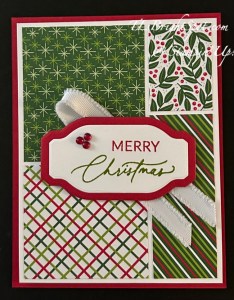
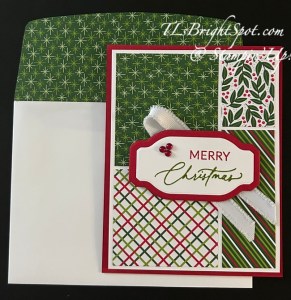
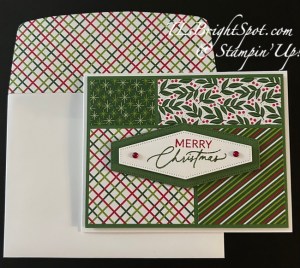
WooHoo! The catalog you have been waiting for is live and purchases may begin… My card today features Season of Elegance SDSP and two bundles – the Peaceful Evergreens and Peaceful Seasons. It also uses the Cherry Cobbler & Gold 3/8″ Satin Ribbon that is part of the suite of products.

Stampin' Up! Season of Elegance SDSP card front

I began by stamping these beautiful trees in Mossy Meadow ink on a 4 x 5 1/4 panel of the Seasons of Elegance SDSP. I stamped the ‘Merry’ from the Peaceful Season stamp set in Cherry Cobbler, then the ‘Christmas’ in VersaMark and sprinkled in Gold embossing powder, then heat set it. Oh my goodness – so pleased with how this large sentiment heat embossed! The ink on the word ‘Merry’ must have still been a bit wet as it also took some of the gold embossing powder. I die cut the star from Gold Foil scrap and adhered it with a mini dimensional. I adhered this panel to Cherry Cobbler 4 1/8 x 5 3/8 then wrapped the Cherry Cobbler Satin Ribbon around it and secured it in back with Seal+. I tied a bow and adhered it with a glue dot. Both panels were added to a Basic Beige card base 4 1/4 x 11. I added Wink of Stella to various parts of all the stamped trees.

Stampin' Up! Peaceful Evergreens card inside

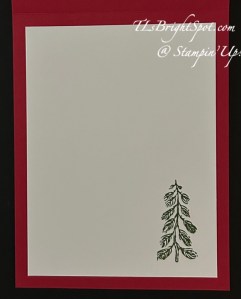
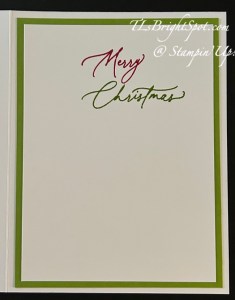
On the inside, I stamped this single stamp of five trees in Basic Beige, then the sentiment in Cherry Cobbler and adhered the 4 x 5 1/4 panel of Basic Beige to the inside of the card.

Stasmpin' Up! Season of Elegance card & envelope

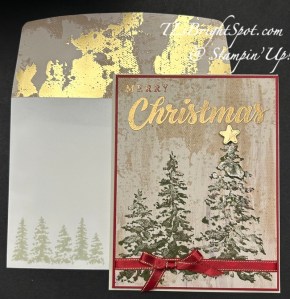
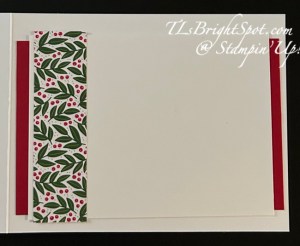
For the envelope, I stamped the same single stamp of five trees in Basic Beige on the front and more of the Season of Elegance SDSP on the flap – this time showing off the other side of this gorgeous SDSP.

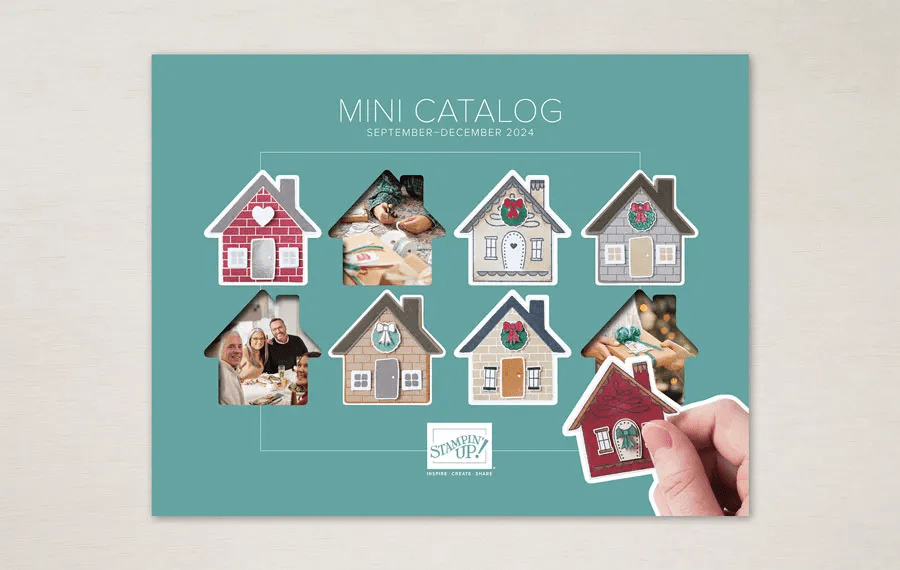
You can find these items on pages 24-25 of this new Sep-Dec Mini Catalog. And if you do not have a demonstrator or a catalog – reach out to me so we can remedy that situation. Below is an image of the cover of this catalog. Click on the image to see what’s inside!

Stampin' Up! Sep-Dec 2024 Mini Catalog

To shop the mini catalog, click on the link in the catalog photo above.

To shop the Kits Collection, click here. New kits will be posted Sep 4.

Stampin' Up! Scrapbooking

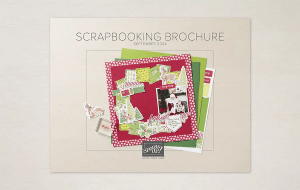
This is a digital-only scrapbooking brochure, full of scrapbooking essentials and exciting new products. As a companion brochure to the September–December 2024 Mini Catalog, the products inside coordinate with products from the mini catalog (and some online only products, too!). With Workshop Kits and some new product releases *hint* Two-Tone Cardstock *hint*, we hope this adds variety and inspiration to your and your customers’ holiday crafts this year! If you are into making memories – click the image below to view the Stampin’ Up! Scrapbooking Brochure

Stampin' Up! Scrapbooking Catalog

OK, how else may I help you? Remember that when you shop with me, there are benefits… with a $50 order, receive a SU! item valued up to $10. Use my HOST CODE so that I’m sure to get that item to you. Plus monthly tutorials are sent with a $50 order as well – for September it features the Autumn Expressions Bundle, a new bundle in the Sep-Dec Mini Catalog.

host code ZBAU6PKX

Thanks for stopping by. May you have a beautiful day. Make someone happy sending them a handmade card filled with love!

Stampin’ Up! Take A Bow 6×6 Stack & Cut C’mas Cards

This is a brand new week – and hard to believe it is September 2 already. The summer went by so darn quickly…. and yes, it isn’t ended until September 22, I get that. But somehow, Labor Day, school starting, other programs picking up again – it seems like summer ‘up & went.’ Bad English, I know. My cards today… I have resisted creating the ever popular ‘stack & cut cards’. And that’s on me. Yesterday I did it and here are the four cards I created.

Stampin' Up! Take a bow 6x6 Stack & cut #1
Take A Bow 6×6 #1
Stampin' Up! Stack & Cut Take a Bow 6x6 #3
Take A Bow 6×6 #3
Stampin' Up! Stack & Cut Take a Bow 6x6 #4
Take A Bow 6×6 #4

One of the reasons I have resisted making stack & cut cards is they are so similar – and I rarely make two of the same card. What I did here is use very different dies for the front sentiment panels. And if you are not familiar with stack & cut cards – here’s the idea… take 4 designer series papers that coordinate, stack them one on top of the other and cut – meaning all four papers are cut exactly the same. What changes is the order of how they appear on the card. And I made my cards as two horizontal and two vertical cards. By switching the cut papers it changes the ‘look’ of each card while using all the same papers. Make sense?

How to create these cards… the DSP is Take A Bow 6×6 DSP available Sep 4 in the new 2024 Sep-Dec Mini Catalog – choose four (4) coordinating patterns, stack them one on top of another and cut 3 3/4 x 5. On the short side cut at 2 1/2″, then cut that strip on the long side at 2 1/4″. And the remaining uncut strip that is now 1 3/4 x 5, cut it at 3 1/4″, leaving two sizes: 1 1/4 x 1 3/4 and 1 1/4 x 3 3/4. Keep papers in appropriate stacks. Cut four different coordinating card stocks 4 x 5 1/4. Begin laying out the DSP patterns by placing all of the top pieces from the same pattern on each of the four cardstock panels – using the cards above as a guide. None of the designer series papers that I chose are directional, so it didn’t matter where they were placed. If any your patterns are directional, that will make a difference. Continue each pattern of DSP until all are distributed. Adhere to cardstock with adhesive of choice, then add to card base with dimensionals.

Besides the Take A Bow 6×6 DSP, here are the various supplies needed for each card:

Card 1 -Something Fancy Dies, Frayed Grosgrain Ribbon in White, Greetings of the Season stamp set, Christmas Friends stamp set on the inside, Real Red ink and Granny Apple Green + Garden Green ink, Adhesive Backed Berries.

Card 2 – Nested Essentials Dies, Greetings of the Season for sentiments, Christmas Friends (mouse) and to color the mouse, Stampin’ Blends Real Red and Granny Apple Green, Adhesive Backed Berries, and inks Real Red and Garden Green.

Card 3 – Greetings of the Season Bundle, Natural Tones Linen Thread in Garden Green, Adhesive Backed Berries and inks Real Red and Granny Apple Green.

Card 4 – Greetings of the Season Bundle, Christmas Friends stamp set, (mouse)and Stampin Blends Real Red and Granny Apple Green for the mouse, Red & White Baker’s Twine, Adhesive Backed Berries.

Here’s the envelope for each card + the inside of each:

Stampin' Up! Stack & Cut card & envelope, #1
Card 1 card & envelope
Stampin' Up Take A Bow DSP, card 1 inside
Card 1, inside
Stampin' Up!, Take A Bow #2 card & envelope
Stampin' Up! Take A Bow, card 2 inside
Card 2, inside

Stampin' Up! Take A Bow, card & envelope #3
Card 3, Card & envelope

Stampin' Up! Take A Bow,#3 inside
Card 3 inside

Stampin' Up! Take A Bow #4 card & envelope
Card 4, card & envelope
Stampin' Up! Take A Bow #4 inside
Card 4, inside

Card bases and cardstock for dies for the various cards: Garden Green, Granny Apple Green, Real Red and Thick Basic White. To shop for those items in the 2024-2025 Annual Catalog, click here.

To shop the ONLINE Exclusives, click here: The Greetings of the Season Bundle may be found in this section, as well as the Adhesive Backed Berries.

Stampin' Up! Sep - Dec 2024 Mini Catalog

To shop the mini catalog, click on the link in the catalog photo above.

To shop the Kits Collection, click here. New kits will be posted Sep 4.

OK, how else may I help you? Remember that when you shop with me, there are benefits… with a $50 order, receive a SU! item valued up to $10. Use my HOST CODE so that I’m sure to get that item to you. Plus monthly tutorials are sent with a $50 order as well – for September it features the Autumn Expressions Bundle, a new bundle in the Sep-Dec Mini Catalog.

host code ZBAU6PKX

Thanks for stopping by. May you have a beautiful day. Make someone happy sending them a handmade card filled with love!

Stampin’ Up! Decorative Trees Bundle & Two Projects

What is your passion? Do you like doodling, creating, doing or making things for others? I enjoy people, most people that is, and I enjoy creating mostly for others. Creating calms me when life sometimes gets out of control. It lowers my stress level when life gets out of balance. Thursday was a card class day and we used the the Decorative Trees bundle. This is in the Sep-Dec 2024 Mini Catalog and I highly recommend it. This catalog goes live Sep 3 – just days away. Let’s look at what we made…

Stampin' Up! Decorative Trees card front

Talk about Christmas – this is it! Oh Christmas tree, Oh Christmas Tree, how lovely are thy branches. Hee Hee. This does NOT show the glittery paper! Darn! However… this is a two step tree die cut, using two dies. The first tree is the background and is die cut from Festive 12 x 12 Glimmer Paper in Granny Apple Green. The next layer is plain Granny Apple Green cardstock with Adhesive Sheet applied to it. The Adhesive Sheet allows you to peel back and stick – similar to how we use dimensionals. :O) When the die cut is delicate, it makes it so easy to use the Adhesive Sheets. Now the tree is together, let’s work on the rest of the card.

  • the card base is Garden Green 4 1/4 x 11 and scored at 5 1/2
  • layer Basic White 4 1/8 x 5 3/8 and adhere to card front.
  • next layer is Granny Apple Green 4 x 5 1/4 and embossed in the Birch Wood 3D embossing folder, then adere directly to the Basic White
  • next layer is Basic White 3 1/8 x 3 1//8
  • final layer is Take A Bow 6x6b DSP cut 3 x 3 and adhered to Basic White: both adhered to card front with equal top & side edges
  • add the tree with dimensionals
  • add a double bow from Natural Tones Linen Thread in Garden Green – a glue dot works well

The card front sentiment comes from the Decorative Trees stamp set. I wanted this sentiment to have a sheen and have heat embossed in clear embossing powder. Here’s how…

  • ink the sentiment with VersaMark ink, then ink right away with Garden Green ink and stamp on the Basic White strip 1 x 3 1/8
  • sprinkle with Clear Embossing Powder and heat set with the heat tool.

Attach the Basic White sentiment strip to the card front with dimensionals and add Adhesive-Backed Shiny Sequins in Granny Apple Green.

Stampin' Up! Decorative Trees card inside

For the inside, I wanted the same sheen to the sentiment from Decorative Trees stamp set:

  • ink sentiment with VersaMark ink, then ink stamp with Garden Green ink – stamp the 4 x 5 1/4 Basic White panel
  • sprinkle the ink with Clear Embossing Powder and heat set with the Heat Tool
Stampin' Up! Decorative Trees card & Envelope

For the envelope…I used the same Take A Bow 6×6 DSP pattern to adhere to the flap and trimmed to fit. On the front I stamped the tree image from Decorative Trees stamp set in Garden Green ink – and done!

For our second project, we created an ornament using the Decorative Trees Dies only. Below are the front, attached loop for hanging and dimensionals to hold in place and last photo is the back side, DSP only.

I used the Decorative Trees outline die to die cut the tree from another DSP in the Sep-Dec Mini Catalog: Season of Elegance SDSP in Pretty Peacock, cut 2. I die cut the snowflake/ tree detail die from Nests of Winter DSP to which I added Adhesive Sheet for easy adhering. I also added Adhesive-Backed Sparkle Gems to two places on the snowflake diecut. Isn’t this paper gorgeous? It comes in Pretty Peacock, Cherry Cobbler and Basic Beige.

If you do not have a demonstrator and need a catalog – please connect with me soon so you can enjoy all the fun products in this Sep-Dec Mini Catalog. And if you decide to shop with me – you may do that here.

Use my HOST CODE when you order for those fringe benefits… Free item of the month with a $50 order: Drusy Adhesive-Backed Embellishments and the tutorial of the month! These embellishments will be ordered at the end of the month and sent out to customers with that $50 & up order!

host code ZBAU6PKX

Remember that Designer Series Paper Saloe – still 15% off through Aug 31…

Thanks for stopping by. I hope you have found these projects inspiring and helpful. If you have questions, let me know! I’m happy to answer them.

May you have a beautiful day. Make someone happy by sending them a handmade card made with love.