
Happy 2025! Here it is already Jan 3… oh my goodness, hard to believe! Before I share my card I want to say thank you to those who follow my blog, who order from me, who are part of my team – you are awesome and I am thankful, grateful for you. If there is something that I can do to help you in your creativity or in communication, whatever it is, please reach out to me. I am here to help support what you desire to do. Thank you again…
My card for today has this fun addition that is the fun fold part – almost like origami. I don’t know what the fold is called, but you can find it on Wild West Paper Arts, Rae Burnet – or Karen Titus.
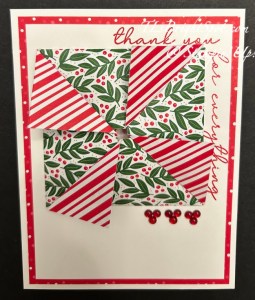
This is a thank you card for a friend of ours who is an amazingly fabulous cook – or I really could say ‘chef’. She ‘volunteers’ at our local JBJ Soul Kitchen as one of the cooks. She is awesome… We were at her home for a fun gathering recently and this is a card specifically for her and for all she does – for me, for others.
I used the Take a Bow 6×6 DSP that is retiring very soon and the Spring Corners bundle which is an ONLINE EXCLUSIVE bundle. Let’s create the origami part first…. score each side of the 6×6 @ 1 1/2″, gently score. Remove corner pieces.
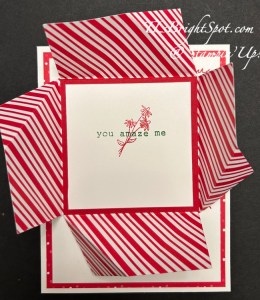
Can you tell in this photo that four ‘corners have been removed? I hope so! After doing that, fold in to the score line, the right hand portion of the remaining bit – you can see the folds here. Cut a Real Red panel 3 x 3 and adhere to the center of the Take A Bow 6×6 DSP. Cut a panel of Basic White 2 3/4 x 2 3/4 and stamp using the Spring Corners Stamps. Here I did the sentiment in Garden Green ink and the bouquet in Real Red ink, then adhere it to the Real Red panel. Set aside.
Cut a piece of Basic White 4 1/4 x 5 1/2 to create the card base. (You could make the card base 8 1/2 x 5 1/2 scored at 4 1/4). Add a panel of Take A Bow 6×6 DSP cut to 4 x 5 1/4 and adhere to the card base. With a 3 3/4 x 5 Basic White panel, stamp the corner sentiment in Real Red ink – using the Spring Corners stamp set. Adhere the ‘origami’ fun fold with liquid glue, then add three berries from ______________ just below the origami fold. And DONE!
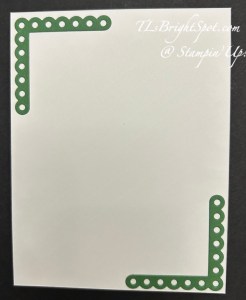
On the back of the Basic White card base I added die cut ‘corners’ from the Spring Corners dies and Garden Green card stock. I decided not to add any more sentiment as I want to say thanks to this woman who has worked so dedicatingly well with me this year and is such an amazing individual.
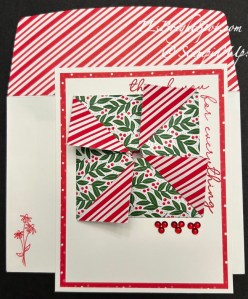
For the envelope… more of the Take A Bow 6×6 DSP adhered to the envelope flap and this sweet, sweet floral bouquet stamped in Real Red ink on the envelope front.

Such a cute card! Fun origami design on the front too! 🙂
LikeLike
Thanks Amy! The origami was so easy to do too!
LikeLike
Super cute – love that fun fold and it’s so pretty in green and red with that DSP! 🙂
LikeLike
Thanks Mary – I thought the contrasting sides of the DSP really showed off that fold :O)
LikeLike