
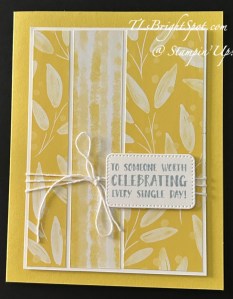
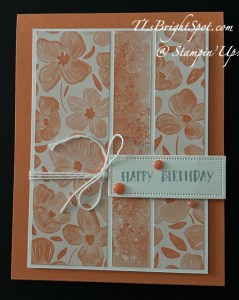
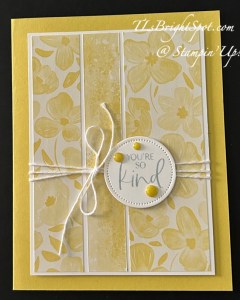
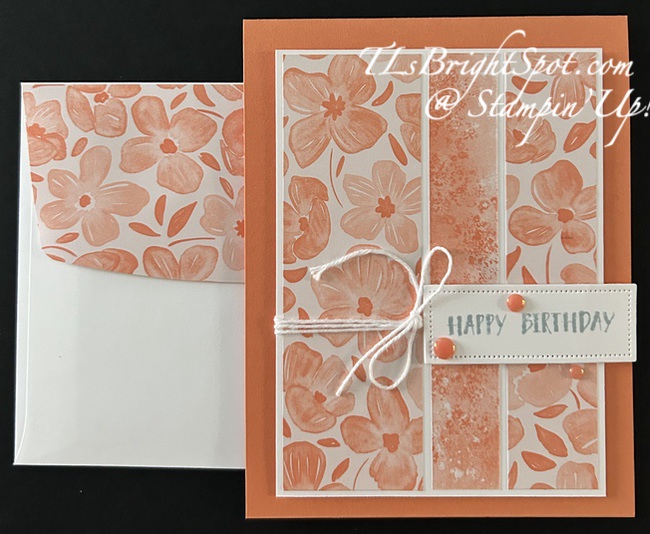
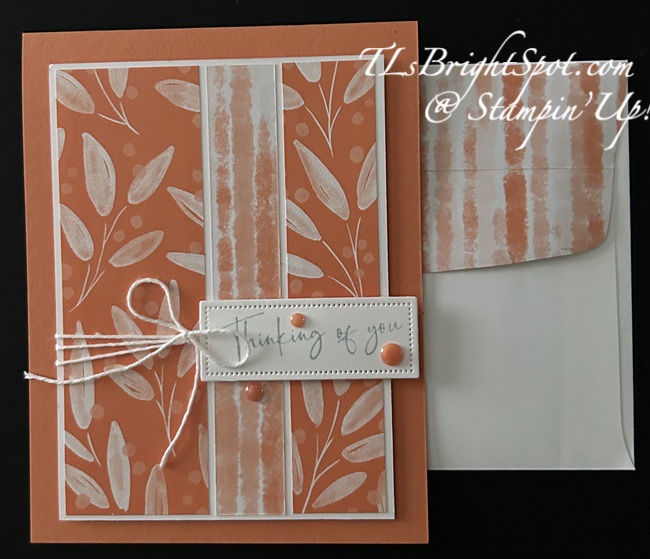
Good Monday morning. How was your weekend.? I’m making progress after knee replacement: can’t drive yet as it’s the right knee, so chauffeuring is the mode of transportation for a while yet. I’ve set up a table on our main floor for card making and was finally able to work at the table for more than 15 minutes! In shifts of time, I’ve made these four cards – all with the 25-27 In Color 6×6 DSP pack Timid Tiger and Darling Duckling. For the sentiments I used the new The Right Words stamp set and cut them out with Nested Essential Dies or the Everyday Details Dies. I added White Bakers Twine from the Twine Essentials Pack and on some, 25-27 In color Flat Pearls. Let’s look.
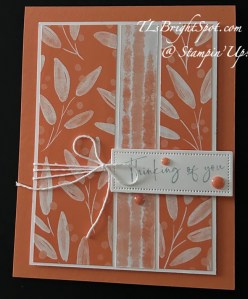
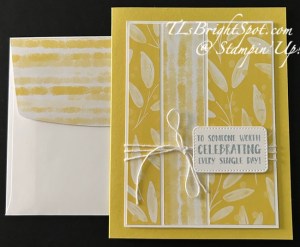
These two cards are the same except the panels widths were switched, making the largest panel to the right as opposed to the left.
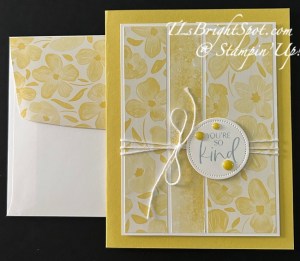
Here I did the same, reversed the largest panel and used another of the fun papers in the 25-27 In Color 6×6 DSP pack with the same colors Timid Tiger and Darling Duckling.
I kept the inside very simple – no stamping, just a strip of the DSP either on the side or at the bottom of the Basic White panel.
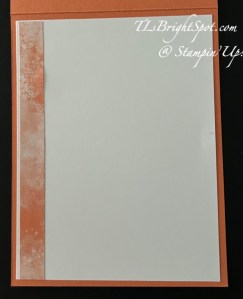
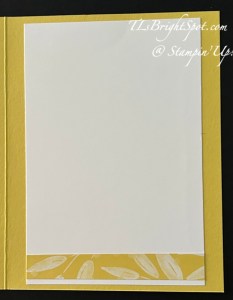
Just this little strip dresses up the inside :O) One of the nice aspects of using a layout like this is one full 6×6 will make one card, using the extra pieces for the inside of the card and the envelope flap.
Card cuts…
- Begin by cutting a panel 3 1/4 x 4 3/4, then trimming that to: 3/4 x 4 3/4, 1 x 4 3/4 and 1 1/2 by 4 3/4. (this will leave a 2 3/4 x 6 strip for covering the flap and adding a strip to the inside of the card)
- Adhere panels, reversing sides of the DSP as desired to a Basic White cut 3 9/16 x 4 7/8
- Wrap with Bakers Twine 3 times and tie a bow
- Stamp sentiment in Cloud Cover ink on Basic White scraps and die cut, adding to the panel with dimensionals.
- Add finished panel to card front with dimensionals: 8 1/2 x 5 1/2 scored at 4 1/4, or 4 1/4 x 11 scored at 5 1/2
- Add embellishments
- Add 2 1/4 x 6 strip to envelope flap, trim to fit. This will leave about 1/2″ for card inside
- Add cut down strip to inside of card
Now you have a small stack of cards for various occasions – and this can be done with the other colors in this pack as well, making certain some can be used for masculine cards.
Want to purchase the products to make these cards? Check the items below as they will take you directly to my shop. Product List
Inspiring Imperfections Bundle (English)
[165167]
The Right Words Cling Stamp Set (English)
[165316]
Kintsugi Inspirations 12″ X 12″ (30.5 X 30.5 Cm) Specialty Designer Series Paper
[165159]
[165171]
Misty Moonlight 8-1/2″ X 11″ Cardstock
[153081]
Misty Moonlight Classic Stampin’ Pad
[153118]
Basic White 8 1/2″ X 11″ Cardstock
[166780]
[159236]
Early Espresso Classic Stampin’ Pad
[147114]
[152392]
[149653]
[104430]
[163338]
[110755]
[152813]
[102300]
[144107]
Thanks for stopping by today! Remember what a difference you make to others when sending a homemade card made with love.

Sweet cards! So glad that you’re getting up and around a little more, I’m sure that you’ll be back to running full speed soon. 🙂
LikeLiked by 1 person
Glad you like the cards! Yes… improving each day.
LikeLike
These are awesome – may well have to make a few! And I remember WELL the days of needing a chauffeur! Yuk! But – it’ll pass and you’ll be zipping around like usual! 🙂
LikeLiked by 1 person
Thanks Tonda. This layout is perfect for so many DSP’s… enjoy making them.
LikeLike