
Hello folks – it’s Thursday… and I have a fun fold card today. It’s called… Pop-Up Book Fold and it’s not as hard as you might think. As a matter of fact, I’m teaching this in my card class today. The scoring & cutting is a bit tricky for the inside and I strongly suggest looking at a video on YouTube and not just following my instructions. :O) I love this card, but I DO have to, ya know, pay attention when creating! Here’s the card…

I’ve used several products on this card… stamp sets: probably three, maybe four; Ladybug Punch (so fun!) , ribbon and embellishments, Stampin’ Blends. Layering, layering. How can we NOT do it?!
The DSP is Perfectly Penciled which I colored with Daffodil Delight Stampin’ Blends. I could have colored the leaves but chose not to. This DSP already has some shading and I used that area for the Dark Daffodil Delight. I like how each flower is different – as they are in real life! Once colored this was layered on Basic Black. The Black & White Gingham ribbon was round around and secured in back with Stampin’ Seal. I then slipped another length under that and tied a bow, then secured it with a glue dot. I put dimensionals on the back and adhered it to the Daffodil Delight card base. I used the Charming Sentiments Bundle to create the sentiment, stamped in Memento ink and die cut with the Sentiment Silhouette Dies. I put dimensionals on the back and adhered it to a Basic Black piece die cut with the Stylish Shapes Dies, then adhered it with liquid glue to the card front. Then came the sweet bee – punched with the Ladybug Punch. I simply cut thin strips of Daffodil Delight scraps and added them to the Basic Black body. The wings were punched from Vellum and added with a thin strip of dimensional. I added the completed bee to the card front with dimensionals. The final touch was a single Iridescent Rhinestone Jewel on the flower just above the bee.

For the Pop-Up insert… cut the panel 8 x 5 and score at 4 on the long side. With the short side up on the paper trimmer, measure down 1″ and cut from 1″ to the 7″ mark. Turn the paper 180 degrees and do the same on the opposite side. These are the only two cuts necessary to create the pop-up book. The rest is all scoring. It might be helpful to mark with pencil all the scoring lines so you don’t goof. :O)
- With long side at the top and the right side of the paper on the 1″ mark beyond the trimmer, score from 1″ to 4″. Move the paper to the 1 1/2″ and score again from 1″ to 4″. Turn the paper 180 degrees and do the same on the opposite side.
- With long side at the top of the trimmer and left side of paper at the 2 1/2″ mark, score 1″ to cutting line, both top & bottom. Again turn the paper 180 degrees and do the same on the other side.
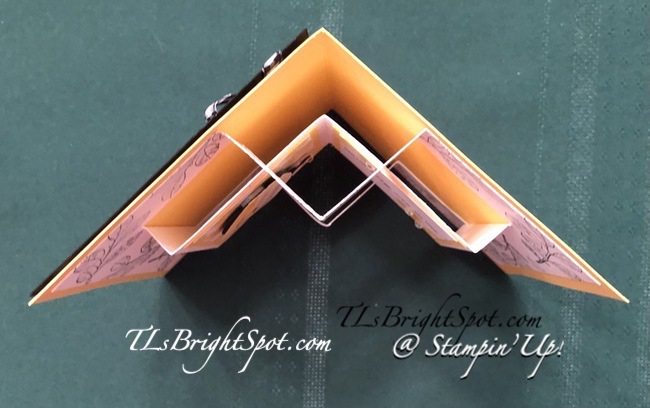
- Burnish all score lines and fold as shown in photo below. Also, refer to photo 2.
You will notice in photo 2 that I stamped all around the score lines and I did it after all lines were done. I think I would suggest stamping the entire sheet before scoring. I think it would look pretty neat that way. The leaf stamp comes from the Abigail Rose stamp set. It seemed to look similar to me to the DSP used on the card front. I stamped in Memento Black ink.
Decorate the ‘book’… (It’s helpful to decorate the ‘book’ prior to adding the insert to the card base.) Cut two panels of Daffodil Delight 2 1/4 x 2 3/4 and adhere. Cut two panels of Basic White 2 x 2 1/2. Stamp the sentiment fromHello Ladybug stamp set in Memento ink on one panel. Stamp with the flower from Hello Ladybug stamp set in Daffodil Delight surrounding the sentiment. Then use the same stamp to cover the other panel. Create another bee using the Ladybug Punch and adhere with liquid glue to the stamped all over panel. Add this to the left ‘book’ side. Adhere the sentiment panel to the right ‘book’ side. Decorate both with Iridescent Rhinestone Jewels on various flower centers. Here’s that photo again.
The next sorta tricky part is adhering the insert to the card base. And I should have taken a photo of this step but was too excited and didn’t do it :o(
- With the card base flat and the insert flat as well, adhere the right side only – outer edge and to the 2 1/2″ score line top & bottom. Center it.
- Close the card with all scoring as it should lie. Adhere the left side: outside edge and top & bottom just to the 2 12″ score lines.
- When completed it should look like the photo below.
Such a fun fold – and not all that difficult… just need to pay attention to the score lines! I hope you try this – and share it with me when you do.
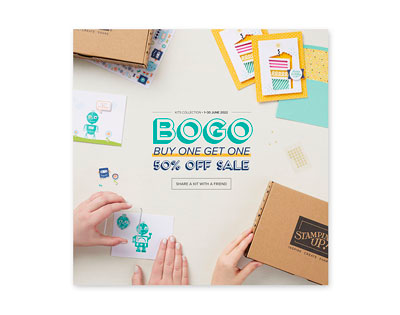
Exciting things happening yet again within the Stampin’ Up! community. Bogo Kits 50% off second kit. In other words, order one at full price and get second kit half off. This is only for the month of June!
Share a Kit with a Friend with the Kits Collection BOGO 50% Off Promotion
Get ready—the Kits Collection is having a buy one, get one 50% off promotion. This is the perfect time to #ShareYourMoment and share a kit from the Kits Collection with a friend! As always, the kit selection is based on availability. You can see what’s available in the Kits Collection selection here.
Ordering info:
Sale runs through 1–30 June 2022.
All kits in the Kits Collection by Stampin’ Up! qualify for this sale.
Kit selection is based on availability.
You will need at least two kits in your cart for the discount to automatically apply at checkout.
There are no order limits on this promotion.
On the customer store, the discount will automatically apply to the most expensive kit in your cart.
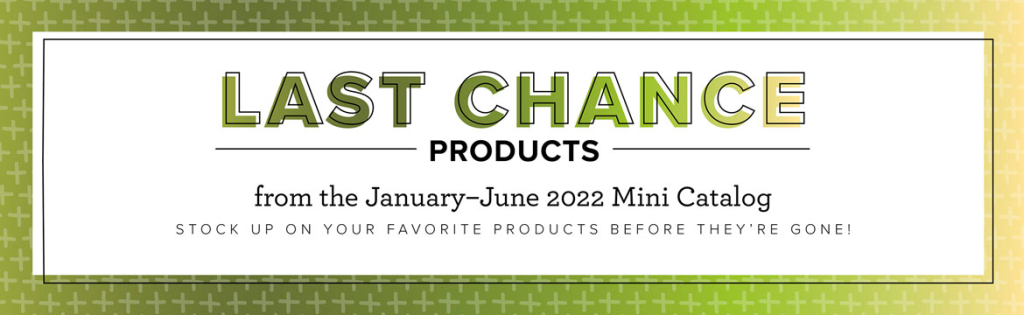
The January–June 2022 Mini Catalog will be retiring soon! It’s always bittersweet to see a classic Stampin’ Up! catalog take a trip to retirement. But, we’re looking forward to all the new products on their way—and we hope you are, too!
Stock up on your favorite products before they’re gone for good! Save up to 50% on essential craft supplies. What are you waiting for? Start shopping! After all, this selection of Last Chance Products is only available while supplies last. You may access the list here.
Products to make this card are listed below. If you do not have a demonstrator and need an Annual Catalog please reach out to me (the 2022-2023 AC) – happy to send one to you. When ordering, please also use current host code: AZQDZ4U4. I offer my customers a free item from Stampin’ Up! item valued to $10 with your order of $50 and above. Click here to go my store. When the order is over $150, you still receive that free gift from me, but SU! has Stampin’ Rewards that may be used for additional products, so don’t use the host code at that time. If you have questions just let me know. If you would like to be able to order products early from catalogs AND enjoy that 20% discount, join my team now… you may do that here. WooHoo! We have lots of fun and are a creative bunch that encourages & supports one another. Would love to have you. :O)
Make someone happy sending them a handmade card filled with love.
Inspire. Create. Share.

Leave a comment