
Hello there! Today’s card features the extra gorgeous So Many Snowflakes Dies and I paired it with Snow Wonder stamp set for the sentiment on the front. What was extra fun was using the new SU! Blending Brushes ~ they are wonderful!!! And… they come in a 3-pack – eeeee. For some reason I cannot get my computer to allow me to share a photo of the brushes – but they are awesome… and will be available in the upcoming Jan-Jun 2021 Mini Catalog.
Now – to the card… here’s a sneak peek…

The how to :O)…
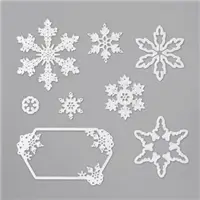
- Die cut the largest snowflake from Whisper White card stock using the So Many Snowflakes Dies
- Using that panel and one of the new Blending Brushes, tap the brush in Balmy Blue ink and blend the color, creating a shadow of snowflakes on the 4 x 5 1/4 panel of Whisper White card stock. Continue to cover, moving the snowflake ‘stencil’ around so there are several shadows on the panel. It should look something like this. Notice there are varying shades of the Balmy Blue ink.

- Cut an Adhesive Sheet to 4 x 5 1/4, peel the backing and adhere to a panel of 4 x 5 1/4 Whisper White card stock
- Die cut several snowflakes of varying sizes using the So Many Snowflakes Dies and the Whisper White card stock with the Adhesive Sheet on it.
- Remove the backing on the die cut snowflakes one at a time as you lay them on the ‘shadowed’ card front
- Stamp the sentiment using the Snow Wonder stamp set in Balmy Blue ink on a 1 x 4 strip of Whisper White
- Adhere this to a 1 1/4 x 4 strip of Balmy Blue card stock
- Adhere the sentiment panel to the card front using dimensionals
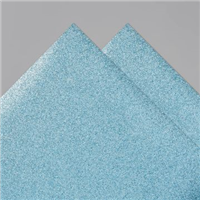
- Die cut yet another snowflake, this time from the Balmy Blue Glimmer Paper – love this paper! Adhere to the sentiment panel with a couple of dots of liquid glue.
- Add some glittery Blue Adhesive-Backed Gems to several of the snowflakes
- Adhere this panel to the Balmy Blue card base (4 1/4 x 11, scored at 5 1/2) and the card front is done.

The inside & the envelope…
You can see in the photo above and below that I used one of the die cut ‘outlines’ as a stencil, the Blending Brush and Balmy Blue ink. I did this on the envelope front and on the envelope flap. I also did it on the 4 x 5 1/4 panel of Whisper White for the inside of the card. Then I adhered one of the leftover die cut snowflakes that had adhesive on the back and placed it over one of the snowflakes stenciled on the panel. I liked the effect this created. This panel was adhered to the inside of the card base and voila…


The product list may be found below… Remember when shopping with me, if your purchase is between $50- $150, use my CURRENT HOST CODE…XS4MSSFN to receive a free SU! gift from me valued at $10!
Thanks for stopping by.
May you have a beautiful day.
Make someone happy by sending them a handmade card filled with love.


Leave a reply to TL’s Bright Spot Cancel reply