
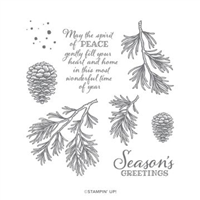
Today’s post is all about Christmas using the Peaceful Boughs stamp set with coordinating Beautiful Boughs Dies. I couldn’t help it – there are two cards for the Amy’s Inkin’ Krew Blog Hop using the Christmas/ Holiday theme. I think you will find some wonderful inspiration on this hop. Enjoy…

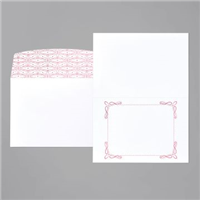
My first card is made using the Wonder of The Season MEMORIES & MORE CARDS & ENVELOPES as my card base.


It is so shiny, it was really difficult to get a good photo…
- Pear Pizzazz card stock is the bottom layer cut to 3 1/8 x 4 1/8 (cut 2 – one for inside) + scraps for the boughs.
- Red Foil Sheets is next and cut 3 x 4. Adhere to the Pear Pizzazz with liquid glue
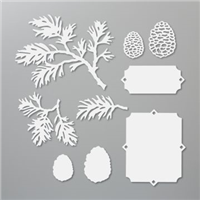
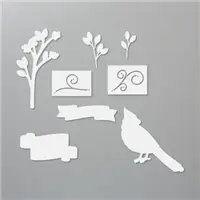
- Die cut two single pine boughs from Pear Pizzazz card stock using the Beautiful Boughs Dies.
- Die cut one triple bough from Shaded Spruce card stock using the Beautiful Boughs Dies
- Die cut two pine cones from either Soft Suede card stock or Early Espresso card stock. (The card stock in the photo is a retired color)
- Adhere the pine boughs to the Red Foil layer with liquid glue. Adhere the pine cones with dimensionals.
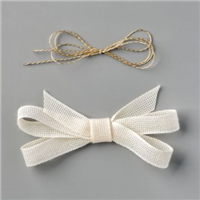
- Add the Linen Thread & Gold Cord bow with a glue dot to the pine cones
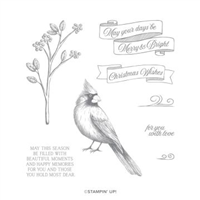
- Stamp the sentiment in Shaded Spruce ink using the Toile Christmas stamp set. Die cut with the Christmas Cardinal Dies that coordinate with Toile Christmas stamp set.
- Adhere the sentiment banner with dimensionals to the Red Foil layer.
- Adhere this completed layer to the card front with dimensionals.
for the inside…
- Stamp the sentiment from the Peaceful Boughs stamp set in Shaded Spruce ink on a panel of Whisper White cut 3 x 4
- Adhere this Whisper White panel to Pear Pizzazz card stock cut 3 1/8 x 4 1/8
- Adhere this completed panel to the inside of the card and voila! the card is complete…
The second card uses the Beautiful Boughs Dies, Painted Labels Dies and the Itty Bitty Christmas stamp set.


- The card base is Thick Whisper White 4 1/4 x 11 scored at 5 1/2
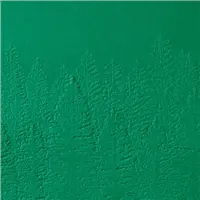
- The embossed layer is Whisper White 4 x 5 1/4 using the Evergreen Forest 3D embossing folder and adhered with liquid glue to the card base
- Cut Shaded Spruce card stock 3 1/4 x 3 1/4
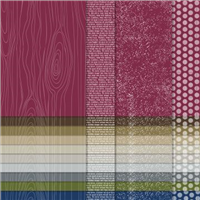
- Cut Neutrals DSP (Soft Suede) 3 x 3. Adhere to the Shaded Spruce panel with liquid glue.
- Die cut two single boughs using the Beautiful Boughs Dies and Pear Pizzazz card stock
- Die cut one triple bough using the Beautiful Boughs Dies and Shaded Spruce card stock
- Adhere the boughs to the DSP panel with liquid glue
- Die cut a single pine cone using the Beautiful Boughs Dies from Soft Suede card stock. Adhere with dimesnionals.
- Tie a bow using Braided Linen Trim in Mossy Meadow (NEW ITEM!) and Gold Cord from the Forever Greenery Trim Combo Pack. Adhere with a glue dot.
- Stamp the sentiment in Garden Green ink on a 1/2″ strip of Whisper White. The sentiment comes from the Itty Bitty Christmas stamp set. Made a banner at one end.
- Die cut a decorative strip using the Brushed Metallic Paper and the Painted Labels Dies. Adhere with liquid glue to the back of the sentiment banner. Add dimensionals to the right end of the banner and adhere to the card front. I also suggest putting some liquid glue on the left end of the sentiment banner to adhere to the pine bough square.
For the inside… and the envelope…
- Stamp the sentiment in Soft Suede ink on Whisper White card stock cut to 4 x 5 1/4. The sentiment comes from the Peaceful Boughs stamp set.
- Stamp the pine boughs (yep, from the Peaceful Boughs stamp set) in Soft Suede ink, stamping off at least once, twice might be even better.
- Cut a strip of the Neutrals DSP 2 1/4 x 6 and adhere to the envelope flap with liquid glue. Trim to fit. YEAH! Card is done, done, done!
Products for these cards may be found in the list below. I hope you have felt inspired to create something from the Peaceful Boughs bundle – it’s gorgeous! Please continue on with the hop by using the buttons below. If you get lost along the way, you may click on the list to visit others on the hop today.


- Jaimie Babarczy: https://wp.me/p79UhD-4so
- Karen Finkle: https://karenscardkorner.blogspot.com/2020/11/stampin-up-poinsettia-place-christmas.html
- Tara Carpenter: https://tarabethstamps.blogspot.com/2020/11/stampin-up-heartwarming-hug-tree-angle.html
- Karen Ksenzakovic: https://wp.me/paaNf4-3nD
- Mary Deatherage: https://wp.me/p5snyt-frj
- Sue Prather: https://wp.me/p5yitZ-2ed
- Krista Yagci: https://www.thestampingnook.com/post/stampin-up-poinsettia-petals-warm-wishes-christmas-card
- Terry Lynn Bright: https://tlsbrightspot.com/2020/11/10/stampin-up-peaceful-boughs-christmas/
- Akiko Sudano: https://wp.me/paOv8E-1WG
- Donna Leonard: http://stampdabbles.com/?p=3349
- Lisa Jurich: https://lisastampingnook.com/?p=335
- Amy Koenders: https://wp.me/p2SFwf-lfD


Thanks for stopping by.
May you have a beautiful day.
Make someone happy by sending them a handmade card filled with love.

Leave a comment