
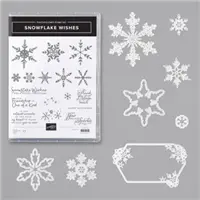
Hi folks! What are you up to on this ‘day after’ the time roll-back? Me? Well it’s fairly cool here and raining outside , so I’m not out playing in the raindrops… What I DID do is make this fun card to share with you today using the Snowflake Wishes Bundle and the gorgeous paper of the Snowflake Splendor DSP. The idea to make this card came from my upline, Mary Deatherage. She does fabulous work and is an inspiration. Here’s the card and you’ll see why it is called a ‘side-fold’.


Isn’t this stunning? The Snowflake Splendor DSP does all the work for me. And the So Many Snowflake Dies (part of the bundle) just add to the gorgeousness.
Let’s take it apart and re-create it…
- Thick Whisper White card base – 4 1/4 x 11, scored at 4 1/4 & 5 1/2
- Pacific Point – 1 x 4, 4 x 4 (front of card), 2″ square (snowflake); 4 x 4 (inside of the card)
- Snowflake Splendor DSP – 7/8 x 3 7/8, 3 7/8 square (front of card)
- Whisper White – 3 3/4 x 1 (sentiment banner), 1 1/2 square (snowflake;, 3 7/8 square for inside
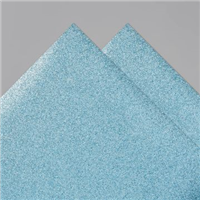
- Balmy Blue Glimmer Paper – 2 1/2 square for snowflake
Take the Thick Whisper White card base and fold it on the 5 1/2 scoreline (this is the valley fold on the card)n with the 4 1/4″ score line facing you; fold that section back (this is the mountain fold). Adhere that 1 1/4″ area together with liquid glue. See photo #2 above for reference. Mark the center of that 1 1/4″ area at top & bottom, then use the Classic Label punch to create very small notches for the ribbon (which will be added later).
Now you are ready to decorate this panel… Adhere with liquid glue the 7/8 x 3 7/8 DSP to the Pacific Point 1 x 4. Adhere this to the 1 1/4″ strip of the card base with the punched notches for ribbon. Adhere the 3 7/8″ DSP square to the 4″ square of Pacific Point – with liquid glue; then adhere to the right front panel. Beautiful already isn’t it – even without the embellishing of snowflakes, gems, and ribbon.
- Stamp the sentiment on Whisper White using Pacific Point ink. Die cut using the Ornate Frames Dies. NOTE: the die is smaller than the sentiment! How do you make it longer? Die cut half the area by placing the clear cutting plate on 2/3 of the die, run it through the die cutting machine, move the die to the end of the sentiment, aligning the cutting lines; cover that section with the clear cutting plate, run it through the die cutting machine and VOILA! This may take some practice but if I can do it – so can you!!! Put dimensionals on the back and adhere to the card front.
- Create the snowflake: larger snowflake in Balmy Blue Glimmer Paper, medium snowflake in Pacific Point and the smallest snowflake in Whisper White. Adhere together with liquid glue (just in the centers of each snowflake); add dimensionals to the largest snowflake and adhere as shown.
- Add several Rhinestone Basic Jewels (I used 7) AND Holiday Rhinestone Basic Jewels (I used 3) for glam.
- Wrap a long length of the Misty Moonlight/ silver Bakers Twine from the Flowers For Every Season Combo Pack around the 1 1/4″ area, fitting it in the notches and tie a bow. Adhere the bow with a glue dot.
Love, love, love this! But we are finished yet; we must do the inside.

- Stamp the sentiment from the Snowflake Wishes stamp set in Pacific point on the 3 7/8″ square. Adhere it to the 4″ square of Pacific Point with liquid glue, then to the card inside.
- Adhere several stars (I added 3) die cut from the Balmy Blue Glimmer Paper. These were from a previous project and left over, but I used the Stitched Stars Dies to create them.
For the envelope… Take another snowflake stamp from the Snowflake Wishes stamp set and stamp the envelope front in Pacific point ink. Cover the envelope flap with more of this wonderful Snowflake Splendor DSP, trim to fit.

I hope you have as much fun creating your side-fold card ads I did – especially if you use the Snowflake Splendor DSP and the Snowflake Wishes Bundle to do so. I can’t wait to see what you do!
The products are listed below. Remember when you shop with me, you will receive a free SU! item of choice valued at $10 when your purchase is between $50-$150. If it is over that amount, don’t use my current host code as Stampin’ Up! offers Stampin Rewards. You WILL still get my gift…
CURRENT HOST CODE NOV 1 – 18 XS4MSSFN


Leave a comment